Welcome to the world of crochet! It all begins with one stitch. This guide is here to help you learn without getting lost in complicated terms. You’ll find clear, funny steps to boost your confidence quickly.
We’ll dive into the essential stitches: starting with a slip knot, then the chain stitch, single, half double, double, and treble crochet. Once you get the hang of one stitch, the rest become easier. This is because the basic actions—yarn over and draw through loops—stay the same.
Getting the right tools and starting simple projects will help you make progress. You’ll need worsted-weight yarn, a Size G hook, a yarn needle, and small scissors. With these, you can create a 7″ x 9″ swatch or a cozy scarf while improving your stitch tension and count.
Our guide comes with written steps and visuals from brands like DMC, plus video demos. You’ll get both clear instructions and visual help. We use US terminology and focus on beginners. You’ll see how simple stitches can lead to bigger projects like hats, pillows, and bags.
Key Takeaways
- Start with a slip knot and chain stitch—these are the foundation stitches for all projects.
- Master one stitch to make learning others easier; mechanics repeat across stitches.
- Use worsted-weight yarn and a Size G hook for predictable beginner practice swatches.
- Combine written steps with visuals from trusted brands like DMC for faster learning.
- This beginner crochet guide uses US terms and focuses on practical, small projects.
Why learn crochet and how basic stitches take you far
Want to make something real in just an afternoon? Learning crochet offers quick wins and lasting benefits. It helps you relax, boosts your confidence, and lets you create gifts or raise funds. Mastering one stitch and repeating it shows progress quickly.
Benefits of learning to crochet
Crochet is a calming hobby that fits into your busy schedule. It lets you make useful items like hats and blankets for charity. Brands like DMC offer patterns and videos to help you learn easily.
Why mastering basic crochet stitches matters
Basic stitches are the base for all your projects. Learning single, half double, double, and treble stitches lets you control fabric weight and drape. Short stitches create dense, warm fabric, while tall stitches make it light and airy.
What you’ll be able to make after learning these stitches
Begin with a foundation chain and one stitch to make a scarf or wrist warmers in a weekend. As you learn more, you can make bags, pillows, hats, and decorative patterns. For step-by-step guides and project ideas, check out understanding basic crochet techniques and stitches.
Practice swatches help you check your gauge and tension before making garments. Once you know how stitch height affects fabric, you can choose the right stitch for your project.
Getting started: tools, yarn, and terminology
Ready to start? You’ll need a few basic items and some terms to get going. Begin with a comfortable hook and a smooth worsted yarn. This will make your practice easy and fun.
Essential tools
Start with a set of crochet hooks, yarn, scissors, and a yarn needle. Hooks are made from metal, plastic, wood, and bamboo. Look for brands like Clover and Boye for ergonomic handles.
Hold the hook in your dominant hand, using either a pencil or knife grip. Use your non-dominant hand to control the yarn. Add small scissors and a blunt yarn needle for trimming and weaving in ends.
Yarn weights and what to choose first
Yarn weights range from lace to super bulky. For beginners, worsted-weight yarn with a Size G (US G/6) hook is best. This combo makes stitches clear and gauge steady.
For stitch ideas, check a stitch guide. Make a swatch to see how your fabric works. It should be about seven inches with the right materials.
Common crochet abbreviations and terms
Learning crochet terms helps avoid confusion. Start with basic abbreviations: ch (chain), sl st (slip stitch), sc (single crochet), and more.
Know the differences in stitch names across regions. For example, US double crochet is UK treble. Get familiar with terms like BLO (back loop only) and magic loop.
| Item | Why it helps | Beginner pick |
|---|---|---|
| Hook | Controls stitch size; material affects glide and grip | Size G metal or Clover ergonomic G/6 |
| Yarn | Affects drape and stitch definition | Worsted weight (best yarn for beginners) |
| Scissors | Clean cuts for ends and trimming | Small sewing scissors |
| Yarn needle | Weaves in ends and sews pieces together | Blunt darning needle, medium size |
| Gauge swatch | Checks tension and measures project fit | 29 chains + sc rows for practice |
Casting on and making a slip knot
Starting is simpler than you might think. To cast on, just put a slip knot on your hook and chain your first row. A neat slip knot makes your first row look great. Keep your tail short for easy weaving and the loop tight for smooth chaining.
There are two easy ways to start. Try both and see which one works best for you.
Method 1 — with your hook:
- Wrap the yarn around your fingers to make two loops.
- Flip your hand so the loops are on top, then use the hook to grab the top loop.
- Pull the bottom loop up and onto the hook; tighten by pulling the tail.
Method 2 — on your finger:
- Wrap the yarn twice around your index finger to make a coil.
- Lift the coil and slide the top loop over your finger, leaving a loop behind.
- Tighten a bit, then slide the loop off your finger and onto the hook. Pull the tail tight.
Practice by making a slip knot and then chaining 29. This helps build muscle and shows how the starting loop affects your work.
For the best results, follow these tips:
- Keep the tail about 4–6 inches for easy weaving.
- Make the loop snug but not too tight for smooth chaining.
- Check if the loop slides easily—if not, loosen it a bit.
- Use the same hand position each time for consistent starts.
Here’s a quick guide to help you choose a method based on speed, control, and ease for beginners.
| Method | Speed | Control | Best for |
|---|---|---|---|
| With your hook | Fast once practiced | High — easy to adjust loop size | Hands that like the hook to guide motion |
| On your finger | Moderate — intuitive for many beginners | Medium — need steady fingers to keep loops | Those who prefer a tactile start before using the hook |
| DMC diagram style | Fast after visual learning | High — clear steps for loop formation | People who follow visual steps and want tidy results |
How to crochet chain stitch (foundation chain)
Begin with a neat slip knot and a comfortable grip. The foundation chain determines your project’s edge, width, and feel. This guide will help you create even and neat work.
Step-by-step chain stitch instructions
Start with a slip knot and hold your hook like a pencil or knife. Wrap the yarn over the hook from back to front. Then, pull that loop through the loop on your hook. Keep repeating to add chains to your foundation chain.
Anatomy of a chain stitch and where to insert
Each chain has three parts: the top front loop, top back loop, and back loop underneath. Most first rows are worked into the top back loop. This leaves the front loop free for neat joins or decorative edges.
Turning chains and planning your foundation chain length
Turning chains are the first stitch height of the next row. Use 1 chain for single crochet, 2 for half double, and 2 or 3 for double crochet. For example, if you need 30 double crochet stitches, chain 32 or 33.
| Stitch Type | Turning Chains | How to count |
|---|---|---|
| Single crochet (sc) | 1 | Add 1 to foundation chain; skip first chain as needed |
| Half double crochet (hdc) | 2 | Add 2 to foundation chain; work into top back loops for neat edge |
| Double crochet (dc) | 2 or 3 | Add 2 or 3; many patterns call for 3 as the safe option |
| Treble (tr) | 3 or 4 | Use 3 for standard patterns, 4 if you want extra height or drape |
Practical tip: when sizing a swatch, chain slightly more than your target width. For a 7″ swatch with medium yarn, try 29 chains then add turning chains. Remember, the stitch on the hook does not count as a chain.
If your chains twist or look uneven, relax your tension and check hand placement. DMC diagrams and classic guides show that consistent yarn wrap direction and steady tension fix most problems. Practice a few short foundation chains and you will feel the rhythm quickly.
Single crochet: the simplest building block
Single crochet is a key stitch for beginners. It creates dense fabric and is a base for many projects. This tutorial helps you get the hang of tension and neat edges before moving on.
Step-by-step single crochet technique
Begin with a foundation chain, aiming for 11 chains. Skip the first chain and insert your hook into the second. Yarn over and pull up a loop, leaving two loops on the hook. Yarn over again and pull through both loops to complete one stitch.
Repeat this across the row until you reach the last chain.
Turning your work and maintaining stitch count
At the end of a row, make 1 chain for the turning chain. Turn your work counterclockwise for even sides. Insert the hook under both top loops of the first stitch of the new row.
Work one sc into each stitch across. Count regularly to keep your stitch count steady. This ensures straight edges and consistent gauge.
Practical uses for single crochet
Single crochet is great for making sturdy items like dishcloths, coasters, and amigurumi. It’s also used in garments like the Upside-down Pullover and Indian Summer tank. The moss or granite stitch, built from single crochet and chains, adds texture.
For a compact guide with videos for right- and left-handed learners, check this back-to-basics resource. Practicing rows, like a 29-chain sample, helps improve your tension. To finish, cut the yarn, pull through the last loop, and weave in the tail with a yarn needle.
This quick guide is a great starting point for beginners. Mastering the basics and maintaining regular tension opens up more textured swatches and wearable pieces.
Half double crochet and when to use it
The half double crochet stitch is perfect for creating fabric that’s just right. It’s taller than a single crochet but not as thick as a double. This makes it ideal for making hats, sweaters, and cozy washcloths.
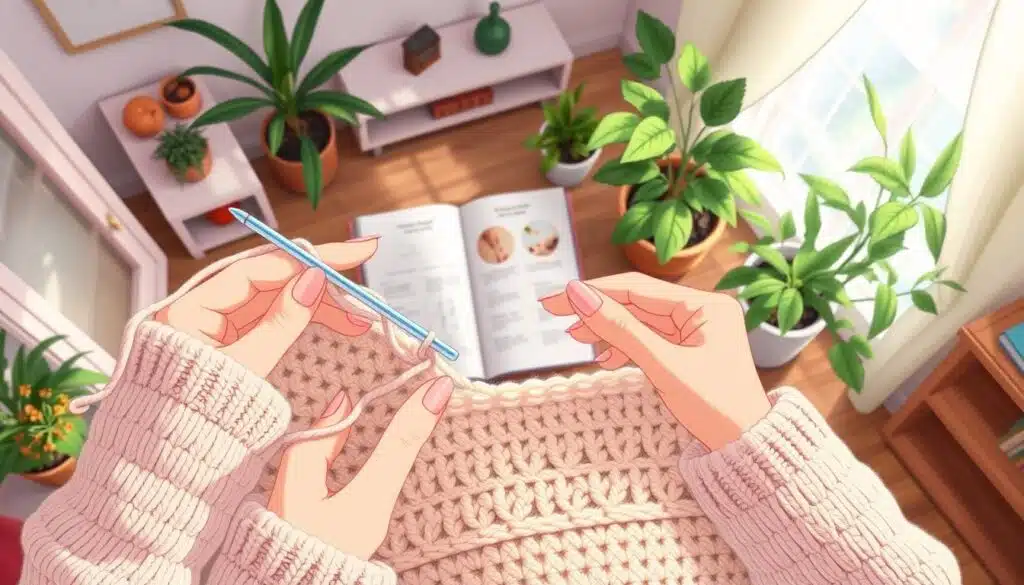
How to make half double crochet
Begin with a small chain, like 12. Yarn over, then insert your hook into the 3rd chain from the hook. Yarn over again and pull up a loop, leaving three loops on the hook. Pull through all three loops to complete one hdc stitch.
Continue this pattern across your foundation chain. If you started with 12 chains, you should end up with 10 hdc stitches.
For rows, start by chaining 2 and turning. Remember, that chain 2 counts as your first stitch. So, skip it when you insert your hook into the next stitch. Work into the top loops of each stitch, unless the pattern tells you to use the back loop only.
Fabric characteristics and project ideas
The hdc stitch creates a soft, dense fabric with good drape. It’s great for beginners and looks elegant in garments. Use it for beanies, scarves, baby blankets, and dishcloths for warmth and stitch definition.
Start with medium-weight yarn (#4) and a 5mm hook for learning. Brands like Lily Sugar ’n Cream and Bernat are good for beginners. For a simple project, try making a washcloth by chaining 22 and working hdc back-and-forth until it’s square.
Common mistakes and fixes
New crocheters often miscount turning chains. Remember, chain 2 at the start of a row counts as a stitch. Always check your stitch count at the end of each row.
Another common mistake is inserting the hook into the wrong part of the chain. Make sure to aim for the top loops if the pattern says so. Use your forefinger to control yarn flow and practice even yarn-over motions to avoid uneven rows.
If you need a visual guide, check out this half double crochet tutorial. It shows each step and common fixes clearly. Try a short sampler, rip it back if needed, and keep practicing until it feels smooth.
Double crochet for speed and drape
Double crochet is great for quick projects and a soft fabric. It’s taller than single crochet, making blankets and scarves grow fast. For a visual guide, check this double crochet tutorial for clear diagrams.
Step-by-step basics
Begin with a foundation chain, like 12 or 13. Yarn over, then insert into the third chain from the hook. You’ll have three loops on the hook after drawing up a loop.
Yarn over, pull through two loops. Then, yarn over and pull through the last two loops. This is the dc stitch. Repeat this across the row.
Choosing two versus three turning chains
Patterns often use three turning chains for a full double crochet. But, many crocheters prefer two for neater edges. Your tension matters: if it’s loose, two chains might work. If tight, you might need three for even edges.
Why it’s a dependable workhorse
Double crochet is fast and creates a soft fabric. It’s perfect for textured blankets and garments that should hang well. For even more drape, try an extended double crochet in shawls or wraps.
| Characteristic | Double crochet | Single crochet |
|---|---|---|
| Speed | Faster; taller stitches cover more area | Slower; denser fabric |
| Fabric openness | Looser, more gaps and stretch | Tighter, more rigid |
| Typical uses | Granny squares, ripple, garments, drapey blankets | Amigurumi, sturdy bags, firm borders |
| Turning chains | 2 or 3 based on tension and edge neatness | 1 or none depending on pattern |
For more tips and methods, CrochetCraze has a detailed double crochet tutorial. It shows how to insert under the two legs of the “V” for consistent results. Use these techniques to master double crochet and achieve the drape you want, whether it’s a cozy blanket or a lightweight shawl.
Treble crochet for lacy and openwork projects
Ready to make fabric that breathes? The treble crochet turns simple yarn into airy, elegant pieces. These are perfect for shawls and lightweight garments. Use this short treble crochet tutorial to spot where the gaps add charm.
How to make it: Start with a foundation chain (try 13 or 14 for practice). Yarn over twice, then insert the hook into the fourth chain from the hook. Yarn over and pull up a loop so you have four loops on the hook.
Yarn over and pull through two loops three times until one loop remains. This sequence gives you the classic tr stitch height and rhythm.
The tr stitch is about three times the height of a single crochet. This height creates noticeable gaps. These gaps work beautifully for crochet lace patterns.
Expect a fabric with drape and openness. This flatters scarves, shawls, and airy cardigans.
Think about edge tidiness when you start each row. Some crocheters use three turning chains, while others prefer four. Try both and match the turning chain to your hook and yarn to keep edges straight and neat.
If you want pattern ideas or advanced openwork tips, check a focused guide on lace techniques at crochet lace techniques. Reading examples will help you adapt treble crochet uses to garments, trims, and decorative panels.
Slip stitch and finishing techniques
Quick finishes keep your project looking neat and professional. This section covers how to work slip stitches, fasten off cleanly, and weave in ends. It also shows how to change yarn or join new yarn smoothly.
How to work slip stitches
To make a slip stitch, insert your hook under both top loops of the target stitch. Yarn over, then pull the yarn through the stitch and through the loop on the hook. This leaves one loop. Use this method to join rounds and tidy edges.
A short slip stitch tutorial can help you master this technique. It keeps corners crisp and seams nearly invisible.
Fasten off and weaving in ends
When you finish the last stitch, cut the working yarn leaving about six inches. Pull the tail through the last loop to close the work. Then, thread the tail into a yarn needle and weave it into the wrong side of the fabric.
If you need tips on how to fasten off neatly, travel the needle under several stitch “v”s. Drop down a row, and come back to secure the tail.
Joining new yarn and changing colors
To change yarn mid-row or swap colors, stop when two loops remain on the hook. Lay the new yarn over the hook and pull through the remaining loops. This finishes the stitch with the new color.
This method is the easiest way to join new yarn and keep tension even. Practice on a swatch until each join looks smooth.
- Use slip stitches to close rounds or move along an edge without adding height.
- Leave a 6″ tail before cutting to make it easier to weave in ends securely.
- To change yarn cleanly, always complete the stitch with the new yarn and keep your joins on the wrong side when possible.
Tension, gauge, and troubleshooting your swatch
You want your finished piece to fit and look the way the pattern promises. Tension in crochet controls size and drape. Crochet gauge tells you how many stitches and rows fit into a 4″ x 4″ square. Small changes in hook, yarn, or hand pressure shift those numbers quickly. A quick check now saves hours of frog-and-retry later.
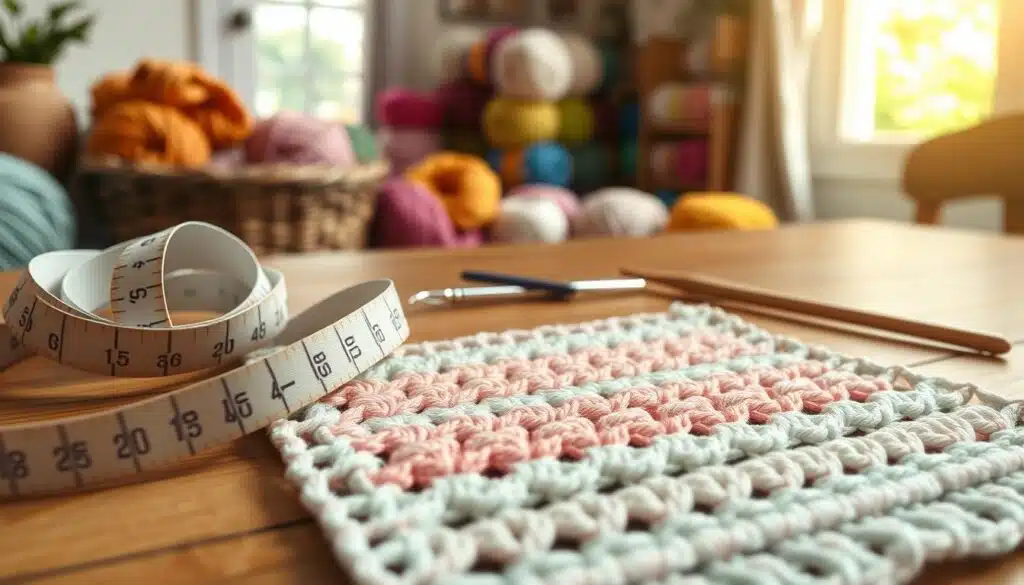
Understanding tension and gauge
Tension in crochet is your personal stitch pressure. Tight tension makes smaller stitches and more per 4″ square. Loose tension makes larger stitches and fewer per 4″ square. Yarn thickness and hook size matter, but your hands matter most. Stress or a long day can tighten your stitches, so gauge can vary even within a project.
How to make a gauge swatch and adjust hook size
Work a gauge swatch with the same yarn and hook called for in the pattern. Chain enough stitches to get a square larger than 4″ across. Use single crochet or the stitch the pattern uses. Measure across 4″ in the center of the swatch to avoid edge distortion. If your swatch has more stitches than the pattern’s crochet gauge, switch to a smaller hook. If it has fewer stitches, go up a hook size. For garment sewing and fitted pieces, match the gauge exactly. For blankets and scarves, a close enough gauge usually works.
Common tension problems and solutions
Curling edges happen in the first few rows of single crochet and usually settle after you add rows. Missed stitches at row ends are common; count stitches and mark turning chains with a contrasting scrap. If your rows are wavy, check that you are inserting the hook in the correct loop; a consistent insertion point keeps edges straight. Persistent tightness around the wrist may mean you need a larger hook or a different stitch pattern to loosen the fabric.
Quick troubleshooting checklist
- Make a properly sized gauge swatch before you start a garment.
- Count stitches across and rows down in the central 4″ area.
- If measurements are off, change the hook size and retest the gauge swatch.
- Use stitch markers to prevent missed stitches and keep edges tidy.
- Relax your grip or switch to ergonomic hooks like Clover Amour if you need to ease tension in crochet.
Fix tension problems early. A small swatch and a tweak to hook size save time and keep your project looking professional.
Creative next steps: combining basic stitches into patterns
You’ve learned the basics. Now, mix and match to create texture, shape, and fun motifs. Combining crochet stitches lets you control fabric density and visual interest. Small changes can turn simple rows into linen stitch, shells, or amigurumi beans.
Simple textures you can make from basic stitches
Begin with familiar moves and layer them. Alternate single and double crochet rows for a subtle rib. Add clustered trebles for bobbles and puff effects.
Feather stitch and shell patterns use basic increases and skips. This lets you experiment without a big pattern book.
Try a linen stitch for dense, tidy fabric. Use half double and chain sequences for the drape you want. Each texture teaches you a new way to combine stitches while keeping math simple.
Starting circular projects and magic loop
Nearly every amigurumi, coaster, and hat starts with a neat center. The magic loop technique makes starting easy. Hold the tail in your palm, insert the hook, chain one, and work the stitches into the loop.
Join with a slip stitch and pull the tail to close the center tight. Practicing magic loop saves time and gives a professional finish.
Increasing, decreasing, and shaping
Shaping is simple math. Increase by working two stitches into the same stitch or space. For steeper growth, place three stitches into one spot.
To reduce, use decreases like treble 2 together or treble 3 together. Leave last loops on the hook, then yarn over and pull through the remaining loops to close.
These moves let you sculpt hats, sleeves, and stuffed bodies. Special stitches like bobbles and puff stitches form when you open multiple treble loops and close them together. Practice these to refine your ability to increase decrease crochet and achieve smooth curves.
Pair small swatches with notes so you remember which combinations create the crochet textures you love. Keep experimenting, and use what you learn to combine crochet stitches into pieces that look intentional and sing with texture.
basic crochet stitches
Ready to compare crochet stitches and pick the right one for your next make? This guide breaks down height, openness, and practical uses. So, you can choose the best stitch for projects with confidence.
Quick comparison of the four main stitches
Stitches vary by height and density. Single crochet is the smallest and densest. Half double sits in the middle. Double gives good drape and speed. Treble is the tallest and most open.
Use this snapshot when comparing stitches: single for firm, structured fabric; half double for soft, warm pieces; double for balance and flow; treble for lace and openness.
Sample swatch visual guide
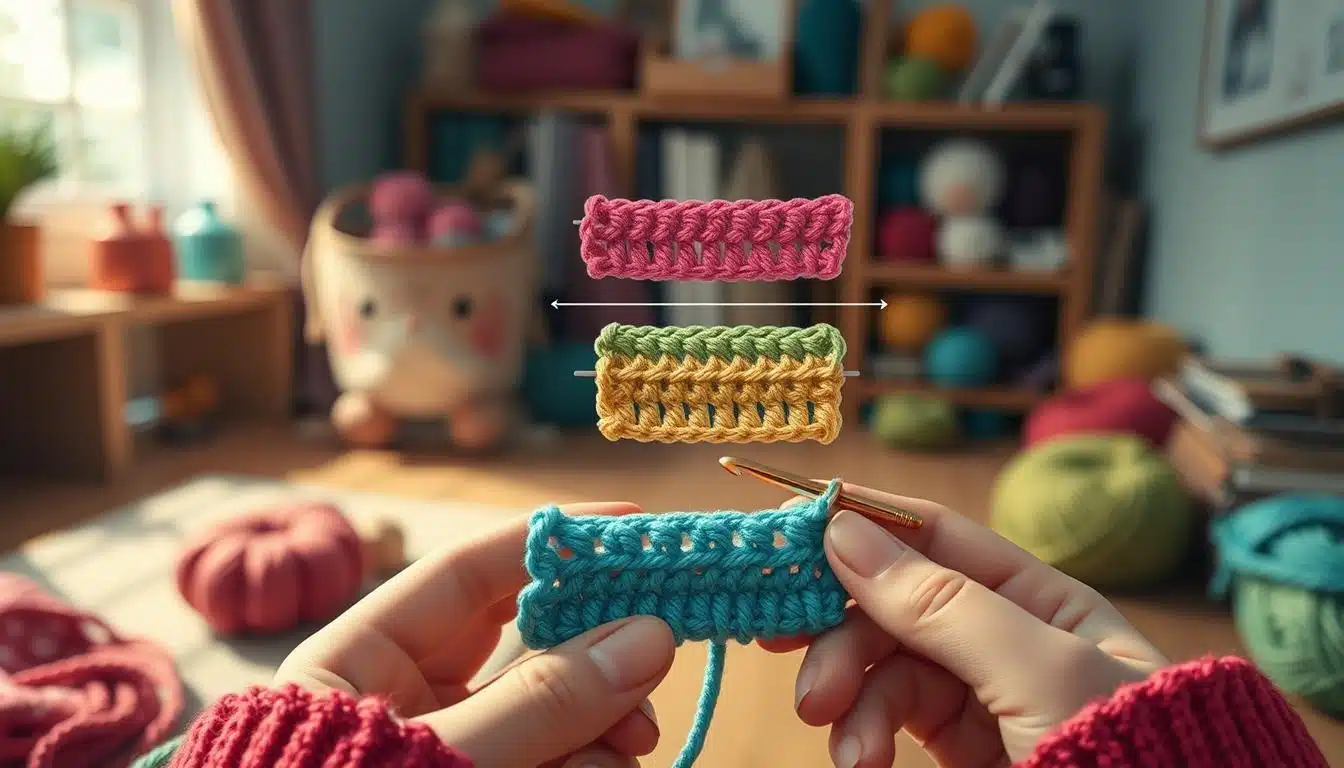
Make a consistent swatch to see real differences. Chain 29 with worsted-weight yarn and your recommended hook. Work rows of each stitch to a roughly 9″ length to create comparable blocks.
Measure height, width, and gapiness. A swatch guide like this gives reliable data about drape and stitch density. So, you can match patterns and gauge.
Which stitch to pick for common projects
Match fabric traits to project needs. For amigurumi, dishcloths, coasters, and sturdy bags choose single crochet. For hats and sweaters pick half double for warmth without bulk.
Blankets, scarves, granny squares, and garments that need flow do well with double crochet. For lacy shawls and openwork use treble.
When you weigh single vs double vs treble, remember yarn weight and desired warmth or drape. Use the swatch guide to test and find the best stitch for projects you plan to make.
Conclusion
You’ve learned the basics of crochet: casting on, chain stitch, and more. Each stitch uses the same basic steps. Once you learn one, the rest are easy to pick up.
Start with small projects to improve your skills. Use worsted-weight yarn and a Size G hook. Finish each project by fastening off and weaving in ends. For extra help, check out Mastering Crochet Stitches: A Visual Guide for diagrams and videos.
Begin with a small project like a scarf or hat. Try new techniques like the magic loop. With practice, you’ll be ready to tackle bigger projects and show off your skills.
FAQ
What are the essential tools you need to start crochet?
You need a few basics to start: crochet hooks in different materials, worsted-weight yarn, a yarn needle, and scissors. An ergonomic hook is comfortable. Keep a tape measure for swatches.
Which yarn weight and hook size should a beginner choose?
Start with worsted-weight yarn and a US Size G/6 hook. This combo is good for practice swatches. It helps with learning tension and stitch placement.
What are the most common crochet abbreviations and terms I should learn?
Learn US terms and abbreviations: ch (chain), sl st (slip stitch), sc (single crochet), hdc (half double crochet), dc (double crochet), tr (treble), BLO (back loop only), inc (increase), dec (decrease), FO or fasten off, and magic loop. Also, know that US dc = UK treble and US tr = UK double.
How do I make a slip knot to cast on?
Make a slip knot by forming a loop, crossing the tail behind the ball end, pulling the ball end through the loop, then placing the loop on your hook and tightening so it slides but isn’t tight. Keep the tail short enough to weave in later.
What are two easy ways to form a slip knot?
Method one uses the hook: wrap yarn around fingers, flip your hand, and use the hook to pull the wrist loop under the fingertip loop to form the knot. Method two uses your finger: wrap yarn twice around your index, lift loops over your fingertip, tighten, remove finger and place the loop on the hook.
How do I crochet a foundation chain (chain stitch)?
After your slip knot, yarn over (wrap yarn back-to-front over the hook) and pull through the loop on your hook. Repeat to create the chain. Chain stitches have top front and back loops; many first rows are worked into the top back loop to leave front loops free for joining.
How many turning chains do I need at the end of a row?
It depends on the stitch: sc usually needs 1 ch, hdc about 2 ch, dc commonly 2 or 3 ch (three is traditional), and tr often 3 or 4 ch. Add the turning chains to your foundation chain when planning so your row counts and edges line up neatly.
What is the step-by-step single crochet technique?
Chain your foundation, skip the first chain from the hook, insert hook into the next chain, yarn over, pull up a loop (2 loops on hook), yarn over and pull through both loops. Repeat across. At the end make 1 turning chain and turn your work.
How do I keep consistent stitch count and neat edges when doing single crochet?
Turn consistently in the same direction (counterclockwise is common), insert under both top loops of the last stitch, and always count stitches at the end of each row. Using the correct turning chain and watching the first and last chains prevents missed or extra stitches.
When should I use half double crochet vs single crochet?
Half double crochet (hdc) is taller and softer than sc but less dense—great for hats and sweaters that need warmth without bulk. Single crochet is denser and best for amigurumi, dishcloths, or bags where stiffness and durability matter.
How do you make a half double crochet?
Yarn over, insert into the indicated chain or stitch, yarn over and pull up a loop (three loops on hook), then yarn over and pull through all three loops. For rows, make 2 turning chains before starting the next row.
What are common mistakes with hdc and how do I fix them?
Common errors include miscounting turning chains and inserting in the wrong part of the stitch. Fixes: confirm your turning chain number, work into the top back loop if required, and practice an even yarn-over motion to smooth tension. Use your forefinger to control tension if helpful.
How do you work a double crochet (dc)?
Yarn over, insert into the stitch (usually 3 chains from hook), yarn over and pull up a loop (3 loops on hook), yarn over and pull through two loops (2 remain), then yarn over and pull through last two loops. Choose 2 or 3 turning chains based on your tension and edge preference.
When should I use two vs three turning chains for double crochet?
Three turning chains are traditional and match stitch height exactly for many patterns. Two turning chains produce tidier edges and are common in modern patterns. If your tension is tight you might need three; if loose, two may work better. Swatch to decide.
Why is double crochet called a “workhorse” stitch?
Double crochet balances speed and drape. It covers more area than sc, works up faster, and produces fabric with moderate openness—ideal for blankets, scarves, granny squares, and many garments.
How do I make a treble crochet and when should I use it?
For treble (tr) yarn over twice, insert into the stitch (typically 4 chains from hook), yarn over and pull up a loop (4 loops on hook), yarn over and pull through two loops repeatedly until one loop remains. Treble creates tall, airy stitches perfect for lacy shawls, open scarves, and airy garments.
How do I keep edges tidy with tall stitches like treble?
Experiment with turning chain height (3 or 4) to match stitch height and produce neater edges. Practice consistent tension and placing your first and last stitch in the correct top loops. Taller stitches exaggerate uneven edges, so swatching helps.
What is a slip stitch and how is it used?
Slip stitch (sl st) is made by inserting the hook under the indicated stitch, yarn over, and drawing yarn through both the stitch and the loop on your hook so only one loop remains. Use it to join rounds, finish edges, or move across stitches without adding height.
How do I fasten off and weave in ends neatly?
After the final stitch, cut yarn leaving a 4–6″ tail, yarn over and pull through the last loop to secure. Thread the tail into a yarn needle and weave it along the wrong side of stitches—travel under the vertical “v”s, drop down a row and return for extra security—then trim.
What’s the proper way to join new yarn or change colors?
Start the new yarn when two loops remain on the hook: lay the new yarn over the hook and pull it through the remaining loops to finish the stitch. Continue crocheting with the new yarn. For colorwork, carry yarn neatly along the wrong side or use joining techniques like slip-stitch joins.
What does gauge mean and why does it matter?
Gauge measures how many stitches and rows fit into a 4″ x 4″ square. It depends on yarn weight, hook size, and your tension. For garments gauge is critical to fit; for blankets or scarves it’s less strict. Make a swatch using the pattern’s yarn and hook to check gauge.
How do I make a gauge swatch and adjust if the size is off?
Crochet a swatch with the same yarn and hook the pattern specifies—measure stitches and rows in a central 4″ area. If your swatch is too large, switch to a smaller hook; if too small, use a larger hook. Adjust until your swatch matches the pattern gauge.
What are common tension problems and how do I fix them?
Tight tension makes small, stiff stitches; loose tension makes large, floppy stitches. Fixes: relax your grip, try a different hook material, practice long even yarn-over motions, or change hook size. Stress and posture affect tension, so take breaks and breathe.
Which basic stitches make up most crochet patterns?
The four building blocks are single crochet (sc), half double crochet (hdc), double crochet (dc), and treble crochet (tr). They vary in height and openness—sc is densest, hdc is medium, dc offers drape, and tr is the tallest and gappiest. Combine them for textures and shapes.
What simple textures can I create from the basic stitches?
From basic stitches you can make linen stitch, shell patterns, ripple/wave, bean/mini bean, and waffle or seed-like textures. Changing stitch height, working into front or back loops, and alternating rows creates endless surface effects.
How do I start circular projects like amigurumi or granny squares?
Use the magic loop (magic ring) to start circles: form a loop with the tail in your palm, insert the hook into the loop, chain one, and work required stitches into the loop. Slip-stitch to join the round and pull the tail to close the center for a tidy start.
How do I increase and decrease to shape projects?
Increase by working two stitches into the same stitch or space. Decrease by leaving last loops of two stitches on the hook then yarning over and pulling through all loops (e.g., dc2tog). Use these techniques to shape hats, garments, and motifs.
Which stitch should I pick for common projects like scarves, hats, and bags?
Choose based on fabric needs: sc for dense, sturdy items like bags and amigurumi; hdc for warm hats and sweaters; dc for blankets, scarves, and garments needing drape; tr for lacy shawls and openwork pieces. Match stitch to yarn weight and desired warmth/dr—openness.
How quickly will I see progress once I learn one basic stitch?
Very fast. Once you master one stitch the mechanics repeat—yarn over and draw through loops—so new stitches come quickly. Practice blocks and small projects build confidence and produce usable items like scarves, hat brims, or afghan blocks in short order.
Where can I find visual help or video tutorials to supplement written instructions?
Brand resources like DMC offer clear step-by-step diagrams and videos covering slip knots, chain, sc/hdc/dc/tr, joining new yarn, fasten off, and weaving ends. Visuals help with hand positioning, yarn wrap direction, and the magic loop method.