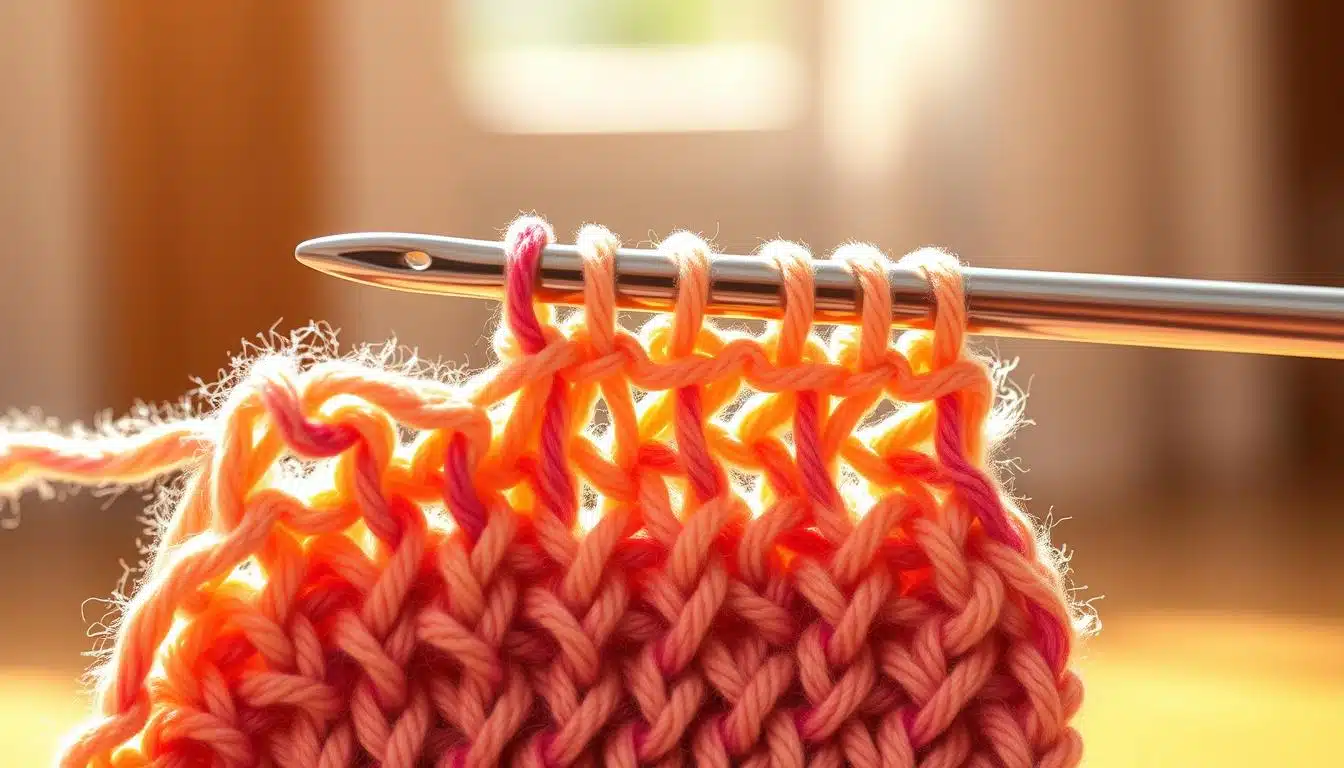
Ever ended a row and saw a puckered edge? This Turning Chain Tutorial is for you. The turning chain crochet step connects one row to the next. It makes sure your Stitches line up and edges stay straight. Without it, your project might look like it shrank.
This guide will teach you the basics of turning chain crochet. Most teach to Turn then chain. But some prefer to chain first to avoid twisted stitches. The goal is to match the turning chain Height to the next stitch for a smooth transition.
Learn about foundation chains, tension, and pattern counting. Practice regularly and read patterns carefully. Join Facebook crochet groups or follow pattern testers for clear instructions. This will make the turning chain easy to master.
Key Takeaways
- The turning chain crochet brings yarn to the height needed for the next row and preserves straight edges.
- How to make turning chain depends on stitch height—match the count to avoid puckering or shrinking.
- Most teachers recommend turning then chaining; some prefer Chain then turn to prevent twists.
- Use a larger hook if your foundation chain or turning chain is too tight; practice tension control.
- Refer to a turning-chain chart and follow pattern Notes when the turning Chain counts as a stitch.
What Is a Turning Chain and Why It Matters
Have you ever seen a row of chains at the end of a crochet row? You might have wondered what they are. These chains are just a simple stitch to lift your yarn for the next row. They help create neat edges and ensure stitches are in the right place.
Knowing about turning chains helps keep your rows even. They act as a placeholder and foundation. This way, the first stitch of the next row lines up perfectly with the previous one. This keeps your fabric even and prevents it from shrinking as you crochet.
The height of your rows depends on the length of the turning chain. For example, single crochet uses ch1, half double uses ch2, and double uses ch3. These are common guidelines, but some patterns might ask you to count the chain as a stitch.
Beginners often struggle with small choices that change a project’s look. Do you turn then chain or chain then turn? Using a tight turning chain can make edges puckered, while a loose one can cause gaps. Both issues highlight the importance of turning chains for a smooth finish.
Another common mistake is crocheting into the wrong part of the chain. Learning to work into the back bump or the chain loop can help avoid gaps at the start of rows. Mastering these chain mechanics is key.
If you need a quick guide for stitch heights and turning chains, check out the Crochet Craze stitch guide. It shows how turning chains fit into everyday crochet basics.
Turning Chain Tutorial
Ready to tame the row edges? This turning chain tutorial will guide you through a clear, step-by-step process. Your next row will look sharp. You’ll learn a practical method, suggested video shots, and how to decide whether to turn or chain first.
 Actions.” title=”A well-lit workshop environment showcasing a detailed turning chain tutorial. In the foreground, a skilled artisan, dressed in an apron and safety goggles, is intently demonstrating the process of creating a chain, with tools like a lathe and calipers visible. In the middle ground, various materials and components for chain-making are neatly arranged on a workbench, highlighting different stages of the process. The background reveals shelves filled with various tools and equipment, casting soft shadows from overhead lights. Warm, natural light filters through a window, creating an inviting and focused atmosphere, emphasizing craftsmanship and attention to detail. The angle captures both the artisan’s concentration and the intricacies of the project without distractions.” width=”1024″ height=”585″ class=”aligncenter size-large wp-image-11248292″ />
Step-by-step written walkthrough for a basic turning chain
Finish the last stitch of the row and pause. Make the required number of chains for the next stitch. This is usually ch1 for single crochet, ch2 for half double, or ch3 for double crochet.
Begin the next row by turning your work so the new loop faces you. Insert the hook where the pattern directs and work your first stitch. This is the core of making a turning chain without drama.
Practical Tip from experienced crocheters at Lion Brand and Red Heart: some prefer to chain first then turn to avoid a twisted edge. Check the pattern to know whether the turning chain counts as a stitch.
Video and visual aids to learn faster (suggested shots and close-ups)
Close-up of the slip knot and the initial chains helps viewers copy your motion. Show a macro shot of the yarn-over motion from back to front so learners can see tension and loop size.
Film finger positioning for tension control with the non-dominant hand clearly visible. Include a split-screen or quick sequence: crocheting into the top loop, then the back bump, so differences are plain to see.
Short GIFs or clips of turn-then-chain versus chain-then-turn make the choice obvious. Keep each clip under 10 seconds and loop the key motion for extra practice.
When to make the turning chain: turn then chain vs. chain then turn
If you turn then chain, you finish the row, turn the fabric, then make the set of chains that give height. This method keeps your working yarn steady and helps you spot the correct insertion point for the first stitch.
If you chain then turn, you make the chains while the current row faces you, then flip the work. Some crocheters find this avoids twisted stitches and makes the first stitch easier to reach.
Try both ways on a small swatch. If chains are tight, loosen your grip or switch to a hook one size up. If they’re too loose, practice even tension and repeat the step-by-step turning chain routine until the edge sits flat.
| Action | When to Use | Tip |
|---|---|---|
| Turn then chain | Useful for clear stitch alignment and spotting insert points | Turn first, then make ch1–ch3 based on stitch height |
| Chain then turn | Helps avoid twisting and eases first stitch insertion | Chain with the last row facing you, then flip before stitching |
| Chain count | Depends on stitch: sc = ch1, hdc = ch2 (sometimes), dc = ch3 | Always check your pattern for whether the chain counts as a stitch |
| Troubleshooting | Loose or tight chains, twisted edges, mismatched stitch count | Adjust grip, try a larger or smaller hook, practice the step-by-step turning chain method |
Choosing the Right Number of Chains for Different Stitches
Getting neat edges and the right stitch count is key. The right turning chain length makes your rows even and your pattern easy to follow. Use a turning chain chart for a quick guide, or check out this turning chain tutorial for more info.
Turning chain guidelines for single crochet, half double, double, and treble
Follow these rules: ch1 for single crochet, ch2 for half double, ch3 for double. For treble and Taller stitches, add more chains. This ensures the first stitch is level with the rest.
How stitch height determines turning chain length
Stitch height is what matters most. Taller stitches need taller starting chains. If the chain is too short, the edge will pull down. Too long, and it will be loose and uneven.
When working into chains, use the back bump for a neat join. Many crocheters at Lion Brand and Red Heart suggest this tip to avoid gaps in the first row.
Pattern cues: when the pattern counts the turning chain as a stitch
Always read pattern notes carefully. Some patterns count the turning chain as a stitch, while others don’t. This can change your stitch math and affect your design if you ignore it.
Below is a small table to compare typical stitch heights and suggested turning chain counts. This way, you can easily check turning chain counts and chains for double crochet.
| Stitch | Approx. Height | Common Turning Chain | Notes |
|---|---|---|---|
| Single Crochet (sc) | Shortest | ch1 | Often not counted as a stitch |
| Half Double Crochet (hdc) | Short–Medium | ch2 | Matches hdc height well |
| Double Crochet (dc) | Medium | ch3 | Commonly used; reference turning chain chart for variations |
| Treble (tr) and taller | Tall | ch4+ | Increase chains with taller stitches |
Patterns on Ravelry and Craftsy may differ; designer conventions vary. Always follow the pattern’s instructions on whether the turning chain counts as a stitch. For a detailed stitch guide, visit Crochet Craze stitch guide.
Test turning chain lengths in small swatches before starting a big project. A quick test can prevent mistakes and keep your edges straight without reworking rows.
How to Make Consistent, Even Turning Chains
Getting a neat edge starts with a reliable routine. Small changes in grip and timing fix a lot of wonky rows. Use these practical tips to tame turning chain tension and produce even turning chains across your project.
Tension tweaks that actually work
If your turning chains pull tight, loosen your fingers on the working yarn. Give the loop one gentle tug before you start the next stitch. When chains come out too loose, slow your rhythm and keep consistent pressure on the yarn.
Try a slight rotation of your wrist; this can smooth out irregularities without reworking the row.
Hand positioning and yarn control techniques
How you hold yarn changes everything. Hold the yarn over your index finger or wrap it around two fingers to control feed. Keep the hook in your dominant hand, relaxed in a pencil or knife grip.
Pick the style that feels natural and stick with it for a whole piece. Consistency in how you hold yarn helps prevent twists and keeps stitch height uniform.
Tools that help: hook size and yarn weight
Your choice of hook and yarn affects turning chain tension as much as your hands do. If you crochet tightly, move up one hook size to reduce strain and create smoother loops. Heavier yarns may need fewer chains visually but follow stitch-height guidelines for the stitch you’re using.
Testing combinations of hook sizes and yarn weights on a small swatch saves time and improves edge quality.
Practical methods to try
- Try the stitch two together finish on one swatch to compare edge bulk and seam alignment.
- Practice a chainless starting stitch for a slim edge, then compare with stacked single crochets on another swatch.
- Use the same turning routine—turn then chain or chain then turn—throughout a project to maintain even turning chains.
For step-by-step visuals and deeper explanations of turning chain choices, see a focused guide at turning chain tutorial. If you run into common mistakes while practicing these crochet tension tips, a troubleshooting piece at crochet fixes can help you correct course quickly.
Troubleshooting Common Turning Chain Problems
You hit a snag and your edges give you attitude. Fixing turning chain problems starts with simple checks. Check the chain length, where you insert your hook, and how tight your tension is. Small changes usually stop puckered edges, gaps in the first row, and stitch-count surprises before they get dramatic.
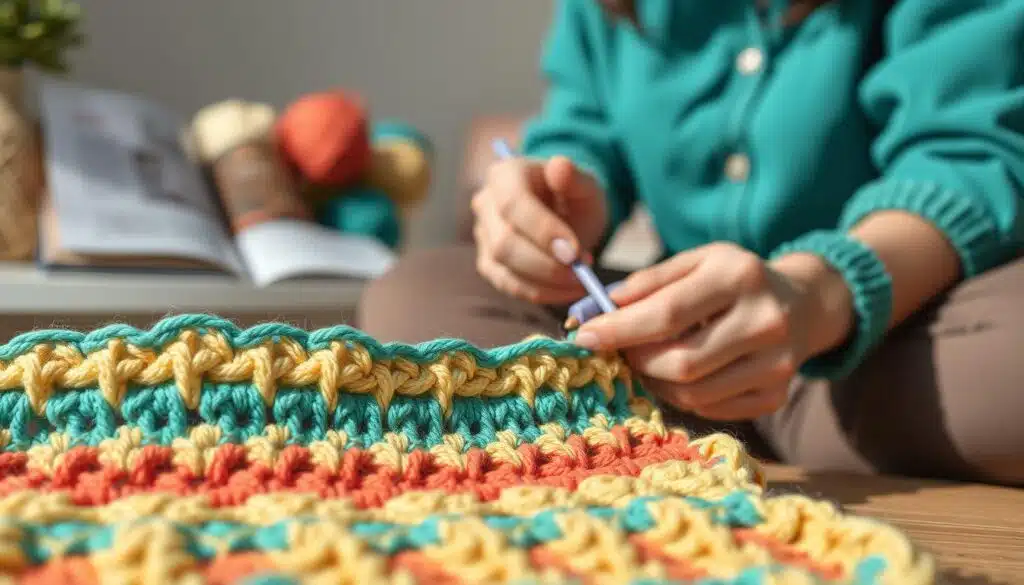
Wavy or puckered edges
Wavy or puckered edges often come from the wrong number of chains or inconsistent tension. Match the turning chain to the stitch height you’ll use. If your double crochet rows pucker, try using two or three chains to reach the correct height.
If the edge is puckered, loosen your chain slightly. This will help it sit like the rest of the stitches.
Gaps in the first stitch row
Gaps in crochet row usually happen because you’re working into the top loop of the foundation chain. Switch to crocheting into the back bump of the chain for a neater, tighter first row. If you want to avoid this forever, try a chainless foundation method; it removes the typical chain gap entirely.
When skipping the turning chain causes problems
Skipping the turning chain can throw off stitch counts and distort your piece. Some patterns count the turning chain as a stitch. Read your pattern before you skip anything.
If your stitch count drifts, rip back to the last correct row. Make the proper turning chain and rework the row. This will restore shape and edge alignment.
- Adjust chain length to match stitch height.
- Crochet into the back bump to reduce gaps in crochet row.
- Keep tension consistent between chains and stitches.
- Follow pattern notes on whether the turning chain counts as a stitch.
Advanced Tips and Alternatives
Want cleaner edges or a stronger start? Try some advanced turning chain tips used by pros. These tricks help avoid gaps, control row height, and make borders look great.
Chainless foundation starts your project off right. It builds the foundation chain and the first row together. This method avoids the loose loop that can cause holes in regular chains. It’s perfect for garments and blankets where a neat edge is important.
Start with a small swatch to get the hang of chainless foundation. It takes a few tries to get your tension right. But it’s worth it for a seamless look. Many designers, like Lion Brand and Knit Picks, offer variations for different yarn weights.
Back bump crochet fixes uneven edges. Crochet into the back bump of the chain for a tighter, flatter first row. This method reduces gaps and aligns better with later rows.
Make a short sample to see the difference between top-loop crochet and back bump crochet. The back bump method makes the edge sit closer to the fabric. It works well with simple borders and single crochet edges.
For textured stitches and fancy borders, adjust the turning chain to fit the stitch height and rhythm. Add extra chains for more height, swap a chain for a slip stitch to tighten, or use contrasting yarn for color.
Make small changes and test them on swatches. Changing the turning chain affects stitch count and row height. So, measure your tension and adjust your hook size if needed. Look for small tweaks in community patterns and forum threads for lace, cables, and post-stitch textures.
Mix these techniques with your usual crochet. Use chainless foundation for elasticity, back bump crochet for neat edges, and targeted turning chain tweaks for textured motifs. Practice with swatches to find the right mix for your style.
Practice Exercises and Projects to Master the Turning Chain
Start by dedicating short, focused sessions to practice turning chain skills. A few minutes each day is better than a long, frustrating afternoon. Use simple yarn and a mid-size hook to feel tension changes easily.
Simple swatches are your best friends. Make three small pieces: one with ch1 turns, one with ch2, and one with ch3. Compare their edge height, stitch alignment, and how the first stitch sits. These swatches show how turning chain length changes row geometry.
Try this quick routine:
- Chain 20, single crochet back across for five rows using ch1 as the turn.
- Repeat with ch2 and ch3, keeping yarn and hook constant.
- Note gaps, puckers, and how easy the first stitch is to find.
Beginner crochet projects that repeat the turning chain help cement muscle memory. Try making a potholder, a Scarf strip, or a simple square. Potholders use thicker yarn, giving immediate feedback. Scarves show long-run consistency. Squares are great for comparing edges side by side.
If a chain feels too tight, switch to a larger hook for the swatch. If stitches are floppy, tighten your tension or try a smaller hook. A fast video demonstration can speed this up; you can follow visual cues from a clear tutorial like the slip knot and chain stitch guide at Amelia Makes.
Keep a practice log to speed learning. Record yarn brand and weight, hook size, stitch type, turning chain count, and a one-line note about tension and outcome. Photograph each swatch and add a short note: “ch2, hook K, tidy edge” or “ch1, tight start—use larger hook.” Over a few weeks you’ll build a reliable map for your hands.
| Exercise | Hook/Yarn | Turning Chain | What to Observe |
|---|---|---|---|
| Edge comparison swatches | H/8 (5 mm) with worsted weight | ch1 / ch2 / ch3 | Row height, stitch placement, gaps |
| Potholder practice | J/10 (6 mm) with bulky cotton | ch2 typical | Durability, neat corners, consistent turns |
| Scarf strip | I/9 (5.5 mm) with acrylic worsted | ch2 or ch3 | Long-run tension, even edges |
| Square sampler | H/8 (5 mm) mixed brands | Mix of counts | Compare visual and tactile results |
For pattern ideas that pair well with focused practice, glance through curated beginner guides such as the step-by-step collections on Crochet Craze at Crochet Craze. Save a few favorites to your Pinterest or project board so you can return to them when you want variety.
Set measurable goals. For example, complete three crochet swatches and one potholder in a week while logging details. Reward yourself when your edges look even and your turning chain falls into place. Those small wins keep you practicing without getting bored.
Use these exercises to make the turning chain second nature. The next time you follow a pattern, your hands will remember the right height and the right rhythm for each row. Keep practicing, track your results, and the turning chain will become a relaxed, consistent part of your making routine.
Helpful Resources and Further Learning
Ready to improve your turning chain skills? Here are resources for different learning styles. Choose what fits your pace and keep practicing.
Video learners: look for videos that show how to do each step clearly. YouTube and Craftsy have great videos that pause to show hand position and tension. These tutorials help you learn fast and avoid mistakes.
Print and quick-reference: download charts that list stitch types and recommended chain counts. Keep a printable guide near you to check chain counts easily. Short courses offer structured lessons and cheat sheets for consistent practice.
Community support: join forums and Facebook groups for help and encouragement. Craft blogs, Pinterest boards, and local guilds share tips and lessons. These communities are great for quick fixes and advice.
Use videos, guides, and feedback from others. Watch, try, check, and repeat to learn fast.
| Resource Type | Best For | What to Look For |
|---|---|---|
| Short crochet video tutorials | Visual learners who need hand-closeups | Clear shots of yarn tension, back bump insertion, and chainless foundation comparisons |
| Printable turning-chain charts | Quick reference while crocheting | Lists of stitch types with exact turning chain counts and notes on when the chain counts as a stitch |
| Structured courses | Beginners wanting step-by-step plans | Lesson sequences, practice swatches, and downloadable worksheets |
| Craft blogs and Pinterest boards | Pattern inspiration and technique variations | Photo sequences, tip roundups, and comparisons of turn-then-chain vs. chain-then-turn |
| Facebook groups and local guilds | Real-time help and community feedback | Project posts, troubleshooting threads, and weekly challenges |
Practice with the right resources and you’ll get better fast. Use a log to track your progress with different yarns and hooks.
Conclusion
You’ve seen the turning chain recap: it sets row height, keeps stitch alignment, and helps edges sit flat. To master turning chain, match chain length to the stitch you’ll make. Keep a steady tension and watch whether your pattern counts the turning chain as a stitch.
Try both turn-then-chain and chain-then-turn to find what stops twisted stitches for your hands. Learn the chain mechanics—slip knot, yarn over, consistent loop size. Consider alternatives like the chainless foundation or working into the back bump when gaps or puckers show up.
Small swatches reveal how changes affect crochet row transitions, so test hook sizes and yarn weights before committing to a project. Use videos, charts, and community feedback to speed learning. A handy reference is this guide at Master Turning Chain: Essential Guide.
Keep a short practice log of what tension and chain counts work for you. Join forums for pattern-specific tips. With steady practice and attention to your turning chain, your pieces will look neater and feel stronger.
Treat each row transition as a small victory—get the basics right, and the rest follows. Happy stitching and enjoy the process of learning to perfect crochet row transitions.
FAQ
What is a turning chain and why does it matter?
A turning chain is a short chain of stitches at the end of a row. It raises the yarn to the height needed for the next row’s first stitch. It helps keep your edges straight by aligning stitches. Use the chain count that matches your stitch height, like ch1 for single crochet or ch2 for half double.
Always follow pattern notes if the turning chain is counted as a stitch.
How does the turning chain affect row height and stitch alignment?
The turning chain sets the vertical starting point for the new row. Its height must match the stitch you’ll work into. If it’s too short, your rows will pull in and pucker. If it’s too tall, your edges will wave or your stitch count will be off.
Matching chain height to stitch height keeps the first stitch of the row level with the rest of the fabric.
Why do beginners get confused about turning chains?
Beginners often skip the turning chain or use the wrong number of chains. This leads to shrinking projects, puckered edges, or mismatched stitch counts. Patterns sometimes count the turning chain as a stitch, causing confusion.
Reading the pattern carefully and practicing on swatches clears most of this up.
What is the step-by-step method for making a basic turning chain?
Finish the last stitch of the row, then make the required number of chains for the next stitch height. For example, ch1–ch3 depending on the stitch. Turn your work and begin the first stitch into the correct place as the pattern indicates.
Maintain even tension and count carefully. If a pattern counts the turning chain as a stitch, treat it as the first stitch in your count.
Are there video or visual aids that make learning the turning chain faster?
Yes. Look for close-ups of slip-knot formation, finger positions for tension control, and clear shots of the yarn-over motion. Macro views of crocheting into the back bump vs. top loop and clips comparing turn-then-chain vs. chain-then-turn are also helpful.
Creators like those on YouTube or craft sites often show these sequences in slow motion or looped GIFs for clarity.
Should I turn then chain, or chain then turn?
Both methods work. Most instructors teach turning, then chaining, but many crocheters chain first then turn to avoid twisted stitches. Try both and stick with whichever gives you neat edges and avoids twist.
The key is consistency—pick a sequence and use it throughout the piece.
How many chains do I use for single crochet, half double, double, and treble?
Common guidelines are: ch1 for single crochet (often not counted), ch2 for half double, ch3 for double, and increase chains for taller stitches like treble. These are conventions—always check your pattern’s turning-chain chart or notes for exact instructions.
How does stitch height determine the turning chain length?
The turning chain must approximate the vertical height of the stitch you’ll work into. Taller stitches need taller turning chains. Think of the chain as a scaffold: it raises the row so the first stitch lands level with the rest of the fabric.
When does the pattern count the turning chain as a stitch?
Patterns will usually state whether to count the turning chain. If it says the turning chain counts as the first stitch, include it in your stitch tally. If it doesn’t, you’ll often begin the first actual stitch into the indicated stitch or space—misreading this causes off counts and odd edges.
How do I keep my turning chains consistent and even?
Control yarn tension by wrapping the working yarn around your fingers and holding the hook comfortably in your dominant hand. Slow down and count chains deliberately while practicing. If your chains are too tight, loosen your grip or try a larger hook; if too loose, relax less and maintain even finger tension.
What hand positioning and yarn control techniques help with turning chains?
Keep the hook in your dominant hand and the working yarn managed by your other hand. Use consistent finger loops for tension, maintain a relaxed grip on the hook, and position the yarn so yarn-overs flow smoothly. Many crocheters find small finger adjustments make a big difference in evenness.
How do hook size and yarn weight affect turning chains?
Heavier yarns and larger hooks change how many chains appear proportional. If your chains are tight, move up one hook size. Yarn weight also influences how a ch1 vs. ch3 looks—stick with stitch-height guidelines but swatch to confirm the visual result for that yarn and hook combo.
Why are my edges wavy or puckered and how do I fix them?
Wavy or puckered edges usually mean your turning chain length or tension is off. Fix it by matching the chain count to the stitch height, adjusting tension, or reworking rows. Trying chain-then-turn vs. turn-then-chain can also solve twisting or distortion issues.
Why do I get gaps in the first stitch row and how can I avoid them?
Gaps often come from crocheting into the top loop of the foundation chain. Work into the back bump of the chain to create a neater, tighter first row. Alternately, use a chainless foundation to avoid the chain-gap entirely.
What happens if I skip the turning chain?
Skipping the turning chain can cause incorrect stitch counts, uneven edges, and a misshapen project—-especially when patterns count the turning chain as a stitch. Always follow the pattern’s instructions and check your counts after turning.
What is the chainless foundation and when should I use it?
The chainless foundation builds the chain and the first row simultaneously, eliminating the usual chain edge and gaps. Use it when you want a tidy edge and fewer chain-gap problems, or when a pattern or stitch demands a seamless start.
How does crocheting into the back bump help my edges?
Crocheting into the back bump of the foundation chain hides the chain’s top loops and produces a tighter, cleaner first row. This reduces visible gaps and gives a sturdier edge for subsequent rows.
Can I modify turning chains for textured stitches or decorative borders?
Yes. You can add extra chains, change colors, or substitute slip stitches for decorative edges. But modifications affect stitch counts and row height. Always swatch and adjust your pattern or stitch counts appropriately before altering a full project.
What practice exercises help me master the turning chain?
Make small swatches comparing ch1, ch2, and ch3 turning chains, or practice simple squares, scarves, and potholders to repeat the motion. Use different hook sizes and yarns to see how tension and tools affect results.
What should I track in a practice log?
Note yarn brand and weight, hook size, stitch type, turning chain count, tension observations, and visual outcomes. A short log helps you reproduce the look you prefer and speeds learning.
What video tutorials, charts, or communities are recommended for learning turning chains?
Look for close-up crochet tutorials on YouTube that show slip knots, yarn-over mechanics, back-bump insertion, and chainless foundation methods. Printable turning-chain charts and swatch patterns help too. Community resources like Itchin’ for Some Stitchin’, Pinterest boards, and Facebook crochet groups offer tips, troubleshooting, and visual examples from other crocheters.
How do I choose resources that match my learning style?
If you learn visually, pick videos with macro shots and step-by-step slow demos. If you prefer written notes, grab a printable turning-chain chart and swatch patterns. Join forums or Facebook groups when you want feedback and pattern-specific advice. Mix resources—watch a clip, then practice a swatch to reinforce learning.