Looking for a quick and easy project that looks like you spent all summer on it? This free crochet bucket hat pattern is perfect for beginners. It uses a granny stitch cluster and a neat single crochet brim. You can follow a clear tutorial that includes a free written pattern and a step-by-step video.
The updated instructions are loved by many on Pinterest, Facebook, and Twitter. They offer a seamless spiral option and joined rounds for beginners. Lion Brand 24/7 Cotton is a popular choice for its breezy drape. But, the pattern also works with worsted-weight cotton or acrylic for a firmer brim. Find the full free crochet bucket hat and video at the pattern page.
This step-by-step crochet hat is for babies to adults. It takes about 2.5 hours to make at a leisurely pace. You can also get a printable PDF for an ad-free copy. The pattern includes clear abbreviations, gauge tips, and smart tweaks for the perfect fit.
Key Takeaways
- The pattern is beginner-friendly and offers both a free crochet bucket hat and a video tutorial.
- Works well with cotton like Lion Brand 24/7 Cotton for a summer crochet hat pattern.
- Includes spiral and joined-round options to suit your preferred finish.
- Sizes range from 0–6 months to adult; printable PDF is available for purchase.
- Estimated make time is about 2.5 hours at a relaxed pace.
Why this free crochet bucket hat pattern is perfect for beginners
This pattern is great for beginners because it’s easy to follow. It uses simple stitches and short rounds. You’ll learn front-loop and back-loop techniques for the brim.
The pattern comes with a video and written instructions. If you like visuals, watch the video and use slow playback when needed. Many people finish this project in just an afternoon.
Shopping for this hat is easy. Cotton is best for a crisp brim, and you’ll only need one skein for small to medium sizes. For more ideas, check out one-skein crochet patterns.
This design is easy to understand. It uses simple abbreviations and continuous rounds. This helps you practice tension and counting without stress. It’s a great way to learn gauge, shaping, and increases.
- Quick wins: fast rounds that build skill.
- Low cost: minimal yarn and common tools.
- Learning resources: paired video and written tutorial for steady progress.
Starting with this beginner crochet bucket hat can be a success. It’s fast and teaches you important skills. You’ll finish the afternoon with a new hat and more confidence for future projects.
Materials and tools you’ll need for your bucket hat
Get ready to start. For a cool summer bucket hat, pick a medium-weight cotton like Lion Brand 24/7 Cotton. It’s 186 yards long and weighs 100 grams. This cotton is crisp and drapes well for a floppy brim.
If you like store brands, try Lily Sugar’n Cream or Red Heart. They’re good for a structured hat.
Recommended yarn types and weights
Choose cotton or cotton blends for breathability and shape. Cotton keeps cool and doesn’t pill much. It’s perfect for summer hats.
Acrylic yarn is softer and cheaper. But it can get hot and pill over time.
Hook sizes to use and why a 4–5mm hook works well
Match your hook to the yarn and brim style. A G-6 (4 mm) hook makes tight stitches, ideal for spiral rounds. A 5 mm hook makes the fabric looser and floppier.
Use a 4–5mm hook for the right fit and drape. Test it on a swatch to check your gauge.
Essential tools: stitch markers, yarn needle, scissors
You’ll need basic tools: a good hook, stitch markers, a yarn needle, and sharp scissors. These tools help keep your work neat and your finishing sharp.
Optional extras: blocking tools, yarn choices for colorwork
For a better finish, consider blocking tools and extra skeins for colorwork. Save a pattern page at this link for easy reference.
| Item | Recommendation | Why it matters |
|---|---|---|
| Yarn | Lion Brand 24/7 Cotton; Lily Sugar’n Cream | Breathable, good drape, resists pilling compared to acrylic |
| Hook | 4 mm (G-6) to 5 mm (H-8) | Tune gauge; 4 mm for tighter crown, 5 mm for floppier brim |
| Markers & finishing | Stitch markers, yarn needle, scissors | Keep rounds accurate and weave in ends cleanly |
| Extras | Blocking tools, extra skeins for colorwork | Shape the brim and add stripes or color patterns |
Gauge and sizing tips to get the perfect fit
Getting the right fit is simple: swatch, measure, adjust. A reliable hat gauge makes this process easier and less uncertain. Start by making a 10 x 10 cm swatch. Check both rows and stitches per 10cm to ensure your hat fits perfectly.
How to measure head circumference and crown diameter
To measure head circumference, wrap a soft tape around the widest part of your head. This is just above the ears. This number is your target for bucket hat sizing. For crown diameter, measure the top circle of your swatch at round 9. This is where the pattern suggests, to see if the crown will reach the desired size.
Matching gauge to the pattern: rows and stitches per 10cm
Start with the pattern’s gauge as a guide: 8.5 rows of 15 double crochets equals a 10 x 10 cm square. If your crochet gauge 10cm is smaller, use a larger hook. If it’s bigger, use a smaller hook. Check the top at 9 rounds. Some patterns expect a crown of about 4″ there, while later rounds reach roughly 6.5″ for the full top.
Adjusting rounds for small, medium, and large sizes
The pattern’s top rounds have clear stitch stops. For example, stop increasing when you reach 70 sts for small, 80 sts for medium, or 90 sts for large. If you want a smaller hat, end increases earlier. If you want larger, add rounds and continue the increase pattern until you hit the correct stitch count.
Use your measured head circumference to confirm these stops match your bucket hat sizing target. If the top circumference equals your head before moving to the side, you’re set. If not, tweak rounds or hook size until the hat gauge and dimensions align with your measurements.
Crochet basics and stitches used in the pattern
Before you start, learn the stitches and terms used in this pattern. It follows US crochet terms and common abbreviations. For a visual guide, check out this tutorial.
Quick note: The pattern starts with a magic ring and rounds that grow to form the crown. Then, it moves to side rounds and a shaped brim. Remember, the chain 2 at the start of each round is not a dc.
US crochet terms
- ch = chain
- sl st = slip stitch
- st or sts = stitch or stitches
- dc = double crochet; hdc = half double crochet; sc = single crochet
Common abbreviations explained
- inc = increase (work two stitches into one stitch)
- rep = repeat a sequence of stitches
- blo = back loop only; flo = front loop only
Want to crochet dc hdc sc smoothly? Keep your tension even and count each stitch at the end of each round. This helps avoid a warped or ruffled crown.
Front loop back loop crochet for shaping
Using blo or flo changes the fabric’s direction without complex math. Use back loop only on the first middle round for a sharp 90-degree bend. Use front loop only during brim increases to make the brim angle down, not flare out.

For a seamless look, try the spiral method with a stitch marker in the first stitch of each round. For a clear join and easy end hiding, use joined rounds. Both methods work well with the stitch set above.
Keep this cheat sheet nearby: crochet stitch abbreviations, US crochet terms, front loop back loop crochet, and steps for dc hdc sc. It will make your project quicker and more enjoyable.
Crochet bucket hat pattern
Begin with the crown and follow the increases until it fits your head. Use the magic ring method for a neat center. Choose US double crochet for a classic drape or hdc for a firmer finish, based on your yarn and hook.
The crown pattern crochet below gives exact stitch counts for the right size. Work in rounds with a ch2 start, keeping your tension even.
Top (crown) pattern rounds with exact stitch counts
Magic ring, R1: ch2, dc10 (10). R2: inc each st (20). R3: [dc, inc] x10 (30). R4: [dc x2, inc] x10 (40). R5: [dc x3, inc] x10 (50). R6: [dc x4, inc] x10 (60). R7: [dc x5, inc] x10 (70) — size stops crochet hat: stop here for small. R8: [dc x6, inc] x10 (80) — stop here for medium. R9: [dc x7, inc] x10 (90) — stop here for large.
Middle (side) rounds and how to control height
Join at the top edge and work in back loop only for a subtle ridge or full rounds for a smooth tube. For the sample, use ch2 and dc in blo each st for the first side round at your current count: 70/80/90. Then work R2–R7: ch2, dc each st around, keeping the same stitch count.
To change height, add or remove middle rounds. Each extra round adds roughly 0.4–0.6 inches depending on yarn and hook. Measure as you go to hit your target.
Brim rounds for a straight, downward-angled brim
Work the brim in front loop or front loop only to encourage a downward angle. Use alternating increase rounds to keep the brim flat and slightly sloped.
Example crochet brim instructions for the small/medium/large progression: Brim R1: ch2, [dc in flo of first 6/7/8 sts, inc in next] to reach 80/90/100. R2: dc each st. R3: [dc in first 7/8/9 sts, inc] to reach 90/100/110. R4: dc each st. R5: [dc in first 8/9/10 sts, inc] to reach 100/110/120. Fasten off and weave ends. Use flo increases to keep the brim tidy and shaped.
Size stops and how to add/subtract rounds for custom fit
Stop increasing the top rounds when the circle circumference equals the measured head circumference. That is your first size stop. Add or remove middle rounds to tweak crown height.
For a wider brim, add extra increase rounds; many schemes add six sts per increase round. For a firmer brim, change to a smaller hook or switch to hdc for those rounds.
| Section | Sample Stitch Counts | When to Stop |
|---|---|---|
| Top (dc scheme) | R1 10 • R2 20 • R3 30 • R4 40 • R5 50 • R6 60 • R7 70 • R8 80 • R9 90 | Stop at 70/80/90 to match small/medium/large head circumference |
| Top (hdc alternative) | R1 8 • R2 16 • R3 24 • R4 32 • R5 40 • R6 48 | Good for tighter stitch texture; use continuous rounds with a marker for a seamless look |
| Middle (side) | Maintain 70/80/90; R2–R7 ch2 dc around | Add or remove rounds to control height; measure as you go |
| Brim | Brim example: 80→90→100 (increments via [dc x, inc] rounds) | Use crochet brim instructions to alternate increase rounds and plain rounds for a flat, downward-angled brim |
| Customization | Extra increase rounds add ~6 sts each; change hook or stitch for stiffness | Use size stops crochet hat guidance: match circumference then adjust height and brim |
Step-by-step construction guide with spiral vs. joined rounds
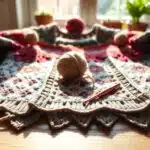
You’ll learn two ways to make your bucket hat. Choose what suits your style and skill level. First, we’ll look at each method. Then, we’ll share tips to keep your project neat and the right size. Below, see the smooth edge of a seamless crochet hat.
When to use the spiral method for a seamless look
For a seamless finish, try spiral rounds crochet. Work without turning chains and mark the first stitch of each round. This method avoids the ladder effect and gives a smooth fabric.
Spiral rounds crochet works well with patterns that list totals like 48 sts at round 6 or 78 sts at round 13. Check your gauge and use a slightly smaller hook for denser stitches.
Using joined rounds with stitch markers for beginners
A joined rounds tutorial is easier for beginners. It starts with a chain-2 and ends with a slip stitch. Mark the first stitch after joining to know where to start next time.
This method is great when patterns list round totals and exact stitch counts. It helps beginners see where increases fall, making it easier to follow the pattern.
Tips for keeping your stitch count accurate each round
To keep stitch count accurate, count at the end of every round. Use a stitch marker for the first stitch. Add markers for each repeat set. If the top starts to curl or ripple, recount to find any mistakes.
Always check your totals against the pattern’s counts. If round 6 should have 48 sts, confirm it. Small checks save big fixes later.
| Method | Start/End | Best for | Key tip |
|---|---|---|---|
| Spiral rounds crochet | Continuous rounds, mark first stitch | Seamless crochet hat, smooth crown | Use marker every round and check pattern totals |
| Joined rounds (chain-2, sl st) | Chain 2 start, slip stitch to close | Beginners, clear row breaks | Chain 2 does not count as dc; follow written counts |
| Hybrid (joined then spiral) | Join for crown, switch to spiral for sides | Controlled shaping with smooth sides | Mark transition stitch and recount at switch |
If you prefer a guided walk-through, check a detailed crochet hats tutorial that shows both approaches step by step. Use these notes to pick spiral rounds crochet or the joined rounds tutorial that fits your comfort level. Practice the stitch-count checks until they become second nature.
Techniques to shape the hat: bends, folds, and brim behavior
Shaping your bucket hat turns yarn into attitude. Small changes in stitch placement and fiber choice can change the look. You can go from a floppy beach hat to a crisp city staple.
Use these tricks to control bends, folds, and brim behavior. You don’t need to make the pattern complicated.
Creating a 90-degree bend using back loop only (blo)
Work the join between crown and side in back loop only for a 90-degree edge. This creates a defined ridge that makes the crown go up and the side go straight down. Try two rounds of blo for a cleaner corner and less rounded crown.
Switching to front loop on a few rows softens the corner. For a sharper break, tighten your tension or drop a hook size for the transition round.
How increases per round affect brim flop or stiffness
The rate of increases controls brim stiffness more than brand names. Adding increases every round makes the brim firm. Adding them every other round makes it slope down neatly.
Yarn choice is key. Mercerized cotton like Lion Brand 24/7 Cotton drapes well without losing shape. Avoid heavy acrylics for hot-weather hats; they can pill and trap heat. Use a smaller hook for a stiffer brim or a larger hook for more flop.
Making a wavy brim vs. a straight brim by changing increase frequency
A wavy brim comes from uneven or frequent increases. Increase on alternating sections or add clusters for a ripple. For a straight drop, stop increasing and work even rounds.
Try using front loop only on some increase rounds to alter stitch torque and encourage folds. Float between increase frequencies and loop placement until the brim behaves the way you want.
For more stitch ideas, check this guide on crochet stitches for hats at crochet stitches for hats. Small experiments yield big style wins when you focus on crochet hat shaping, back loop only crochet bend, brim stiffness crochet, and wavy brim crochet.
Troubleshooting common issues while crocheting your hat
If your hat isn’t turning out right, don’t worry. Small mistakes can make the crown look like a bowl or the brim flop. Here are some quick fixes to get your project back on track.
Top curling into a bowl
When the crown looks like a cereal bowl, you might have missed increases or your tension is too tight. Check the stitch counts for each round against the pattern. If you find the mistake, frog back to the last correct round and redo the increases at a relaxed tension. Using a stitch marker or switching to a slightly larger hook often stops top curling crochet in its tracks.
Top getting wavy
A rippled crown usually means extra increases or loose tension. First, check your increase pattern: the middle section should have no increases unless the pattern says so. If the ripple is small, try blocking the hat lightly. For bigger waves, frog to the round before the error and redo with correct counts. Counting each round as you go prevents repeat mistakes and is a reliable wavy crown fix.
Brim too floppy or too stiff
Brim behavior depends on yarn and hook choice. If the brim flops, use a firmer yarn or drop a hook size. If the brim is too stiff, try a softer yarn or go up one hook size. Adjusting increases in the brim can add or reduce volume. Measure the brim against your head as you go so you can stop and tweak before finishing.
Magic ring problems and easy alternatives
If the magic ring slips or looks uneven, you can use a magic ring alternative that creates a tight center. Make a slip knot, chain 4, then sl st into the first chain to form a small circle. Work your first round into that loop and pull it closed. Another option: chain 3, then dc10 into the 3rd chain from the hook to form a neat center. These hacks save time and eliminate stress for beginners who struggle with the original technique.
Practical habits that prevent most issues
Stop and check counts often. Use a stitch marker when switching between spiral and joined rounds. Slow video playback when following a tutorial and practice the crown increases on scrap yarn if you’re unsure. Take breaks if your hands tighten; fatigue changes tension and can cause persistent problems.
Quick fixes checklist
- Recount stitch totals each round.
- Frog back to the last correct round when needed.
- Swap hook sizes to tweak tension.
- Use stitch markers and measure against head circumference.
- Try a magic ring alternative if the ring gives you trouble.
Customization ideas to make the hat your own
Your bucket hat is a blank canvas. You can make it your own with small touches. Pick one or two techniques to keep the design crisp.
Add appliqués
Small motifs can change everything. Stars, hearts, flowers, or 3-D motifs look great on the crown or brim. For a standout look, try an appliqué crochet hat. Sew pieces on with a yarn needle and matching yarn for a secure finish.
Colorwork options
Stripes, color blocking, and checkered patterns add personality. Carry floats for tidy checks or change colors at round starts for clean stripes. A colorwork bucket hat with a wavy brim uses the same color-change skills but plays with increase placement for texture.
Themed add-ons
You can add playful themed details without making it too complicated. The Appa arrow from Avatar: The Last Airbender is a popular motif. There’s a video tutorial showing how to make and attach it for precise placement. Use that method for other themed pieces to keep edges neat.
Choosing seasonal yarns
Pick fibers that match the season. Use cotton or cotton blends for breathability and structure in warm months. For cool weather, wool blends or acrylic blends add warmth and drape.
Quick reference
| Feature | Best use | How to apply |
|---|---|---|
| Appliqué motifs | Decorative focal points | Crochet separately, sew on with matching yarn |
| Stripes | Classic, easy contrast | Change color at start of round, weave ends neatly |
| Checkered pattern | Bold graphic look | Carry floats or switch colors every few stitches |
| Wavy brim | Playful edge | Adjust increase frequency and use alternating stitch heights |
| Seasonal yarn for hat | Match comfort and function | Choose cotton for summer; blends for warmth in fall/winter |
Want to customize your crochet hat more? Add increasing rounds to widen the brim. Change stitch placement for subtle stripes. Or layer appliqués for a tactile finish. Keep a tidy tension and check placement against the hat as you go to avoid surprises.
If you plan a beach-ready version, avoid heavy acrylic. Reach for Lion Brand 24/7 Cotton or similar mercerized cottons for color variety and breathability. For cooler months, pick snug wool blends that hold shape and pair well with a colorwork bucket hat design.
Video tutorial and printable PDF options
Ready to follow along? Watch a clear crochet hat video tutorial that guides you through every round. It includes crochet pattern timestamps for quick access to any part. Use the player speed control to adjust the pace for easier learning.

Want a paper copy while crocheting? Get the printable crochet pattern PDF. It’s designed for easy reference, with stitch counts and row notes at your fingertips. Many prefer it for its clarity when hands are busy with yarn.
For a clean format, consider purchasing the ad-free crochet pattern. It offers a distraction-free experience with no pop-ups. This format is perfect for long sessions, paired well with the video.
Combining the video tutorial with the written PDF speeds up learning. Pause at the timestamps, practice the stitch, and rewind if needed. This method enhances muscle memory.
Share your finished hat on Instagram or YouTube and tag the designer. Post photos on Ravelry, Pinterest, or Facebook groups. Use social tags to get feedback and tips. Many creators, like the pattern’s creator, welcome tags and can help troubleshoot.
Conclusion
You now have a beginner-friendly free crochet bucket hat pattern. It guides you from the crown to the brim. Follow the written instructions and the video for help. Make sure to check your gauge early.
Use cotton yarn, like Lion Brand 24/7 Cotton, with a 4 mm hook for a crisp finish. The pattern includes simple tricks to shape the brim. You can choose a straight or slightly bent brim.
This project is quick and rewarding, taking about 2.5–3 hours to complete. Start by planning your materials and measuring your head. Follow the pattern’s increase guidance for the perfect fit.
If the brim feels off, try changing yarn weight or hook size. Don’t worry about starting over.
Make your hat unique by adding appliqués, stripes, or color blocking. Adjust the rounds to change the brim width. Use the video for pacing and the printable PDF for a clean reference.
In short, this pattern lets you finish a crochet hat with confidence. You can personalize every stitch.
FAQ
What is this free crochet bucket hat pattern and what does the guide include?
This is a beginner-friendly crochet bucket hat pattern. It includes a free written pattern and a YouTube video tutorial. The guide covers the crown, middle, and brim rounds. It also offers stitch counts for small, medium, and large sizes.
There’s an option to buy an ad-free printable PDF for a clean reference. The pattern includes both video and written instructions. This way, you can follow whichever method you prefer.
Why is this pattern good for beginners?
It’s perfect for beginners because it’s quick and uses minimal yarn. It teaches handy techniques like front/back loop work and continuous rounds. The video shows every step, and you can slow playback on YouTube.
The written pattern uses clear US terms and simple increases. This helps you build confidence in just an afternoon.
What yarns and weights are recommended for a summer bucket hat?
Choose cotton or cotton blends for breathability and shape. Lion Brand 24/7 Cotton is a favorite for its drape and floppy brim. Lily Sugar’n Cream and Red Heart Super Saver are also good choices.
Avoid pure acrylic for summer hats. It can be hot and may pill.
Which hook size should I use and why do recommendations range from 4–5mm?
Use 4mm (G-6) for a tighter gauge and firmer brim. Or, use 5mm (Clover Amour 5mm) for looser stitches and a flopier brim. The pattern suggests 4mm for a seamless spiral finish with mercerized cotton.
Adjust up or down to match the pattern gauge.
What essential tools do I need beside yarn and hook?
You’ll need stitch markers, a yarn needle for weaving ends and appliqués, scissors, and an optional blocking setup. A printed ad-free PDF is handy as a quick reference while you work.
What gauge should I hit and how do I check it?
The pattern gauge is about 8.5 rows of 15 double crochets = 10 x 10 cm. Make a swatch and measure. At around 9 rounds, the crown should be close to the pattern’s target diameter.
If it’s too small, try a larger hook. If too big, go down a hook size or tighten your tension.
How do I measure head circumference and when should I stop increasing the crown?
Measure around the widest part of the head where the hat will sit. Use the pattern’s top-round stitch counts. Stop increasing at 70 sts for small, 80 sts for medium, or 90 sts for large.
Stop increases once the circle matches the wearer’s head circumference. Then, begin side rounds to set height.
What stitch abbreviations and US terms does this pattern use?
The pattern uses US terms: ch (chain), dc (double crochet), hdc (half double crochet), sc (single crochet), sl st (slip stitch), inc (increase), blo (back loop only), flo (front loop only). Rounds may be written for joined or spiral methods—both are explained.
When should I work in the front loop or back loop only, and why?
Work the first middle round in back loop only (blo) to create a sharp 90-degree bend between crown and side. Use front loop only (flo) on brim increase rounds to change stitch behavior and angle, producing a downward-angled brim instead of a flat one.
What are the exact crown rounds and stitch counts for the dc-based top?
The dc top begins with a magic ring and ch2: R1 dc10 (10), R2 inc to 20, R3 [dc, inc] to 30, R4 [dc x2, inc] to 40, R5 [dc x3, inc] to 50, R6 [dc x4, inc] to 60, R7 [dc x5, inc] to 70 (stop for small), R8 [dc x6, inc] to 80 (stop for medium), R9 [dc x7, inc] to 90 (stop for large). From there, you switch to side rounds.
How do the middle (side) rounds work to control hat height?
After stopping increases for the crown size you want, work rounds of ch2 dc in each stitch around—often beginning the first middle round in blo to shape the bend. Add or remove these side rounds to reach the desired crown height (example: roughly 3.5″ crown height in the sample). Measure against the wearer as you go.
How are brim rounds constructed for a straight vs. downward-angled brim?
Brim shaping typically uses increases spaced across rounds. To get a downward-angled brim, do increases every other round and use flo on increase rounds. Example sequence increases the spacing between increases each time (e.g., dc in first 6 sts, inc, then a full round; next increase after 7 sts, etc.). Increasing every round makes the brim flare out more; no increases yields a straight drop.
How can I customize size—add or subtract rounds for small, medium, large?
Stop increasing earlier for a smaller top or continue increases for a larger top. Use the pattern’s stitch counts at rounds 7–9 as stopping points (70/80/90 sts). Add or remove middle rounds to change height, and add extra brim increase rounds to widen the brim—each increase round typically adds a predictable number of stitches depending on the scheme.
When should I use spiral rounds vs. joined rounds?
Use the spiral method for a seamless finish; place a stitch marker in the first stitch to keep track. Joined rounds (chain 2 and sl st endings) are fine for beginners who prefer clear round starts. Both methods are supported—choose based on your comfort and desired look.
How do I keep my stitch count accurate each round?
Count your stitches at the end of every round, use a stitch marker for the first stitch (or every set of repeats), and pause to recount if the top starts curling or waving. The pattern provides expected stitch totals you can cross-check against.
How does working in blo create a 90-degree bend?
Working a round in the back loop only shortens the effective stitch height on that round and forces the fabric to turn, creating a perpendicular fold between crown and side. It’s a simple trick to make the hat look structured instead of rounded.
What influences brim flop or stiffness and how can I change it?
Yarn fiber and hook size are primary factors. Mercerized cotton like Lion Brand 24/7 Cotton drapes nicely; a larger hook or lighter yarn makes a floppier brim. A smaller hook or denser yarn tightens fabric for a stiffer brim. The increase frequency also matters—more frequent increases create waves or extra flair.
How do I make a wavy brim instead of a straight one?
Increase more often or increase unevenly across rounds. For example, add increases every round or introduce clustered increases in places to create waves. Experiment on a swatch to preview how your chosen yarn and hook react.
My top is curling into a bowl—what went wrong?
Curling usually means you missed increases or your tension is too tight. Recount the last few rounds, frog back to the last correct round, or switch to a larger hook. You can also compare stitch counts to the pattern’s totals to spot where an increase was skipped.
My top is wavy—how do I fix extra increases or loose tension?
Waviness signals too many increases or loose tension. Recount stitches, rip back to the point before the unwanted increases, and rework with a slightly smaller hook or firmer tension. A gauge swatch helps prevent this early on.
The brim is too floppy or too stiff—what adjustments help?
For a stiffer brim, use a smaller hook, tighter tension, or a denser cotton/worsted yarn. For a floppier brim, use a larger hook, lighter mercerized cotton, or reduce the density of increases. Blocking can also shape the brim post-finish.
I dislike the magic ring—are there easy slip-knot alternatives?
Yes. You can make a small loop with a slip knot, chain 4 and sl st into the first chain to form a ring, or chain 3 then dc10 into the 3rd chain from hook as a substitute. The pattern explains these alternatives.
How do I fix stitch mistakes mid-way without starting over?
Recount to find the incorrect round, frog back to the last correct round, and rework. Use stitch markers to isolate sections and check counts frequently. If tension or hook size caused the issue, adjust before reworking the rounds.
Can I add appliqués or colorwork to this bucket hat?
Absolutely. The hat is a blank canvas for appliqués (stars, hearts, flowers, or 3-D motifs). There’s a separate video tutorial for attaching appliqués like the Appa arrow. For colorwork, introduce color changes during rounds for clean stripes or carry floats for checkering; the checkered and striped variations have video demos.
What yarns are best for seasonal versions of the hat?
For summer, use cotton or cotton blends (Lion Brand 24/7 Cotton, Lily Sugar’n Cream). For cooler weather, wool blends or acrylic blends add warmth—just note acrylic can pill and be warmer to wear. Choose fibers with the drape and stitch definition you want.
Where can I find the video tutorial and the ad-free printable PDF?
The YouTube tutorial is embedded in the pattern post and includes timestamps so you can jump to crown, side, brim, and finishing sections. The ad-free printable PDF is available for purchase via the pattern page link—handy if you prefer a clean, printable format.
How long will this hat take to make?
At a leisurely pace, the project takes about 2–3 hours. Many makers finish it in a short afternoon—perfect for a weekend or a quick gift.
Can I work the sample hat in hdc or sc instead of dc?
Yes. The pattern includes alternate crown schemes using hdc or sc with adjusted increase rounds. For example, an hdc spiral variant reaches 48 sts by round 6 using G-6 (4 mm) and gives a seamless finish. Follow the alternate stitch counts for consistent sizing.
How should I share my finished hat online?
Tag the creator on Instagram or YouTube (the tutorial author often requests tags like @yarndrasil), post to Ravelry, Pinterest, or Facebook groups, and include pattern details so others can follow. Creators welcome tags to see finished projects and offer help in comments.
Any practical quick tips before I start?
Make a gauge swatch, choose cotton for summer hats, decide whether you want a seamless spiral or joined rounds, and keep stitch markers handy. Use both written rounds and the video together—measure as you go so you can stop increases at the right top diameter, and have fun customizing colors or appliqués.