
Garter Stitch Knitting: 7 Powerful Reasons Beginners Love It
Getting Started with Garter Stitch Knitting
Garter stitch knitting is the most beginner-friendly knitting technique that creates a reversible, flat-lying fabric. Here’s what you need to know:
- Definition: A pattern created by knitting every row when working flat, or alternating knit and purl rounds when working in the round
- Key characteristics: Reversible, non-curling edges, stretchy, and durable
- How to knit it flat: Cast on, then knit every row until desired length
- How to knit it in the round: Alternate between knit rounds and purl rounds
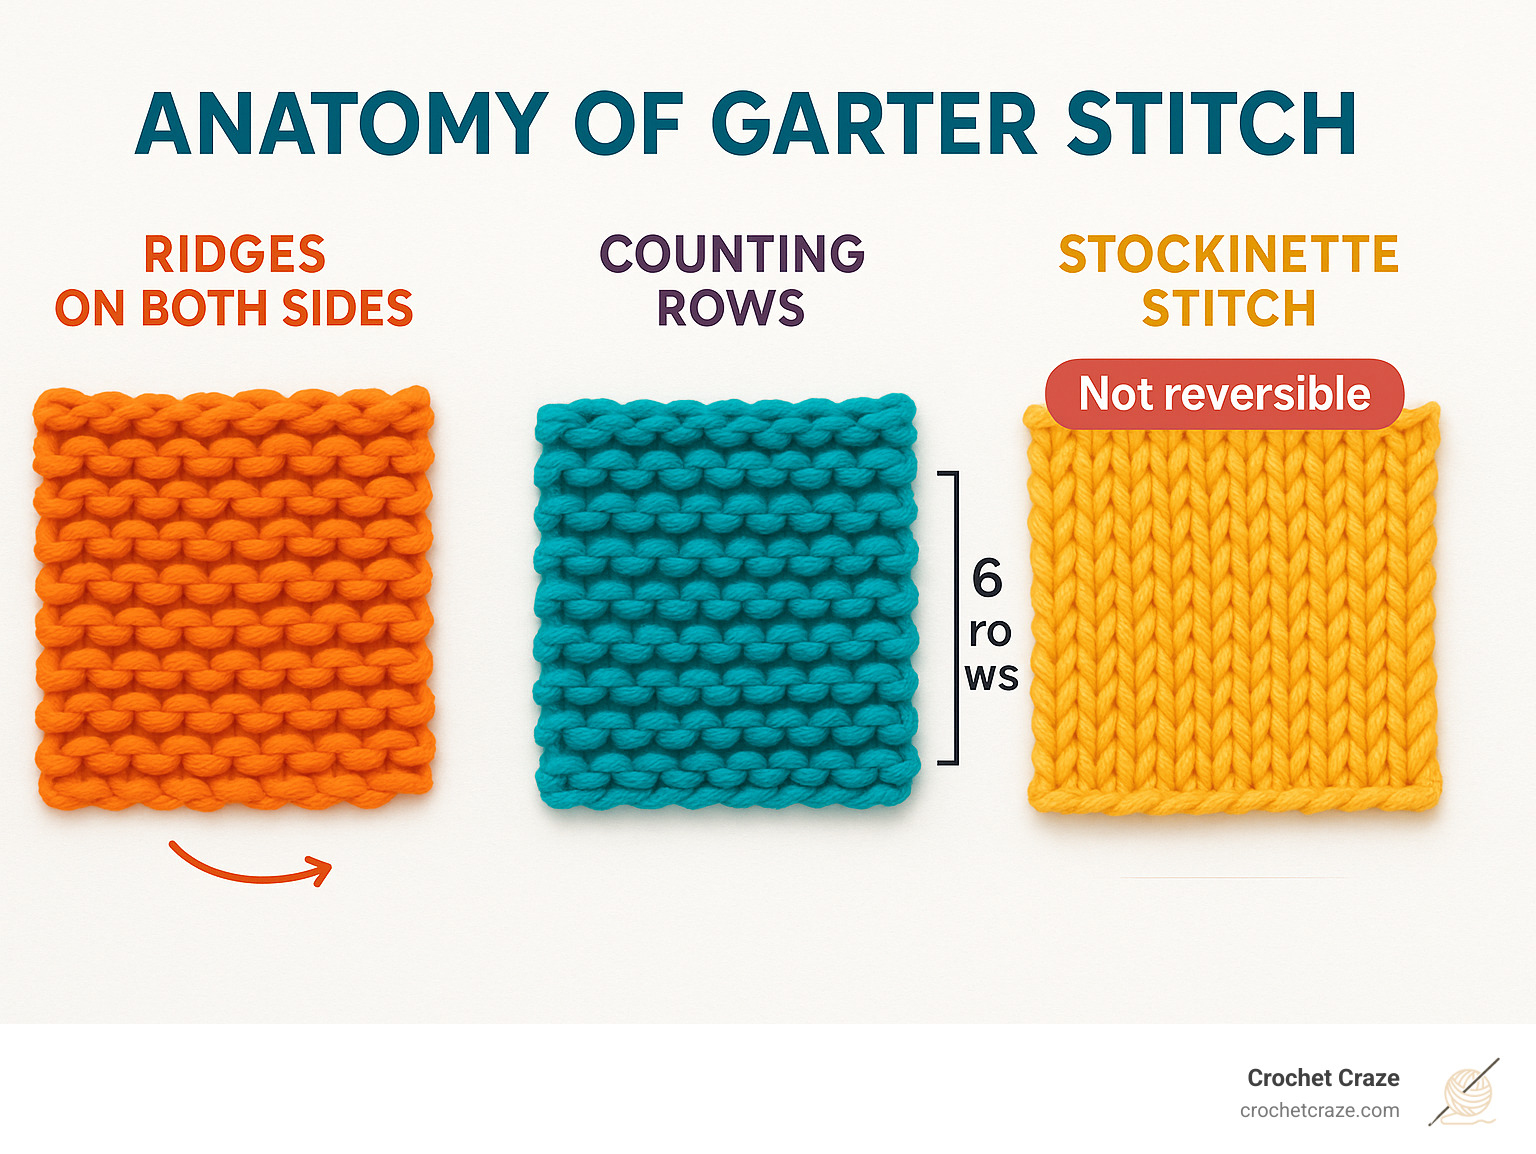
Garter stitch produces a distinctive ridged texture that lies flat without curling at the edges, making it perfect for scarves, blankets, dishcloths, and borders. Unlike stockinette stitch, both sides look identical, which is why beginners love starting with this versatile stitch.
The fabric created is thick, warm, and slightly more condensed than stockinette stitch. It uses approximately 30% more yarn than stockinette for the same dimensions, but creates a sturdier fabric that’s ideal for many projects.
Hi there! I’m Sonji Huerta, a newcomer to yarn crafts who has acceptd garter stitch knitting as my entry point into the wonderful world of creating handmade items. While I’m primarily focusing on crochet these days, I’ve found that understanding knitting fundamentals has improved my overall fiber arts journey.
What Is Garter Stitch Knitting?
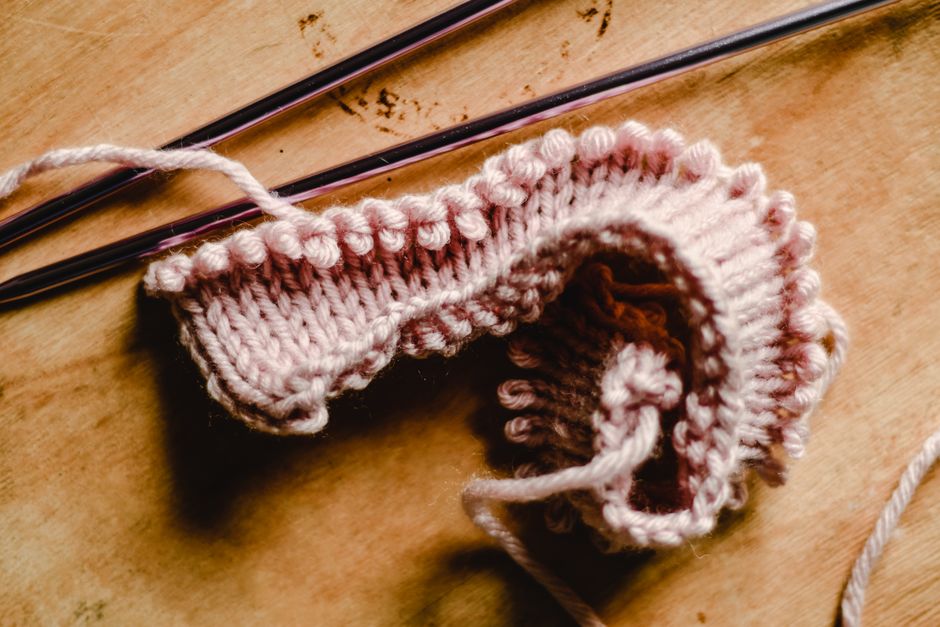
There’s something magical about the simplicity of garter stitch knitting. As the foundation of all knitting patterns, it’s usually the first technique beginners learn—and for good reason! When working on straight needles, you create this beautiful texture by simply knitting every row. No complicated pattern memorization, no switching between knit and purl stitches. Just knit, knit, and knit some more.
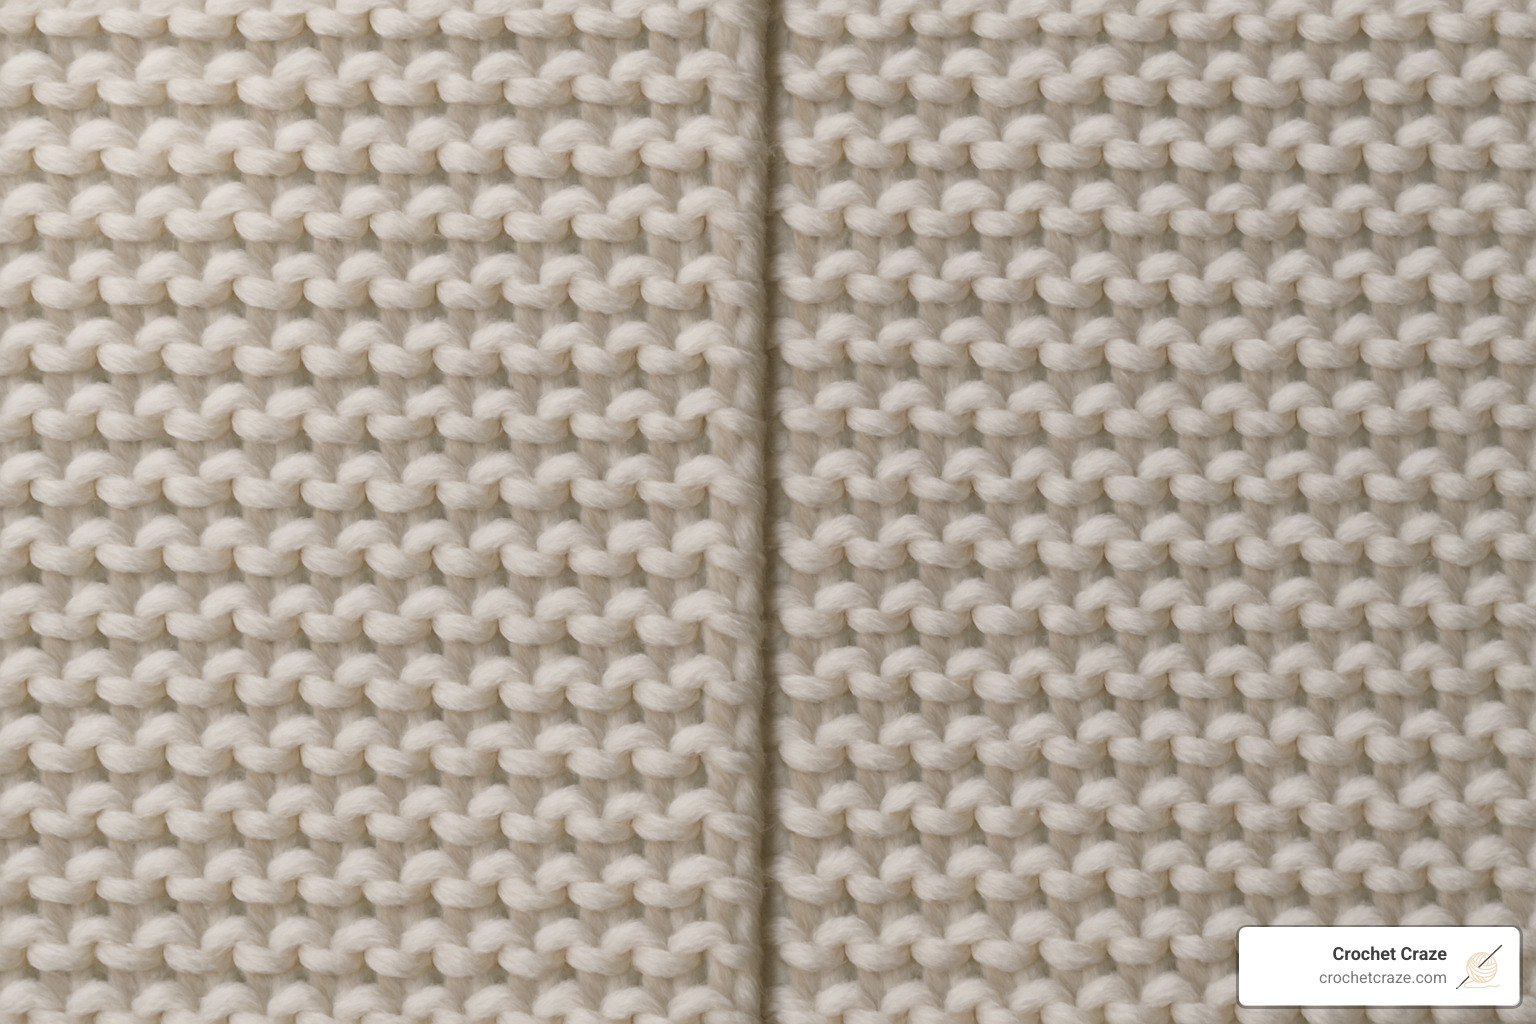
Those lovely horizontal “garter ridges” that form are what give this stitch its distinctive character. Run your fingers across a piece of garter stitch fabric, and you’ll feel those satisfying bumps that create both texture and visual interest.
One of the most delightful things about garter stitch is its perfect reversibility. Both sides look identical—there’s no “right” or “wrong” side to worry about! This makes it absolutely perfect for projects where both sides might be visible, like scarves, blankets, or dishcloths. You can flip it, fold it, or drape it any way you like, and it always looks intentional and beautiful.
The fabric that garter stitch knitting creates is wonderfully dense and cozy. This additional thickness makes it particularly warm and insulating—perfect for winter accessories or baby blankets. The trade-off? This density means garter stitch uses about 30% more yarn than stockinette stitch for similarly-sized projects. But the extra coziness is often worth it!
“I always tell my students that garter stitch is like the comfort food of knitting,” says one of our Crochet Craze instructors. “It’s simple, satisfying, and creates a fabric that’s both sturdy and comforting—perfect for beginners and seasoned knitters alike.”
Garter Stitch vs Stockinette Stitch
When you’re new to knitting, understanding the differences between garter stitch and stockinette stitch helps you make better project choices. These two fundamental stitches create completely different fabrics:
| Feature | Garter Stitch | Stockinette Stitch |
|---|---|---|
| Creation (flat) | Knit every row | Knit one row, purl one row |
| Creation (round) | Alternate knit and purl rounds | Knit every round |
| Appearance | Horizontal ridges on both sides | V-shapes on front, purl bumps on back |
| Edge behavior | Lies flat, doesn’t curl | Tends to curl at edges |
| Yarn usage | Uses more yarn | Uses less yarn |
| Gauge | Square (twice as many rows as stitches per inch) | Rectangular (fewer rows than stitches per inch) |
| Reversibility | Fully reversible | Not reversible |
The most obvious difference you’ll notice is how they behave at the edges. While stockinette has that frustrating tendency to curl (requiring blocking or special borders), garter stitch naturally lies flat. This is exactly why many knitters add garter stitch borders to stockinette projects—they tame those curling edges!
Stockinette creates that classic “V” pattern we often associate with knitting, appearing smooth on the front and bumpy on the back. It drapes more fluidly than garter stitch but lacks the dimensional texture and stability. Each has its place in your knitting toolkit!
Why Beginners Love Garter Stitch Knitting
There’s a reason nearly every knitter’s first project involves garter stitch knitting. The benefits for beginners are tremendous:
First and foremost is the simplicity. When you’re just starting out, focusing on mastering a single stitch type (the knit stitch) allows you to develop consistent tension and comfortable hand positioning without juggling multiple techniques.
The repetitive motion creates strong muscle memory development. After a few rows, many beginners find their hands naturally falling into rhythm—it’s like your fingers begin to understand what to do without your brain having to micromanage every movement.
The forgiving texture of garter stitch is another blessing for beginners. Those lovely ridges? They’re excellent at hiding small tension inconsistencies that might scream for attention in smoother stitches. Your early practice pieces will look intentional and beautiful, even as you’re learning.
Unlike many other stitches, garter stitch creates fabric with no curling edges, eliminating the need for special edge treatments or blocking techniques that can overwhelm a beginner.
Many knitters also find the mindful, meditative quality of garter stitch. Its simplicity allows you to fall into a peaceful rhythm without constantly checking patterns or counting stitches. This meditative aspect often becomes a cherished part of the knitting experience.
Finally, garter stitch typically has a square gauge (the same number of stitches and rows per inch), making it much easier to calculate dimensions for simple projects like scarves or washcloths.
“My first garter stitch project was a small square that somehow ended up trapezoid-shaped,” laughs one of our Crochet Craze community members. “But even with my beginner mistakes, it was still functional and got me hooked on knitting for life!”
Step-by-Step Guide: Flat & Circular Methods
Ready to try your hand at garter stitch knitting? Let’s walk through how to create this beautiful, versatile fabric using both flat needles and circular needles. I’ll guide you through every step of the process!
Materials You’ll Need:
- Knitting needles (straight for flat knitting or circular for round projects)
- Yarn (beginners, grab a medium weight/#4 yarn)
- Scissors
- Darning needle for those finishing touches
- Stitch marker (you’ll need this for circular knitting)
When you’re just starting out, choose a light-colored yarn that isn’t too dark or variegated. Trust me on this one—being able to clearly see your stitches makes learning so much easier! I recommend a nice worsted weight yarn paired with US size 7-8 (4.5-5mm) needles for your practice swatches.
Flat Method: Knit Every Row
Step 1: Cast On
Begin by casting on your desired number of stitches. The long-tail cast-on method gives you a lovely stretchy edge that works perfectly with garter stitch. Leave about a 10-inch tail—better to have too much than too little!
Step 2: Knit the First Row
Hold the needle with your cast-on stitches in your left hand (if you’re right-handed). Insert your right needle from front to back through the first stitch, wrap your working yarn counterclockwise around the right needle, and pull through to create a new loop. Slide the old stitch off, and voilà—you’ve made your first knit stitch! Continue across the row.
Step 3: Turn Your Work
When you reach the end of the row, simply flip your work around so the needle with all your stitches is back in your left hand.
Step 4: Repeat
Here’s where the magic happens—just keep knitting every row! That’s the beauty of garter stitch knitting—no switching between knit and purl.
Step 5: Bind Off
Once your project reaches the desired length, bind off all stitches. Keep your tension loose here to maintain that wonderful stretch garter stitch is known for.
Want prettier edges? Try slipping the first stitch of each row purlwise with your yarn held in front. This creates a smooth selvedge that looks much more professional, especially if you’ll be seaming pieces together later.
Garter Stitch Knitting in the Round
Creating garter stitch in the round requires a slightly different approach. Since you’re knitting in a spiral and always working on the right side of the fabric, you’ll need to alternate between knit and purl rounds.
Step 1: Cast On and Join
Cast on your stitches onto a Circular Knitting Needle. When joining to work in the round, be extra careful not to twist your stitches (this is the voice of experience talking!). Place a stitch marker to mark the beginning of your round.
Step 2: First Round
Knit all stitches for your first round.
Step 3: Second Round
Now purl all stitches for the second round.
Step 4: Repeat Pattern
Continue this pattern—knit a round, purl a round—until your project is the length you want.
Step 5: Bind Off
Bind off in pattern, meaning knit or purl depending on which round you’re finishing with.
I remember being completely confused the first time I tried garter stitch in the round. “Why am I purling? I thought garter stitch was just knitting!” But then it clicked—since you never turn your work in circular knitting, you need those purl rounds to create the same lovely ridges you get when knitting flat.
Jogless Garter Trick
When working garter stitch in the round, you might notice an annoying little “step” where your rounds connect. This happens because you’re actually knitting in a spiral, not perfect circles. Here’s my favorite trick to hide that jog:
The Slip-Stitch Method:
1. Round 1: Knit all stitches
2. Round 2: Purl all stitches
3. Round 3: Slip the first stitch with yarn in front, then knit to the end
4. Round 4: Purl all stitches
5. Repeat rounds 3 and 4
This simple technique creates an almost invisible transition between rounds. The slipped stitch blends in with the purl bumps, disguising that pesky jog.
Another clever approach is to move the beginning of the round by shifting your marker over a stitch or two every few rounds. This distributes the jog so it’s much less noticeable.
Oops! Dropped a stitch? Don’t panic (we’ve all been there)! You can easily use a crochet hook to pick up that runaway stitch and ladder it back up to your needle. This rescue technique has saved many of my projects, and it will save yours too!
Fabric Traits, Gauge & Ideal Projects
When you’re working with garter stitch knitting, you’re creating a fabric that’s truly special in the knitting world. I fell in love with garter stitch early in my knitting journey because it’s so versatile and forgiving!
The fabric you create with garter stitch has a wonderful bouncy quality—it stretches beautifully in all directions, making it incredibly comfortable for wearables. Unlike most knitting patterns, garter stitch typically creates a square gauge, meaning there are usually twice as many rows as stitches in one inch of fabric. This makes calculating dimensions so much easier, especially when you’re just starting out.
One thing to keep in mind is that garter stitch creates a thicker, denser fabric than other stitches like stockinette. This density makes it wonderfully warm for cold-weather accessories, but it also means you’ll use about 30% more yarn for the same size project. Worth it for the beautiful texture, though!
“I love using garter stitch for baby blankets,” shares one of our community members. “The thick, squishy texture is perfect for little ones, and I don’t have to worry about the edges curling up!”
Ideal Projects for Garter Stitch
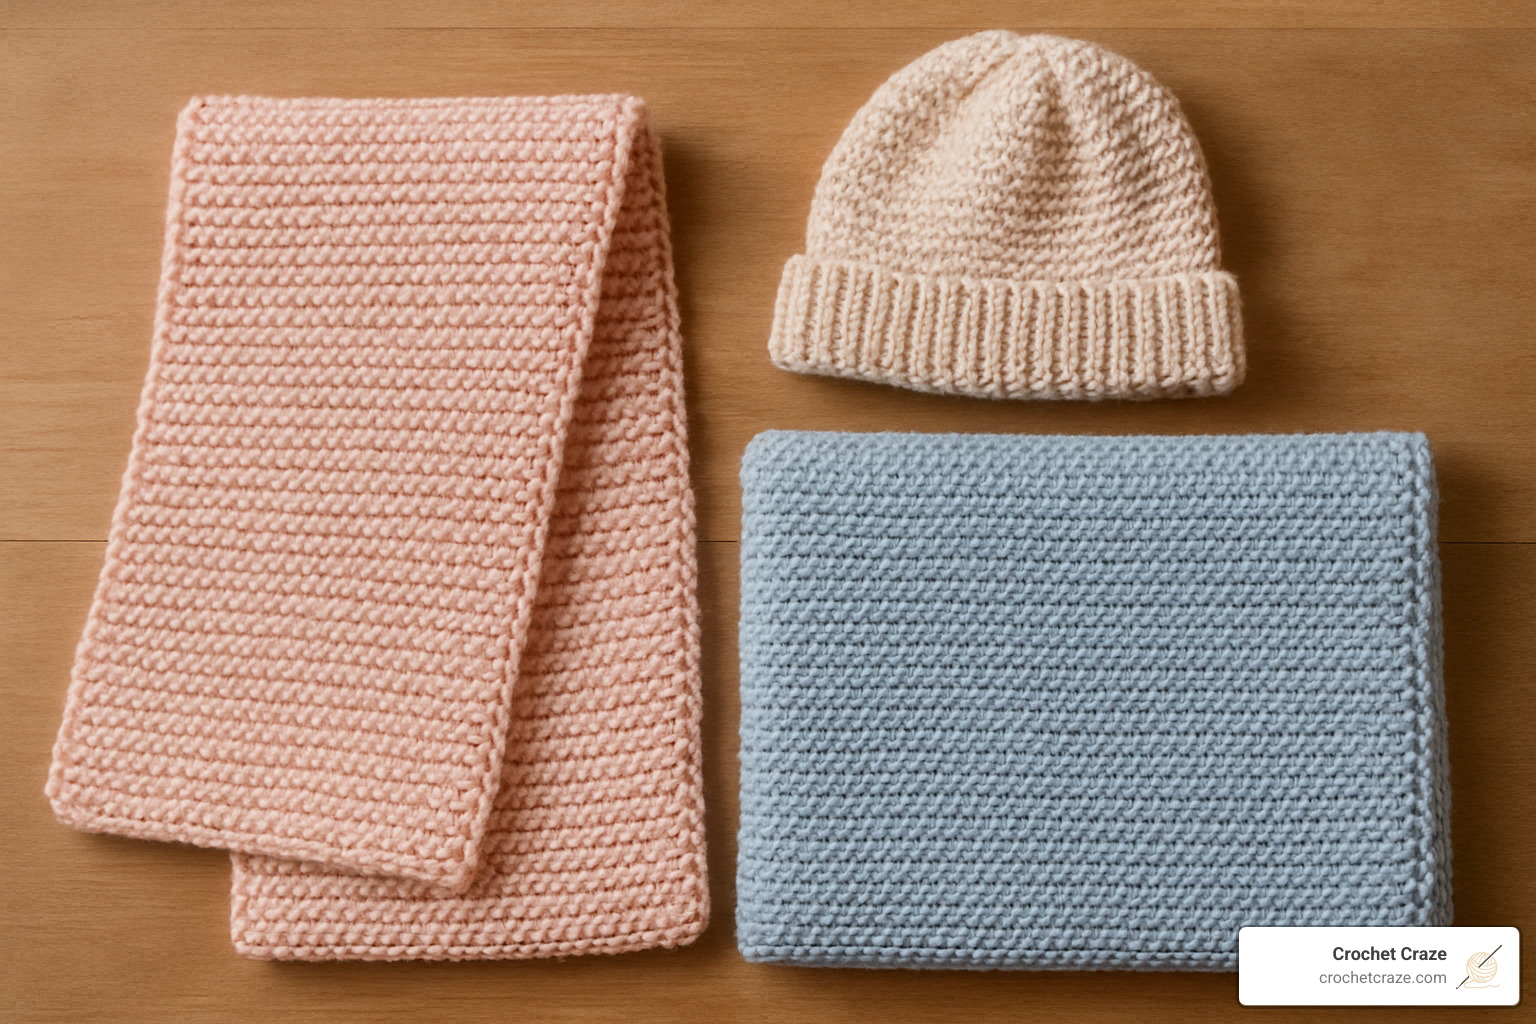
Garter stitch knitting shines in so many different projects! Because it’s reversible (both sides look identical), it’s perfect for scarves and cowls where either side might be visible. The non-curling edges eliminate the need for special borders, making it ideal for beginners who want to create something beautiful without added complexity.
Blankets are another perfect canvas for garter stitch—the texture adds visual interest while creating a warm, cozy fabric. For practical items, dishcloths and washcloths benefit from garter stitch’s textured surface, which provides just enough scrubbing power while being absorbent.
Baby items like blankets, booties, and hats work beautifully in garter stitch because the fabric is stretchy, soft, and forgiving. And don’t forget about using garter stitch for borders and edgings on stockinette projects—it’s the perfect solution for preventing those curling edges!
If you’re feeling adventurous, check out our guide to making a Garter Stitch Sweater, where you’ll often see garter stitch used for collars, cuffs, and hems. And before starting any project, our Yarn Weight Guide: Mastering Your Craft can help you select the perfect yarn for your garter stitch creation.
Counting Rows & Measuring Gauge
“Wait, I’ve knitted 10 rows, but I only count 5 ridges!” This is one of the most common confusions with garter stitch knitting, and you’re not alone if you’ve experienced it!
Here’s the secret: each “ridge” you see on your garter stitch fabric actually represents two rows of knitting. When you look at your work, those horizontal ridges are what you’ll count, then multiply by two to get your total row count. Another way to think about it is to count both the “valleys” and the “ridges”—each counts as one row.
I love teaching beginners a little trick I call the “color-stripe method.” Try changing yarn colors every 4 or 6 rows when making a practice swatch. Those color changes will help you see exactly where rows begin and end, making counting so much easier!
When it comes to measuring gauge (which is super important for getting the right size in your projects), knit a swatch at least 4″ x 4″, block it if needed, and lay it flat. Count how many stitches and ridges appear in 1 inch, remembering that each ridge equals 2 rows. This square gauge is actually one of the things that makes garter stitch so beginner-friendly!
Troubleshooting, Row Counting & Edge Perfection
Even the humble garter stitch knitting comes with its share of hiccups, especially when you’re just starting out. I’ve been there myself—watching in dismay as my edges wobbled and mysterious holes appeared in my work!
Common Problems and Solutions:
That uneven tension that makes your knitting look like ocean waves? It happens to everyone. When your fabric has tight sections followed by loose ones, it’s usually a sign you’re gripping the yarn differently as you work. Try to find a consistent way to wrap the yarn around your fingers—I like to loop it once around my index finger and control tension with my middle finger.
Those pesky holes that seem to appear out of nowhere? They’re likely accidental yarn overs, where you’ve inadvertently brought the yarn over the needle between stitches. It’s worth counting your stitches every few rows to catch these early.
And don’t get me started on those messy edges! My first scarf looked like it had been nibbled by mice along both sides. The game-changer for me was learning to slip the first stitch of each row purlwise with the yarn held in front. Such a simple trick, but it creates this beautiful, even chain edge that looks intentional rather than haphazard.
For more clever techniques that’ll make your knitting look professional, our Knitting Tips section is packed with gems.
Fixing Mistakes in Garter Stitch
We all drop stitches—even experienced knitters. The difference is knowing how to fix them without ripping out rows of work. When you notice that heart-stopping moment where a stitch has escaped and is laddering down your work, grab a crochet hook (your new best friend for knitting rescues).
Insert the hook into the dropped stitch from front to back, catch the horizontal strand above it, and pull it through the loop. Work your way up each “rung” of the ladder until you reach the current row, then slip that rescued stitch back onto your left needle. Voilà—crisis averted!

For fresh mistakes, “tinking” (that’s knitting spelled backward) is your go-to solution. Just insert your left needle into the stitch below the one on your right needle and gently pull out the right needle. The working yarn solves, and you can try again.
For more complicated situations, lifelines are like insurance policies for your knitting. Thread some dental floss or smooth, thin yarn through all the stitches in a row you know is correct. If disaster strikes later, you can rip back to this safety net without losing everything.
Keeping Even Tension
Beautiful garter stitch knitting starts with consistent tension. I remember my first projects looking like they’d been knit during an earthquake! Here’s what helped me smooth things out:
Finding my comfortable grip made the biggest difference. There’s no single “right way” to hold yarn—continental, English, Portuguese—they all work. What matters is finding what feels natural for your hands.
The needles you use matter too. When I was learning, wooden needles were my saviors because they grip the yarn slightly, preventing stitches from sliding around too freely. Once my tension improved, I graduated to slicker metal needles.
Remember to knit at a steady pace. When I rush, my stitches tighten up like I’m preparing for a hurricane. Taking deep breaths and knitting rhythmically creates much more even fabric.
And please—relax those hands! If your knuckles are white from gripping, your tension will suffer. Take breaks, shake out your hands, and remember this is supposed to be enjoyable!
Creating Neat Edges & Borders
Nothing lifts a simple garter stitch project like professional-looking edges. The slip-stitch selvedge is my go-to technique: simply slip the first stitch of every row purlwise with yarn in front, then knit to the end. This creates a beautiful chain edge that’s not only attractive but makes seaming easier if you’re joining pieces.
For a more substantial edge, the I-cord technique creates a rounded, polished finish. Cast on 3 extra stitches at the beginning of your row, knit across to the last 3 stitches, then slip these with yarn in back. When you turn your work and repeat, these stitches form a lovely rolled edge.
A classic solution for preventing stockinette curl is adding a garter stitch border. Knit the first and last 3-5 stitches of every row while working the middle in stockinette. The garter edges lie flat, taming that natural tendency to roll.
When you need to join new yarn in your project (because you’ve run out or want to change colors), check out our guide on Connecting Yarn in Knitting for techniques that leave your work looking seamless.
With a little practice and these troubleshooting tips, your garter stitch knitting will transform from “obviously handmade” to “professionally crafted”—and you’ll enjoy the process so much more!
Creative Variations & Combining Stitches
Once you’ve mastered basic garter stitch knitting, a whole world of creative possibilities opens up! You don’t need to stick with plain garter stitch forever – it’s actually a fantastic foundation for countless variations and combinations.
Garter Stitch Variations:
The beauty of garter stitch is how versatile it can be with just a few tweaks. Broken garter stitch alternates rows of garter and stockinette, creating a fascinating texture that adds visual interest to scarves and shawls. I tried this on a winter scarf last year, and the texture difference really made it stand out!
Garter rib is another favorite – you simply combine knit and purl stitches in the same row (like K2, P2) and then knit all stitches on the following row. The result? A lovely ribbed effect that still maintains that cozy garter texture we all love.
Color changes can transform garter stitch entirely. Striped garter stitch uses different colored yarn every few rows, highlighting those beautiful ridges. I’ve found that even simple two-color stripes can turn a basic baby blanket into something special.
“I was stuck in a knitting rut until I finded mosaic garter stitch,” shares one knitting enthusiast. “Using slip stitches with color changes creates the most amazing geometric patterns – and it’s not nearly as difficult as it looks!”
Short-row shaping is perhaps the most exciting variation, allowing you to create curved or angular shapes within your garter stitch fabric. This technique is perfect for modern shawl designs with asymmetrical edges or gentle curves.

If hand knitting feels too slow, our guide to Flatbed Knitting Machines explains how to achieve garter stitch with machine assistance – a game-changer for larger projects!
Mixing Garter Stitch with Other Textures
The textural quality of garter stitch makes it a perfect partner for other knitting patterns. I’ve found that alternating panels of garter and stockinette creates a striking striped effect without changing colors – the texture difference alone creates the visual interest.
Garter and lace combinations are particularly beautiful. By incorporating yarn overs and decreases on certain rows while maintaining garter on others, you create an airy, textured fabric that’s perfect for summer shawls. The solid garter sections provide stability while the lace adds elegance.
“One of my favorite things about garter stitch is how well it pairs with other techniques,” shares a knitting designer. “The texture provides a perfect backdrop for cables or lace elements to really stand out.”
Color block garter takes advantage of the stitch’s distinctive texture while adding bold geometric color changes. I’ve seen stunning blankets where different colored squares of garter stitch create a modern patchwork effect – without any actual seaming required during the knitting process!
Seaming Garter Stitch Pieces
When creating larger projects from multiple garter stitch pieces, proper seaming techniques ensure professional results. The mattress stitch works beautifully for side-to-side joins – you simply place pieces side by side with right sides up, then weave through the edge stitches, catching the “bars” between the first and second stitches of each piece. When you gently pull the yarn, the seam virtually disappears!
For joining the tops and bottoms of pieces (bind-off to bind-off), a ridge-to-ridge join works best. Place pieces with right sides together and sew through the bind-off stitches of both pieces, keeping tension even for a flat join.
“When seaming garter stitch, I’ve found that matching ridge-to-ridge creates the most invisible joins,” notes an experienced knitter. “Take your time and use plenty of pins to align the pieces before seaming.”
Cast-on to bind-off joins can be trickier, but they’re perfect for joining pieces like blanket squares. Place the cast-on edge of one piece against the bind-off edge of another, then sew through the loops of both edges, pulling gently to create a join that’s barely noticeable.
The three-dimensional texture of garter stitch actually makes it more forgiving when seaming compared to smoother stitches – another reason why it remains a favorite for beginners and experienced knitters alike!
Conclusion & Next Steps
There’s something truly special about garter stitch knitting. This humble technique forms the bedrock of knitting skills, welcoming beginners with open arms while giving experienced crafters a versatile tool they’ll return to time and again. From cozy scarves to neat shawl borders, the simple beauty of those horizontal ridges brings warmth and texture to countless projects.
I’ve watched many beginners light up when they realize they’ve completed their first few rows of garter stitch—that moment when muscle memory starts to kick in and the rhythm becomes almost meditative. That’s the magic that keeps us coming back to our needles, isn’t it?
To continue growing your knitting journey, I’d recommend starting with small practice swatches. Play with different yarn weights and needle sizes to see how they transform the feel and appearance of your garter stitch fabric. Notice how chunky yarn creates dramatic ridges, while finer yarns produce a more delicate texture.
When you’re ready for your first complete project, consider something straightforward like a scarf or dishcloth. These smaller items give you the satisfaction of finishing something beautiful without overwhelming you with complex shaping or lengthy time commitments.
As your confidence grows, dip your toes into the variations we’ve explored. Try adding simple stripes to your garter stitch or experiment with mixing in sections of stockinette for visual interest. These small steps build your skills naturally and prepare you for more intricate designs down the road.
Perhaps most importantly, learn to “read” your knitting. Take time to examine your work, count those garter ridges, and identify where stitches sit. This fundamental skill will serve you in every project you tackle, making troubleshooting easier and boosting your confidence.
Every knitting expert started exactly where you are now. Your early garter stitch projects might have uneven tension or wobbly edges—and that’s perfectly okay! Each stitch you work brings improvement, and before long, you’ll be creating pieces you’re proud to wear or share.
We at Crochet Craze believe in celebrating progress over perfection. The joy of fiber arts isn’t just in the finished objects but in the peaceful moments spent creating them. Let your garter stitch practice be a retreat from the hectic pace of daily life—a chance to slow down and create something lasting with your own two hands.
For more inspiration and detailed tutorials on other stitches, visit our stitch tutorials section. We’re constantly adding fresh content to support you at every stage of your fiber arts trip.
Happy knitting, and may your garter stitch journeys bring you joy, comfort, and creative satisfaction!