
garter stitch sweater: 7 Powerful Reasons to Love in 2025
Find the Timeless Appeal of Garter Stitch Sweaters
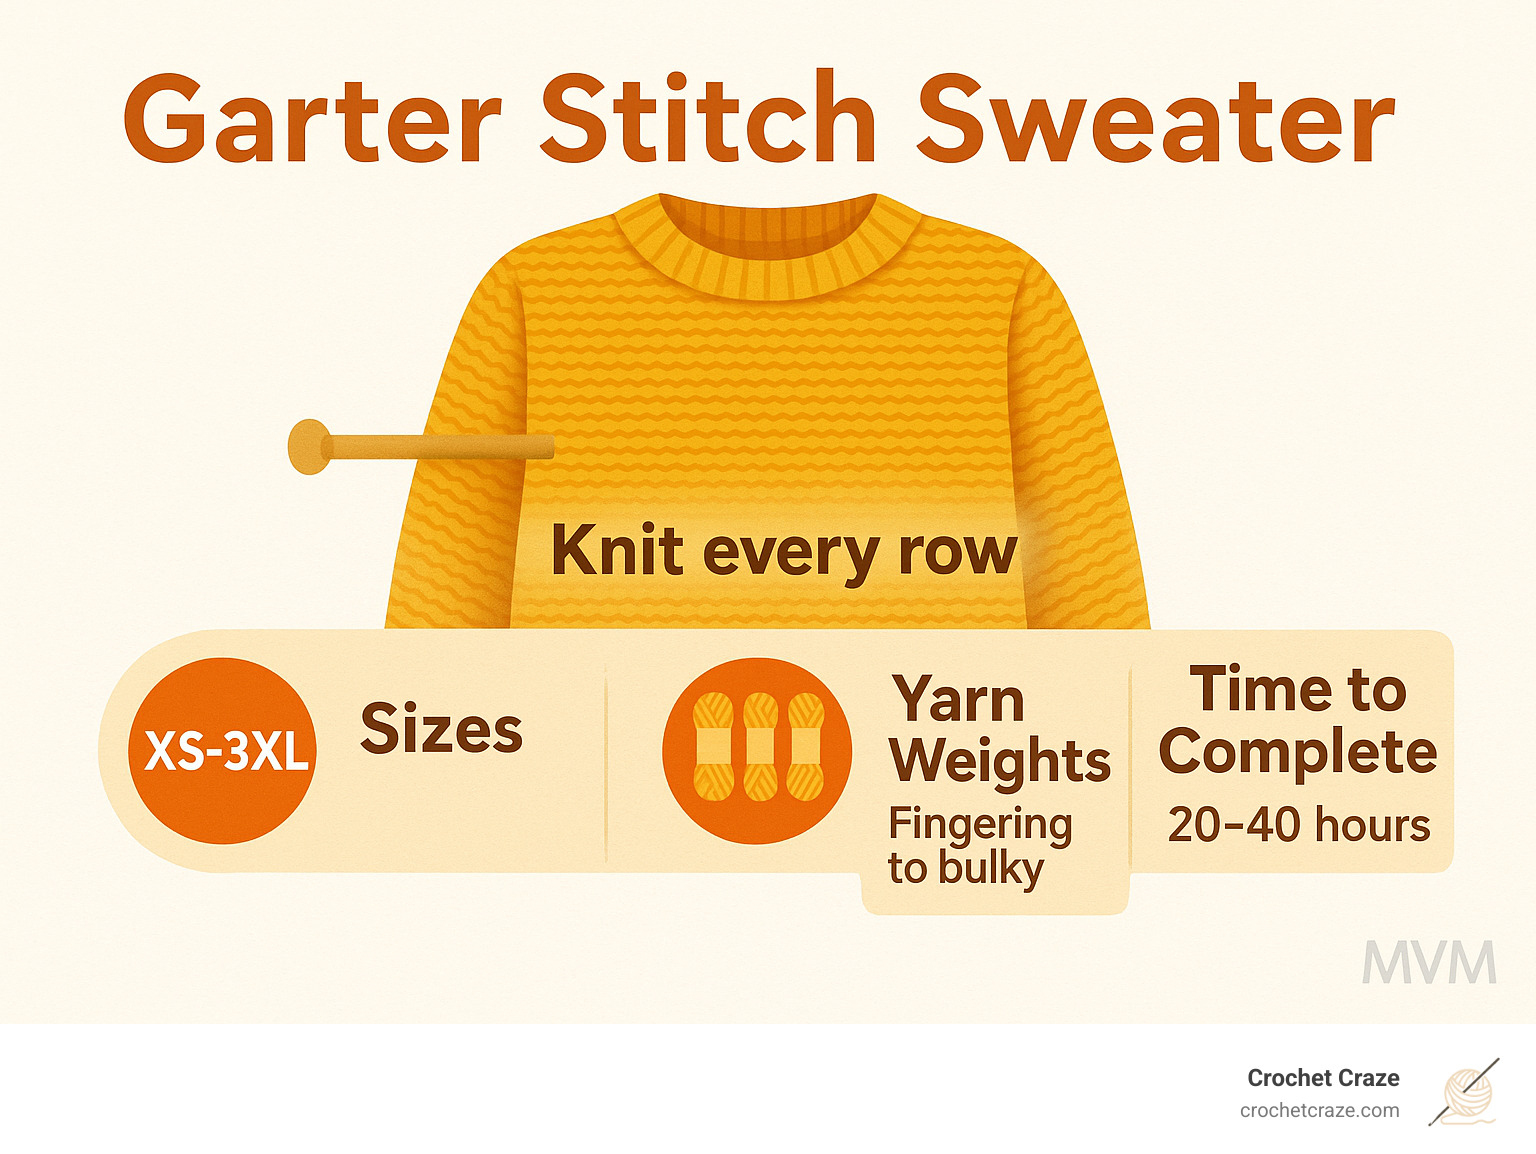
Have you ever run your fingers across a beautifully textured sweater and felt instantly comforted? That’s the magic of a garter stitch sweater – the perfect gateway into knitted garments for beginners and a timeless favorite for crafters of all levels.
When I first picked up knitting needles, I was intimidated by complex patterns with their mysterious abbreviations. Then I finded the humble garter stitch – simply knitting every row – and realized I could create something truly wearable with just this one technique.
A garter stitch sweater offers so much more than simplicity. The distinctive ridged texture creates a fabric that’s wonderfully squishy and warm, wrapping you in comfort on chilly days. Unlike its fussier cousin stockinette, garter stitch lies flat without curling at the edges – a true blessing for new knitters! The natural stretch and recovery make these sweaters forgiving in fit and delightfully comfortable to wear.
What was once considered your grandmother’s basic stitch has experienced a stunning renaissance in modern knitwear. Designers like Stephen West have transformed this humble technique into fashion-forward statement pieces. Today’s garter stitch sweaters run the style gamut from oversized weekend pullovers to sleek cropped cardigans, proving that sometimes the simplest techniques yield the most striking results.
I’m Sonji Huerta, and I still remember the pride I felt completing my first garter stitch sweater after graduating from scarves and dishcloths. There’s something deeply satisfying about creating a garment that’s both beautiful and functional using just the most basic knitting skills – casting on, knitting each row, and binding off.
Whether you’re a complete novice or an experienced knitter seeking a meditative project, the garter stitch sweater welcomes you with open arms. The texture naturally camouflages minor mistakes, making it the perfect confidence-builder for those new to garment knitting. And the rhythmic, repetitive nature of the stitch creates a soothing crafting experience that many find almost therapeutic.
Ready to join the slow fashion revolution with your own handmade wardrobe? A garter stitch sweater is your perfect starting point – timeless, adaptable, and surprisingly modern. In the following sections, I’ll guide you through everything you need to know to create your own wearable masterpiece, one relaxing row at a time.
Why the Garter Stitch Sweater Is a Modern Wardrobe Hero
The humble garter stitch sweater has experienced quite the glow-up in recent years. What was once dismissed as “just a beginner project” has blossomed into a fashion staple acceptd by knitters at every level. I remember when I first finded how versatile this stitch could be – it completely changed my perspective on “basic” techniques!
“People often think of garter stitch as basic, beginner, or maybe even a bit boring. Not so! While garter stitch may very well be the first stitch you learn how to knit, that doesn’t make it any less beautiful,” notes a popular knitting blog. This captures exactly what’s happening in the knitting world today – we’re refinding the beauty in simplicity.
The numbers don’t lie about this renaissance. Take Stephen West’s Garter Marler Sweater – it boasts 110 completed projects and sits in 417 Ravelry queues, earning an impressive 4.9 out of 5 stars from 35 reviewers. Similarly, Jenn Pellerin’s Garter Stitch Swingy Sweater has inspired 419 projects and waits in 1,679 Ravelry queues, with a solid 4.1 rating from 126 knitters.
What I love most about garter stitch sweaters is how they align with the slow fashion movement. In our world of disposable clothing, there’s something deeply satisfying about creating a garment with your own hands – one that’s built to last in both construction and style. Each stitch represents a tiny rebellion against fast fashion’s wasteful cycle.
The Main Advantages at a Glance
What makes garter stitch sweaters so beloved by modern knitters? The magic lies in their practical benefits as much as their aesthetic appeal.
First, they offer no-curl edges – unlike stockinette stitch which stubbornly rolls up at the borders, garter stitch lies beautifully flat without requiring additional edging. This feature alone saves so much frustration!
The textured ridges brilliantly hide mistakes, making this stitch forgiving for beginners (and, let’s be honest, for all of us on those distracted knitting evenings). The meditative rhythm of knitting every row creates a soothing crafting experience that many knitters find almost therapeutic.
Beyond the process benefits, the dimensional texture adds visual interest to even the simplest designs. And let’s not forget the excellent stretch and recovery – garter stitch sweaters maintain their shape beautifully through wear after wear.
As one knitting expert explains, “Garter stitch creates two identical faces due to alternating knit and purl rows. Despite its simple appearance, garter stitch requires planning to maintain even tension and shape.” This deceptive simplicity is part of its enduring charm.
Who Can Knit One? Skill Levels Debunked
The beauty of a garter stitch sweater is that it truly welcomes knitters of all abilities. If you’re an absolute beginner who can cast on and work a basic knit stitch, you can create a simple garter stitch sweater. Patterns like the Simple Knit Sweater by Sewrella are specifically designed with newcomers in mind.
For adventurous beginners who’ve mastered the basics, you can explore patterns with simple shaping techniques – perhaps decreases for raglan sleeves or increases for a flattering a-line silhouette. These small steps beyond the basics build confidence while creating something truly wearable.
Intermediate knitters aren’t left out of the garter stitch renaissance either. At this level, you can incorporate more complex design elements like colorwork, bias construction, or mixed stitch patterns while still enjoying the comfort of that familiar garter stitch base.
I love how Stephen West’s Garter Marler Sweater pattern notes that it’s “ideal for adventurous beginners and experienced sweater knitters alike.” This perfectly demonstrates how this versatile stitch bridges skill gaps, bringing knitters together regardless of experience.
For those just starting their knitting journey, a garter stitch sweater serves as the ultimate confidence builder. Each completed row shows visible progress, and the forgiving nature of the stitch means small tension inconsistencies won’t ruin your project. It’s the perfect introduction to garment knitting – accessible yet incredibly rewarding.
Tools, Yarn & Gauge Essentials
Before casting on your first garter stitch sweater, it’s important to gather the right materials and understand the unique properties of garter stitch fabric.
Picking the Perfect Yarn for Garter Stitch
The yarn you choose dramatically shapes the personality of your garter stitch sweater. Think of yarn as the foundation of your creation – it affects everything from comfort to drape.
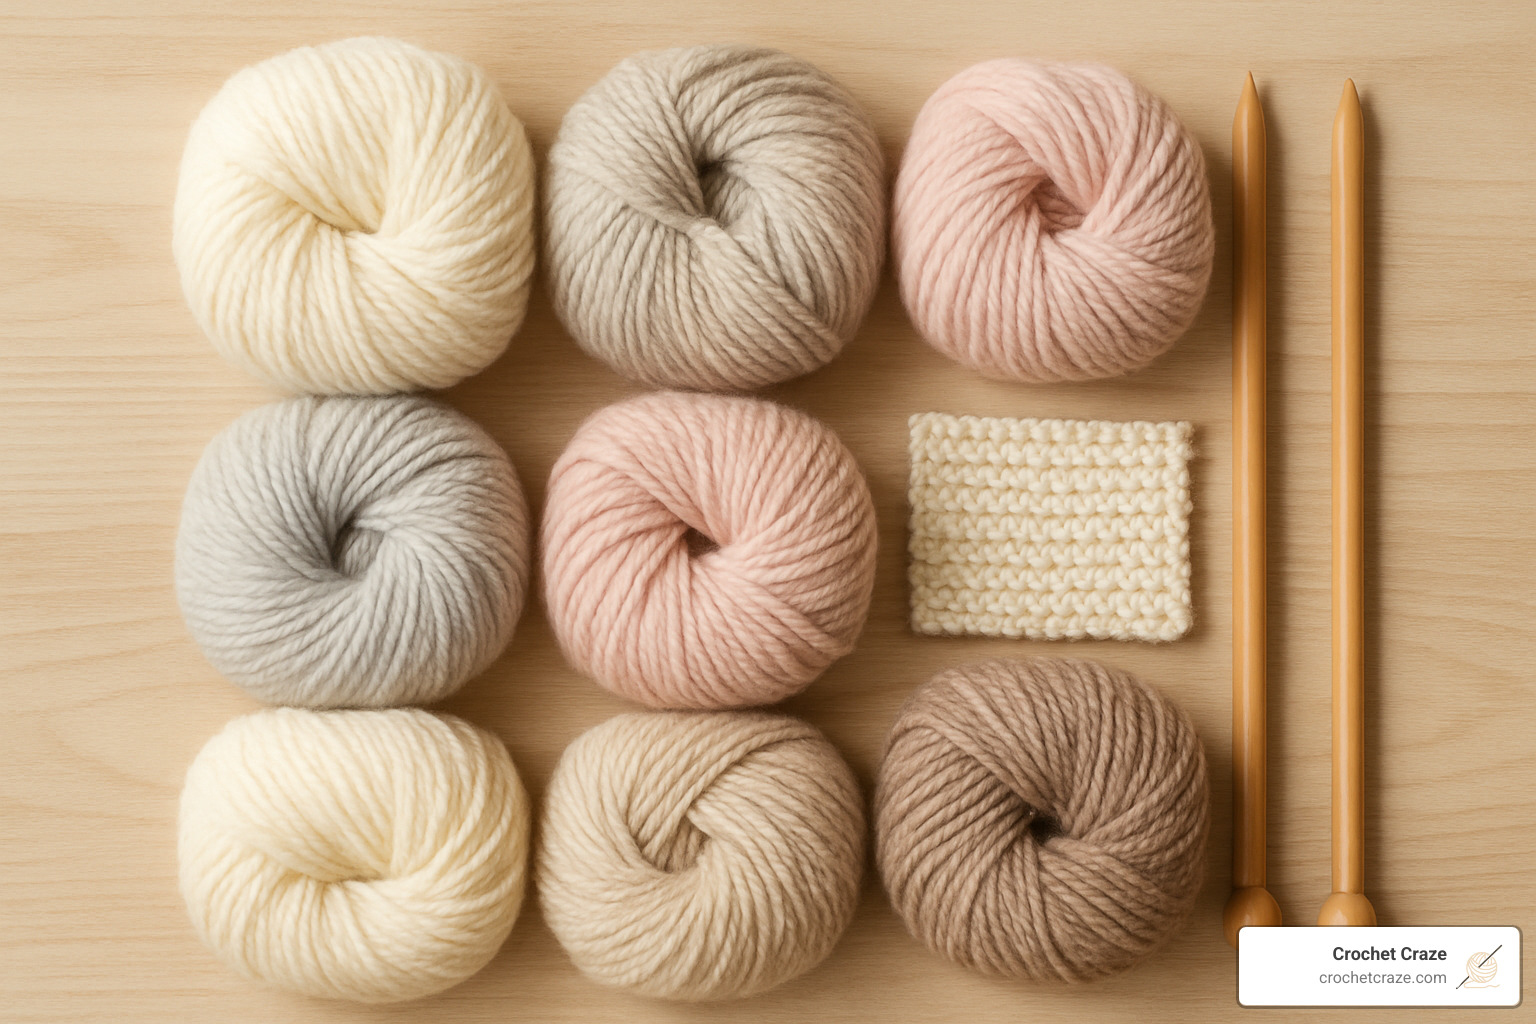
Wool and wool blends are my personal favorites for garter stitch. They create beautiful stitch definition while providing natural elasticity that complements garter stitch’s squishy texture. Merino wool feels heavenly against the skin – perfect if you’re sensitive to scratchier fibers.
If you tend to run warm or have wool sensitivities, cotton and cotton blends offer a wonderful alternative. I’ve found cotton creates a more structured fabric with a bit less give than wool, which can be perfect for spring and summer sweaters. The crisp stitch definition can really showcase those lovely garter ridges.
In a hurry to wear your creation? Bulky and super bulky yarns are your best friends. The Simple Knit Sweater pattern uses bulky yarn with a gauge of just 8 stitches per 4 inches – you could literally have a new sweater by the end of a weekend! One of my students finished her first bulky garter stitch sweater in just three evenings.
For those who find color changes intimidating, variegated and self-striping yarns work magic with garter stitch. The textured ridges make color transitions pop in a way that’s truly special. As my knitting circle friend Jen always says, “Let the yarn do the work for you!”
Yarn quantities vary widely depending on your size and the pattern. The Simple Knit Sweater needs 5-8 skeins of bulky yarn depending on size, while Stephen West’s Garter Marler Sweater requires approximately 1,800-5,500 yards of fingering weight yarn held double. Always buy an extra skein – it’s better to have too much than too little!
Needle Sizes & Must-Have Notions
Setting yourself up with the right tools makes your garter stitch sweater journey so much more enjoyable.
Circular needles are essential even if you’re knitting flat pieces. They distribute the weight of your growing sweater much more comfortably than straight needles. I learned this the hard way when my first sweater kept sliding off straight needles! For most adult sweaters, a 24-32 inch cable works beautifully for bodies, with 16-inch circulars perfect for sleeves.
Don’t be surprised if your pattern calls for multiple needle sizes. Many designs use a smaller needle for ribbing or edges to create a neater finish. The Gartergan pattern, for instance, uses US 6 (4 mm) for the main fabric but drops down to US 5 (3.75 mm) for the edges.
Stitch markers are absolute lifesavers, especially for raglan increases or marking the sides of your sweater. I like using different colors to indicate different parts of the pattern – red for raglan lines, blue for side seams, etc.
A row counter helps track your progress through shaping sections. Whether you prefer a digital counter, a mechanical one that clicks, or just good old-fashioned paper and pencil, find what works for you.
Don’t forget a mix needle for weaving in ends and a measuring tape to check your progress. I also keep a small pair of scissors in my project bag for snipping yarn.
Here’s a clever tip I learned from my knitting group: use interchangeable circular needle cables as stitch holders when working on raglan sleeves. When it’s time to work those stitches again, you can simply attach needle tips and continue – no transferring required!
Getting a Reliable Garter Gauge
Gauge swatching might seem tedious, but it’s particularly crucial for garter stitch sweaters because garter fabric behaves differently than stockinette.
Garter stitch creates a fabric that’s shorter and wider than stockinette, which means you’ll typically have more rows per inch. This can dramatically affect the fit of your finished sweater. I once skipped swatching and ended up with a crop top instead of the tunic I’d planned!
Row gauge matters tremendously in garter stitch. Those horizontal ridges directly influence your sweater’s length, so measuring accurately will save you from unexpected results.
To create a reliable gauge swatch, cast on enough stitches for at least 6 inches of fabric. Work in garter stitch for at least 6 inches vertically, then bind off loosely. Block your swatch exactly as you plan to block your finished sweater – this step is non-negotiable for accurate measurements.
Once dry, measure both stitch and row gauge over at least 4 inches in the center of your swatch. Edge stitches often behave differently, so avoid including them in your measurements.
The Simple Knit Sweater pattern, for example, has a gauge of 8 stitches and 16 rows per 4 inches in garter stitch using size 17 needles. If your swatch doesn’t match the pattern gauge, adjust your needle size accordingly – larger needles if you have too many stitches per inch, smaller needles if you have too few.
As my knitting teacher wisely told me, “If you don’t knit a swatch, you’re just knitting a bigger swatch later when you rip out your project.” Those words have saved me countless hours of frustration!
Construction Methods Demystified
When it comes to creating your garter stitch sweater, there’s no one-size-fits-all approach. The construction method you choose can dramatically impact both your knitting experience and the final look of your garment. Let’s explore the most popular approaches so you can find your perfect match!
Top-Down Raglan Garter Stitch Sweater
If you’re new to sweater knitting, the top-down raglan is your best friend. This beginner-friendly method starts at the neckline and grows outward like a beautiful knitted flower.
You’ll begin by casting on stitches for the neck, placing markers to separate your front, back, and sleeves. As you work downward, you’ll increase along these “raglan lines” (the diagonal seams where your sleeves meet your body), creating that classic sloped shoulder look. Once your yoke reaches the right depth, you’ll separate the sleeves by placing those stitches on waste yarn, cast on a few stitches for your underarms, and continue working the body.
The magic of this method? You can literally try on your garter stitch sweater as you go! No more guessing if it’ll fit—you’ll know before you’ve invested weeks of knitting time.
“I love top-down construction because I can customize the fit at every stage,” shares one knitter. “If I need an extra inch in the bust or want shorter sleeves, I just make those adjustments on the fly.”
The popular Garter Stitch Swingy Sweater exemplifies this technique, offering that “squishy garter stitch” comfort in an asymmetrical top-down design that flatters many body types.
Bottom-Up Panels & Easy Seaming
There’s something wonderfully methodical about the traditional panel approach. This time-honored construction breaks your garter stitch sweater into manageable pieces—front, back, and two sleeves—that you seam together at the end.
You’ll start at the bottom of each piece and work upward, which means you’re handling smaller, more portable sections throughout most of your project. This approach creates a more structured garment with clean lines and excellent stability.
The Simple Knit Sweater pattern accepts this method, guiding you through five separate pieces that come together for that perfect oversized silhouette. The pattern thoughtfully recommends different seaming techniques for different joins: mattress stitch for shoulders, whip stitch for attaching sleeves, and invisible seams for the sides.
Many knitters appreciate how this method allows them to work on their project in bite-sized chunks. “I can tuck a sleeve in my purse and knit a few rows during my lunch break,” one crafty commuter explains. “It’s much more manageable than trying to wrangle an entire sweater-in-progress on a crowded train!”
Bias, Marled & Modular Builds
Ready to push your garter stitch sweater beyond the basics? These innovative construction methods transform simple garter stitch into something truly spectacular.
Bias knitting creates fabric at a 45-degree angle, adding unexpected drape and movement to your garment. This technique makes stripes and variegated yarns dance across your sweater in fascinating ways. As one tutorial explains, this approach actually simplifies seaming because the garter ridges naturally form squares at this angle.
The marled technique, popularized by designer Stephen West in his Garter Marler Sweater, involves holding two strands of yarn together as you knit. This creates gorgeous depth and texture—like a painter mixing colors on a palette. West’s pattern cleverly uses two strands of fingering weight yarn to create a marled DK-weight fabric with incredible visual interest.
For the stash-busters among us, modular construction offers a creative playground. By building your sweater from smaller pieces joined together, you can incorporate those precious single skeins and leftover yarn into a cohesive, wearable masterpiece. This approach turns your garter stitch sweater into a canvas for color experimentation.
These innovative approaches have liftd the humble garter stitch from beginner territory to high fashion. They prove that the simplest stitch in knitting can produce the most sophisticated results when constructed with creativity and vision.
Step-by-Step: Mastering the Garter Stitch Fabric
The foundation of any garter stitch sweater is mastering the garter stitch itself. While it’s considered the most basic knitting stitch, achieving consistent, even garter stitch fabric takes practice.
How to Knit Basic Garter Rows
I remember when I first learned to knit – there’s something almost magical about creating fabric with just two simple tools and some yarn. If you’re new to knitting, you’ll be happy to know that garter stitch is as simple as it gets!
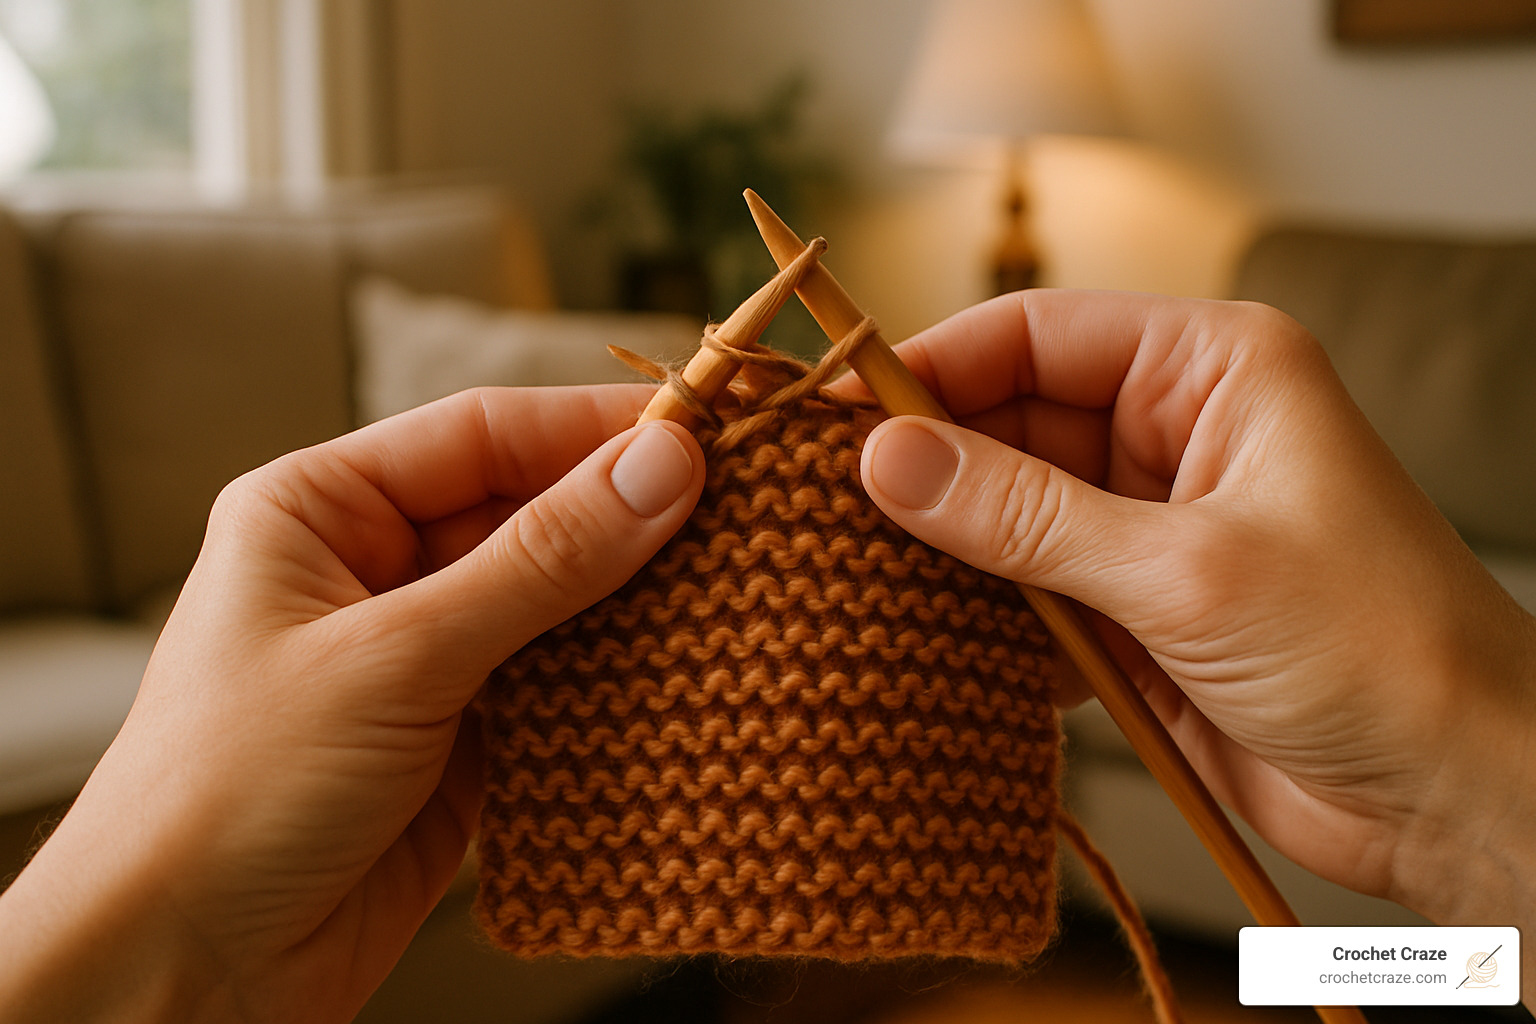
For flat knitting (working back and forth), you’ll start by casting on your desired number of stitches. Then, simply knit every stitch from right needle to left. When you reach the end, turn your work and knit every stitch again. That’s it! Just repeat these two rows until your piece reaches the length you want.
Here’s a little secret that helped me when I was starting out: each “ridge” you see in garter stitch actually consists of two rows of knitting. So when your pattern says to work for 20 rows, you can count 10 ridges instead – much easier to keep track of!
If you’re feeling adventurous and want to try circular knitting (in the round), the process is slightly different. After casting on and joining in the round, you’ll knit every stitch in round 1, then purl every stitch in round 2. Repeating these two rounds creates that lovely garter texture we’re after.
The way you hold your needles and control your yarn tension makes all the difference in creating beautiful garter stitch. Try not to pull the yarn too tight as you work – a relaxed hand creates the most even fabric. Some knitters like to slip the first stitch of each row purlwise, which creates a neater edge. It’s a little trick I picked up that makes seaming much easier later!
“Garter stitch is my favorite pattern because it means plain knitting!” a fellow crafter once told me. This simplicity is exactly what makes garter stitch sweaters so perfect for beginners.
Still confused about how to do the garter stitch? This helpful video tutorial breaks it down step by step.
Troubleshooting Common Garter Stitch Sweater Problems
Even with a stitch as straightforward as garter, we all run into challenges sometimes. Let me share some solutions to the most common problems I’ve encountered while making garter stitch sweaters:
Those loose first stitches at the edge of each row can be frustrating! Try slipping the first stitch purlwise with your yarn in front instead of knitting it. This creates a neater edge that’s easier to seam later. Also, pay special attention to your tension on the second stitch – that’s where many of us accidentally loosen up.
Uneven edges happen to everyone at some point. I find it helpful to count my stitches every few rows to make sure I’m not accidentally adding or dropping any. Be consistent with how you turn your work at the end of each row, and consider adding a slipped stitch or i-cord edge for a more polished finish.
Those mysterious holes that appear out of nowhere? They’re usually accidental yarn overs that happen when the yarn gets wrapped around the needle during your knitting motion. Be mindful of your yarn position, especially when turning your work. If you spot an extra loop, simply drop it in the next row rather than knitting it.
Tension inconsistencies are normal, especially when you’re knitting for long periods. I’ve learned to take breaks when my hands get tired, as that’s when my tension tends to change. Try to maintain the same comfortable knitting position throughout your project. And remember, blocking your finished pieces works wonders for evening out minor tension issues!
Row gauge issues can be tricky with garter stitch because it’s naturally more compressed vertically than stockinette. I always measure my row gauge frequently during a project and adjust my needle size if needed. Row gauge directly affects the length of your garter stitch sweater, so it’s worth getting right.
As one pattern designer wisely noted, “Garter stitch’s flat structure makes it ideal for items that lie flat, like scarves and blankets,” but with the right techniques, it creates beautiful, textured garments with incredible comfort and warmth.
The wonderful thing about garter stitch is its forgiving nature. Those little wobbles and inconsistencies often disappear into the texture once your sweater is complete and blocked. So relax, enjoy the rhythmic process, and watch your garter stitch sweater take shape one row at a time!
Design Features, Sizing & Customization
The beauty of a garter stitch sweater lies in its incredible versatility. From cozy pullovers to stylish cardigans, this simple stitch creates a canvas for endless personalization.
Choosing the Right Size & Fit
Finding your perfect fit is the first step toward a garter stitch sweater you’ll love wearing. Most patterns offer a generous range of sizes – like the Simple Knit Sweater pattern that spans from XS to XXXL, with the largest size accommodating a 54-inch bust.
Understanding ease makes all the difference in how your sweater will fit. Ease is simply the difference between your body measurements and the finished garment. For garter stitch sweaters, you’ll typically see:
Positive ease creates that relaxed, comfortable fit when the garment is larger than your measurements. Many contemporary garter stitch designs accept significant positive ease for that fashionable oversized look. The Gartergan pattern, for instance, suggests “10-12 inches of positive ease” for an intentionally roomy silhouette.
Negative ease produces a more fitted look when the garment is smaller than your measurements. This approach is less common with garter stitch, since the texture naturally has more stretch and a squishier drape than other stitches.
When selecting your size, focus first on bust or chest circumference as your primary measurement, then consider shoulder width, sleeve length, and body length from underarm to hem. Many designers follow the Craft Yarn Council’s standard sizing regulations for consistency.
A helpful tip from experienced knitters: “Highlight or circle all size-specific numbers before beginning the pattern” to avoid confusion as you work through the instructions.
Adding Personality: Stripes, Marling & Texture Mixes
While a solid-colored garter stitch sweater has timeless appeal, adding design elements brings your personal style to life.
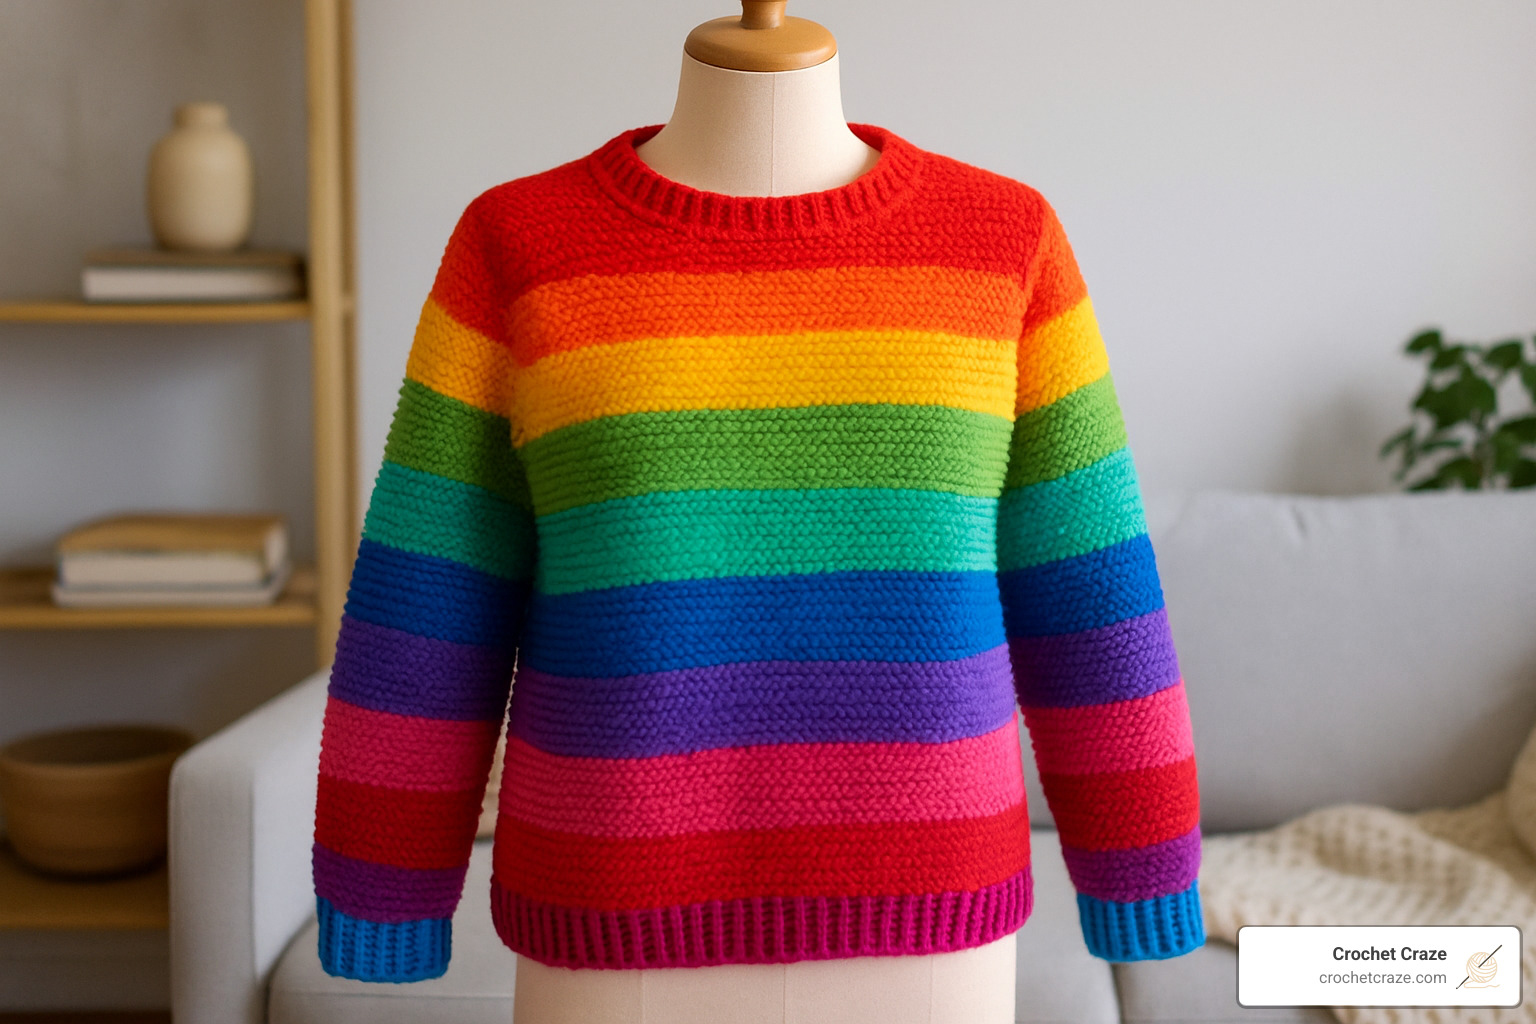
Stripes are perhaps the easiest way to create visual interest while keeping the technique simple. If you’re working in the round, try the “jogless stripes” technique to eliminate that visible step where your rounds meet. Even simple color changes can transform a basic garment into something special.
Marling creates gorgeous depth by holding two different colored yarns together as you knit. Stephen West’s popular Garter Marler Sweater showcases this technique beautifully: “Gather a colorful pile of fingering weight yarns to knit this scraptastic garter stitch sweater.” The resulting fabric has a tweedy, dimensional quality that’s both sophisticated and playful.
Mixed textures add interest while maintaining simplicity. Many patterns combine garter stitch bodies with ribbed cuffs, hems, and necklines for structure and contrast. This approach gives you the ease of garter with the polished finish of other stitches.
Color blocking offers a modern, graphic approach that’s perfect for garter stitch sweaters. Bold blocks of contrasting colors create visual impact while keeping the knitting technique straightforward – ideal for beginners who want impressive results.
Adapting the Garter Stitch Sweater for Every Body
One of the joys of creating your own garter stitch sweater is the ability to customize it perfectly for your unique shape.
If you have a shorter torso, consider reducing the number of rows between the underarm and hem, or accept a trendy cropped style that hits at the high hip. This proportion can be especially flattering and removes the need to constantly adjust a too-long sweater.
For longer torsos, adding additional length between the underarm and hem ensures comfortable coverage. A high-low hem created with short rows gives extra back coverage while maintaining a flattering front length.
Those with broader shoulders might increase the number of stitches in the yoke or upper back for more room. Drop-shoulder or modified raglan designs naturally accommodate wider shoulders without complex adjustments.
For fuller busts, short rows at the bust point create additional shaping and prevent the front hem from riding up. Cardigan styles offer versatility, as they can be worn open or closed depending on your preference and comfort.
The Summertime Garter Stitch Top tutorial offers this practical advice: “Work increases evenly over a measured number of rows to distribute shaping smoothly” for a customized fit that flatters your shape.
Garter stitch sweaters have a natural stretch and forgiveness that makes them wonderfully adaptable to different body types. As one pattern notes with refreshing honesty, “For a more fitted sweater, simply size down” from your usual size – the flexibility of the stitch will still ensure comfort.
Finishing Touches: Seaming, Blocking & Care
The final steps in creating your garter stitch sweater can make the difference between a homemade-looking project and a professional-quality garment.
Assembly & Seaming Secrets
If your garter stitch sweater pattern involves seaming separate pieces together, these techniques will help you achieve a polished finish:
Mattress stitch is perfect for invisible side and shoulder seams in garter stitch:
1. Place pieces side by side with right sides facing up.
2. Thread a mix needle with matching yarn.
3. Work from bottom to top, weaving the needle through the edges of each piece.
4. Pull the yarn gently every few stitches to close the seam.
Three-needle bind-off creates sturdy shoulder seams:
1. Hold the pieces with right sides together.
2. Insert a third needle through the first stitch of each piece.
3. Knit these stitches together and bind off as you go.
For necklines and other finishing edges:
1. Pick up stitches evenly around the opening.
2. Work in ribbing (typically K1, P1) for a few rows.
3. Bind off loosely to maintain stretch.
One pattern recommends: “Fold the neck ribbing in half and catch down loosely for a neat collar,” creating a clean, professional finish.
Blocking & Long-Term Sweater Care
Blocking is essential for garter stitch sweaters to even out stitches and set the final dimensions:
Wet blocking:
1. Fill a basin with lukewarm water and wool wash.
2. Submerge your sweater and gently squeeze (don’t wring).
3. Press out excess water between towels.
4. Lay flat on a blocking mat, shaping to desired dimensions.
5. Allow to dry completely before wearing.
Steam blocking:
1. Lay your sweater flat on an ironing board.
2. Hold a steamer or iron (on steam setting) a few inches above the fabric.
3. Allow steam to penetrate the fibers without touching the iron to the knitting.
4. Shape as needed and allow to cool and dry completely.
For long-term care of your garter stitch sweater:
– Follow fiber-specific washing instructions (wool, cotton, blends).
– Store folded rather than hung to prevent stretching.
– Use a sweater comb or fabric shaver to address pilling.
– For wool sweaters, consider cedar storage during off-seasons to deter moths.
As one knitter suggests, “I also like to use a lint roller to clean the garment afterward in case of any fluff, pet hair, etc!” This simple step helps your finished project look its best.
Patterns & Inspiration Library
Ready to cast on your first (or next) garter stitch sweater? I’ve gathered some of my favorite patterns that showcase just how versatile this simple stitch can be – from quick weekend projects to heirloom pieces you’ll treasure for years.
Beginner-Friendly Patterns
When I first started knitting garments, I was intimidated until I found patterns specifically designed for newcomers. The Simple Knit Sweater by Sewrella was my gateway into sweater knitting – it uses bulky yarn so you see progress quickly, and the straightforward construction builds confidence. I love that it’s sized inclusively from XS to XXXL, making it accessible for almost everyone.
If you’re knitting for the men in your life (or yourself!), the Men’s Garter Stitch Sweater by Handy Little Me creates a classic pullover that never goes out of style. Available in five adult sizes, it’s the perfect introduction to creating wearable garments that actually fit.
And for the little ones? The Garter Stitch Baby Cardigan by Louise creates the sweetest little sweater. I’ve made this as a baby shower gift several times – it works up quickly and always gets “oohs” and “aahs” when unwrapped.
Intermediate Patterns
Once you’ve mastered the basics, you might want to try something with a bit more personality. The Garter Stitch Swingy Sweater by Jenn Pellerin is a free pattern that’s become something of a community favorite – with 419 completed projects on Ravelry! Its asymmetrical design and top-down construction add interest while still using the comforting garter stitch you’ve come to love.
The Gartergan by Tori Yu lifts garter stitch to new heights with sophisticated details like a high-low hemline, clean I-cord edges, and faux seams. It’s the perfect “next step” project that still relies on the stitch you’re comfortable with.
For cardigan lovers, the Uptown Cardigan by Lion Brand has become a customer favorite. The clean 1×1 ribbed edges frame the garter stitch beautifully, creating a polished look that works for both casual and slightly dressier occasions.
Advanced Patterns
Ready for a challenge? The Garter Marler Sweater by Stephen West transformed how I think about garter stitch. This creative, colorful design uses two strands of fingering weight yarn held together for a marled effect that adds incredible visual interest and depth.
The Garter Stitch Bias Top introduced me to innovative construction techniques. By knitting on the bias (at a 45-degree angle), the fabric drapes in surprising and flattering ways that regular garter stitch doesn’t.
And for those of us with overflowing yarn bins, the Scraptastic Garter Stitch Sweater is a dream come true. I made one using leftover yarn from five different projects, and it’s now one of my most-complimented garments. There’s something so satisfying about turning odds and ends into something beautiful and wearable.

Community Inspiration
The knitting community has acceptd garter stitch sweaters with genuine enthusiasm. Just looking at the numbers tells the story – Stephen West’s Garter Marler Sweater has been made in 110 projects and sits in 417 Ravelry queues, while the Garter Stitch Swingy Sweater has 419 completed projects and is queued by 1,679 knitters waiting for their turn to make it.
I still remember reading a review that perfectly captured why these projects are so beloved: “This pattern was remarkably clear—I made two in less than a week.” That kind of accessibility is what makes garter stitch sweaters special – they’re achievable projects that deliver beautiful, wearable results.
Whether you’re looking for your first garment project or your fiftieth, there’s a garter stitch sweater pattern out there that will speak to your style and skill level. The hardest part might just be deciding which one to cast on first!
Frequently Asked Questions about Garter Stitch Sweaters
Why does my garter stitch sweater row gauge matter so much?
When I first started knitting garter stitch sweaters, I was puzzled by how much emphasis patterns placed on row gauge. Now I understand why it’s so crucial!
Row gauge directly affects your sweater’s length because garter stitch creates those lovely horizontal ridges that stack up vertically. Think about it this way: if your pattern calls for 40 ridges (that’s 80 rows) to create a 20-inch length, but your gauge is off by just one row per inch, your finished sweater could end up 2 inches longer or shorter than intended. That’s the difference between a perfectly fitting garment and one that hits at an awkward spot!
I’ve learned through experience that the best approach is to always swatch and measure both stitch and row gauge carefully. If your row gauge differs from the pattern, you can make simple adjustments by adding or subtracting ridges where needed. I find it helpful to take measurements as I go, especially at key points like armhole depth and shoulder shaping, to stay on track.
Can I substitute a different yarn weight and still get good drape?
Absolutely! One of the things I love about garter stitch sweaters is their adaptability to different yarns. But there’s definitely an art to successful substitution.
If you’re using a lighter weight yarn than the pattern calls for, you’ll need more stitches and rows to achieve the same dimensions. The upside? This typically creates a fabric with beautiful drape and movement – perfect for flowy summer tops or lightweight cardigans.
Going the other direction with a heavier weight yarn means fewer stitches and rows. This creates a more substantial, structured fabric that’s wonderful for cozy winter sweaters that hold their shape.
For either substitution, I always recommend swatching with your chosen yarn to determine the new gauge, then recalculating stitch counts based on your findings. Consider what the project is meant for – that delicate drapey top pattern might not translate well to a chunky yarn, and vice versa.
As my knitting friend Sarah always says, “Garter stitch creates a drapey, textured garment,” but the character of that drape varies significantly depending on your yarn choice. It’s part of what makes each garter stitch sweater uniquely yours!
How do I keep edges from flaring when knitting garter stitch in the round?
This is such a common question! When working a garter stitch sweater in the round, that transition between knit and purl rounds can sometimes create a visible “jog” or flaring that spoils your otherwise beautiful work.
I’ve found several techniques that help create smoother edges. The jogless stripes technique isn’t just for color changes – it works beautifully for creating a smoother transition between knit and purl rounds in garter stitch. Try slipping the first stitch of each round purlwise with yarn in front to create a cleaner edge – this small adjustment makes a noticeable difference.
For a more polished look, consider adding an i-cord edge. The Gartergan pattern features “clean I-cord edges” that not only look professional but provide structure and prevent flaring. They take a little extra time but are worth the effort!
Don’t underestimate the power of blocking, either. I’ve rescued many a wobbly-edged garter stitch sweater with thorough blocking that evened out those edge irregularities.
I particularly appreciate Stephen West’s practical advice on this issue. His patterns often include a helpful tip: “If you want to make the rows ‘jogless’ to eliminate the back center ‘jog’, try out the Jogless Stripes video tutorial.” His techniques have saved many of my in-the-round projects from unsightly edges!
With these approaches, your garter stitch in the round can look just as polished as flat-knitted pieces. If you’re still having trouble, drop by our community forum at Crochet Craze where fellow knitters are always happy to troubleshoot specific issues with your project.
Conclusion
Creating a garter stitch sweater is more than just a knitting project—it’s a journey that captures the essence of crafting. There’s something deeply satisfying about the rhythmic motion of knitting every row, watching your fabric grow ridge by ridge, and eventually slipping on a garment you’ve made with your own two hands.
At Crochet Craze, we firmly believe that knitting should welcome everyone, regardless of how much experience you have. The garter stitch sweater perfectly embodies this inclusive spirit—simple enough for someone just starting out yet versatile enough for seasoned knitters to express their creativity through color, texture, and design.
Every knitter’s journey starts with that first stitch. Whether this is your very first sweater or you’ve lost count of how many you’ve made, the fundamentals remain unchanged: patience as you work through each row, practice to refine your technique, and persistence when you encounter challenges. Each ridge of your garter stitch sweater represents not just the time you’ve invested, but your growing confidence and skill as a maker.
As you start on your own garter stitch sweater trip, know that our community is here cheering you on. We’d love for you to share your progress, ask questions when you get stuck, and celebrate those victories—whether it’s mastering a new technique or simply completing another inch of fabric. The change from a humble ball of yarn to a wearable garment you’ll treasure for years is nothing short of magical.
So grab those needles, select a yarn that brings you joy, and take that first step. Your perfect garter stitch sweater is waiting to be created, one simple knit stitch at a time. And when you’re ready to expand your skills even further, we’re here to help you master more stitches and techniques for your next creative endeavor.