If your afghan, scarf, or pillow needs a mic-drop finish, you’re in the right place. This guide shows you over 20 curated crochet edging patterns. They turn simple projects into stunning pieces. You’ll find free crochet borders and blanket edging ideas, some with video demos and others with clear written directions.
Think of crochet trims as frames for your handiwork. They add polish, boost durability, and let you use leftover yarn for playful color pops. I’ll show you how to check stitch multiples, find step-by-step tutorials, and keep your finishing crochet projects neat and balanced with a quick swatch.
Whether you want a bold blanket edging for an understated throw or a delicate trim for a garment, these crochet borders will help. They let you plan size adjustments and avoid count-related headaches before the final join.
Key Takeaways
- Use crochet edging patterns to elevate blankets, garments, and home decor.
- Choose trims that match your main fabric’s visual busyness for balance.
- Check stitch multiples and make a swatch before adding blanket edging.
- Look for free patterns with video or photo tutorials for faster learning.
- Use leftover yarn in crochet borders to add color and save resources.
Why Crochet Edging Patterns Transform Your Finished Projects
You want your blanket, garment, or home decor to look magazine-worthy. A well-chosen edge is the simplest way to achieve this. Finishing crochet work is like framing a painting. It pulls focus, cleans up rows, and turns something homey into something deliberate.
The finishing touch that frames your work
A neat border makes your piece look like one whole. When you frame crochet projects, the eye stops at the edge with pleasure, not confusion. Use a plain single crochet border for a tidy finish, or step up to scallops if you want drama. You can read a practical how-to on a single crochet edge at single crochet border edge for a quick starter.
How borders add durability, size, and balance
Borders do more than beautify. They add structure and help seams lie flat, which explains why edging for durability is a favorite tip among experienced makers. A sturdier edge prevents stretching and unraveling, so your blanket or garment holds shape through washes.
Want a little extra width or length? Add rounds of edging to frame crochet projects and increase size without altering the main pattern. Pay attention to stitch multiples on the pattern you choose, and be ready to fudge a stitch or two to keep corners neat.
Using edgings to use leftover yarn and experiment with color
Edgings give you license to use leftover skeins and try bold contrasts. You can use scrap yarn to make a bold band, a subtler trim, or a multi-row rainbow. This is one of the easiest border benefits: it stretches your stash while adding personality.
Before you commit, swatch the edging so you can see how texture and color pair with the main fabric. If you need pattern ideas or visual guidance, browse roundups of crochet borders for inspiration at crochet border collections.
| Goal | Suggested Edge | Why It Works |
|---|---|---|
| Clean, simple finish | Single crochet border | Straightens edges, easy to work over tails, great beginner choice |
| Add width without reworking | Multiple rounds of single or half-double crochet | Builds size evenly, keeps fabric drape consistent |
| Durability and structure | Dense slip stitch or crab stitch | Reinforces edges, resists stretching, ideal for heavy-use items |
| Use leftover yarn and color play | Striped rounds or contrasting scallops | Makes a statement, uses scraps, visually balances busy centers |
| Prep for a decorative upgrade | Plain foundation border | Provides an even base for future ruffles or lace trims |
Quick and Easy Border Ideas for Beginners
Looking for fast, neat finishes? These beginner crochet borders are perfect. They’re easy to learn and great for scarves, dishcloths, and baby blankets. Choose one and find a video or photo tutorial for help.
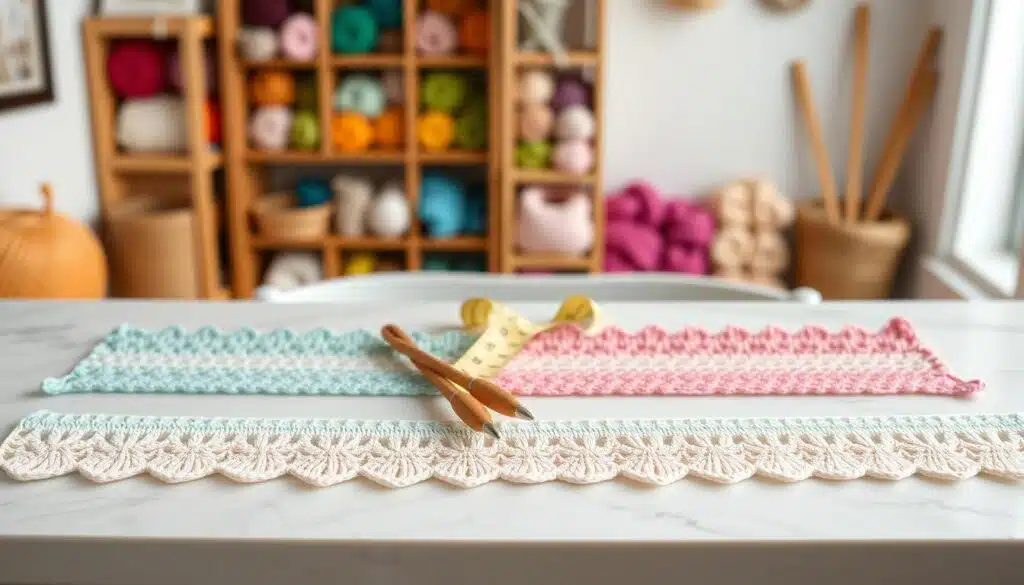
Pair single crochet with crab stitch for a modern edge. Start with a round of single crochet to even out your sides. Then, add a crab stitch border for a rope-like look that hides small mistakes. If reverse single crochet is hard, try twisted single crochet instead.
Picot edging adds a delicate touch with little effort. It uses short chains and slip stitches to create tiny points. Place picots evenly on straight edges and more on corners for a scalloped look. This edging works well for hems and doilies.
Moss stitch edging, or linen stitch, adds texture without being too bold. It’s made of alternating single crochet and chain stitches. For corners and repeats, follow odd-stitch multiples and use one hook size up for a flat border.
Here’s a quick guide to help you pick a border based on speed, texture, and skill.
| Finish | Speed | Texture | Best Use |
|---|---|---|---|
| Single crochet + crab stitch border | Fast | Clean, rope-like | Blankets, bags, hems |
| Picot edging | Moderate | Dainty, 3D | Garments, doilies, trims |
| Moss stitch edging | Moderate | Subtle, woven | Home decor, scarves, shawls |
| Bobble edging | Slower | Playful, raised | Kids’ items, playful borders |
For the best results, follow stitch-multiple rules and keep picots even. Block the border when needed. These easy trims help you finish quickly and let you play with colors and yarn weights.
Textured and Playful Edgings to Add Personality
Adding playful, tactile borders to your projects gives them a unique personality. Try chunky bobble edging or a puff stitch border for fun 3D elements. These add texture without overwhelming the fabric.
Bobble and puff edgings for playful texture
Bobble edging adds fun knobs that look like confetti. Catherine’s Cute Bobble Edging is a great choice. It uses double crochet, single crochet, and chains for a neat look.
Puff stitch borders offer softer bumps. They’re perfect for baby blankets and kid-friendly scarves. Test the scale with scrap yarn before finishing the border.
Little ridges and camel stitch for braided, cozy looks
The little ridges border creates subtle striations. It works well with odd stitch multiples. It looks great on afghans when finished neatly.
Camel stitch edging gives a cozy, braided look. Use half double crochet to achieve the textured effect. Repeat rounds for depth and finish with an invisible join.
Tied loops and pom-pom inspired trims for whimsical projects
Tied loop trim adds whimsy with minimal stitches. You can knot loops or secure them in a chain. For drama, add small pom-pom crochet edging to shawls or rugs.
For mixing techniques, check curated roundups. They offer tied loops and pom-pom options. A single guide can help you avoid mistakes and keep corners neat. See more at innovative crochet techniques.
Practical takeaway: Use bobble or puff stitch borders for lively texture. Choose little ridges or camel stitch for a snug look. Save tied loop or pom-pom edging for whimsical projects. Follow instructions closely to avoid surprises.
Elegant Lace and Vintage-Inspired Crochet Trims
Looking for something special? Try delicate borders that make fabric look like jewelry. Lace crochet edging and scallop edging can turn simple linens into treasures. A shell border or picot lace edging adds old-world charm without being too much.
Scallops, shells, and lacy peaks for heirloom quality
Scallop edging and shell borders add beautiful curves. They’re perfect for handkerchiefs, pillow cases, and towels. Small patterns like treble scallop or reverse shell give a soft, vintage look.
Use bigger hooks or finer yarn to make lacy peaks stand out. This keeps the stitches light and airy.
Picot-and-lace combinations for delicate garments and doilies
Picot lace edging adds tiny details and depth. Try a standing single crochet with a picot (sc, ch3, sl st into loop) for a 3D finish. Pair picot with filet or Irish motifs for delicate collars and lingerie trims.
These trims hold up well to washing if you block them.
Where to find vintage edging patterns and how to modernize them
Want antique trims? Check out Free Vintage Crochet for hundreds of ideas. Choose a favorite like pineapple or Georgian Belle, then update it with new yarn colors or stitch sizes.
Always block lace trims after finishing. Steam block gently and check fit on corners for curtains or blankets. When updating a vintage pattern, keep the rhythm but adjust hook size and fiber to fit your style.
Specialty Borders for Blankets, Afghans, and Home Decor
You want a border that makes your blanket sing and sits flat on a sofa or wall. Choose a specialty edge that fits your piece’s scale and style. Test a swatch, plan corners, and keep stitch multiples in mind for large projects.
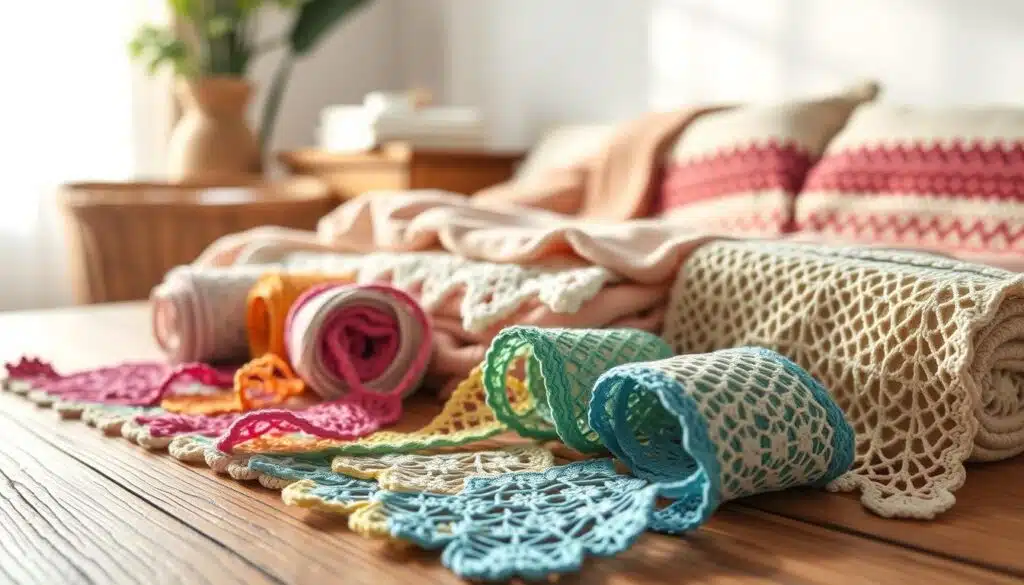
Whipsiderry border from Dedri Uys (Banksia Baby Blanket) is built for rhythm. It uses a border stitch multiple of 10 + 5 per side and asks for a corner ch2 space. This clear math makes it easier to scale for wide afghans.
Zig-Zag border by Tatsiana Kupryianchyk thrives on bold peaks and valleys. The overlay technique often needs a multiple of 4 + 1 for the round you attach to. Video tutorials walk you through the shaping so your chevrons line up neatly.
Magic Carpet edging from Polly Plum suits tapestries and hangables. It commonly needs a multiple of 8 + 3, with alternate instructions for multiples like 2 + 4. Use it when you want a woven look that frames a large motif.
Meet Me On The Corner edging by Christine Bateman is a go-to when you need corner-friendly edging for rectangular pieces. It usually requires a multiple of 8 + 3 and includes corner ch2 spaces so increases sit where they should.
Other specialty choices include Persian Dream (Diana Krenz) and Iris Stitch (Lullaby Lodge). Persian Dream often uses a border stitch multiple of 12. Iris Stitch works nicely with multiples of 4 + 3 and includes step-by-step photos for precise placement.
Large blankets demand attention to corner-friendly edging and consistent stitch math. Swatch full border repeats and test corner joins. If a pattern’s multiple doesn’t match your blanket, add a small “fudge” stitch or alter a repeat so the border lies flat.
Use this quick reference to compare common specialty borders and their multiples before you commit to edging a big project.
| Border Name | Typical Multiple | Corner Instruction | Best For |
|---|---|---|---|
| Whipsiderry border (Dedri Uys) | 10 + 5 | Corner ch2 space | Wide afghans, rhythmic texture |
| Zig-Zag border (Tatsiana Kupryianchyk) | 4 + 1 | Follow overlay round; adjust peaks | Chevron blankets, bold edges |
| Magic Carpet edging (Polly Plum) | 8 + 3 (alt 2 + 4) | Corner increases in pattern notes | Tapestries, wall hangings |
| Meet Me On The Corner (Christine Bateman) | 8 + 3 | Corner ch2 space | Rectangular blankets, neat corners |
| Persian Dream (Diana Krenz) | 12 | Written corner guidance | Heirloom afghans, textured panels |
| Iris Stitch Edging (Lullaby Lodge) | 4 + 3 | Photo tutorial for corners | Delicate trims, floral vibes |
Advanced Edging Techniques and When to Use Them
Ready to take your borders beyond the basic single crochet? This section will guide you on when to use advanced crochet borders for bold results. You’ll learn how to test tricky repeats and the finishing moves that make your work shine.
Overlay crochet, spike stitches, and 3D motifs
Overlay crochet edging creates a layered, tapestry-like look. It’s perfect for blankets and garments where you want color contrast without changing the fabric’s gauge.
Spike stitch border stretches and elongates stitches, making eye-catching lines. It’s great for rectangular pieces where you want a vertical emphasis.
3D crochet motifs add sculptural detail. Small shells, bobbles, or petals lift from the surface, creating playful texture. Use them on pieces that can handle extra bulk, like afghans and cushions.
Working with stitch multiples and adjusting stitch counts
Many advanced borders need exact stitch multiples like 4+1, 10+5, or 12. Count your outer edge stitches before starting. If the count is off, tweak a corner or add a small swatch to absorb the difference.
Practice on swatches to test your gauge and the border’s rhythm. You can “fudge” by adding a chain or skipping a stitch in the final round to meet the multiple. This keeps your project square and your pattern intact.
Blocking and finishing tips for crisp, professional edges
Blocking crochet edges transforms textured and lacy trims. For linen or moss stitch, try one hook size up and steam block gently to settle rows. Pin lacy peaks and 3D crochet motifs on a board, stretch loops before drying, and steam again if needed.
Invisible joins and careful weaving in give a polished look. Take your time with ends; neat finishes make advanced crochet borders look intentional and shop-ready.
Use these advanced techniques when you want drama. Swatch, check stitch multiples, and block carefully for crisp, professional edges that get noticed.
Curated Collections and Free Pattern Resources
If you love tidy edges and playful trims, start by bookmarking reliable roundups that gather dozens of ideas. Collections that list 20+ or 30+ options save time and spark creativity. They are perfect when you need fresh inspiration for a blanket or a quick baby gift.
Roundups worth bookmarking: 20+ and 30+ crochet border collections
Seek out large lists from sites like AllFreeCrochet and curated posts that compile varied stitches. These crochet border roundups often include simple scallops, bobble trims, and lacy peaks in one place. This way, you can compare shapes and gauge effort before you commit.
Best Borders for Crochet Blankets and baby-specific edgings
For blanket makers, look for blanket border collections that highlight multiples and corner-friendly designs. Maria’s Best Borders for Crochet Blankets offers many tried-and-true edges such as Reverse Shell, Puff Edge, Moss Stitch, and Pom Pom Edging. Baby blanket selections from The Spruce Crafts include V-stitch with picots and soft puff lace that work well with delicate yarns.
Video tutorials, photo step-by-steps, and where to find downloadable instructions
When a stitch looks tricky, a video crochet tutorial turns confusion into confidence. Search for step-by-step videos for crab stitch alternatives or Kinga’s twisted single crochet demo when you need a cleaner reverse single. Photo tutorials are great for multi-row borders like Whipsiderry and Magic Carpet where placement matters.
Downloadable crochet patterns help you keep pattern details at hand. Ravelry, AllFreeCrochet, and designer blogs frequently offer downloadable crochet patterns and written instructions you can save or print. Subscribing to newsletters like Free Pattern Friday makes it easy to receive new free crochet edging patterns straight to your inbox.
Need a single source to start? Check this curated guide for stunning edging ideas and stepwise tutorials: beautiful crochet edging patterns. It blends blanket-friendly choices, baby-specific trims, and links to video crochet tutorials so you can learn visually before you stitch.
- Quick tip: Pick one roundup, practice the stitch on a swatch, then try it on the corner of your project.
- Pro move: Save both video and written copies so you can follow a tutorial offline while you work.
crochet edging patterns
Choosing the right crochet edging patterns depends on your fabric. For busy blankets, sweaters, or shawls, pick a simple border. This way, the edge frames nicely without overpowering the design. On the other hand, for plain pieces, a bold trim can add a lot of personality.
How to pick the right edging for busy vs. simple projects
Consider the scale and rhythm of your project. For busy designs, go for something simple like single crochet or crab stitch. These won’t compete with the main pattern. Simple fabrics, on the other hand, can handle more elaborate designs like scallops or shells.
Try out a border on a small swatch first. This helps you see if the edge works well with the whole piece. Use leftover yarn to test different colors and see how they change the look.
Swatching your chosen edging and making small adjustments before finishing
Swatching is key to getting a neat finish. Crochet a small sample of the body and then add the border. This step helps you figure out if you need to adjust the stitch count or change the hook size.
Make sure the edge works with the number of stitches in your fabric. If it doesn’t, you can tweak it slightly. Blocking the swatch will show you how the stitches will look in the finished piece.
Using edging patterns to complement colorwork and texture in your main piece
The border should enhance the yarn texture, not clash with it. Smooth yarns like cotton or merino look great with lacy borders. But chunky yarns need bold, simple edges to hold their shape.
You can add stripes or a picot row to match the main fabric’s colors. For a quick fix, check out a one-row border tutorial here.
When swatching, adjust the stitch count and try a larger hook for linen-style borders. If you run into problems, a stitch troubleshooting guide can help here.
- Tip: For busy patterns, choose understated trims.
- Tip: For simple fabrics, pick decorative, eye-catching borders.
- Tip: Always swatch, adjust stitch counts, and block before committing.
Conclusion
You now have a clear roadmap to finish crochet projects with confidence. Curated border collections, like the 20+ pattern roundups many designers share, are great for crochet trim inspiration. They help you spot the best crochet edgings for blankets, garments, and gifts.
Pick a border that fits your skill level, swatch it, and check stitch multiples before you commit. There are tons of free patterns with video, photo, and written instructions to guide you. Simple edging final tips, like using leftover yarn to adjust size, make finishing less painful and more creative.
Remember why borders matter: they frame your work, add durability, and let you tweak dimensions. Balance complexity with the piece’s purpose. Use blocking and joining techniques for crisp lines. Test on small swatches to avoid surprises.
Armed with beginner options, textured and vintage trims, specialty blanket borders, and advanced finishes, you’re ready to choose the best crochet edgings. Turn your projects into professional, gift-ready pieces. Keep experimenting and use these edging final tips as your checklist when you finish your next piece.
FAQ
What makes a crochet edging pattern a “stunning” finish for your blanket or afghan?
A well-chosen edging acts like a picture frame. It unifies the piece, highlights colors and texture, and gives a polished finish. The right border can turn a lovely blanket into a sensational heirloom by balancing the main fabric’s busyness, adding defining contrast or complement, and providing neat corners and consistent edges.
How do borders add durability, size, and balance to my finished project?
Edgings lock down raw edges so stitches don’t loosen, and a sturdy finish (like single crochet or moss stitch) adds structural strength. Borders also increase dimensions—one or more rounds can widen or lengthen your blanket—and they visually balance the design: simple fabrics pair well with bolder trims, while busy blankets benefit from understated edges.
Can I use leftover yarn for edgings, and how can color play with borders?
Yes—you can use scrap yarn to craft a contrasting or coordinating border, saving leftovers and adding flair. Try a single- or two-row accent in a bright spare color, or make multiple rounds in graduated hues. Color changes in borders are an easy, budget-friendly way to experiment without reworking the whole project.
What are the fastest, most beginner-friendly border options?
Start with single crochet followed by a crab stitch (reverse single crochet) for a tidy, classic edge. If crab stitch feels awkward, try twisted single crochet. Picot and moss (linen/granite) stitches are also beginner-friendly and add delicate or subtle texture without much fuss.
How do you make a picot border and what should I watch for?
Picots are short chains typically fastened with a slip stitch to create little points. Work a standing single crochet in the join round, then repeat sc, ch3, sl st into the base stitch to place picots evenly. Picots don’t require a strict multiple, but consistent spacing matters—practice on a swatch and follow corner instructions so the lace reads neatly around edges.
What is the moss (linen/granite) stitch edging and when should I use it?
Moss stitch alternates single crochet and chain stitches to create a woven, low-profile texture. It’s ideal when you want texture that doesn’t compete with a busy blanket. Use a hook one size larger for better drape, steam-block when finished, and repeat rounds for desired width.
Which textured edgings add playful personality to baby blankets or throws?
Bobble and puff edgings add bouncy, tactile charm—great for playful or child-focused projects. Little ridges and camel stitch give a cozy, braided look, while tied loops and pom-pom trims bring whimsical drama. Pick texture based on age-appropriateness and whether you need machine-washable durability.
How does the camel stitch differ from little ridges, and what effects do they create?
Camel stitch is worked into the third loop to create a raised, braided rib that looks woven. Little ridges use slip stitches and double crochet to make subtle horizontal bands. Camel stitch gives pronounced, cozy ribs; little ridges give gentle texture and are excellent for scrap-y, layered edging looks.
What heirloom or vintage trims should I consider for elegant projects?
Scallops, shells, lacy peaks, treble scallops, and picot-and-lace combos deliver heirloom appeal. These trims read as delicate and classic—perfect for baby blankets, shawls, or decorative throws. Blocking is essential for crisp definition on lace trims, and adjusting hook size can help you achieve the right drape.
Where can I find vintage edging patterns and how can I modernize them?
Free Vintage Crochet hosts hundreds of antique edging patterns. To modernize, use current yarn weights or bright colors, scale stitch multiples to fit your piece, and substitute hooks or fibers for softer drape. Photo tutorials and step-by-step videos can help translate older shorthand into today’s instructions.
Which specialty borders work best for statement blankets and wall hangings?
Whipsiderry, Zig Zag (overlay crochet), and Magic Carpet edgings are designed to make a statement. Zig Zag often uses overlay techniques for layered visuals; Magic Carpet suits tapestries and hangable pieces; Whipsiderry adds decorative scalloped structure. These often require specific stitch multiples and sometimes video or photo tutorials.
How do I plan corners and stitch multiples for large blankets?
Always count stitches along the outer edge and check the border’s required multiple (examples: multiple of 10 + 5, 4 + 1, 12, or 8 + 3). Many borders include corner instructions (ch-2 spaces or extra stitches); make a swatch and test corner rounds. If counts don’t line up, you can “fudge” by adding or skipping a stitch in the final round to meet the multiple.
What advanced edging techniques should I learn to create dramatic effects?
Overlay crochet, spike stitches, and 3D motifs (puffs, tall shells, extended post stitches) create pronounced texture and layered visuals. These techniques often need precise stitch counts and practiced tension, so make swatches and follow photo or video tutorials before committing to the final border.
How important is blocking and finishing for crisp, professional edges?
Very. Steam or wet-blocking sets lace and moss stitch edges for crisp definition. Pin picot-and-lace trims flat, stretch tied loops before drying, and use invisible joins to weave ends for a neat finish. Blocking transforms a good border into a gift-ready, heirloom-quality trim.
Which curated collections and roundups are worth bookmarking for border inspiration?
Look for themed roundups like “20 Unique Crochet Border Patterns” and “30+ Crochet Border Patterns” on sites such as AllFreeCrochet, The Spruce Crafts, Celina Lane, and designer blogs. Maria’s “Best Borders for Crochet Blankets” and Free Pattern Friday newsletter collections are also excellent sources for regular, free pattern updates.
Where can I find photo or video tutorials for tricky edges like crab stitch alternatives?
Many designer blogs and YouTube channels provide step-by-step videos and photo tutorials. Tutorials by designers like Kinga (twisted single crochet) and pattern photo-tutorials for Whipsiderry and Zig Zag are commonly linked from roundups. Ravelry and AllFreeCrochet often link to downloadable written instructions too.
How do I choose the right edging for a busy pattern versus a simple blanket?
For busy patterns, choose understated edgings—single crochet, moss stitch, or thin picot trims—to avoid visual competition. For simple, solid, or subtle main fabrics, pick bolder borders—bobble, Persian Dream, overlay Zig Zag, or multi-row scallops—to add drama and personality.
What practical checklist should I follow before adding an edging?
Count edge stitches, check the edging’s required multiple, swatch with the same yarn and hook, test corners, decide on hook size adjustments (e.g., +1 size for linen stitch), and plan blocking. Keep scrap yarn handy for trial runs and consult video/photo tutorials for unfamiliar techniques.