Crochet Delaney Hat Tutorial: 7 Powerfully Fun Steps 2025
Why the Delaney Hat Is Every Beginner’s Dream Project
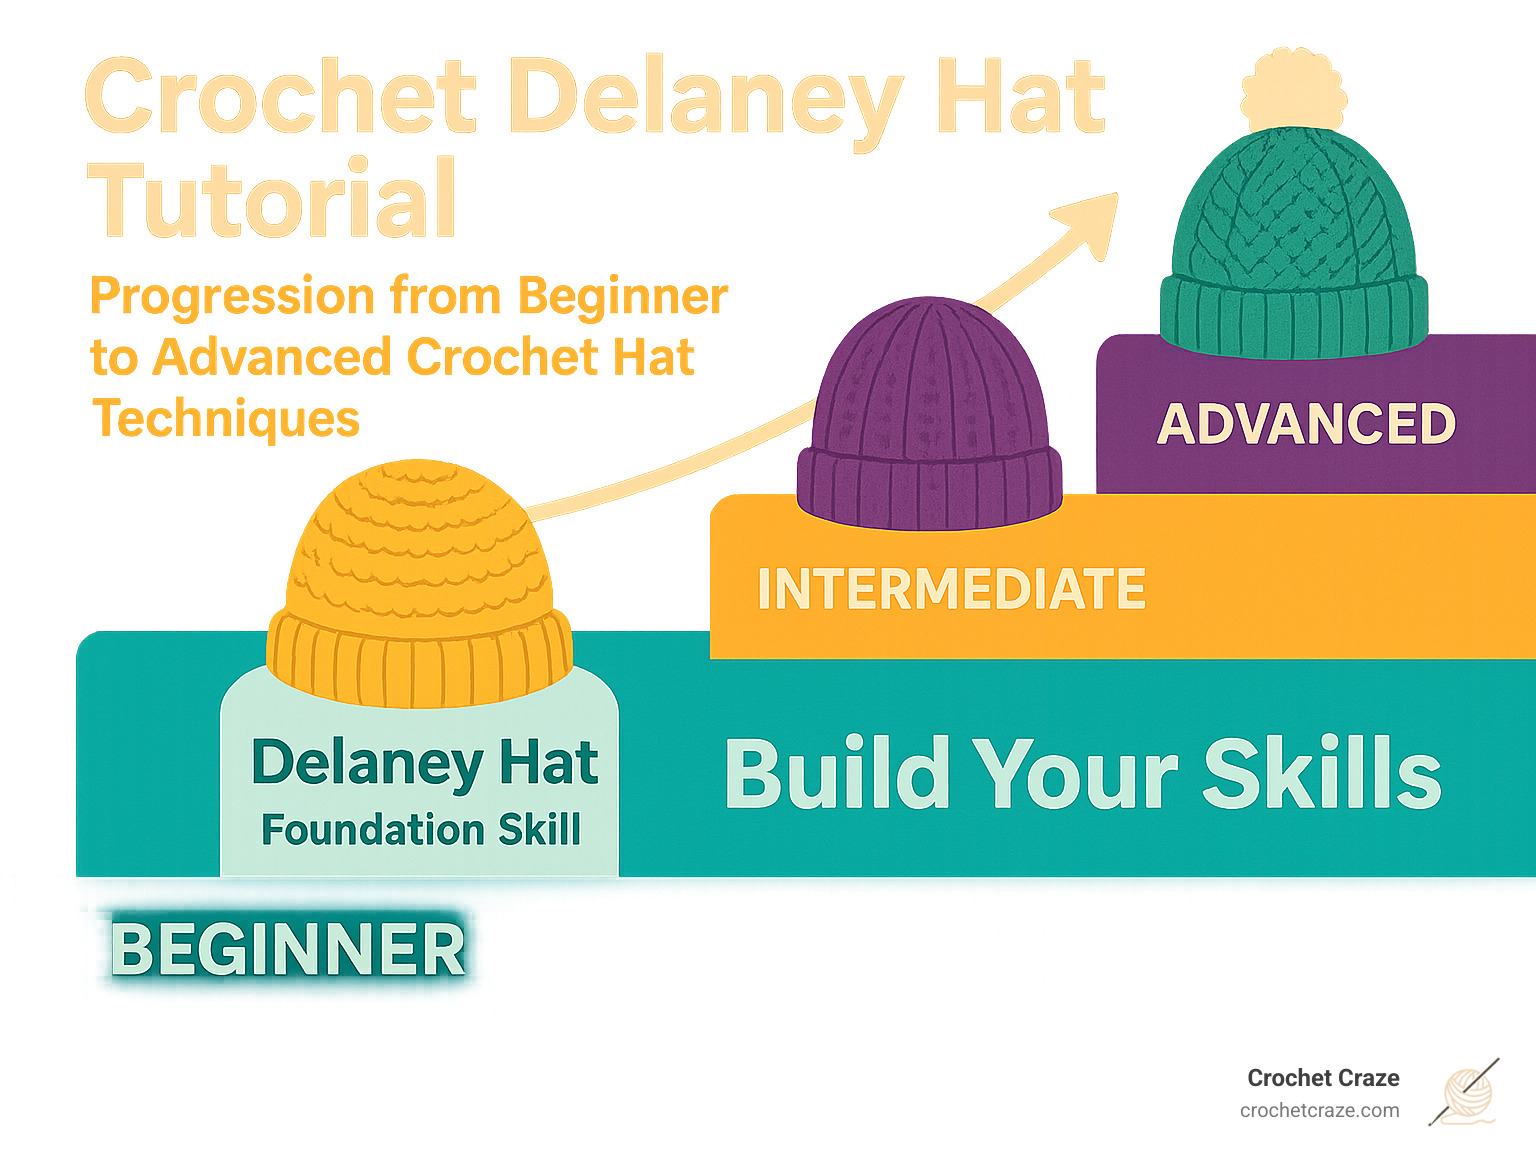
A crochet delaney hat tutorial opens the door to creating one of the most beloved beginner-friendly patterns in the crochet community. The Delaney Hat stands out with its playful spiral crown – a unique twist that replaces traditional pom-poms with textured loops that dance as you move.
Quick Tutorial Overview:
– Skill Level: Beginner (uses only basic stitches)
– Time: 2-4 hours depending on size
– Yarn: 150-180 yards worsted weight
– Sizes: Baby through adult (14″-24″ head circumference)
– Special Feature: Spiral crown clusters instead of pom-pom
– Designer: Originally by Danyel Pink (pattern now discontinued)
This hat pattern became popular because it teaches essential crochet skills while creating something genuinely fun to wear. The spiral top gives movement and personality that makes each hat feel special. Best of all, the pattern works up quickly and fits every family member.
The original Delaney Hat pattern by designer Danyel Pink has been discontinued, but the technique remains a favorite among crocheters. You’ll find variations and community-shared versions still circulating on platforms like Ravelry and Etsy, where crochet hat patterns consistently rank among the most popular downloads.
I’m Sonja Huerta, and as someone who recently finded the joy of crochet, I found this crochet delaney hat tutorial perfect for building confidence with basic stitches while creating something truly unique. My attention to detail and patience with learning new techniques made this spiral-topped hat an ideal project for mastering consistent tension and stitch work.
Crochet delaney hat tutorial terms to remember:
– beginner crochet beanie tutorial
– chunky beanie crochet tutorial
– crochet hats tutorial
Delaney Hat at a Glance: Design, Sizes & Skill Level
The Delaney Hat is like that friend who makes everything look effortless – it’s beginner-friendly but looks professionally crafted. Originally designed by Danyel Pink, this pattern became a sensation in the crochet world before being discontinued. Don’t worry though – the technique lives on through community sharing and has inspired countless variations.
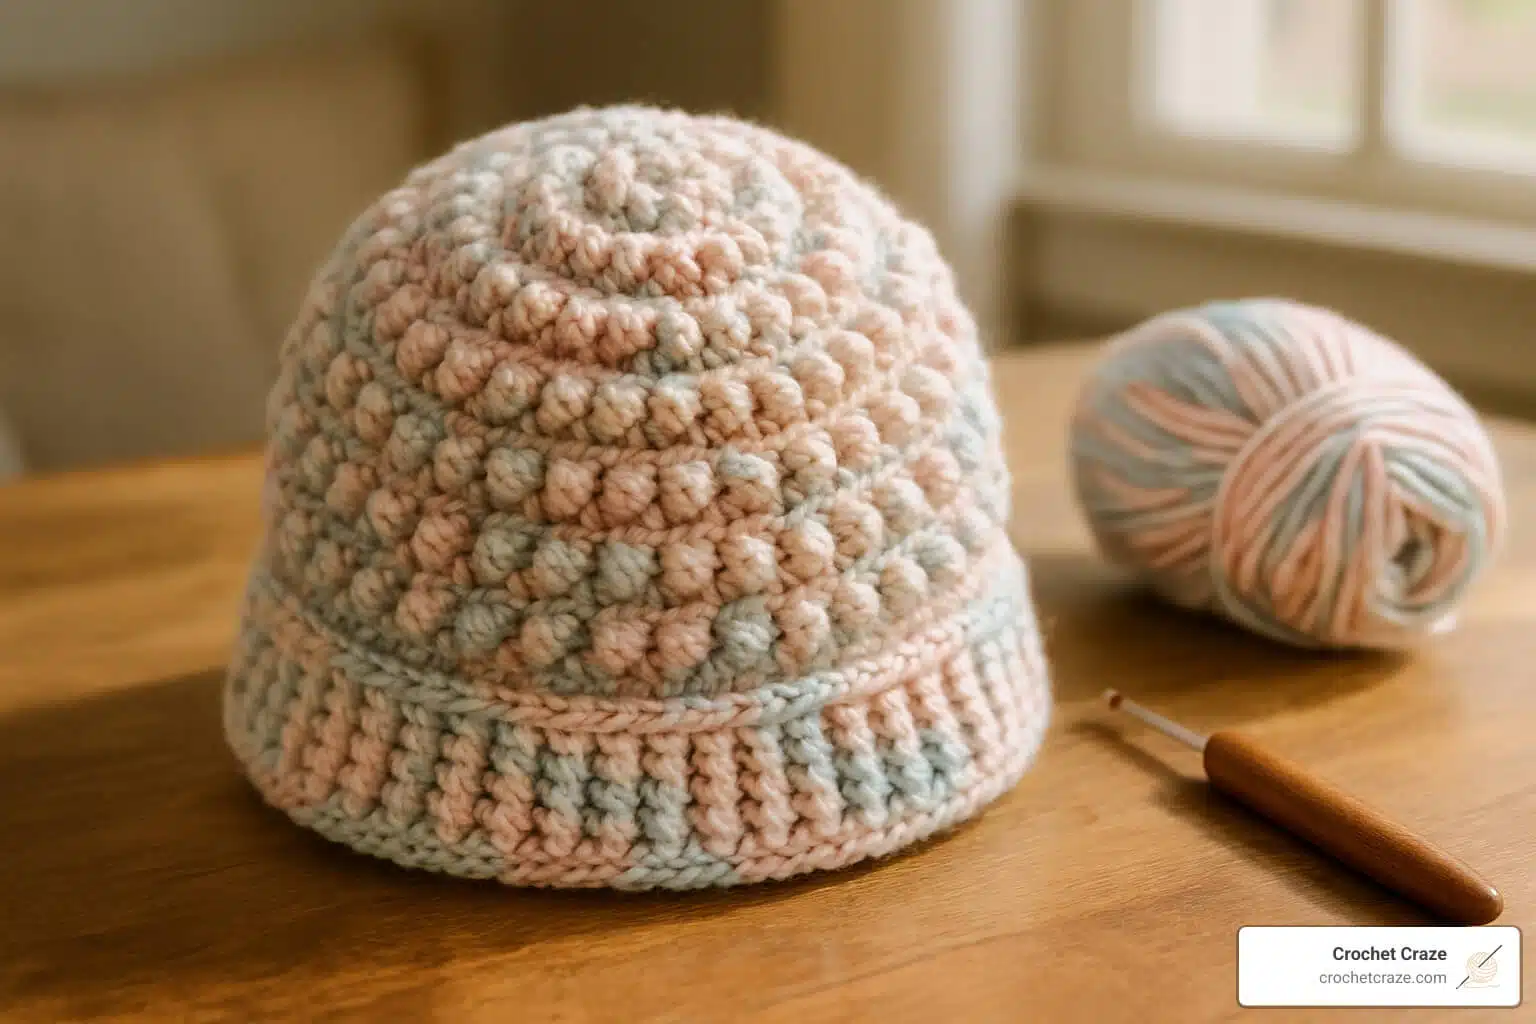
What makes this crochet delaney hat tutorial so special? It’s all about those playful spiral clusters at the crown. Instead of wrestling with a pom-pom that might fall off or get matted, you create textured spirals directly into the hat. These little curlicues dance and bounce as you move, giving the hat personality that static decorations just can’t match.
The pattern sits comfortably at beginner level, which means you won’t need to master complex stitches or techniques. If you can single crochet and half double crochet, you’re ready to tackle this project. It’s perfect for building confidence while creating something genuinely fun to wear.
Size-wise, this hat is a real crowd-pleaser. The pattern works for baby through adult sizes, covering head circumferences from 14 to 24 inches. This versatility makes it fantastic for gift-giving or creating matching family sets. Despite the original pattern being discontinued, you’ll still find variations flourishing on Etsy and pattern-sharing communities.
Why the Spirals Make This Hat Stand Out
Those spirals aren’t just cute – they’re practical problem-solvers. Unlike traditional pom-poms that can come loose or lose their fluff, these crocheted spirals are permanently attached and maintain their shape through countless washes. They create that coveted texture pop that makes simple hats look sophisticated.
The spirals also offer fun movement that brings the hat to life. Every head turn or breeze sets them dancing, creating visual interest that static decorations simply can’t provide. Plus, they’re forgiving for beginners – any minor inconsistencies in your crown decreases get hidden by the textural interest of the spirals.
No pom-pom means no extra trips to the craft store and no fumbling with attachments. Everything you need is created with your hook and yarn, making this a truly self-contained project.
Meet the Original Designer
Danyel Pink created the original Delaney Hat as part of her mission to make crochet accessible and fun for families. Her approach focused on incorporating unique design elements – like those signature spirals – while keeping techniques simple enough for beginners to master.
Though Pink’s original pattern is no longer available, her influence ripples through the crochet community. The pattern history shows how one creative idea can inspire countless adaptations. Crocheters continue sharing their Delaney Hat variations and techniques across social platforms and community forums, keeping the spirit of the design alive and evolving.
What You Need: Materials, Gauge & Prep
Starting your crochet delaney hat tutorial trip doesn’t require a huge investment in supplies. Most of what you need might already be sitting in your craft basket waiting for the perfect project!
The star of your supply list is worsted weight yarn (#4) – this medium thickness gives you the perfect balance of warmth and workability. For an adult-sized hat, you’ll need about 150-180 yards, which is less than most standard skeins. This means you might even have enough leftover yarn for a matching child’s hat!
Your crochet hook size can range from 5.0mm (H) to 6.5mm (K), depending on your yarn choice and how tightly you naturally crochet. Don’t stress too much about getting this perfect right away – we’ll talk about adjusting as you go.
The other essentials are simple: a yarn needle for weaving in those pesky ends, scissors for clean cuts, and stitch markers if you like extra security (though they’re totally optional). If you’re just starting out, our guide on the Best Crochet Hook to Start With can help you choose the right tools for comfortable crocheting.
Yarn amounts vary by size, and here’s where the Delaney Hat really shines for families. A baby hat (14-16″ head) needs only 100-120 yards, while a toddler size (16-18″) uses 120-140 yards. Child sizes (18-20″) require 140-160 yards, adult small (20-22″) needs 160-180 yards, and adult large (22-24″) uses 180-200 yards.
Gauge matters more than you might think. We know it’s tempting to skip the gauge swatch, but spending 15 minutes making a 4-inch square with 16 single crochet stitches by 18 rows can save you hours of frogging later. If your square measures smaller than 4 inches, grab a bigger hook. If it’s larger, go down a hook size.
Essential Stitches & Techniques
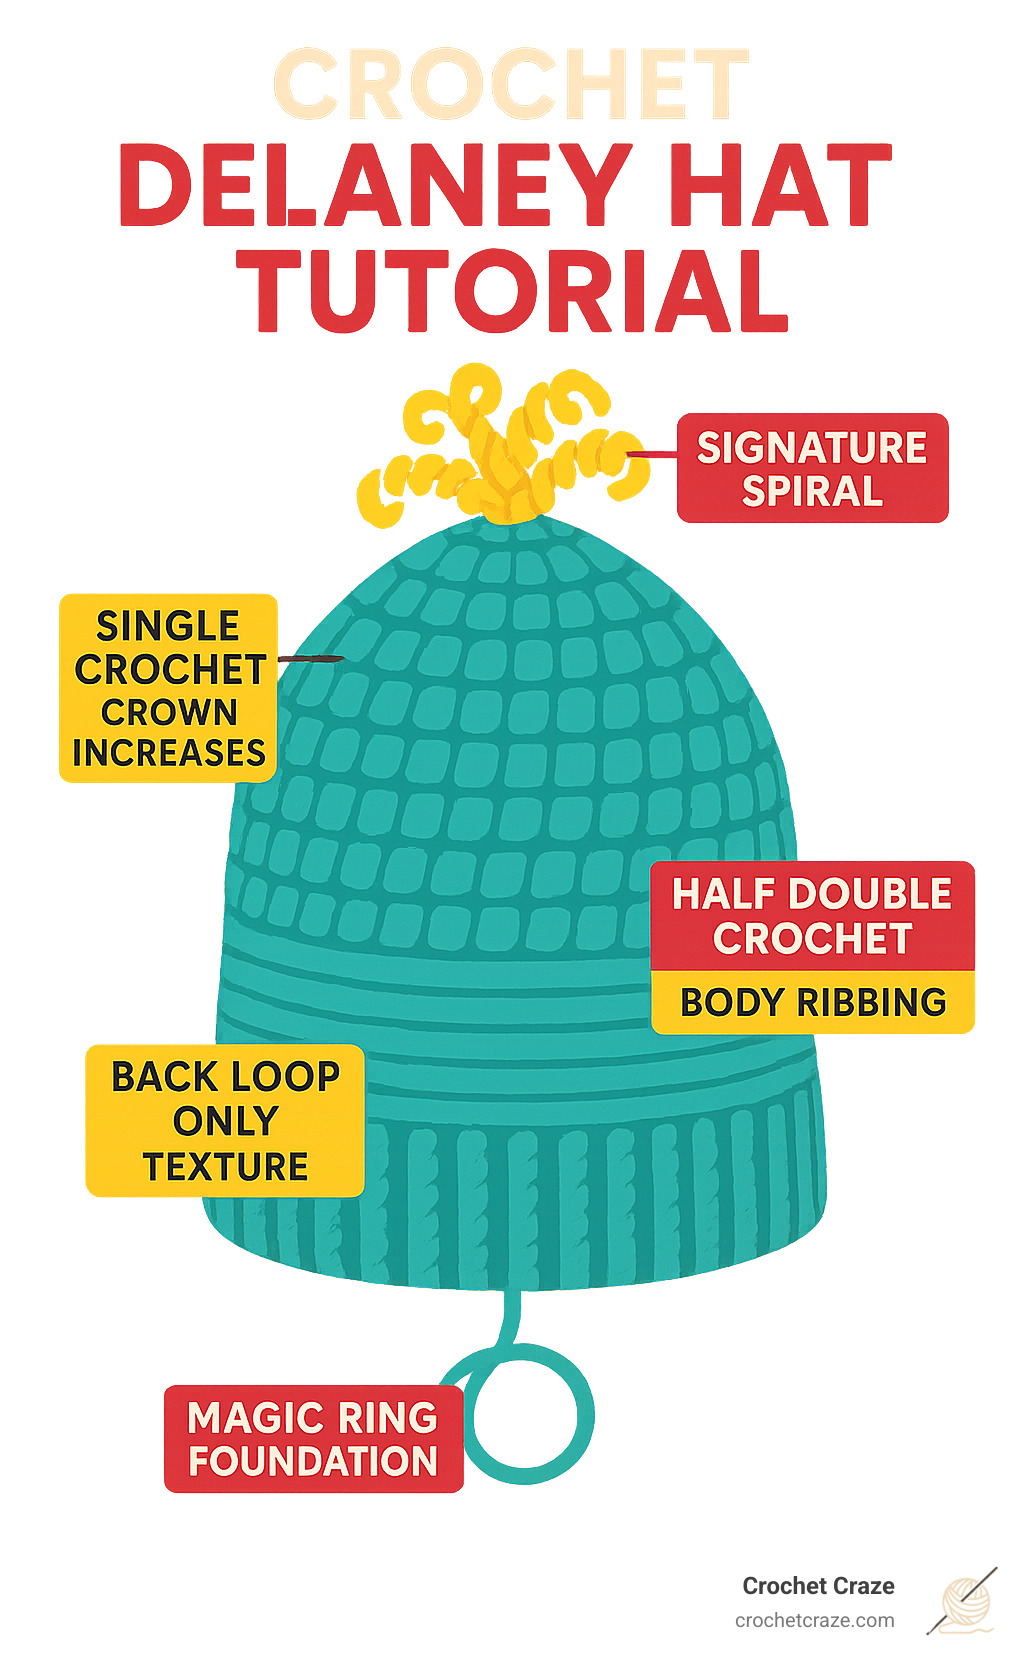
Here’s the beautiful truth about this crochet delaney hat tutorial – you only need to know the basics! The single crochet and half double crochet stitches do most of the heavy lifting, with simple chain stitches and slip stitches rounding out your toolkit.
The magic ring technique starts your crown with a neat, tight center instead of a visible hole. If you’ve never tried a magic ring before, practice it a few times with scrap yarn. Once you get the hang of it, you’ll wonder how you ever started projects without it!
Working in the round keeps your hat seamless and professional-looking. The back loop only (blo) technique creates that lovely ribbed texture around the brim. When you work your half double crochet stitches in just the back loops, you’ll see raised ridges form naturally.
The signature spiral chains at the crown use the same chain stitch you already know, just worked in a specific pattern to create those playful loops. No fancy stitches or complicated maneuvers – just chains arranged to dance and move with personality.
Adjusting for Any Head Size
One of our favorite things about the Delaney Hat is how easily it adapts to different head sizes. You don’t need to hunt down separate patterns for each family member!
Measuring heads properly makes all the difference. Wrap your measuring tape around the widest part of the head, usually just above the eyebrows and ears. This gives you the circumference you need to match against our sizing guide.
Hook size changes offer the simplest adjustment method. A smaller hook creates tighter stitches and a smaller finished size, while a larger hook opens up the fabric for bigger heads. Adding extra increase rounds in the crown section accommodates larger head circumferences, and working additional body rounds creates deeper hats for those who prefer more coverage.
Delaney Hat vs. Basic Beanie Sizing:
| Size | Head Circumference | Delaney Hat Crown | Basic Beanie Crown | Yarn Needed |
|---|---|---|---|---|
| Baby | 14-16″ | 4.5″ diameter | 4″ diameter | 100-120 yds |
| Toddler | 16-18″ | 5″ diameter | 4.5″ diameter | 120-140 yds |
| Child | 18-20″ | 5.5″ diameter | 5″ diameter | 140-160 yds |
| Adult S | 20-22″ | 6″ diameter | 5.5″ diameter | 160-180 yds |
| Adult L | 22-24″ | 6.5″ diameter | 6″ diameter | 180-200 yds |
Notice how the Delaney Hat crowns run slightly larger than basic beanies? This extra room lets the spiral closure technique work its magic without pulling the hat too tight. The spirals need space to form properly and create that signature bouncy movement we love.
Step-by-Step Crochet Delaney Hat Tutorial
Ready to create your own spiral-topped masterpiece? This crochet delaney hat tutorial breaks down the entire process into three manageable parts, making it easy to follow along whether you’re brand new to crochet or just new to this particular style.
Before we dive in, take a moment to set yourself up for success. Find a cozy spot with good lighting and gather all your materials within arm’s reach. Trust me, there’s nothing more frustrating than realizing your scissors are across the room when you need them! I always recommend reading through the entire pattern once before starting – it helps you understand the big picture and avoid surprises.
Here’s what makes this tutorial so beginner-friendly: we’re building your hat in logical sections that each teach you something new. First, you’ll master the foundation crown, then move on to the satisfying rhythm of the ribbed body, and finally create those playful spirals that make everyone ask “How did you do that?”
Keep these time-saving tips handy: Use a row counter or simple notepad to track your progress (seriously, you’ll thank me later), pop in stitch markers to mark the beginning of rounds, and remember that crochet should be relaxing. If you find yourself gripping your hook like you’re arm-wrestling, take a break and shake out those hands.
Foundation Rounds – crochet delaney hat tutorial part 1
Every great hat starts with a solid foundation, and the Delaney Hat begins with a magic ring. If you’ve never done a magic ring before, don’t worry – it might feel a bit awkward the first few times, but once you get it, you’ll wonder how you ever lived without this technique.
Start by creating your magic ring, then chain 2 (this counts as your first half double crochet). Work 11 more half double crochet stitches into the ring, then pull that tail tight to close the ring. Join with a slip stitch to the top of your beginning chain 2, and you’ve got your first round of 12 stitches total.
Now comes the fun part – watching your hat crown grow! For Round 2, chain 2 again, then work 2 half double crochet in each stitch around. You’ll end up with 24 stitches when you join this round.
Round 3 follows the same increase pattern but with a twist: chain 2, work 1 half double crochet in the same stitch, then alternate between 1 half double crochet in the next stitch and 2 half double crochet in the following stitch all the way around. This gives you 36 stitches total.
The magic number to remember is 12 additional stitches per round. Keep following this increase pattern until your crown reaches the right diameter for your size. For a baby hat, you’ll want 4.5 inches across (about 48 stitches), while a toddler needs 5 inches (60 stitches), child size needs 5.5 inches (72 stitches), and adult sizes range from 6 to 6.5 inches (72-96 stitches depending on head size).
Here’s a pro tip that saves so much heartache: measure your crown diameter frequently. Lay your work completely flat and measure across the widest point. If it’s cupping up like a bowl, you need more increases. If it’s ruffling like a lettuce leaf, you’ve increased too quickly and might need to frog back a round.
Body & Ribbing – crochet delaney hat tutorial part 2
Once your crown hits the perfect diameter, it’s time to transition from the flat top to the sides of your hat. This is where the Delaney Hat really starts looking like, well, a hat!
Your transition round is beautifully simple: chain 2, then work 1 half double crochet in each stitch around without any increases. This round is like telling your hat “okay, we’re done growing outward, now we’re growing downward.”
Now we get to the technique that gives the Delaney Hat its signature ribbed texture: half double crochet in back loops only. If you’ve never tried this before, you’re in for a treat. Instead of inserting your hook through both loops of each stitch (like you normally would), you’ll only go through the back loop.
Chain 2 to start each ribbing round, then work your way around inserting your hook through just that back loop of each stitch. The front loops you leave behind create those lovely raised ridges that look just like professional ribbing. Repeat this round until your hat reaches the right depth from crown to brim.
For baby hats, work 4-5 inches from the crown. Toddler sizes need 5-6 inches, child sizes want 6-7 inches, and adult hats look best at 7-8 inches deep. Don’t worry about being exact – try the hat on (or on your intended recipient) as you go.
Here’s a game-changing tip for a professional finish: try the invisible join technique instead of regular slip stitches. When you finish a round, cut your yarn leaving about 6 inches, thread it through a mix needle, and draw it through the top of your beginning chain from front to back, then down through the last stitch. This creates an almost invisible seam that makes your hat look store-bought.
If you’re loving the hat-making process, our comprehensive Crochet Hats Tutorial has tons more techniques to explore.
Finishing Spirals – crochet delaney hat tutorial part 3
Here’s where the Delaney Hat transforms from “nice beanie” to “wow, where did you get that?” The spiral finish is what makes this pattern truly special, and honestly, it’s easier than you might think.
Don’t fasten off after your last ribbing round – you’ll work the spirals directly from the edge of your hat. This is where the magic happens!
To create each spiral, chain 15-20 stitches (longer chains make bigger, more dramatic spirals). Then skip 3-4 stitches along your hat edge and slip stitch into the next stitch. The chains will naturally want to curl and twist – let them! That’s exactly what creates the spiral effect.
For the most balanced look, aim for 6-8 spirals total around your hat opening. Here’s the math made easy: count your total stitches and divide by the number of spirals you want. If you have 72 stitches and want 8 spirals, skip about 9 stitches between each spiral chain.
The beauty of this technique is that it doesn’t have to be perfect. If your spirals are slightly uneven or your spacing isn’t exact, it just adds to the handmade charm. Crochet is supposed to have personality!

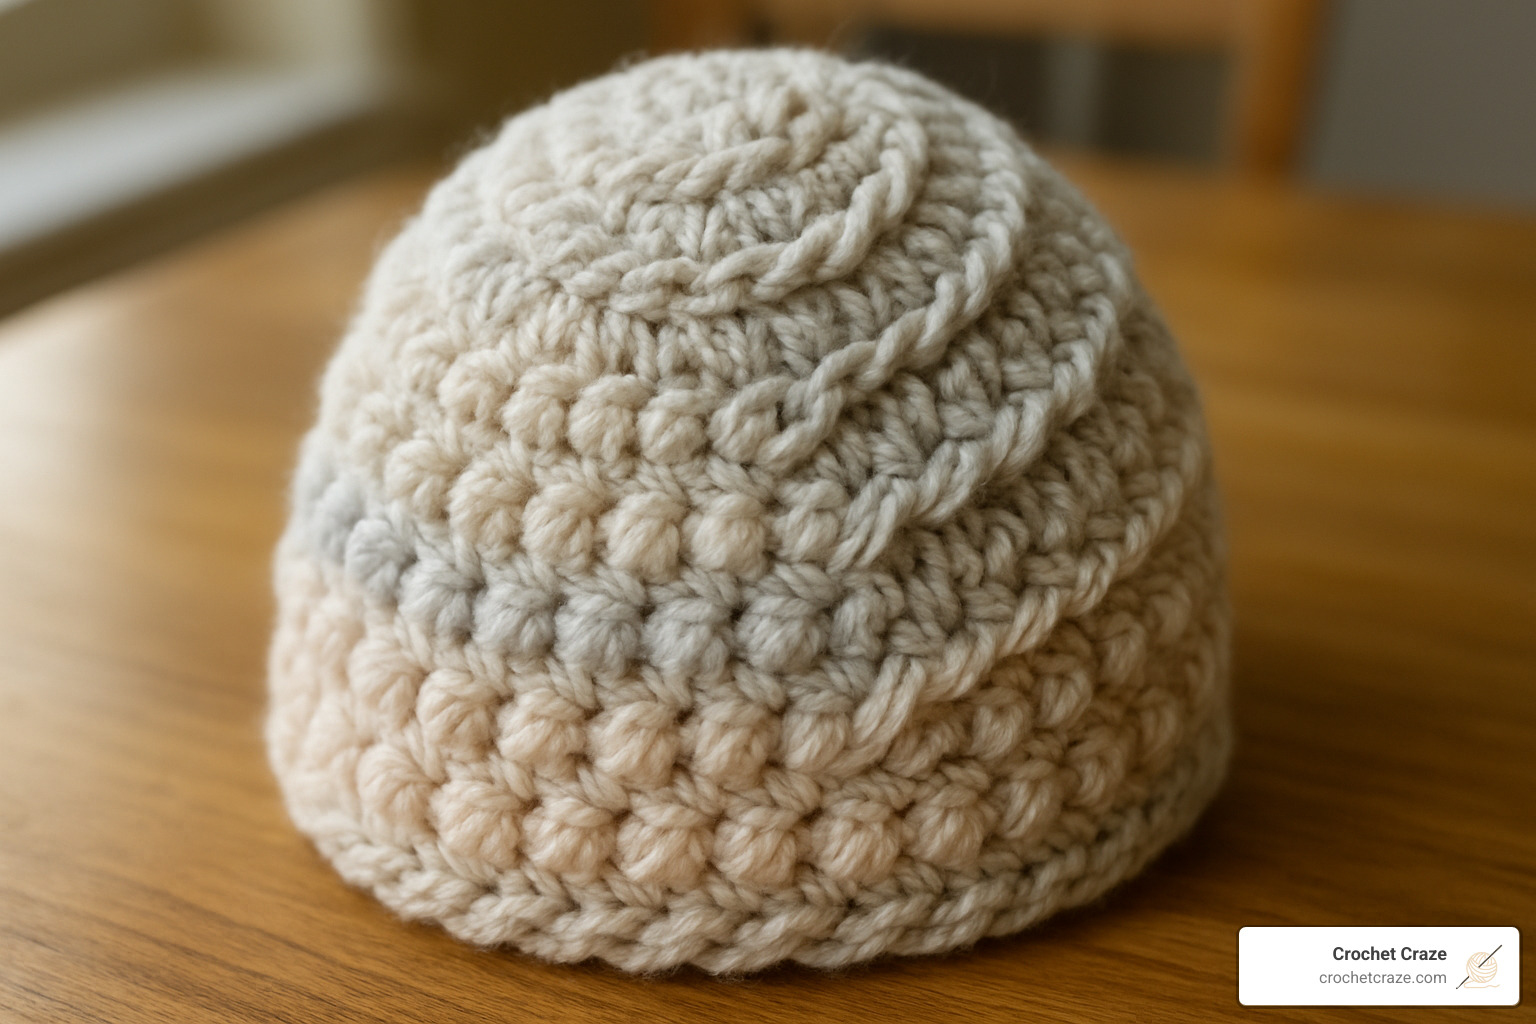
After creating all your spiral chains, fasten off securely and weave in that end really well – you don’t want a spiral coming loose after all this work! The spirals will curl naturally, but you can encourage them by gently twisting each chain with your fingers.
Some crocheters like to add a small pom-pom right in the center of the spiral cluster for extra flair. If this appeals to you, attach it securely through the original magic ring using a long mix needle and strong thread.
Give your finished spirals a gentle stretch and shape with your fingers. They’ll maintain their twisted, playful appearance through normal wear and even washing. Congratulations – you’ve just completed your first Delaney Hat!
Customize, Troubleshoot & FAQs
The beauty of our crochet delaney hat tutorial lies in how easily you can make each hat uniquely yours. Whether you want to add your personal touch or solve a pesky problem that’s driving you crazy, we’ve got you covered with tried-and-true solutions.
Color blocking transforms a simple hat into something spectacular. Try switching colors every few rounds in the crown section, or create a bold contrast between the crown and ribbed body. The ribbed texture looks especially stunning when worked in a different shade than the main hat color.
Embellishments open up endless possibilities. Small appliques, decorative buttons, or even embroidered details can turn your basic Delaney Hat into a work of art. Just remember to secure everything well – nobody wants to lose a beautiful button on the first wear.
Yarn swaps let you experiment with different textures and weights. Cotton creates a more structured hat perfect for spring weather, while wool blends offer cozy warmth for winter trips. Alpaca yarn adds incredible softness that feels luxurious against your skin.
When you’re ready to explore variations and connect with other crocheters, the ravelry.com Delaney Hat page remains a treasure trove of inspiration and community wisdom. You’ll find countless photos of finished projects and helpful tips from fellow crafters.
Quick note about online browsing: If you’re shopping for patterns and prefer to avoid targeted ads, you can learn about your options in the Help Center Personalized advertising section.
Quick Custom Tweaks
Stripe math doesn’t have to make your head spin. Simply divide your total body rounds by the number of colors you want to use. Planning 20 body rounds with 4 colors? Work 5 rounds of each color. Always change colors at the beginning of a round for the cleanest look possible.
Faux-fur poms create an neat alternative to the traditional spiral finish. Cut a 4-inch circle from faux fur fabric, gather the edges with running stitches, stuff lightly with fiberfill, then pull tight and attach to your spiral center. The result looks professionally made.
Button spiral accents add personality without overwhelming the design. Sew small decorative buttons at the base of each spiral chain. Wooden buttons complement natural fibers beautifully, while bright plastic buttons make children’s hats extra playful.
Fixing Common Challenges
Tight brims frustrate even experienced crocheters, but the fix is simpler than you might think. Usually, this happens when we work too tightly during the ribbing rounds. Go up one hook size for the body section only, or switch from back-loop-only to regular half double crochet stitches.
Loose spirals that won’t hold their twist need firmer tension during the chain rounds. Your chains should feel secure but not puckered. If your spirals are already finished but too floppy, try light steam blocking to help set their shape.
Laddering seams create visible lines where rounds join together. Pay attention to your beginning chain height – chain 2 works for most half double crochet rounds, but you might need chain 3 if gaps persist. The invisible join technique we mentioned earlier eliminates this problem completely.
Crown sizing issues catch many beginners off guard. A crown that cups inward needs more increases per round, while a ruffling crown has too many increases. Count your stitches carefully and fix sizing problems early – it’s much easier than trying to adjust a finished hat.
Care & Washing
Your finished Delaney Hat deserves proper care to maintain its shape and those gorgeous spirals through many seasons of wear.
Hand washing keeps your hat looking its best. Fill a basin with cool water and gentle wool wash, then submerge your hat and squeeze gently – never wring or twist. Let it soak for 10-15 minutes before rinsing thoroughly with cool water.
Reshaping spirals while the hat is still damp helps them remember their twisted position. Gently twist each spiral chain back into shape, taking advantage of the moisture to reset the yarn fibers.
Drying flat prevents stretching and maintains the hat’s proper dimensions. Lay your hat on a clean towel away from direct heat and sunlight, reshaping it to the correct size. Avoid hanging, which can stretch the ribbing beyond repair.
Storage matters more than most people realize. Keep your hat flat or loosely folded to preserve those spiral shapes. A hat box works perfectly, but even a dedicated drawer keeps everything protected from crushing under heavier items.
Conclusion & Next Steps
What an amazing journey you’ve completed with our crochet delaney hat tutorial! You’ve just created something truly special – a hat that combines simple stitches with a creative spiral crown that makes people smile. Those basic techniques you mastered, like working in the round and creating texture with back loop only stitches, are building blocks you’ll use in countless future projects.
The Delaney Hat isn’t just another beginner pattern. It’s your introduction to understanding how simple crochet techniques can create sophisticated results that look way more complicated than they actually are. The confidence boost from finishing this project will carry you forward as you tackle new challenges in your crochet journey.
At Crochet Craze, we believe every beginner deserves clear instructions and encouraging guidance. This tutorial shows our commitment to breaking down techniques that might seem intimidating into manageable steps that actually make sense. We want you to succeed, and we know you can.
Your next steps could take you in so many exciting directions. Try making matching hats for your whole family – imagine everyone wearing their own Delaney Hat in different colors! Share your finished creation on social media with #CrochetCraze so we can celebrate your success. We love seeing what our community creates.
Consider experimenting with different yarn textures or color combinations for your next hat. Maybe try stripes, or use that gorgeous variegated yarn you’ve been saving. Each variation teaches you something new about how yarn behaves and how colors work together.
Ready to plan your next project? Our Crochet Pattern Planner helps you organize your hat-making trips and track your progress across multiple projects. It’s like having a crafting buddy who remembers everything for you.
The crochet community welcomes you with open arms. Don’t hesitate to ask questions, share your wins, or seek advice on customizations. Every experienced crocheter started exactly where you are right now – with enthusiasm, basic skills, and the willingness to keep learning.
Each hat you make will be better than the last. Your hands now know the rhythm of consistent stitches and the satisfaction of creating something both beautiful and useful. The muscle memory you’ve developed makes future projects faster and more enjoyable.
Happy hooking, and welcome to the wonderful world of crochet hat making! Your Delaney Hat is just the beginning of many cozy, creative trips ahead.