Get ready to fall in love with amigurumi patterns. These are tiny crochet stuffed toys that help you learn fast. Amigurumi comes from Japan and is all about crocheting small dolls and animals.
It’s perfect for beginners because it’s quick, cute, and easy to carry around. You can start with small projects to learn stitches and shapes. This way, you can finish without feeling overwhelmed.
This article will guide you through amigurumi tutorials and tips. You’ll learn how to go from simple shapes to more detailed ones. You’ll discover the secret to tighter stitches and how to start your project right.
It also covers the importance of stitch markers and special needles. You’ll get clear steps on stuffing, shaping, and sewing. Plus, you’ll learn how to fix common mistakes to keep your work looking great.
Are you ready to start crocheting? Begin with small projects and practice your skills. Each finished toy will boost your confidence faster than you think.
Key Takeaways
- Amigurumi patterns are ideal for learning because small projects build stitch speed and finishing skills.
- Choose easy amigurumi and beginner amigurumi patterns to practice magic circle, single crochet, and increases.
- Use a slightly smaller hook for tighter stitches and fewer gaps when stuffing.
- Stitch markers, stitch counts, and bent-tip tapestry needles make assembly and sewing easier.
- Follow amigurumi tutorials for stuffing, shaping, and clean color changes to get pro results.
Why Amigurumi Is the Perfect Skill-Builder for Crocheters
Amigurumi is a mix of crochet and making stuffed toys into small, fun projects. It’s a Japanese art of crocheting tiny creatures and figures. These quick projects give you fast results and make you want to do more.
Learning amigurumi means doing short, focused practice sessions. Small projects help you master single crochet, increases, and decreases. This repetition makes these skills easy and natural.
What amigurumi means and why it’s so addicting
Amigurumi is charming and gives instant results. Making a tiny head or a cute ball shows progress in minutes. This quick feedback makes you want to keep going and finish more projects.
How small projects accelerate stitch mastery
Small projects force you to focus on key techniques. You practice rounds, count stitches, and work on tension in short sessions. Tips like using a smaller hook and magic rings help you improve faster.
Benefits for beginners and experienced crocheters
Beginners build confidence by finishing projects and learning finishing techniques. Experienced crocheters refine invisible decreases and shaping tricks for better results.
Being portable is a big plus. You can work on a tiny amigurumi anywhere. This makes it great for travel and short breaks.
To start, check a curated gallery at crochet amigurumi characters. Use stitch markers and a row-counter app to avoid mistakes. Save embroidery for the end to ensure facial details are perfect.
| Skill Focus | How Amigurumi Helps | Quick Tip |
|---|---|---|
| Single Crochet | High repetition in small rounds builds consistency | Practice with DK yarn and a slightly smaller hook |
| Increases/Decreases | Frequent shaping tasks teach curve creation fast | Start with simple spheres and cones |
| Finishing & Sewing | Small parts make placement and invisible joins essential | Pin pieces before stitching |
| Tension Control | Short projects expose tension issues quickly | Switch hooks if stuffing shows through |
| Portability | Mini projects fit in a pouch for on-the-go practice | Keep a small kit with yarn, hook, and tapestry needle |
Choosing the Right Materials for Success
You want your amigurumi to look great and last long. The right yarn is key for clear stitches, durability, and easy sewing.
Yarn types: acrylic, cotton, and when to use each
Cotton is great for detailed faces and toys that need to keep their shape. It gives crisp stitches. Acrylic is cheaper and comes in many colors, making it perfect for kids’ toys and when you need lots of shades.
Wool and carded fibers feel nice but might fuzz or shed. Brands like Lanas Rubí and Lion Brand suggest medium-weight yarns for quick and consistent work. Always test a small swatch to see how it looks before you start.
Hook sizes and the rule of thumb: go down a size for tighter stitches
For tight stitches, use a crochet hook size smaller than the yarn label suggests. For example, use 3.5 mm if the label says 4–5 mm.
Your tension changes with the yarn and your mood. If stitches are too loose, use a smaller hook. If they’re too tight, use a larger one. Keep a small swatch to compare and find the right hook size.
Essential tools: tapestry needles (including bent-tip), stitch markers, stuffing, safety eyes
Good tools make amigurumi easier and faster. A bent-tip tapestry needle helps with sewing by making it easier to turn corners. Make sure you have at least one for tight spots.
Stitch markers help keep your work organized. Use paperclips or a piece of yarn if you don’t have markers. Polyfill is good for light stuffing, while carded wool is firmer. Attach safety eyes before closing the head, and have small stuffing sticks and sharp scissors ready for final touches.
You can find kits that include everything you need. For more on crochet, check this guide on crochet wearables.
| Material | Strengths | When to choose |
|---|---|---|
| Cotton | Excellent stitch definition, low stretch, crisp finish | Faces, small details, toys that must hold shape |
| Acrylic | Affordable, wide color range, easy care | Play toys, color-heavy projects, beginner practice |
| Wool / Carded | Warm texture, natural fibers | Decorative pieces or tactile projects where fuzz is okay |
| Tools (needles, markers) | Bent-tip tapestry needle for sewing, markers for rounds | Any project needing clean joins and consistent rounds |
amigurumi patterns
Look for patterns that use simple language. Check the materials list and the abbreviation key first. This helps you understand terms like BLO, FLO, or slst quickly.
How patterns are structured: rounds, stitch counts, and abbreviations
Most patterns use rounds, not rows. Each round ends with a stitch count. This lets you check your work as you go.
For example, if a pattern says R5: sc x 30, you should have thirty stitches at the end of round five.
Pattern structure amigurumi relies on consistency. You’ll find a materials list, an abbreviation chart, and stitch counts after each row. These counts help you spot mistakes early.
Reading stitch notation and common pattern conventions
Designers use bracketed repeats and multipliers to save space. For instance, R9: sc, [sc, 2 inc] x 6, sc means start with a single crochet, then work six repeats of (single crochet, increase), and finish with a single crochet.
Learning amigurumi abbreviations makes reading patterns easier. Notations like BLO or dec tell you how stitches will shape your work. If you’re unsure, watch a tutorial or follow a photo guide in the pattern.
Knowing skill level labels and choosing patterns that match your abilities
Difficulty tags help you choose the right project. Beginners should start with simple, round shapes. Look for patterns with clear stitch counts and spelled-out abbreviations.
Try a small free pattern to test your skills. Start with a chick or mini carrot, then move to a bunny or octopus when you’re ready. For beginner-friendly options, check out free amigurumi patterns.
| Pattern Element | What to look for | Why it matters |
|---|---|---|
| Materials list | Yarn weight, hook size, safety eyes | Ensures gauge and final size match the designer’s intent |
| Abbreviation key | Definitions for sc, inc, dec, BLO, FLO | Prevents misreading and reduces counting errors |
| Rounds stitch counts | Stitch totals after each round (e.g., R7: sc x 42) | Helps you verify shape and catch mistakes early |
| Notation examples | Bracketed repeats like [sc, 2 inc] x 6 | Makes long instructions compact and predictable |
| Skill level label | Beginner, Intermediate | Matches project complexity to your current skills |
Starter Patterns That Are Cute, Quick, and Skill-Boosting
Ready to dive into the world of amigurumi? Start with projects that teach you how to shape, stitch tightly, and finish without getting tired. Choose patterns that can be finished in a few hours. This way, you’ll feel a sense of accomplishment and grow your skills fast.
Beginner favorites
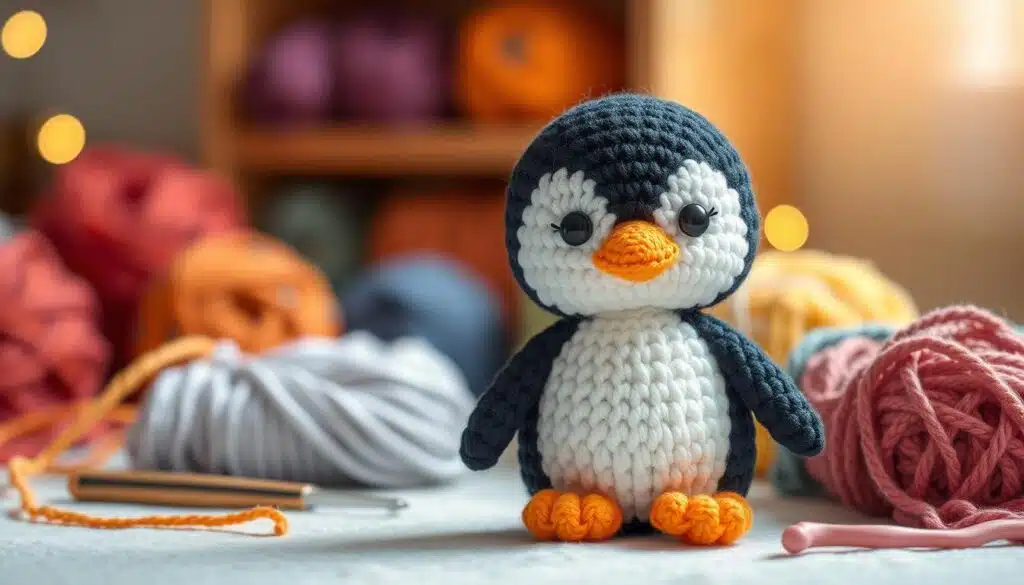
Start with designs like chick and penguin amigurumi. They use basic rounds and simple joins. The Woobles’ Penguin and Chick patterns guide you through each step, making them perfect for beginners.
Simple ball-shaped critters help you keep even tension and sew features neatly. Small projects teach you important finishing techniques, which are more valuable than endless practice rows.
Progression patterns for intermediates
When you’re ready to level up, try patterns with texture and new stitches. Party Octopus and Norman the Sheep introduce bobble stitches, half-double crochets, and front/back loop work. These patterns will stretch your skills.
Red Heart’s Flopsy bunny is great for those in between. Sunny the Elephant adds double crochet increases, helping you master shape and rhythm.
Free pattern resources and designer recommendations
Many free amigurumi patterns are available on yarn brand sites and crafty blogs. Lanas Rubí and collections like “10+ Free Amigurumi Patterns” offer reliable, tested tutorials. This lets you practice without buying materials first.
For a hassle-free start, try amigurumi kits. Kits, like Pierre the Penguin or Kiki the Chick bundles, include everything you need. This makes them perfect for gifting or a distraction-free start.
Choose patterns that match your skill level and practice small techniques until they feel natural. For a guided start, check out crochet project guides for beginners. They offer patterns and pacing that fit your goals.
| Project | Skills Introduced | Time | Recommended For |
|---|---|---|---|
| Chick amigurumi | Magic ring, single crochet, basic shaping | 2–3 hours | Complete beginners |
| Penguin amigurumi | Color change, simple shaping, sewing parts | 3–4 hours | Beginners gaining confidence |
| Ball-shaped critter | Tension control, invisible seam | 1–2 hours | Practice pieces |
| Flopsy bunny (Red Heart) | Shaping with increases, limb attachment | 4–6 hours | Advanced beginner / intermediate |
| Party Octopus | Bobble stitch, tentacle shaping | 4–6 hours | Intermediate |
| Norman the Sheep | Textured body, loop/bobble work | 5–7 hours | Intermediate |
| Amigurumi kits (e.g., penguin or chick kits) | All-in-one materials, guided pattern | Varies | Beginners who want convenience |
Core Techniques Every Amigurumi Maker Should Master
You want neat starts, smooth shaping, and joins that vanish like magic. Start by learning the magic ring amigurumi method for a tight center. This keeps stuffing from peeking through. If a chain-start feels safer at first, practice both; you will notice the difference in finished limbs and heads.
Next, get comfortable with single crochet amigurumi as your basic unit. Single crochet stitches build the fabric; increases add volume; decreases taper and sculpt. Master the invisible decrease to make shaping subtle and professional. This technique hides the join and keeps faces and seams clean.
Decide whether to work in continuous rounds or use joined rounds based on the look you want. Continuous rounds give a seamless spiral and smoother surfaces, while joined rounds create a faint seam you can use as a design line. When you choose continuous rounds, move a stitch marker each rotation and count carefully to avoid mistakes.
Place your stitch marker in the top two loops of the first stitch of a round and move it at the start of each new round. Count the “V”s on the top of the work to track your stitches. If something looks wavy, adjust your increase pattern. If it cups inward, try a larger hook or add increases.
To secure a magic ring, thread the starting tail through the wrong side of Round 1 stitches, loop back and skip a stitch on the return, repeat once more, then pull tight and trim the tail. That simple step prevents loosening over time and helps the right side present beautifully without turning your work later. For extra tips on working in the round, see crochet in the round guidance.
Practice these moves in short sessions. A tight magic ring, steady single crochet amigurumi, confident invisible decrease, and deliberate use of continuous rounds will lift your projects from cute to pro-level in no time.
Stuffing, Shaping, and Getting Pro Results
Getting the right balance between firm and soft makes your amigurumi look handmade, not homemade. Watch how the fabric stretches as you add filling. This tells you if you need more or less stuffing to keep the shape without lumps.
How much stuffing is “just enough” — avoid overstuffing and puckering
Start by adding small amounts and feel the piece as you go. If stitches start to strain or you see polyfill through the yarn, take some out. Under-stuffed parts will pucker and collapse. Overstuffed parts will distort curves and show stuffing.
Shaping with increases/decreases to create curves and contours
Use strategic increases and decreases to define the nose, belly, or a banana curve. Place increases where you want volume and decreases where you want taper. The exact placement determines whether a limb is rounded or flat. Thoughtful amigurumi shaping gives simple rounds realistic anatomy.
Even stuffing techniques and tools to help
Tools matter. A stuffing stick, blunt-tipped tool, or the back end of a pencil lets you push polyfill into tight spots like fingers, noses, and between seams. Stuff limbs lightly before closing and add firmer fill to heads and bodies so pieces sit and sew cleanly. Work one small section at a time to distribute fill evenly.
When you finish, smooth the surface with gentle pressure so the form reads as one shape. That final step unifies your amigurumi shaping and keeps seams neat for years of play or display.
Color Changes, Embellishments, and Finishing Touches
You want neat stripes, expressive faces, and accessories that make your amigurumi sing. Plan where each color band will sit and practice the color change on a swatch. This ensures the seam looks crisp. For clear guidance on timing and techniques, check practical tutorials at crochet tutorials.
Change yarn on the final yarn-over of the stitch before the new color begins. This single move gives you a clean edge without loose strands showing. If you work with dark yarn, pick a lighter practice color so you can see your stitches while you master color changes amigurumi.
Timing the Switch
Keep your tail tidy by catching it inside the next few rounds. Use short tails for thin stripes and longer tails when you plan to weave in a decorative surface. A consistent tension keeps striping even and prevents puckers along joins.
Facial Mapping
Leave your amigurumi embroidery until after assembly. Stitching once the piece is stuffed and assembled helps you avoid shifted features. Pin the eyes, nose, and mouth in place, step back and tweak until the expression reads right.
Embroider with Purpose
Use small, deliberate stitches when doing amigurumi embroidery so lines stay smooth on curved surfaces. For delicate features, use a single strand of embroidery floss. If you prefer a bolder look, try two strands or a small satin stitch for a little shine.
Eyes, Felt, and Tiny Extras
Insert safety eyes before you close the head for secure placement. If you want to audition positions, use pins first so you can move them without leaving marks. Felt bits can be glued or sewn for cheeks and beaks when you need a flat finish.
Personalize with Accessories
Add scarves, hats, bows, or tiny buttons to turn a simple toy into a character. Amigurumi accessories are an easy way to layer personality. Try mixing yarn textures or adding a small crocheted flower for contrast.
| Finishing Task | Quick Tip | Best For |
|---|---|---|
| Color changes | Switch color on final YO; weave tails in over 3–4 rounds | Stripes, color-block pieces |
| Embroidery | Pin placement after stuffing; use single-strand for subtle lines | Eyes, mouths, whiskers |
| Safety eyes | Insert before closing head; use washers for toddlers’ toys | Shiny, reflective eyes |
| Felt accents | Glue for quick fixes; sew for durability | Cheeks, small shapes, signs |
| Accessories | Make removable pieces for playability and washing | Hats, scarves, tiny bags |
Practice makes confident finishes. When you want a deeper dive into stripe tricks and clean joins, take a look at a beginner-friendly guide at amigurumi for beginners. Your next project will benefit from tidy color changes amigurumi, careful amigurumi embroidery, thought-out safety eyes placement, and delightful amigurumi accessories that give each toy its own voice.
Sewing and Assembling Like a Pro
You want your amigurumi to look great and last through playtime. Start by pinning first to see where things go and avoid uneven faces or limbs. Pin one piece at a time or pair up like arms to check if they’re even before sewing.
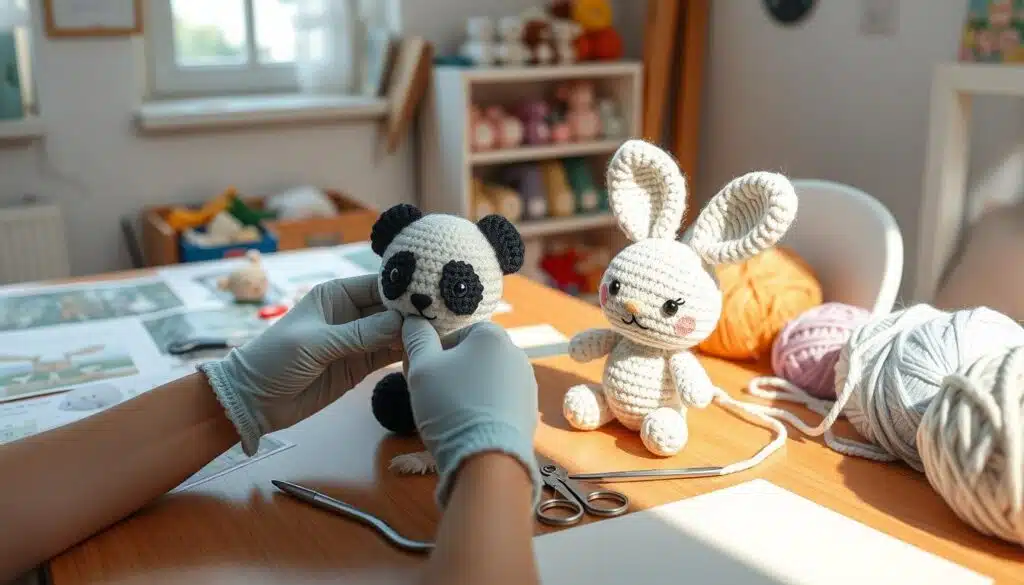
Choose the right tools and needle for the job. A bent-tip tapestry needle makes sewing curved pieces and tight seams easier. Many prefer it because it’s less straining on the hands and speeds up sewing.
Use long yarn tails and a strong joining method. Techniques like mattress-stitch hide seams well. Whipstitch works too, if you sew carefully. For an invisible join, sew small, even stitches and pull gently to close without puckering.
Pin placement tricks help line up facial features. Mark the center line and plot eye and nose positions with pins. Step back and squint; small adjustments now save you from unpicking later.
When attaching limbs, thread tails through stuffing to anchor joints. Sew through a few stitches twice on high-traffic parts like arms and legs for strength. This simple reinforcement keeps pieces secure during handling and washing.
For neck and head joins, pull the body and head together with a cinching technique that draws fabric tight around the seam. Weave tails several rows deep so the connection sits flush and the stuffing won’t show through.
The following quick reference compares common sewing approaches and when to use them so you can assemble amigurumi with confidence.
| Method | Best for | Strength | Finish |
|---|---|---|---|
| Mattress-style hidden stitch | Body joins, flat seams | High | Nearly invisible |
| Whipstitch with even tension | Curved edges, small parts | Medium | Clean if pulled tight |
| Cinch-and-weave for heads | Head-to-body joins | Very high | Flush, gap-free |
| Double-pass reinforcement | Arms, hands, well-handled toys | Very high | Secure, slightly visible |
Troubleshooting Common Amigurumi Problems
Stuck on a lumpy head or a gap that shows stuffing? You’re not alone. This guide offers quick fixes for common amigurumi issues. Follow these tips to save your project and improve your troubleshooting skills.
Holes in your work: Big gaps often mean your tension is too loose or your hook is too big. Try using a smaller hook and hold the yarn tighter. If the pattern suggests a bulky hook, try the next smaller size to hide stuffing. For holes that won’t go away, stitch a round of single crochet in the back loops only or weave the tail through wrong-side stitches to cinch the magic ring.
Pointy or uneven shapes: A point can appear when your tension tightens after loose initial rounds. You can restart or add a compensating round. Use extra decreases or a single increase to smooth the silhouette. Identify the right side early and orient pieces as you go. Push the magic circle snug to prevent flipping and odd bulges in small stitch-count areas.
Counting mistakes: Missing an increase or skipping a round wrecks shaping fast. Mark the first stitch of each round with a stitch marker or a safety pin. Keep a simple paper log of rounds and increases; the act of writing helps catch errors. Row-counter apps like Row Counter or Stitchy can help, but a pen-and-paper list is reliable when you swap needles or pause projects.
Quick fixes and prevention: Recount when you resume work. If a mistake shows up several rounds later, rip back to the last correct marker and rework only that segment. Secure loose starts by sewing the magic ring tail through wrong-side stitches, as described earlier in the guide, to stop the beginning from loosening over time.
| Problem | Likely Cause | Simple Fix |
|---|---|---|
| Visible stuffing / large holes | Loose amigurumi tension or oversized hook | Drop one hook size; tighten yarn hold; add a back-loop round |
| Pointy head or uneven curve | Tension changed after starting; small stitch counts flipped | Restart or add shaping rounds; identify right side early; snug magic circle |
| Missed increases / wrong shaping | Poor stitch counting amigurumi or lost round start | Use stitch markers; keep a paper log; recount before resuming |
| Starts loosening over time | Untidy magic ring tail or unsecured joins | Sew tail through wrong-side stitches to anchor; weave ends securely |
Conclusion
Amigurumi is a fun way to improve your crochet skills. Start with a simple pattern like a chick or penguin. Use a medium-weight yarn and a hook that’s one size smaller than recommended.
Learn the magic ring, single crochet, and invisible decreases. These stitches are key to amigurumi. Practice until they become second nature.
Count your stitches and use stitch markers to keep track. A bent-tip tapestry needle helps with neat joins. Proper stuffing is important to avoid puckering.
Pin pieces before sewing to ensure they’re even. These steps will make finishing your projects easier and more rewarding.
Begin with short, simple projects. Mistakes are opportunities to learn. Leave embroidery for last and add personal touches.
Enjoy making tiny characters from yarn. Focus on these basics to learn amigurumi quickly. You’ll see improvement fast.
The key takeaway is to start simple, use the right tools, and practice well. With dedication, you’ll soon be proud of your amigurumi creations.
FAQ
What is amigurumi and why is it so addicting?
Amigurumi is a Japanese craft of making small stuffed animals. It’s loved because projects are quick and fun. You can finish a cute critter in just a few hours.
How do small amigurumi projects speed up my stitch mastery?
Small projects make you repeat key stitches fast. This quick feedback helps you improve your skills. You can learn tension and shaping without spending weeks on one piece.
Should beginners try amigurumi, or is it just for experienced crocheters?
Both beginners and experienced crocheters can enjoy amigurumi. Beginners get confidence from quick projects. Experienced crocheters refine their skills with small patterns.
What yarn should I use for amigurumi?
Cotton is good for clear stitches and shape. Acrylic is affordable with many colors. Wool may fuzz but is soft. Choose medium-weight yarns for control.
How do I choose the right hook size?
Use a hook one size smaller than the yarn label suggests. Tight stitches hide stuffing and prevent holes. Adjust based on your tension and yarn brand.
What essential tools do I need for amigurumi?
You’ll need tapestry needles, stitch markers, stuffing, safety eyes, scissors, and stuffing sticks. These tools help with sewing and stuffing.
How are amigurumi patterns usually written?
Patterns are in rounds with stitch counts after each round. They include a materials list and abbreviations. Follow each round and count stitches for shape.
I see notation like R9: sc, [sc, 2 inc] x 6, sc—how do I read that?
It means in Round 9, start with a single crochet. Then repeat the sequence (single crochet, 2 single crochets in next stitch) six times. Finish with a single crochet. The bracket shows the repeated pattern and the multiplier tells you how many repeats.
How do I pick patterns that match my skill level?
Look for patterns labeled as beginner, intermediate. Beginners start with simple shapes like chicks and penguins. Intermediates try patterns with bobbles and front/back loop work.
What are good starter patterns you recommend?
Beginners like simple chicks and penguins. For a bit more challenge, try Red Heart’s Flopsy bunny. Intermediate patterns include an octopus or a sheep to learn bobbles and front/back loop techniques.
Where can I find free patterns or kits?
Many yarn brands and blogs offer free patterns. Kits include yarn, eyes, and a pattern. Look for collections or brand-specific kits.
What is the magic ring and why should I learn it?
The magic ring makes a tight starting round. It’s better than long-chain starts for small stuffed parts. It gives a neat finish.
How do I secure a magic ring so it won’t loosen?
Thread the starting tail through the wrong side of Round 1 stitches. Sew it clockwise and back counter-clockwise twice. Pull tight and trim. This anchors the tail so your ring won’t loosen.
Which stitches should I master first?
Start with single crochet, increases, decreases, and invisible decrease. The invisible decrease gives neater shaping and is a game-changer for professional-looking results.
Should I work in continuous rounds or joined rounds?
Continuous rounds avoid visible seams but require careful stitch counting. Joined rounds have a visible seam but are easier to track. Learn to identify right side vs. wrong side—orient your work early (nudge the magic circle) to avoid flipping later.
How much stuffing should I use?
Stuff until the piece holds shape without stitches stretching. Overstuffing stretches yarn; under-stuffing causes puckers. Aim for firm but not ballooned, and stuff limbs lightly before closing.
How do increases and decreases shape a piece?
Strategic placement of increases and decreases creates curves and contours. Follow the pattern’s stitch placement to get the intended three-dimensional shape.
What tools help get stuffing into tiny spots?
Use stuffing sticks, the back of a crochet hook, blunt knitting needles, or specialized stuffing tools. These tools help push polyfill into noses, between seams, and limb tips for even shaping.
When and how should I change colors for clean lines?
Change color on the final yarn over (YO) of the stitch before the new color is needed. This keeps stripes and color blocks crisp and tidy.
Should I embroider the face before or after assembly?
Do embroidery last. Pin facial features and accessories in place first, then stitch after sewing parts together. This avoids misplacement caused by shifting during assembly and stuffing.
When should I insert safety eyes?
Insert safety eyes before you close the head, while you have access inside. This way, you can secure washers and add stuffing around the eye posts for a stable placement.
Any tips for personalizing amigurumi?
Use felt for small details, add tiny accessories like scarves or hats, and experiment with stripes or color changes. Try different yarn textures and embroider unique expressions to give each toy character.
How do I pin parts to avoid lopsided faces and limbs?
Pin one part at a time or pin symmetrical pairs, then step back and compare sides. Use stitch markers or safety pins to mark positions, adjust until balanced, and only then sew for a centered, even look.
Why use a bent-tip tapestry needle?
Bent-tip needles make sewing curved pieces easier and reduce finger contortions. They help you get into tight seams and speed up assembly, making small or deep amigurumi joins easier.
What sewing techniques give invisible joins?
Mattress-stitch-like methods, whipstitch with hidden joins, and weaving long tails through several stitches produce tidy, secure seams. For high-traffic parts, sew through stitches twice and weave tails inside the body for durability.
Why am I getting holes in my work?
Holes often mean your hook is too large or tension is too loose. Switch to a smaller hook and tighten your hold. Using a smaller hook than the label recommends usually solves stuffing-showing holes.
What causes pointy or uneven shaping and how do I fix it?
Uneven tension, early rounds, can create points as your tension evens out. Restart if needed, or compensate with additional rounds or strategic increases/decreases. Orient the right side early by nudging the magic circle to avoid flips.
How do I fix counting mistakes mid-project?
Use stitch markers to mark round starts and keep a paper log or row-counter app. If you spot a mistake, rip back to the last known good round or frog just enough to fix the stitch count; small projects make corrections fast and educational.
Any final practical tips for faster progress?
Use smaller hooks, secure magic rings, count stitches with markers or a paper log, leave embroidery until the end, and try a bent-tip tapestry needle for assembly. Start with a beginner-friendly chick or penguin, and keep projects short to build skills quickly.