crochet stitch guide: 10 Powerful Tips for Amazing Results 2025
Starting on Your Crochet Journey: The Essential Stitch Guide
Looking for a comprehensive crochet stitch guide? Here are the six essential stitches every beginner should master:
- Chain stitch (ch) – The foundation of most crochet projects
- Slip stitch (sl st) – For joining and creating flat seams
- Single crochet (sc) – Creates dense, sturdy fabric
- Half double crochet (hdc) – Balanced height and density
- Double crochet (dc) – Taller stitch with nice drape
- Treble crochet (tr) – Creates height and openwork texture
A crochet stitch guide is your roadmap to creating beautiful handmade items with just a hook and yarn. Learning these fundamental techniques opens up a world of creative possibilities – from cozy blankets to stylish garments. The beauty of crochet lies in its accessibility; with just a few basic stitches, you can begin crafting immediately, then gradually expand your repertoire as your confidence grows.
Starting with a simple chain stitch, you’ll build the foundation for virtually every crochet project. From there, learning the variations in height and texture created by different stitches allows you to customize your work for specific purposes – whether you need the sturdy fabric of single crochet for amigurumi toys or the airy drape of treble crochet for neat shawls.
I’m Sonji Huerta, a newcomer to crochet who’s documenting my journey through learning various techniques in this crochet stitch guide. As I master each stitch, I’m excited to share both the challenges and triumphs that come with developing this rewarding skill.

Find more about crochet stitch guide:
– basic crochet stitches printable
– how to do a basic crochet stitch
Understanding Crochet Fundamentals
Before we dive into the wonderful world of stitches, let’s take a moment to build a solid foundation. Think of these fundamentals as the roots that will support your entire crochet journey – the stronger they are, the more your skills will flourish!
What Is Crochet & How Do Stitches Work?
When I first picked up a crochet hook, I was fascinated by how a simple tool and strand of yarn could create such beautiful fabric. At its heart, crochet is a rhythmic dance between your hook and yarn, creating interlocked loops that build upon each other.
Unlike knitting (crochet’s cousin) which juggles multiple active loops on needles, crochet typically works with just one active loop at a time. This makes it wonderfully forgiving for beginners – dropped a stitch? No worries! It won’t solve like knitting might.
The magic happens when you wrap yarn around your hook (called a “yarn over”) and pull this new yarn through existing loops. Each stitch is essentially a variation on this theme – changing how many times you yarn over and which loops you work through creates different heights, textures, and densities in your fabric.
As I practiced, I finded that crochet has a beautiful rhythm to it. Your hands develop a muscle memory that eventually feels as natural as breathing. The gentle clicking of your hook and the soft pull of yarn create a meditative experience that many crocheters (myself included) find deeply calming.
Essential Supplies Checklist
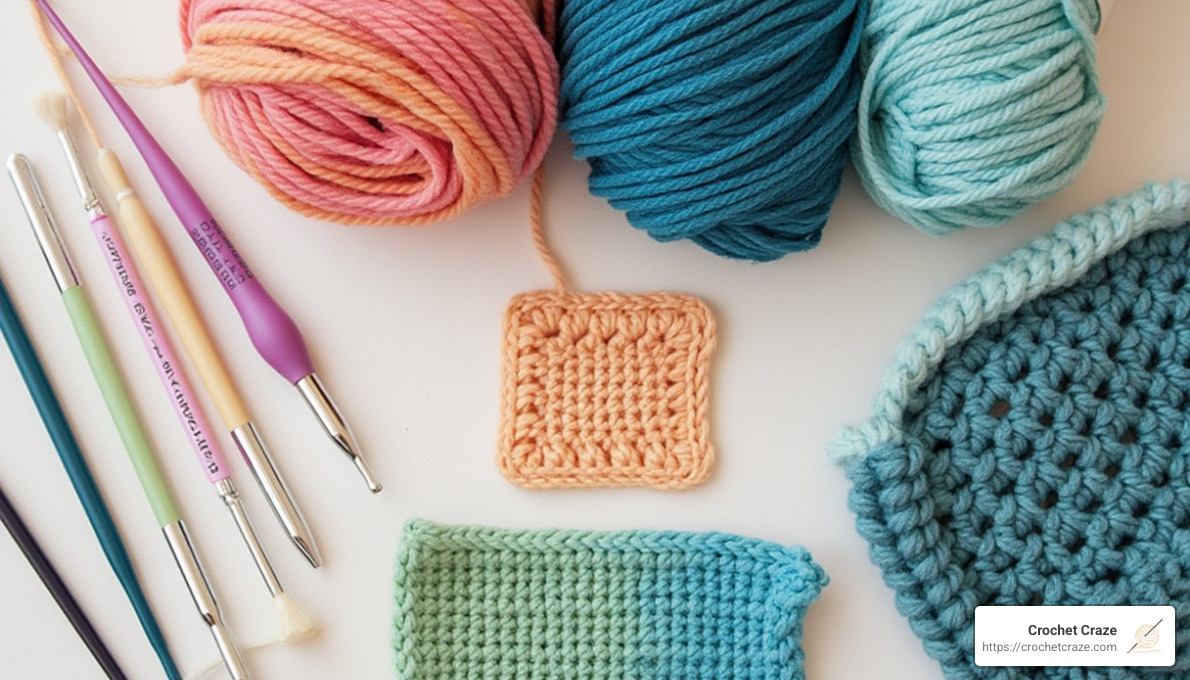
When I started crocheting, I was relieved to find I didn’t need an elaborate setup or expensive equipment. You only need a few basic tools to begin your journey:
Your most important tool is a comfortable crochet hook – I recommend starting with a medium-sized hook (US size H/5.0mm) which feels comfortable in most hands. Aluminum hooks are slick and fast, while ergonomic hooks with cushioned grips can prevent hand fatigue during longer sessions.
For yarn, choose a medium-weight (worsted/size 4) in a light color. Dark yarns hide your stitches, making learning more difficult! Light colors like cream, light blue, or pale yellow will help you clearly see each stitch as you form it.
Round out your toolkit with some sharp scissors for cutting yarn, a few stitch markers (or safety pins in a pinch) to mark important spots in your work, a mix needle for weaving in ends, and a measuring tape to check your progress.
Not sure which hook is best for beginners? Check out our detailed guide on the Best Crochet Hook to Start With for personalized recommendations based on your comfort and project needs.
Why This Crochet Stitch Guide Matters
When I first began crocheting, I felt overwhelmed by the seemingly endless variety of stitches. That’s exactly why I created this crochet stitch guide – to provide the roadmap I wish I’d had!
Learning stitches in a thoughtful progression builds your confidence as each new technique builds upon skills you’ve already mastered. It’s like learning to walk before you run. Starting with a chain stitch, then single crochet, and gradually working up to taller stitches creates a natural learning path that prevents frustration.
Different stitches serve different purposes in your projects. Single crochet creates a dense, sturdy fabric perfect for amigurumi toys or kitchen dishcloths. Double crochet works up quickly with more drape, making it ideal for scarves and blankets. Understanding these differences helps you choose the right stitch for each project.
As one of our community members, Sarah from Ohio, told me: “After struggling with random YouTube tutorials, finding a structured guide changed everything. I went from feeling confused to completing my first baby blanket in just two weeks!”
Plus, once you understand how stitches work, reading patterns becomes so much easier. Those cryptic abbreviations suddenly make sense when you know what each stitch actually does!
How to Steer This Crochet Stitch Guide
I’ve designed this guide to grow with you, from your very first chain to complex textured stitches. Here’s how to get the most from your learning journey:
Start at the beginning, even if you’ve crocheted a little before. Reviewing fundamentals often reveals small technique improvements that make a big difference. I thought I knew how to hold my yarn correctly until I revisited the basics and finded a more efficient tension method!
Take time to practice each stitch thoroughly before moving on. I recommend making a small 4″x4″ swatch of each new stitch – this gives your hands time to develop muscle memory. Don’t worry if your early swatches look a bit wonky; mine certainly did!
Bookmark this guide to use as a reference when working on projects. Even experienced crocheters keep stitch guides handy for refreshers on less-used techniques.
Everyone learns differently. Some stitches might click immediately while others require more practice. That’s completely normal! I struggled with treble crochet for weeks before it suddenly made sense.
Combine this guide with our video tutorials for a multi-sensory learning experience. Some concepts are easier to grasp when you can see them in motion, then reinforce with written instructions.
The most important thing to remember? Every expert crocheter started exactly where you are now – with a hook, some yarn, and the determination to learn. Your hands will feel awkward at first, but with practice, the movements will become second nature. I promise!
The Core Crochet Stitch Guide: From Slip Knot to Treble
Welcome to the heart of our crochet stitch guide where we’ll explore the essential stitches that will form the foundation of your crochet journey. Think of these six stitches as your crochet alphabet – once you master them, you’ll be able to “spell” virtually any project your heart desires!
Making a Slip Knot & Foundation Chain
Every crochet trip begins with a humble slip knot – that first magical loop that connects your yarn to your hook.
To create a slip knot, form a loop with your yarn (leaving a tail of about 4-6 inches), then pull a second loop of working yarn through your first loop. Slide this new loop onto your hook and gently snug it up – but not too tight! You’ll need to work into this first stitch later.
With your slip knot securely on your hook, you’re ready to create your foundation chain. Hold your hook comfortably in your dominant hand while managing the yarn with your other hand. Wrap the yarn over your hook from back to front (we call this a “yarn over” or “YO”), then pull this new yarn through the loop on your hook. Congratulations – you’ve just made your first chain stitch! Repeat this motion until you have the number of chains your pattern requires.
I still remember making my first chain – it looked more like a twisted telephone cord than a neat row of stitches! Don’t worry if yours isn’t perfect either. With practice, your chains will become more even.
Your foundation chain has two sides – the front with V-shaped loops and the back with little bumps. While you can work into either side, many crocheters prefer the back bumps because they create a cleaner-looking edge. When I finded this trick, it completely transformed the appearance of my projects!
For a more detailed breakdown of these foundation techniques, our guide on How to Do a Basic Crochet Stitch provides step-by-step instructions with helpful visuals.
Chain Stitch (ch) – Your Project’s Spine
The chain stitch isn’t just for getting your project started – it’s a versatile element used throughout your crochet journey. Think of chains as the connective tissue of crochet, serving multiple purposes:
They create your foundation row, act as turning chains at the beginning of rows to create height, form airy spaces in lacy patterns, and can even stand alone as decorative cords or fringe.
Different stitches require different numbers of turning chains to match their height. Here’s a handy reference: single crochet needs 1 chain (which typically doesn’t count as a stitch), half double crochet needs 2 chains, double crochet requires 3 chains, and treble crochet needs 4 chains. The taller chains usually count as your first stitch in the row, but always check your pattern – some designers have their own preferences!
Single Crochet (sc) – Dense & Versatile
Single crochet creates a firm, sturdy fabric that’s perfect when you need structure and durability. It’s the shortest of the basic stitches, creating a dense fabric with minimal gaps.
To work a single crochet, insert your hook into the specified stitch, yarn over and pull up a loop (giving you two loops on your hook), then yarn over again and pull through both loops. That’s it!
This stitch is incredibly versatile – it’s perfect for amigurumi (those adorable stuffed creatures), washcloths that can take some scrubbing, sturdy market bags, and warm winter accessories. When I made my first single crochet washcloth, I was amazed at how the simple rhythm of the stitch became almost meditative.
Ashley from The Loopy Lamb shares wonderful insights in her Single Crochet Tutorial, noting that this stitch is truly fundamental for beginners. Her step-by-step photos are especially helpful for visual learners.
Half Double Crochet (hdc) – Speed Meets Texture
Half double crochet is that perfect middle-ground stitch – not too short, not too tall, with a lovely texture that works for so many projects. I like to think of it as the “Goldilocks” of crochet stitches!
To create a half double crochet, yarn over once before inserting your hook into the stitch. Pull up a loop (giving you three loops on your hook), then yarn over and pull through all three loops at once. The result is a stitch taller than single crochet but shorter than double crochet.
This versatile stitch is wonderful for blankets since it works up faster than single crochet while still creating a warm, cozy fabric. It’s also great for hats with a bit of stretch and garments that need some structure without being stiff. The unique third loop created by half double crochet also opens up interesting texture possibilities as you advance in your skills.
Double Crochet (dc) – Drape & Coverage
Double crochet is where many crocheters find their rhythm – it’s tall enough to see quick progress while still creating a lovely, versatile fabric with natural drape.
To work a double crochet, yarn over once, insert your hook into the stitch, and pull up a loop (three loops on hook). Next, yarn over and pull through the first two loops, then yarn over again and pull through the remaining two loops.
The beauty of double crochet lies in its efficiency and versatility. It’s perfect for garments that need to flow and move with your body, blankets you’d like to finish before the season changes, and beautiful shawls with just the right amount of drape. One of our Crochet Craze community members shared, “Double crochet is my go-to stitch when I need a mental health day – it works up quickly enough to give me that satisfaction of seeing progress, but still requires just enough focus to quiet my busy mind.”
Treble Crochet (tr) – Lacy Heights
Treble crochet (sometimes called triple crochet) creates beautiful height and openness in your fabric. It’s the tallest of our basic stitches, perfect for creating airy, lacy designs.
To create a treble crochet, yarn over twice before inserting your hook. After pulling up a loop (giving you four loops on your hook), you’ll work through them two at a time: yarn over and pull through two loops, yarn over and pull through two loops again, and finally yarn over and pull through the last two loops.
Treble crochet shines in projects where you want light, flowing fabric with beautiful drape – think neat shawls, summer garments, and decorative edgings. The height of this stitch also makes it economical with yarn while creating lovely movement in your finished pieces. When I made my first treble crochet wrap, I was amazed at how quickly it worked up and how luxuriously it draped around my shoulders!
Slip Stitch (sl st) – Invisible Joins & Edges
Don’t let its simplicity fool you – the slip stitch is the unsung hero of crochet! This shortest, flattest stitch might not build fabric on its own, but it’s essential for finishing techniques and creating smooth edges.
Working a slip stitch is beautifully simple: insert your hook into the designated stitch, yarn over, and pull directly through both the stitch and the loop already on your hook in one smooth motion.
Slip stitches are perfect for joining rounds without adding height, creating nearly invisible seams when joining pieces together, traveling across a row without adding height, and even creating subtle texture in special stitch patterns. I’ve found slip stitch to be particularly useful when I need to join new yarn or fasten off discreetly – it’s like the ninja of crochet stitches, doing important work while staying out of sight!
Combining Basics: Moss & Granny Stitch Primer
Once you’ve gotten comfortable with the basic stitches, you can begin combining them to create beautiful textured patterns. Two beginner-friendly combinations to try are the moss stitch and granny stitch.
The moss stitch (also called granite or linen stitch) alternates single crochet stitches with chain spaces to create a woven-looking fabric that’s beautifully flat and reversible. To work it, chain an even number, single crochet in the fourth chain from your hook, then alternate chain 1, skip 1 chain, single crochet in the next chain across the row. On subsequent rows, you’ll work single crochets into the chain spaces from the previous row.
The classic granny stitch works in clusters of three double crochets separated by chain spaces. While traditionally worked in rounds for granny squares, you can also work this stitch pattern in rows for beautiful blankets, scarves, and garments. The spaces between clusters create a lovely, lacy effect that works up quickly.
For a handy reference to keep by your side while learning these essential stitches, our Basic Crochet Stitches (Printable) provides clear illustrations you can refer to whenever you need a quick refresher.
Mastering these basic stitches is like learning to walk before you run. Take your time, practice each one until it feels comfortable in your hands, and soon you’ll be combining them with confidence to create beautiful, unique projects!
Reading Patterns, Symbols & Abbreviations
Once you’ve mastered the basic stitches, you’re ready to tackle the next challenge – understanding crochet patterns. Think of this as learning to read a new language, one that will open up thousands of beautiful projects.
Decoding Common Abbreviations
When I first looked at a crochet pattern, I felt like I was trying to decode a secret message! Those mysterious abbreviations are actually a shorthand that makes patterns more concise and easier to follow once you know what they mean.
The most common abbreviations you’ll encounter include ch for chain, sc for single crochet, and dc for double crochet. You’ll also see terms like rep (repeat), tog (together), and those mysterious asterisks ( … ) that indicate sections to repeat.
“I remember staring at my first pattern completely confused,” shares Maria, one of our Crochet Craze community members. “But once I learned what those abbreviations meant, it was like someone turned on the lights!”
When working with a new pattern, I recommend keeping a cheat sheet nearby with common abbreviations. The Craft Yarn Council has standardized most of these terms, so they’ll be consistent across most patterns you find.
Understanding Stitch Diagrams
If written instructions make your head spin, you might be a visual learner who would benefit from stitch diagrams. Also called symbol crochet, these visual charts show exactly what your project should look like.
In a stitch diagram, each type of stitch has its own symbol – a small cross for a single crochet, a T-shape for a double crochet, and so on. The beauty of diagrams is that they visually represent the height of stitches and exactly where your hook should go. This makes complex stitch patterns much easier to understand at a glance.
Many international patterns rely heavily on diagrams, which is wonderful because it means you can follow patterns from around the world even if you don’t speak the language! You simply read from bottom to top for rows, and counter-clockwise for rounds.
“Stitch diagrams transformed my crochet journey,” explains Janelle, a crochet instructor. “I could suddenly ‘see’ how the stitches fit together in a way written instructions never conveyed.”
Tips to Conquer Your First Written Pattern
Taking on your first written pattern might feel intimidating, but with a few strategies, you’ll be crocheting with confidence in no time.
Before you pick up your hook, read through the entire pattern first. This gives you a roadmap of what’s ahead and helps identify any unfamiliar terms you might need to look up. I like to highlight row numbers or use a pattern tracker app to keep my place.
Stitch markers are your best friends when following patterns. Place them at the beginning of rounds or to mark pattern repeats. This simple tool has saved me countless hours of frustration!
Don’t be afraid to count your stitches at the end of each row, especially when you’re starting out. Catching a mistake early is much easier than trying to fix it several rows later. Trust me on this one – I’ve learned the hard way!
If you encounter a technique you’re not familiar with, our How to Read a Pattern Guide offers detailed explanations and troubleshooting tips.
Every expert crocheter once struggled with their first pattern. “I had to rip out my first project three times before I got it right,” confesses Sam, another Crochet Craze reader. “Now I can read patterns without even thinking about it. It becomes second nature with practice.”
Take your time, be patient with yourself, and soon you’ll be reading patterns as easily as you’re reading this crochet stitch guide. The satisfaction of completing your first pattern-based project is absolutely worth the learning curve!
Shaping, Increasing & Decreasing Like a Pro
Now that you’ve mastered the basic stitches and can read patterns, it’s time to add some curves and dimension to your crochet! Shaping is what transforms flat fabric into three-dimensional pieces—it’s the magic that creates the crown of a hat, the curve of a sweater sleeve, or the roundness of an amigurumi toy.
Standard Increases (2 sts in 1)
Increasing is simply adding stitches to make your work wider. The most common way to do this is by working two stitches into the same space—like magic, one stitch becomes two!
When I first learned to increase, it felt like I was cheating somehow—surely crochet couldn’t be this forgiving! But that’s the beauty of it. To make a basic increase, you simply work one stitch as normal into your designated stitch, then instead of moving on, you work a second stitch right into that same space. Voilà—you’ve added an extra stitch!
For projects worked in the round, like a circle for the base of a basket or hat, even spacing of your increases is crucial. The standard formula for a flat circle follows a predictable pattern: 6 increases in round 1, then 12 in round 2, and so on. This creates those beautiful ripple blankets and perfectly flat circle bases that lie smooth without any unwanted ruffling.
“I remember being so proud when I finally crocheted my first flat circle without it looking like a potato chip,” shared one Crochet Craze community member. That moment of achievement is worth the practice!
Decreases (sc2tog, dc2tog, tr2tog)
If increases add stitches, decreases do the opposite—they neatly remove stitches to narrow your work. Think of them as combining two stitches into one, which creates tapering and shaping.
The single crochet decrease (sc2tog) is like a little magic trick. You start a single crochet in one stitch but don’t finish it, then start another in the next stitch, and finally complete both together. It sounds complicated, but with practice, it becomes second nature:
Begin by inserting your hook into a stitch and pull up a loop, then insert your hook into the next stitch and pull up another loop. With three loops now on your hook, yarn over and pull through all three loops at once. You’ve just turned two stitches into one!
Double crochet decreases (dc2tog) follow the same principle but with the added yarn overs of double crochet. These decreases are essential for shaping hat crowns (that satisfying spiral at the top!), creating armholes in sweaters, shaping necklines, and tapering edges for a polished finish.
The gentle slope created by well-placed decreases is what gives handmade garments their professional look. As one crocheter noted, “Learning to decrease properly was the difference between my hats looking homemade and handmade.”
Working In the Round & Magic Ring
Many of our favorite projects—hats, stuffed animals, granny squares—work in continuous rounds rather than back-and-forth rows. This creates seamless fabric perfect for three-dimensional items.
There are two main approaches to working in the round. Joined rounds are like completing a circle—you finish each round with a slip stitch to the first stitch, then chain up to begin the next round. This creates a visible “seam” but gives you a clear starting point for each round. Spiral rounds, on the other hand, continue without joining, creating a seamless spiral (perfect for amigurumi where you don’t want any visible breaks).
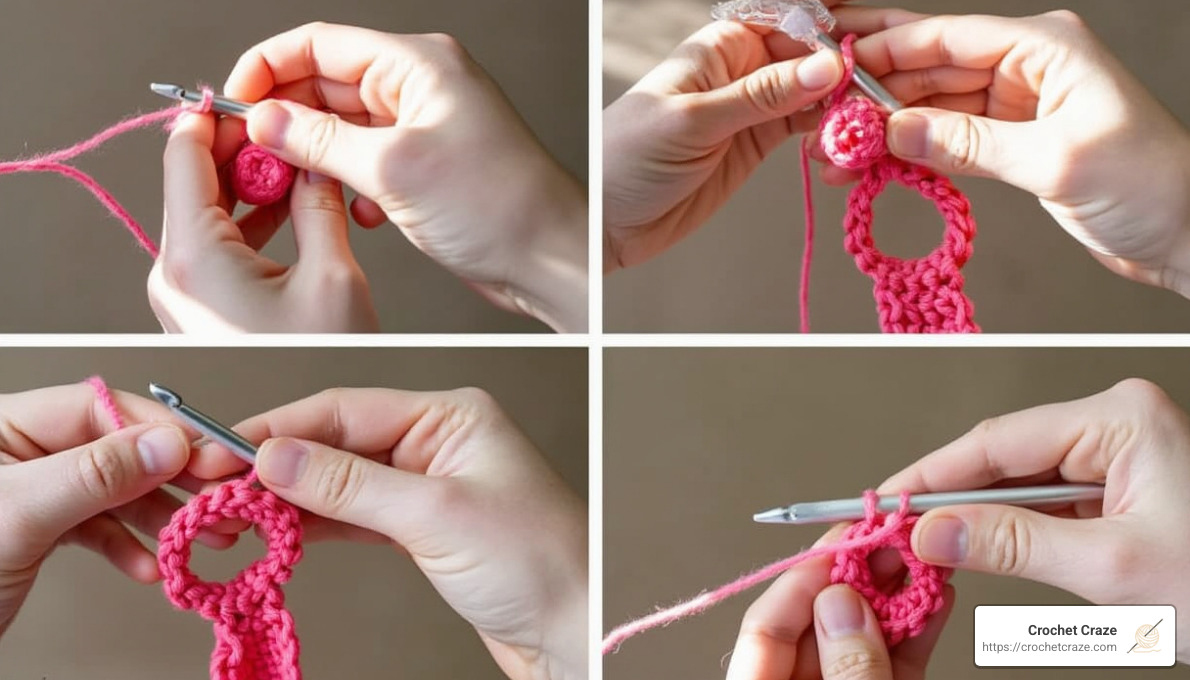
The magic ring (or magic circle) is perhaps the most satisfying technique to master for projects worked in the round. Unlike starting with a chain and joining it (which often leaves a hole), the magic ring creates a completely adjustable center that can be pulled tight.
The first time I successfully completed a magic ring, I felt like I’d performed actual sorcery! You create a loop with your yarn, crochet your stitches directly into this loop, and then—the magical part—pull the tail to close the ring completely, leaving no hole. It’s particularly wonderful for amigurumi (no stuffing escaping!), granny squares (no center gaps), and the tops of hats.
“The magic ring changed my amigurumi game completely,” one crocheter told us. “No more stuffing peeking through that first chain circle!”
With increases, decreases, and working in the round in your skill set, you’ve graduated from flat fabric to the exciting world of three-dimensional crochet. These techniques open up endless possibilities for creating shaped, curved, and rounded projects that truly showcase your developing crochet mastery.
Troubleshooting & Mastering Tension
Let’s face it – even the most experienced crocheters run into snags sometimes. The good news? Every crochet challenge has a solution, and mastering these fixes will make your crafting journey much more enjoyable.
7 Common Beginner Mistakes & How to Fix Them
Have you ever looked at your project and wondered why it doesn’t quite match the pattern photo? You’re not alone!
Inconsistent tension is perhaps the most common challenge for beginners. When your stitches alternate between too tight and too loose, your project can look uneven. Try developing a comfortable rhythm as you work, and consider how you hold your yarn – many crocheters wrap it around specific fingers to maintain consistent control. With practice, your muscle memory will develop and your tension will naturally even out.
Accidentally increasing or decreasing happens to everyone! You’re happily crocheting along when suddenly you realize your rectangular scarf is turning into a trapezoid. The simplest solution is to count your stitches at the end of each row. Place a stitch marker in the first and last stitch of your rows until you develop the eye for spotting them naturally.
That sneaky last stitch can be particularly hard to spot, especially with certain stitch patterns. It often hides and gets skipped, causing your edges to slope inward. Until you’re comfortable identifying it, mark it with a stitch marker or safety pin.
Working into the wrong part of stitches creates unintentional holes or twisted fabric. Take time to really examine your stitches and identify the top two loops where you’ll typically insert your hook. Good lighting makes a huge difference here!
Turning chain confusion trips up many beginners. Different stitches require different turning chain heights (single crochet needs 1 chain, half double needs 2, double needs 3, and treble needs 4). Some patterns count the turning chain as a stitch while others don’t – always check your pattern instructions.
Tight foundation chains can make working your first row incredibly frustrating. If you find yourself struggling to insert your hook, try using a hook one size larger just for your foundation chain, or explore chainless foundation techniques that create both your chain and first row simultaneously.
Inconsistent stitch height creates wavy, uneven edges. Make sure you complete each yarn over fully and pull through the correct number of loops for each stitch type. A little attention here goes a long way toward professional-looking results.
For more detailed troubleshooting guidance, our Mastering Your Crochet: A Guide to Fixing Common Mistakes walks you through solutions with helpful visuals.
Yarn Management Hacks
Nothing disrupts the peaceful rhythm of crochet quite like wrestling with tangled yarn. Fortunately, a few simple techniques can keep your yarn flowing smoothly.
Center-pull yarn balls are a game-changer. Instead of pulling from the outside (which makes the ball bounce and roll), pull from the center for stationary, tangle-free crocheting. Just be prepared for the occasional “yarn barf” when too much comes out at once!
Yarn bowls are both beautiful and functional. These ceramic bowls feature a curved notch that guides your yarn while keeping the ball contained. As one of our Crochet Craze community members shared, “I used to fight my yarn constantly until I started using a simple coffee mug to hold my ball. Game changer!”
If you’re working with multiple colors, try making yarn butterflies – small hand-wound mini-skeins that prevent tangling when you’re carrying colors across your work. For larger color sections, yarn bobbins keep everything organized and tangle-free.
For joining new yarn, the Russian join technique creates seamless connections without knots or tails to weave in later. This method is especially valuable for projects where the wrong side will be visible.
Frogging & Lifelines Without Tears
“Frogging” (named for the “rip it, rip it” sound reminiscent of a frog’s croak) is the process of undoing your work to fix mistakes. While it can feel disheartening to undo your hard work, it’s a normal part of crocheting that even experts do regularly.
For minor fixes, simply pull your hook out and gently tug the working yarn to undo stitches one by one. For more extensive corrections, use a mix needle to carefully frog back to a row before your mistake, then reinsert your hook.
One sanity-saving technique is using lifelines – pieces of smooth scrap yarn threaded through a row of stitches before attempting complicated sections. If you make a mistake, you can frog back to your lifeline rather than starting completely over.
Frogging isn’t failure – it’s a commitment to creating something you’ll truly love. As one of our favorite crochet saying goes, “Professionals are just amateurs who were willing to frog their work until they got it right.”
With these troubleshooting techniques in your toolkit, you’ll be able to tackle challenges with confidence and keep your crochet stitch guide practice moving forward smoothly!
Finishing Touches: Fastening Off, Blocking & Care
The journey from yarn to finished project doesn’t end with your last stitch. Those final finishing touches transform your handmade creation from “homemade-looking” to “wow, you made that?” professional quality. Let’s explore these essential finishing techniques that lift your crochet work.
Fasten Off & Weave Like a Ninja
We’ve all been there – you’ve completed your beautiful project only to have those pesky yarn tails threatening to solve your hard work. Properly securing your work isn’t just functional; it’s part of creating a polished finished piece.
When you reach the end of your project, cut your yarn leaving a generous 4-6 inch tail. Yarn over one last time and pull this tail completely through the loop on your hook, then give it a gentle tug to create a secure knot. This simple action – called “fastening off” – prevents your work from solveing.
But what about those tails? This is where you can truly become a “weaving ninja.” Thread your yarn tail through a mix needle and weave it through the back of several stitches, changing direction at least once. For extra security (especially important for items that will see frequent washing), weave through tight stitches or inside post stitches where the yarn is less likely to work loose.
“I used to just knot my ends and trim them short,” admits Sarah, one of our Crochet Craze community members. “But after my daughter’s first handmade hat solveed in the wash, I learned my lesson about proper weaving!”
For projects like amigurumi where even the tiniest knot might be visible, try the invisible finish-off technique. This clever method hides the final knot inside your work, creating a seamless finish that looks professionally made.
Wet, Steam & Spray Blocking
Blocking might seem like an optional step, but it’s often the magic that transforms good crochet into great crochet. This process helps even out your stitches, defines stitch patterns, and gives your finished piece its proper shape.
Different fibers respond best to different blocking methods:
Wet blocking works wonders for natural fibers like wool, cotton, and linen. Fully submerge your piece in lukewarm water (add a bit of wool wash for animal fibers), gently squeeze out excess moisture without wringing, then lay it flat on a blocking board or towel. Pin it to your desired measurements and let it dry completely – usually overnight.
Steam blocking is perfect for wool and wool blends that might stretch with wet blocking. Pin your dry piece to shape, then hold a steamer or iron (set to steam but never touching the fabric!) about an inch above the surface. The steam will relax the fibers without the risk of stretching.
Spray blocking offers a quick solution for small items or minor adjustments. Pin your piece to shape, then lightly mist with water from a spray bottle until evenly damp. Allow to dry completely.
“Blocking isn’t many stitchers’ favorite task,” as one experienced crocheter told me, “but the first time you see what it does to lacework, you’ll be a convert.” She’s right – the change can be truly remarkable, especially for openwork patterns and garments.
Adding Edgings & Simple Seams
A thoughtfully chosen edging doesn’t just frame your work beautifully – it can also prevent curling edges and add structural stability. Even the simplest edging can lift a basic project.
Simple single crochet edging creates a clean, professional finish. Work single crochet stitches evenly around all edges, taking care to maintain consistent tension. This basic edging works for virtually any project, from blankets to garments.
For something more decorative, try a shell edging by working groups of 5 double crochet stitches into one stitch, then skipping stitches between shells. This creates a lovely scalloped effect perfect for baby blankets or feminine garments.
Picot edging adds a delicate touch with minimal effort. Simply chain 3 and slip stitch into the first chain to create small, decorative bumps along your edge.
When it’s time to join separate pieces, your seaming technique can make or break your project. A slip stitch seam offers a quick solution – simply hold pieces together with right sides facing and slip stitch through both layers.
For a nearly invisible join, the mattress stitch is worth mastering. This clever technique mimics the structure of your stitches, creating a seam that virtually disappears into your work. It’s especially valuable for garments where bulky seams would detract from the design.
The humble whip stitch shouldn’t be overlooked either. This simple over-and-over stitch with a mix needle creates a secure, flexible join that works well for amigurumi and three-dimensional projects.
Proper finishing doesn’t just improve appearance – it also affects the longevity and functionality of your creation. A well-finished piece will withstand washing, wearing, and the test of time, ensuring your handmade treasures can be enjoyed for years to come.
Level‑Up Library: Intermediate & Advanced Stitches to Explore
Ready to expand your crochet repertoire? Once you’ve gotten comfortable with the basics, a whole playground of exciting textures and patterns opens up to you! Think of this section as your treasure map to the next level of your crochet journey.
Textured Favorites (Waffle, Bobble, Puff)
There’s something deeply satisfying about running your fingers over a richly textured crochet piece. These three-dimensional stitches transform flat fabric into tactile works of art that beg to be touched.
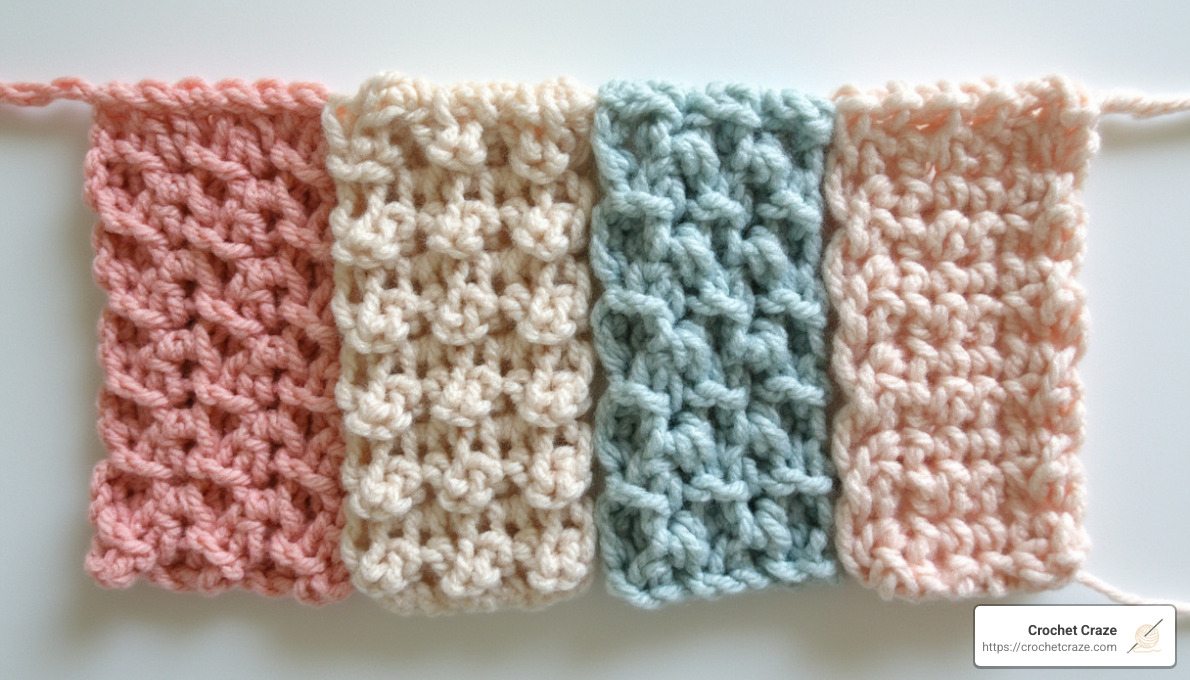
The waffle stitch creates that beloved grid pattern we all recognize from our favorite breakfast food. By alternating front and back post double crochets, you build a fabric with delightful depth that traps warmth, making it perfect for cozy blankets you’ll want to snuggle under on chilly evenings. Many of our community members tell me this stitch becomes almost meditative once you get into its rhythm.
“The first time I completed a waffle stitch dishcloth, I couldn’t stop touching it,” shares Marisa, one of our regular Crochet Craze students. “Now my family requests them as gifts every Christmas!”
If you’re looking for pronounced texture, the bobble stitch delivers delightful little bumps across your fabric. You create each bobble by working multiple unfinished double crochets into the same stitch, then closing them together at the top. They’re particularly adorable in baby blankets, where little fingers love exploring the raised surfaces. While they might look complicated, bobbles break down into simple steps that intermediate beginners can absolutely master.
Similar but with its own unique character, the puff stitch creates rounded pillowy sections that stand proud from your fabric background. These plush little clouds add wonderful dimension to blankets and scarves. I find puff stitches work up a bit faster than bobbles while still delivering that delicious texture that makes people ask, “How did you DO that?”
Eye‑Catching Lace (Solomon’s Knot, V‑Stitch)
Ready to create fabric that dances with light and shadow? Lacy stitches might look delicate, but they’re surprisingly sturdy and often work up quickly.
The Solomon’s Knot (also called Love Knot) creates neat, elongated loops that form an airy, ethereal fabric. It’s perfect for those flowing summer shawls that drape beautifully over your shoulders on breezy evenings. While it looks intricate, it’s mainly a clever manipulation of loop height. Many crocheters tell me they feel like they’re creating magic the first time they successfully work this stitch.
For a more structured approach to openwork, the V-Stitch offers beautiful results with minimal complexity. By working two double crochets into the same stitch with chains between groups, you create a fabric with delicate “V” shapes throughout. This versatile stitch works beautifully for market bags where you want that stretchy, open texture. I’ve used it countless times for lightweight summer tops that let the breeze through.
The mesh stitch pattern creates that perfect net-like fabric that’s functional and beautiful. It’s my go-to for produce bags and beach totes where you want the sand to fall through. What I love most about these lacy stitches is how they showcase the natural drape of your yarn while using less material – economical and gorgeous!
Statement Stitches (Crocodile, Star, Bullion)
When you’re ready to make jaws drop, these show-stopping stitches deliver the wow factor.
The crocodile stitch creates dramatic scales that seem to pop right off your fabric. Working five double crochets down and up around posts creates this distinctive texture that’s perfect for fantasy-inspired projects. My friend’s dragon-themed baby blanket using this stitch became an instant family heirloom. Yes, it takes more time and yarn than simpler stitches, but the results are absolutely worth it.
For a more subtle but equally impressive effect, the star stitch creates beautiful star-like patterns across your work. It’s particularly stunning in solid-colored yarns where the texture can really shine. Children’s items worked in star stitch have that special quality that says “made with extra love.” The first few stars might feel awkward, but soon your fingers will find their rhythm.
Perhaps the most technically challenging of this group, the bullion stitch involves multiple yarn overs wrapped around your hook, then pulled through in one motion. It creates tight coils that are perfect for floral motifs and special accents. I won’t lie – this one takes practice and patience, but the unique texture it creates simply can’t be replicated any other way.
A gentle word of caution: these more complex stitches can be harder on your hands, especially for extended periods. I’ve learned (the hard way) to take frequent breaks and use ergonomic hooks when working with these statement stitches. According to hand health experts at WebMD’s arthritis guidelines, varying your activities and maintaining proper positioning can help prevent strain.
Every expert crocheter was once a beginner trying these stitches for the first time. Be patient with yourself, celebrate small victories, and before you know it, you’ll be creating fabric that makes people ask, “How in the world did you make that?”
Quick Practice Projects for Beginners
There’s no better way to solidify your crochet skills than by putting them to work on actual projects. The satisfaction of creating something useful from just yarn and a hook is what makes this craft so rewarding. Let’s explore some beginner-friendly projects that use the stitches you’ve just learned.
Beginner Crochet Beanie Tutorial
A simple beanie is the perfect first “in-the-round” project – it’s practical, makes a wonderful gift, and helps you master essential techniques.
Working your first beanie is easier than you might think. Start with a magic ring and work 10-12 single crochets into it. The magic ring gives you that perfect, hole-free center that’s so important for hats. Then, you’ll increase evenly in each round until your circle reaches about 6-7 inches in diameter – just right for the crown of most adult heads.
Once your circle is the right size, you’ll work even rounds (no increases) until your beanie reaches your desired length. This is where you can really find your rhythm with your stitches. Many beginners find this meditative “cruise control” section quite enjoyable!
To finish, you might add a simple border of single crochet or experiment with one of the edgings we discussed earlier. The beauty of a basic beanie is its versatility – make it slouchy by adding more length, fold up the brim for a fisherman style, or add a pompom for a playful touch.
“My first beanie looked a bit wonky,” shares Melissa from our Crochet Craze community, “but I wore it proudly all winter, and by my third hat, they looked store-bought!”
For detailed, step-by-step instructions with photos, check out our Beginner Crochet Beanie Tutorial.
Simple Dishcloth Using Only sc & hdc
Dishcloths are truly the perfect beginner project. They’re small enough to finish quickly (instant gratification!), and any little mistakes or tension issues won’t affect how well they work. Plus, cotton yarn – which is ideal for dishcloths – provides excellent stitch definition that helps you see exactly what you’re doing.
To make a basic dishcloth, start by chaining 31. Work a single crochet in the second chain from your hook and in each chain across to create a row of 30 single crochets. For row 2, chain 1 (which doesn’t count as a stitch), turn your work, and single crochet across again. On row 3, you’ll switch things up with half double crochet – chain 2 (which counts as your first hdc), turn, and work half double crochet in each stitch across.
Continue alternating between rows of single crochet and half double crochet until your dishcloth is square, usually around 20-24 rows. If you’d like, add a simple single crochet border around all sides for a finished look.
The beauty of dishcloths is how they invite experimentation. Once you’ve mastered the basic pattern, try creating textured designs by mixing up your stitches – perhaps a checkerboard pattern or diagonal stripes. Each dishcloth becomes a small canvas for practicing new techniques without the commitment of a larger project.
“I keep a dishcloth project in my purse at all times,” one Crochet Craze reader told us. “They’re perfect for waiting rooms, commutes, or anytime I have a few spare minutes to stitch.”
Color‑Block Blanket in dc Rows
Ready for something a bit larger? A simple color-block blanket using double crochet is the perfect “level-up” project. Double crochet works up quickly, creating a soft, drapey fabric that’s perfect for snuggling.
Start by selecting 3-5 colors of the same yarn – this is a wonderful opportunity to play with color combinations you love. Chain to your desired width (a multiple of 2 plus 1 for the best results), making sure it’s not so wide that it becomes overwhelming for a first blanket project. A throw-sized blanket works well for beginners.
For your first row, work a double crochet in the fourth chain from your hook and in each chain across. The three chains you skipped count as your first double crochet. For all subsequent rows, chain 3 (which counts as your first double crochet), turn your work, and double crochet in each stitch across.
The magic happens when you change colors every 10-20 rows (or whatever rhythm appeals to you). There’s something deeply satisfying about watching color blocks emerge as your blanket grows. Continue until you reach your desired length, then consider adding a simple border to frame your creation.
“I love the speed of double crochet when I want to make something quickly and relax,” shared Jessica, a Crochet Craze community member. “My first color-block blanket became my evening crafting project – perfect for unwinding while watching TV, and before I knew it, I had a beautiful throw I still use years later.”
The rhythmic nature of a simple double crochet blanket makes it the ideal project for developing your tension consistency and stitch recognition. And unlike smaller projects, a blanket gives you plenty of practice time to really embed those muscle memories that will serve you throughout your crochet journey.
Your first projects don’t need to be perfect – they’re stepping stones on your creative path. Each stitch is practice, each project builds confidence, and before long, you’ll be tackling more complex patterns with ease.
Resource Hub & Community Connections
The journey of learning crochet becomes infinitely more rewarding when you connect with others who share your passion. As I’ve finded in my own crochet trips, having access to quality resources and a supportive community can transform frustrating moments into breakthroughs!
Videos, Printables & Stitch Libraries
Visual learning has been a game-changer for many crocheters, myself included. There’s something magical about watching someone’s hands work through a tricky stitch that written instructions just can’t capture.
When I first attempted the magic ring, I must have read the instructions twenty times before finally watching a video—and then it clicked in seconds! YouTube has become my personal crochet mentor, with channels dedicated to everything from basic stitches to complex techniques. Whenever I’m stuck, I search for the specific stitch or technique I’m struggling with and find multiple demonstrations.
For those moments when you need a quick reference without firing up your device, keep our Basic Crochet Stitches Printable nearby. Many crocheters laminate these guides or keep them in plastic sleeves in their project bags for quick consultation.
Online stitch libraries have also become invaluable resources for expanding your repertoire beyond the basics. These digital collections catalog hundreds of stitch patterns, often with difficulty ratings and suggested applications. And don’t overlook crochet apps, which offer handy tools for counting rows, calculating yarn requirements, and even translating international patterns!
For a comprehensive collection of visual tutorials covering all the stitches we’ve discussed in this crochet stitch guide, visit our Crochet Video Tutorials page. We’ve curated these specifically for beginners who appreciate seeing techniques from multiple angles.
Events & Workshops for Hands‑On Learning
While online resources are wonderfully convenient, there’s something irreplaceable about in-person instruction. I’ll never forget the moment a teacher gently adjusted my tension during a workshop—suddenly my stitches transformed from awkward, tight knots to beautiful, even loops!
Local yarn shops are treasure troves of knowledge, with many offering beginner workshops where experienced crocheters can guide your hook hand and help you troubleshoot in real-time. One Crochet Craze community member shared, “I learned more in one hour at a local workshop than I did in weeks of trying to teach myself.” It’s true—sometimes a quick adjustment to how you hold your yarn can make all the difference.
Craft fairs and fiber festivals provide both inspiration and specialized technique demonstrations. Walking through aisles of hand-dyed yarns and watching artisans demonstrate unique stitches can spark creativity you didn’t know you had. Public libraries often host regular crochet groups where you can bring your project and work alongside others of varying skill levels.
For those looking to immerse themselves in maker culture, events like Maker Festivals Pennsylvania showcase fiber arts alongside other crafts, creating a vibrant atmosphere of creativity and skill-sharing. These events often feature workshops specifically designed for beginners and are wonderful places to touch different yarns and try various hook styles before investing.
Where to Ask Questions & Share Progress
The crochet community is remarkably generous with knowledge and encouragement. I’ve found that most crocheters remember their beginner days vividly and are eager to help newcomers avoid the frustrations they experienced.
Facebook groups like the Easy Crochet Club and Crochet Guru welcome beginners with open arms. These virtual communities provide spaces where you can post pictures of your work-in-progress with questions like “Why does my edge keep getting wider?” and receive helpful feedback within minutes.
Ravelry forums offer searchable discussions on virtually every crochet topic imaginable, from “Why does my amigurumi have gaps?” to “Help! I dropped a stitch!” The search function makes it especially valuable when you’re facing a specific challenge.
For those craving in-person connection, look for local “stitch ‘n bitch” groups that gather at cafes or yarn shops. These informal meetups combine socializing with crafting and are perfect for getting immediate help when you’re stuck. I’ve watched beautiful friendships form over frogged projects and shared yarn.
Instagram has also become a vibrant hub for crocheters, with hashtags like #CrochetCommunity, #CrochetHelp, and #CrochetTips connecting makers worldwide. Posting your progress here not only documents your journey but often attracts encouraging comments and helpful suggestions.
Every expert crocheter was once tangled in yarn and confused by terminology. The crochet stitch guide you’re reading now exists because we understand that learning journey and want to make it smoother for you. Reaching out for help isn’t a sign of failure—it’s a sign you’re serious about improving your craft!
Frequently Asked Questions about Crochet Stitches
How do I keep my edges straight?
Straight edges can be one of the trickiest parts of crochet for beginners. I remember when I first started, my dishcloths looked more like trapezoids than squares!
The most common culprit is accidentally adding or dropping stitches along the way. Counting your stitches at the end of each row might seem tedious, but it’s your best defense against wonky edges. I like to use stitch markers to highlight the first and last stitches in each row – those bright little clips have saved countless projects from the frogging pile!
Be especially mindful of your turning chains at the beginning of rows. Some patterns count these as stitches while others don’t, which can create confusion. And don’t forget about that sneaky last stitch of each row – it’s surprisingly easy to miss! Many beginners accidentally decrease because they can’t spot where the final stitch should go.
Something that helped me tremendously was making sure I turn my work the same way each time, typically clockwise. This creates muscle memory and helps maintain consistent tension along the edges.
With practice, you’ll develop an almost intuitive feel for where each row should begin and end. Until then, count, mark, and double-check – your future self will thank you!
What hook/yarn combo is best for absolute beginners?
When you’re just starting your crochet journey, the right tools make all the difference. Think of your first project as learning to drive – you wouldn’t start with a manual sports car on a mountain road!
For true beginners, I recommend a US H/8 (5mm) or I/9 (5.5mm) hook. These medium-sized hooks are comfortable to hold and maneuver without being too small to see what you’re doing. Pair this with medium (#4 worsted) weight yarn in a light color that clearly shows stitch definition.
As for fiber content, smooth acrylic or cotton blends are forgiving and affordable. They won’t split easily and provide good stitch visibility. One of my students had a breakthrough moment when she switched from navy blue yarn to a pale yellow – suddenly she could see exactly where her hook needed to go!
What you should avoid are very dark colors (impossible to see your stitches), fuzzy or textured yarns (which hide your stitch structure), and novelty yarns with irregular textures. As one of our Crochet Craze instructors often says, “Blanket yarn is not recommended for beginners because it obscures stitch visibility.” Save those fun specialty yarns for when you’ve built some confidence!
When should I block my project, and how?
Blocking is that magical finishing step that can transform your work from “homemade” to “handcrafted.” Think of it as the difference between wearing wrinkled clothes straight from the dryer versus neatly pressed ones!
Your project would benefit from blocking if it has lace elements that need opening up, requires precise measurements (like garments), consists of pieces that will be joined together, or shows uneven edges or curling. I once made a granny square blanket where the squares varied by almost an inch before blocking – after blocking, they lined up perfectly!
The right blocking method depends entirely on your fiber content:
Animal fibers like wool and alpaca respond beautifully to wet blocking. These natural fibers have memory and can be dramatically reshaped when wet. Soak your piece thoroughly, gently squeeze out excess moisture (no wringing!), and pin it to shape on a blocking board or towel-covered bed.
Plant fibers including cotton and linen benefit from spray or steam blocking. These fibers are less elastic but still respond well to moisture. Pin your dry piece to shape first, then lightly spray with water or hover a steam iron above (not touching!) to set the stitches.
Synthetics like acrylic need special care – they respond best to steam blocking, but be careful not to get too close or you’ll melt your hard work! I learned this lesson the hard way with my first acrylic blanket.
Always check your yarn label for washing instructions before blocking. Some yarns may specify “dry clean only” or have other special requirements that should guide your blocking approach.
Blocking might seem like an extra step, but the professional finish it gives your projects is absolutely worth the effort!
Conclusion
Congratulations on making it through this comprehensive crochet stitch guide! You’ve taken an important step on your crafting journey by learning the fundamental stitches and techniques that will serve as the foundation for countless creative projects. From the humble chain stitch to those eye-catching textured patterns, each technique you’ve explored opens a door to new creative possibilities.
Mastering crochet is truly a journey, not a destination. Even those who’ve been crocheting for decades continue to learn and refine their skills with each project. Be gentle with yourself as you practice—your tension will naturally improve, your stitches will become more even, and your confidence will grow with every row you complete.
Those little mistakes and uneven edges? They’re not failures—they’re signs that you’re learning and growing as a crafter. As one of our community members likes to say, “Perfect stitches come from imperfect practice.”
I encourage you to start with simple, approachable projects that incorporate the basic stitches you’ve learned. A cotton dishcloth gives you practice with tension, a cozy scarf helps you master maintaining consistent stitch counts, and a simple beanie introduces you to working in the round—all while creating something both useful and beautiful. As your skills develop, you can gradually incorporate new stitches and techniques into your repertoire.
One of the most wonderful aspects of learning crochet is finding the incredibly supportive community that comes with it. Don’t hesitate to reach out for help when you encounter challenges. Share your progress (yes, even those early “what-is-that-supposed-to-be” projects!), ask questions, and celebrate your successes with fellow crafters who truly understand the joy of creating something with your own two hands.
We hope this crochet stitch guide has inspired you to pick up your hook and jump into this rewarding craft with both hands! Every expert crocheter once struggled with their first chain stitch—persistence is your most valuable tool. For ongoing support, fresh project ideas, and more detailed tutorials, be sure to explore our crochet patterns & video tutorials.
Happy crocheting, and may your yarn always flow smoothly and your tension be just right!