amigurumi for beginners: 5 Essential Steps to Master Fast
Your Amigurumi Journey Starts Here
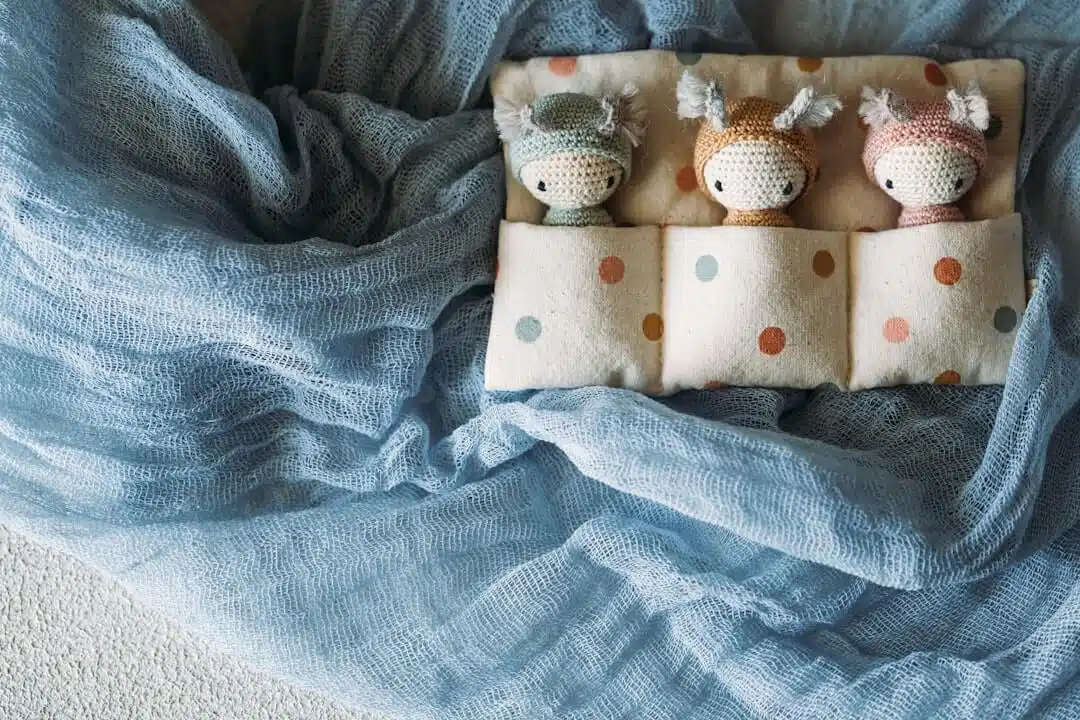
Remember when you were a child and your favorite stuffed animal went everywhere with you? That’s the magic of amigurumi for beginners – creating your very own huggable friends with just yarn and a hook.
I’m Sonji Huerta, and like you, I was once a complete newcomer to crochet. What drew me to amigurumi was its accessibility – you don’t need fancy equipment or years of experience to create something truly delightful.
Amigurumi for beginners is the perfect entry point into the crafting world. This Japanese art of crocheting small, stuffed yarn creatures is incredibly beginner-friendly because it focuses on just a handful of techniques. Unlike complicated sweaters or blankets that might leave you frustrated, these adorable little creations give you that wonderful sense of accomplishment in just a few hours.
What I love most about amigurumi is its therapeutic nature. There’s something profoundly calming about the repetitive motion of the hook, watching a character take shape in your hands. And unlike bulkier projects, you can tuck your amigurumi-in-progress into your bag and work on it anywhere – during your lunch break, on the bus, or while watching your favorite show.
The handmade trend isn’t going anywhere, and knowing how to create personalized gifts is a skill that keeps on giving. With over 8,000 patterns available on amigurumi.com alone, your creative possibilities are endless. The “Baby Monster Beginner Amigurumi” pattern has been made by over 783 crafters with an impressive 4.7 out of 5 star rating – proof that even first-timers can achieve professional-looking results.
Looking to expand your amigurumi for beginners vocabulary? Check out our comprehensive guides on amigurumis and best amigurumi books for beginners.
What You’ll Get From This Guide
This 5-step approach to amigurumi for beginners isn’t just about learning to crochet – it’s about opening a door to a whole new world of creativity and joy.
You’ll experience the thrill of quick success as most beginner projects can be completed in just a few hours. There’s nothing quite like the pride of looking at your finished creation and thinking, “I made that!” As one beginner shared with us: “Easy to learn and so, so cute! Fun winter time project for my teen.”
The portability of amigurumi makes it perfect for our busy lives. I’ve crocheted tiny animals while waiting at doctor’s appointments, during my lunch break, and even on long flights. These little moments of creativity can transform otherwise wasted time into productive, stress-relieving sessions.
The skills you’ll build transfer beautifully to larger projects. The single crochet, increases, and decreases you’ll master are the building blocks for countless other crochet creations. Think of this guide as your foundation for a lifetime of crafting trips.
Perhaps most meaningful of all, you’ll gain the ability to create personalized, heartfelt gifts. In our mass-produced world, there’s something special about giving someone a creation that took time, thought, and care. The joy on a child’s face when they receive a custom-made stuffed animal is truly priceless.
So grab your hook, choose some colorful yarn, and let’s begin this journey together. Your first adorable amigurumi creation is just a few stitches away!
Step 1: Build Your Beginner Tool Kit
Before diving into your first amigurumi for beginners project, you’ll need to gather some essential supplies. The good news? You don’t need a lot to get started!

Essential Tools for Amigurumi Success:
When I started my amigurumi journey, I was surprised by how few tools I actually needed. Your crochet hook is your most important tool – for amigurumi for beginners, choose hooks 1-2 sizes smaller than what your yarn label recommends. This creates those tight, stuffing-proof stitches that give amigurumi its distinctive look. Most beginners (myself included!) start with a 3.5mm-4.0mm hook for worsted weight yarn.
Speaking of yarn, worsted weight acrylic is perfect for your first projects. It’s budget-friendly, comes in rainbow of colors, and shows your stitches clearly without the fuzziness that can make counting difficult. Plus, it’s durable enough to withstand enthusiastic hugging if your creations end up in little hands!
Don’t forget stitch markers – these little plastic clips are absolute lifesavers when working in continuous rounds. I learned this lesson the hard way after losing track of my rounds and having to solve half a project! Even a small safety pin or piece of contrasting yarn can work in a pinch.
For stuffing, polyester fiberfill gives your amigurumi that perfect squishable quality. I recommend 100% polyester because it doesn’t retain water when washing – important for toys that might need frequent cleaning.
A bent-tip mix needle might seem like an odd tool until you try to sew amigurumi parts together. The curved tip lets you steer through tight spaces with ease. As one of our Crochet Craze community members told me, “Using a bent-tip mix needle speeds up sewing and improves accuracy by at least 50%!”
Safety eyes add personality to your creations and look much more polished than embroidered alternatives. Sizes between 6mm-9mm work well for most beginner projects. Just remember to attach them before closing your piece, as they lock permanently into place.
Round out your toolkit with a pair of small, sharp scissors and a row counter (either physical or a smartphone app) to track your progress.
More info about Best Yarn and Hook for Beginner Crochet
Budget-Friendly Starter Pack
I remember feeling overwhelmed by the cost when starting a new hobby, but amigurumi is actually quite affordable to begin. At Crochet Craze, we recommend this budget-friendly starter kit:
For yarn, Caron Simply Soft ($4-5 per skein) offers excellent value with a slight sheen that makes your creations pop. One skein will make several small projects, so you can create multiple amigurumi friends without breaking the bank. If you’re looking for an alternative, YarnArt Jeans has become incredibly popular among our beginner community members for its consistent texture and impressive color range.
You don’t need a full set of hooks right away – just start with one 3.5mm hook. Basic aluminum hooks are perfectly functional while you’re learning the ropes. For stuffing, a small bag of Poly-Fil is widely available at craft stores and will last through many projects.
I was delighted to read this customer review about one of our recommended starter kits: “The kit includes both a well-organized printed booklet and QR codes linking to step-by-step video tutorials, catering to different learning preferences.” If you prefer an all-in-one solution, these beginner kits can be a wonderful way to get everything you need in one package.
Upgrading for Comfort & Speed
Once you’ve completed a few projects and fallen in love with amigurumi (which happens to almost everyone!), you might want to consider some upgrades that make crocheting more comfortable and efficient.
Ergonomic hooks like Clover Amour make a world of difference during longer crafting sessions. My wrists used to ache after an hour of crocheting with basic hooks, but these ergonomic wonders changed everything. As one of our experienced Crochet Craze instructors notes, “Clover Amour hooks are the most comfortable and ergonomic for long crochet sessions – they’re worth every penny.”
For yarn enthusiasts ready to expand their palette, Rico Design Ricorumi is specifically created for amigurumi with its mini size and extensive color range. Many of our community members consider it their “all-time favorite yarn” for creating detailed, colorful creatures.
Here’s a surprising upgrade tip: a dog slicker brush! This unexpected tool is perfect for fluffing amigurumi made with fuzzy yarn, giving them that extra-cuddly appearance that makes them irresistible.
Finally, consider investing in a dedicated project bag to keep all your supplies together. I love being able to grab my amigurumi bag whenever inspiration strikes, whether I’m heading to a coffee shop or just settling in for an evening of crafting on the couch.
Quality tools can improve your experience, but they’re absolutely not necessary for beginners. Start with the basics, enjoy the learning process, and upgrade as you develop your skills and find your personal preferences. The most important thing is to begin your amigurumi for beginners journey with enthusiasm and creativity!
Step 2: Core Crochet Stitches for Amigurumi for Beginners
The beauty of amigurumi for beginners is that you only need to master a handful of basic stitches to create adorable stuffed creatures. Think of it as learning just a few dance steps that, when combined, create an entire choreography of cute!
Let me walk you through the essential stitches you’ll need. The single crochet (sc) is truly the workhorse of amigurumi – you’ll use it constantly to create the tight, dense fabric that holds your stuffing securely. In US terminology, you simply insert your hook into the stitch, yarn over, pull through (leaving you with 2 loops on your hook), yarn over again, and pull through both loops. Master this stitch, and you’re halfway to amigurumi success!
The chain stitch (ch) might seem basic, but it’s crucial for starting projects or creating details like tails or hanging loops. Just yarn over and pull through the loop on your hook – simple but essential.
When you’re ready to create rounded shapes, the increase (inc) becomes your best friend. By working two single crochets into the same stitch, you expand your work naturally. Most patterns abbreviate this as “2 sc in next st” or simply “inc.”
On the flip side, the decrease (dec) combines two stitches into one, reducing your stitch count to create tapered shapes. This gives your amigurumi personality and form – imagine creating a cute nose or narrowing toward feet!
Finally, the slip stitch (sl st) helps you join rounds or create flat seams. Just insert your hook, yarn over, and pull through both loops on your hook.
Consistent tension is your secret weapon for professional-looking amigurumi. Your stitches should be snug enough to prevent stuffing from peeking through, but not so tight that your fingers ache. This balance comes with practice, so be patient with yourself as you develop your own perfect tension.
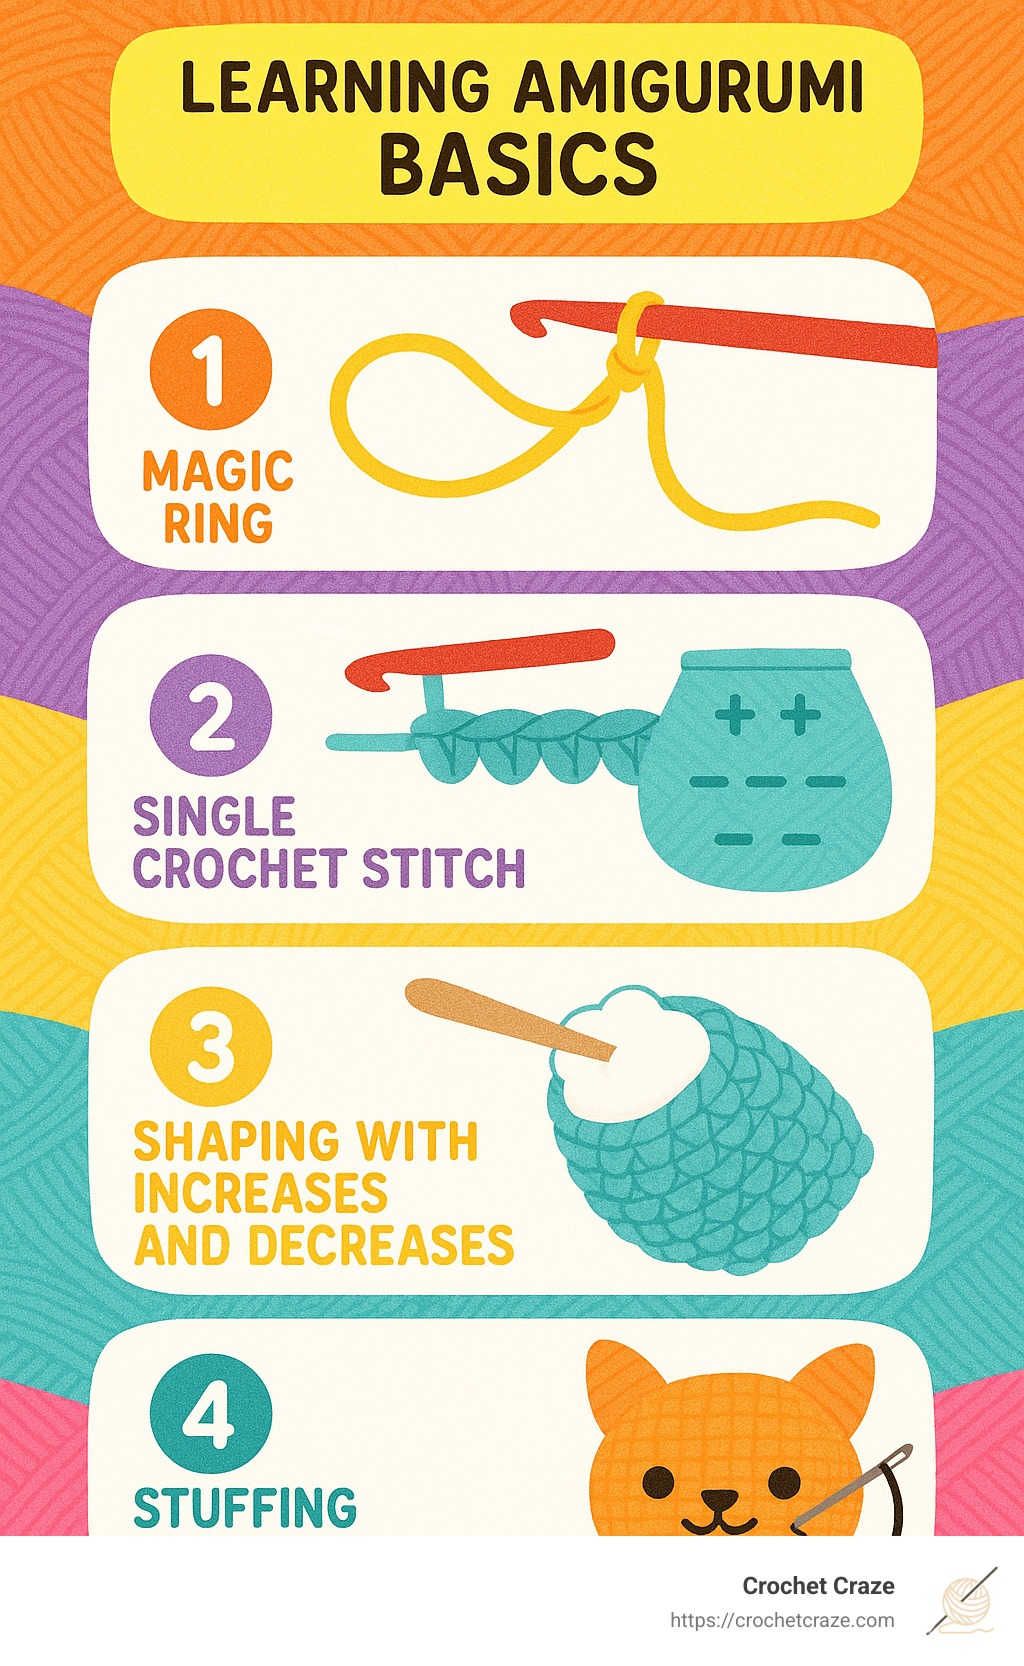
Why the Magic Ring Matters in Amigurumi for Beginners
If there’s one technique that lifts amigurumi for beginners from “homemade” to “wow, you made that?”, it’s the magic ring (also called magic circle). Instead of starting with a chain and joining it, which often leaves an annoying hole, the magic ring creates a tight, adjustable center that you can pull completely closed.
The magic ring is a game-changer because it creates a completely closed center with no hole, allows for adjustment even after working several stitches, and gives your amigurumi a more polished finish. Your stuffed friends will thank you for not giving them a belly button unless intentional!
Here’s a pro tip I learned the hard way: Always secure your magic circles to prevent gaps from forming later. After completing your first round, weave the tail through the stitches twice in opposite directions and pull tight before trimming. Your future self will thank you when that cute amigurumi doesn’t develop a stuffing leak!
Want to build your foundation even further? Check out More info about How to Do a Basic Crochet Stitch for detailed instructions with photos.
Invisible Decrease Tips for Amigurumi for Beginners
The standard decrease (sc2tog) can leave small holes in your work – not ideal when you’re trying to create a smooth, professional finish. Enter the invisible decrease – a technique that will transform your amigurumi for beginners projects instantly.
To perform this magic trick, insert your hook through the front loop only of the first stitch, then without yarning over, insert your hook through the front loop only of the next stitch. Yarn over and pull through the first two loops on your hook, then yarn over again and pull through the remaining two loops. Voilà – a decrease that practically disappears!
The benefits are remarkable – you’ll create seamless shapes with no visible holes, hide stuffing more effectively than with standard decreases, and maintain consistent tension across your work. Your amigurumi will look cleaner and more professional with this one simple technique.
As one enthusiastic crafter shared with us: “Invisible decrease made such a huge change to my amigurumi I couldn’t recommend it more.” Small technique, big impact!
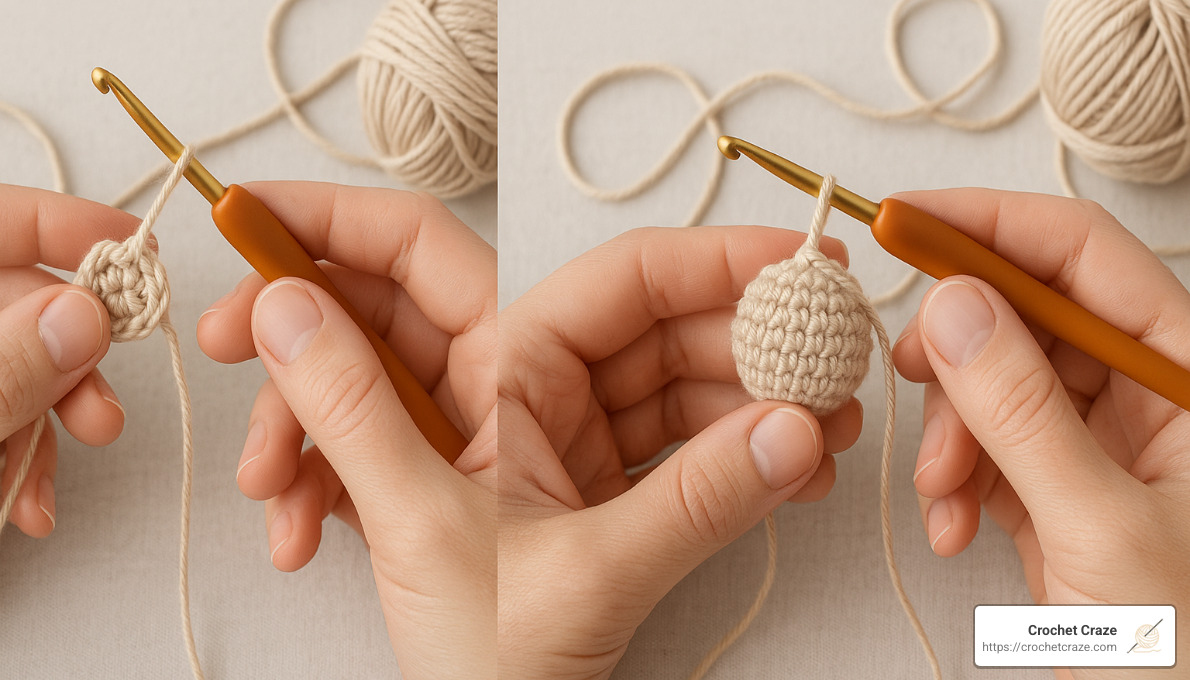
Practice Sphere Exercise
Before tackling a complex amigurumi pattern, let’s start with a simple sphere – the perfect training ground for amigurumi for beginners. This exercise helps you practice increases, decreases, and maintaining even tension all in one project.
Begin with a magic ring, then work 6 single crochets into it and pull tight (6 stitches). For round 2, work 2 sc in each stitch around (12 stitches) – you’ve just practiced your increases! Continue with round 3: (1 sc, inc) repeated around (18 stitches), and round 4: (2 sc, inc) repeated around (24 stitches).
For rounds 5-8, simply single crochet in each stitch around, maintaining your 24 stitches. This is where you’ll practice keeping even tension and neat, consistent stitches.
Now comes the decreasing: round 9: (2 sc, dec) repeated around (18 stitches), round 10: (1 sc, dec) repeated around (12 stitches), and round 11: (dec) repeated around (6 stitches). Fasten off, leaving a tail, thread through the remaining stitches, pull tight, and weave in the end.
Using a stitch marker to track the beginning of each round is absolutely essential – I can’t tell you how many times this simple tool has saved me from losing my place! Count your stitches at the end of each round to catch any mistakes early, and work in continuous rounds (spiral) rather than joined rounds for a smoother finish.
This simple sphere is like the flour in a cake recipe – it forms the foundation of countless amigurumi designs. Once you’ve mastered it, you can modify it to create heads, bodies, and other rounded parts for all your future creations. Before you know it, you’ll be crocheting spheres without even looking at the pattern!
Step 3: Read & Decode Amigurumi Patterns
Learning to understand pattern instructions is like learning a new language when you’re new to amigurumi for beginners. Don’t worry though—once you crack the code, you’ll be creating adorable creatures in no time!
US vs. UK Terminology
One thing that trips up many new crocheters is the difference between US and UK terminology. Most amigurumi patterns use US terms, but it’s always smart to double-check before you begin.
| US Term | UK Term | Description |
|---|---|---|
| Single crochet (sc) | Double crochet (dc) | The basic stitch used in amigurumi |
| Half double crochet (hdc) | Half treble crochet (htr) | Taller than sc, used in some details |
| Double crochet (dc) | Treble crochet (tr) | Even taller stitch, used occasionally |
| Slip stitch (sl st) | Slip stitch (sl st) | Same in both systems |
| Chain (ch) | Chain (ch) | Same in both systems |
I remember how confused I was when I first encountered this difference—I couldn’t figure out why my project looked nothing like the picture! Checking which terminology your pattern uses can save you hours of frustration.
Common Amigurumi Abbreviations
Pattern writers use abbreviations to keep instructions concise. You’ll see things like sc for single crochet, inc for increase (working two single crochets in the same stitch), and dec for decrease (combining two stitches into one). Other common abbreviations include inv dec for invisible decrease, ch for chain, and sl st for slip stitch.
Terms like BLO (back loop only) and FLO (front loop only) tell you which part of the stitch to work into, while mr refers to the magic ring we learned in Step 2. Don’t worry about memorizing all of these—most patterns include an abbreviation key for reference.
Understanding Round Notation
Amigurumi patterns describe rounds in one of two main formats:
The detailed format spells everything out: Round 3: (1 sc, inc) repeat 6 times (18)
While the abbreviated version is more compact: Rnd 3: [sc, inc] × 6 (18)
They both tell you the same thing—work one single crochet, then an increase, and repeat this pattern six times around, giving you 18 stitches total. That number in parentheses at the end is your stitch count—an invaluable way to check if you’re on track.
I find it helpful to read each round out loud before I start crocheting it. This little trick helps me understand what I’m supposed to do and catch any confusion before I make a mistake.
Continuous Rounds vs. Joined Rounds
When making amigurumi, you’ll typically work in continuous rounds (spirals) rather than joining each round with a slip stitch. This creates a smoother finish without a visible seam. The trade-off is that it can be tricky to know where one round ends and the next begins—that’s why a stitch marker is your best friend!
As one of our Crochet Craze community members wisely advises: “Work in continuous rounds with stitch markers to avoid visible seams. I clip mine onto the first stitch of each new round and move it up as I go.”
More info about Crochet Stitch Guide
Pattern Hunting 101
Finding the right patterns is crucial when you’re just starting with amigurumi for beginners. The good news is that there are plenty of free options out there!
Amigurumi.com hosts over 8,000 patterns across various categories, while Ravelry has extensive free pattern collections with helpful user ratings and project galleries. Don’t forget to check out Crochet Craze’s Amigurumis section for beginner-friendly designs we’ve personally vetted.
If you’re willing to spend a few dollars, paid patterns (typically $4-6) often include more detailed instructions, have been pattern-tested for accuracy, and sometimes offer designer support if you get stuck.
For your first project, look for a pattern with clear, step-by-step instructions and plenty of photos showing the process. Simple shapes with minimal pieces to join together will help you build confidence. The “Baby Monster Beginner Amigurumi” pattern is in 1,311 queues on Ravelry—a strong sign that it’s popular with beginners. It teaches fundamental skills like starting crochet in the round, single crochet, increases, and basic construction techniques.
Using Video & QR Codes
We’re lucky to be learning amigurumi in the digital age! Many modern patterns include video support through YouTube tutorials or QR codes that you can scan with your phone. This hybrid learning approach is perfect for visual learners.
In a recent review of a popular beginner crochet kit, 22 customers mentioned “ease of use,” with 17 specifically praising the QR-coded video tutorials. One happy customer shared: “The video tutorial host explains each step in detail at a perfect pace for any skill level.”
Here at Crochet Craze, we’ve found that combining written instructions with video demonstrations significantly improves success rates for beginners. I suggest reading through the written pattern first to understand the overall structure, then watching videos for any steps that seem confusing. Following along with both resources as you work gives you the best chance of success.
Many crafters find they develop a preference for either written or video instructions as they gain experience. There’s no right or wrong way to learn—the best method is whatever helps you create beautiful amigurumi!
Step 4: Shape, Stuff & Assemble Like a Pro
Creating well-shaped, professional-looking amigurumi involves more than just following stitch counts. Let’s explore the techniques that lift amigurumi for beginners from good to great:

Shaping Techniques
The secret to those adorable round shapes in amigurumi for beginners lies in how you distribute your increases and decreases. Think of increases as the “growing” phase and decreases as the “shrinking” phase of your creation.
When working increases, spacing them evenly around each round creates that perfect spherical shape we all love in amigurumi. Most patterns follow a standard formula for spheres, starting with 6 stitches in your magic ring, then doubling to 12, then 18, 24, and so on. The pattern typically follows an (X sc, inc) format, where X increases by one each round.
Strategic decreases are just as important! They should mirror your increases for the most pleasing shape. When I first started, my amigurumi looked a bit lumpy because I bunched my decreases together. Once I learned to space them evenly with patterns like (X sc, dec), my creatures looked so much more professional.
Always remember to keep the “right side” of your work facing outward. As you crochet in spirals, one side will have a smoother, more uniform appearance – that’s your outside! As one of our Crochet Craze community members shared: “Identify and keep the right side of your piece facing out in rounds. It makes all the difference in the final look.”
The Art of Stuffing
Proper stuffing truly makes or breaks your amigurumi. It’s like giving your creation its personality!
The golden rule of stuffing is “firm but not stretched.” You want enough filling to hold the shape, but not so much that the stuffing starts peeking through your stitches. I learned this the hard way when I overstuffed my first bunny and could see white fiberfill between every stitch!
Start by breaking up any clumps in your fiberfill before inserting it. This creates a smoother finish. Then add stuffing gradually as you work, especially in narrow parts like arms and legs. For limbs, a neat trick is to stuff more firmly at joints and less at extremities – this helps them bend more naturally.
A chopstick or pencil eraser works wonders for pushing stuffing into small spaces. For tiny parts like fingers or ears, consider using small yarn scraps instead of fiberfill – they’re easier to control in limited spaces.
Assembly Techniques
Joining all the pieces is where your amigurumi truly comes to life – it’s like watching your character’s personality emerge!
Before sewing anything permanently, take time to position all parts with pins. This extra step ensures proper placement and symmetry. I once skipped this step and ended up with a lopsided teddy bear that looked perpetually confused!
When attaching limbs, consider your character’s posture and personality. Do you want a playful pose or a more formal stance? The position of arms and legs can dramatically change the feel of your creation.
For the actual joining, the whip stitch is your best friend. It’s simple yet effective for attaching parts securely. For nearly invisible seams, try the mattress stitch – it takes a bit more practice but creates beautiful results. For detailed guidance that really helped me improve, check out Planet June joining tutorial.
Attaching Safety Eyes Securely
Safety eyes give your amigurumi that spark of life and personality. They’re called “safety” eyes for a reason – when attached correctly, they’re extremely secure.
Position your eyes before attaching permanently – this is your chance to experiment! Moving them just a few millimeters can change your character from sleepy to surprised. Once you’re happy with the placement, push the post through from the outside of your work, then secure firmly with the washer backing from inside.
Always attach eyes before closing and stuffing your amigurumi – it becomes nearly impossible to add them later! And an important note for the little ones in your life: if your creation is for a child under 3, skip the safety eyes and embroider them instead. Better safe than sorry!
After attaching, give them a gentle tug to ensure they’re secure. They should not budge at all when pulled.
Seamless Assembly Workflow
For the most professional-looking amigurumi, I’ve found this workflow to be foolproof:
First, pin everything before sewing. As one of our Crochet Craze experts always says, “Using pins to position parts before sewing gives much better placement control.” This simple step prevents wobbly heads and crooked limbs!
Next, use the right tools. A bent-tip needle is a game-changer for sewing amigurumi parts. The bent tip allows you to steer curves and tight spaces with ease, making assembly so much less frustrating.
Always match your yarn color when sewing pieces together. Use the same color as the piece you’re attaching to (or the piece being attached, if it’s smaller). This makes your seams nearly invisible.
Be sure to secure your stitches well. Begin and end with a secure knot, and weave in ends thoroughly. Nothing’s more disappointing than a limb that falls off after all your hard work!
Finally, check your work from different angles as you go. What looks perfect from the front might be crooked from the side. Taking a moment to view your creation from all angles ensures a balanced, professional result.
One crafter in our community learned this lesson the hard way: “Embroidering a face before assembly led to off-center placement after sewing.” Always leave facial details until after the basic assembly is complete to avoid this common pitfall.
With these techniques in your toolkit, your amigurumi for beginners projects will look like they were made by a seasoned pro! Each creation teaches you something new, so accept the learning process and watch your skills grow with every stitch.
Step 5: Personalize, Care & Troubleshoot
The journey of amigurumi for beginners doesn’t end when you’ve assembled your creation. Now comes the fun part – giving your little friend personality, ensuring it stays in good shape, and fixing any hiccups along the way!
Personalization Techniques
Adding unique touches to your amigurumi is where you truly make it yours. Let’s explore some simple ways to give your creations character and charm.
Changing colors in amigurumi can seem tricky at first, but it’s actually quite straightforward. The key is timing – work until the very last yarn over of the stitch before your color change, then drop your current yarn and complete that final yarn over with your new color. This creates a clean transition that looks professionally done. As one of our Crochet Craze community members shared: “Changing colour on the final yarn-over ensures clean colour transitions without those awkward ‘blips’ that can happen otherwise.”
Embroidering faces is perhaps the most transformative personalization you can add. It’s amazing how the tiniest adjustment to an eye or mouth can completely change your amigurumi’s expression! For best results, use embroidery floss rather than yarn – 2-3 strands gives you much more control for delicate features. I always recommend planning your face design with pins first, then carefully stitching once you’re happy with the placement. Simple curved lines can create anything from a sleepy face to an excited grin!
One important tip I learned the hard way: “Always leave embroidery until after assembly to avoid misplacement of facial features.” Trust me on this one – trying to embroider before parts are attached often leads to off-center or awkward-looking features once everything’s put together.
For extra personality, consider adding felt details. Small felt circles make perfect ears, noses, or cheek accents. Tiny pom-poms can become adorable noses or fluffy tails. Even simple ribbon additions around the neck can lift your creation from cute to utterly charming.
Care & Maintenance
Your handmade treasures deserve proper care to keep them looking their best for years to come.
For washing, gentle is the name of the game. Most acrylic amigurumi can be hand-washed with mild soap and lukewarm water. Gently squeeze (never wring!) to remove excess water, then reshape while damp and allow to air dry completely. For amigurumi that’s just a bit dusty, try a soft brush for “dry cleaning” without the moisture.
When it comes to storage, keep your creations in a cool, dry place away from direct sunlight, which can fade colors over time. For long-term storage, a sealed plastic bag with a silica gel packet helps prevent moisture damage. I like to give my stored amigurumi a gentle fluff every few months to help them maintain their shape.
Different yarns require different care approaches. Acrylic is wonderfully durable and washable, making it perfect for children’s toys. Cotton can be washed but might shrink slightly, while wool requires gentler handling to prevent felting. Always consider the yarn type when giving care instructions if you’re gifting your creations.
Troubleshooting Common Issues
Even experienced crocheters encounter problems sometimes! Here are solutions to the most common amigurumi challenges:
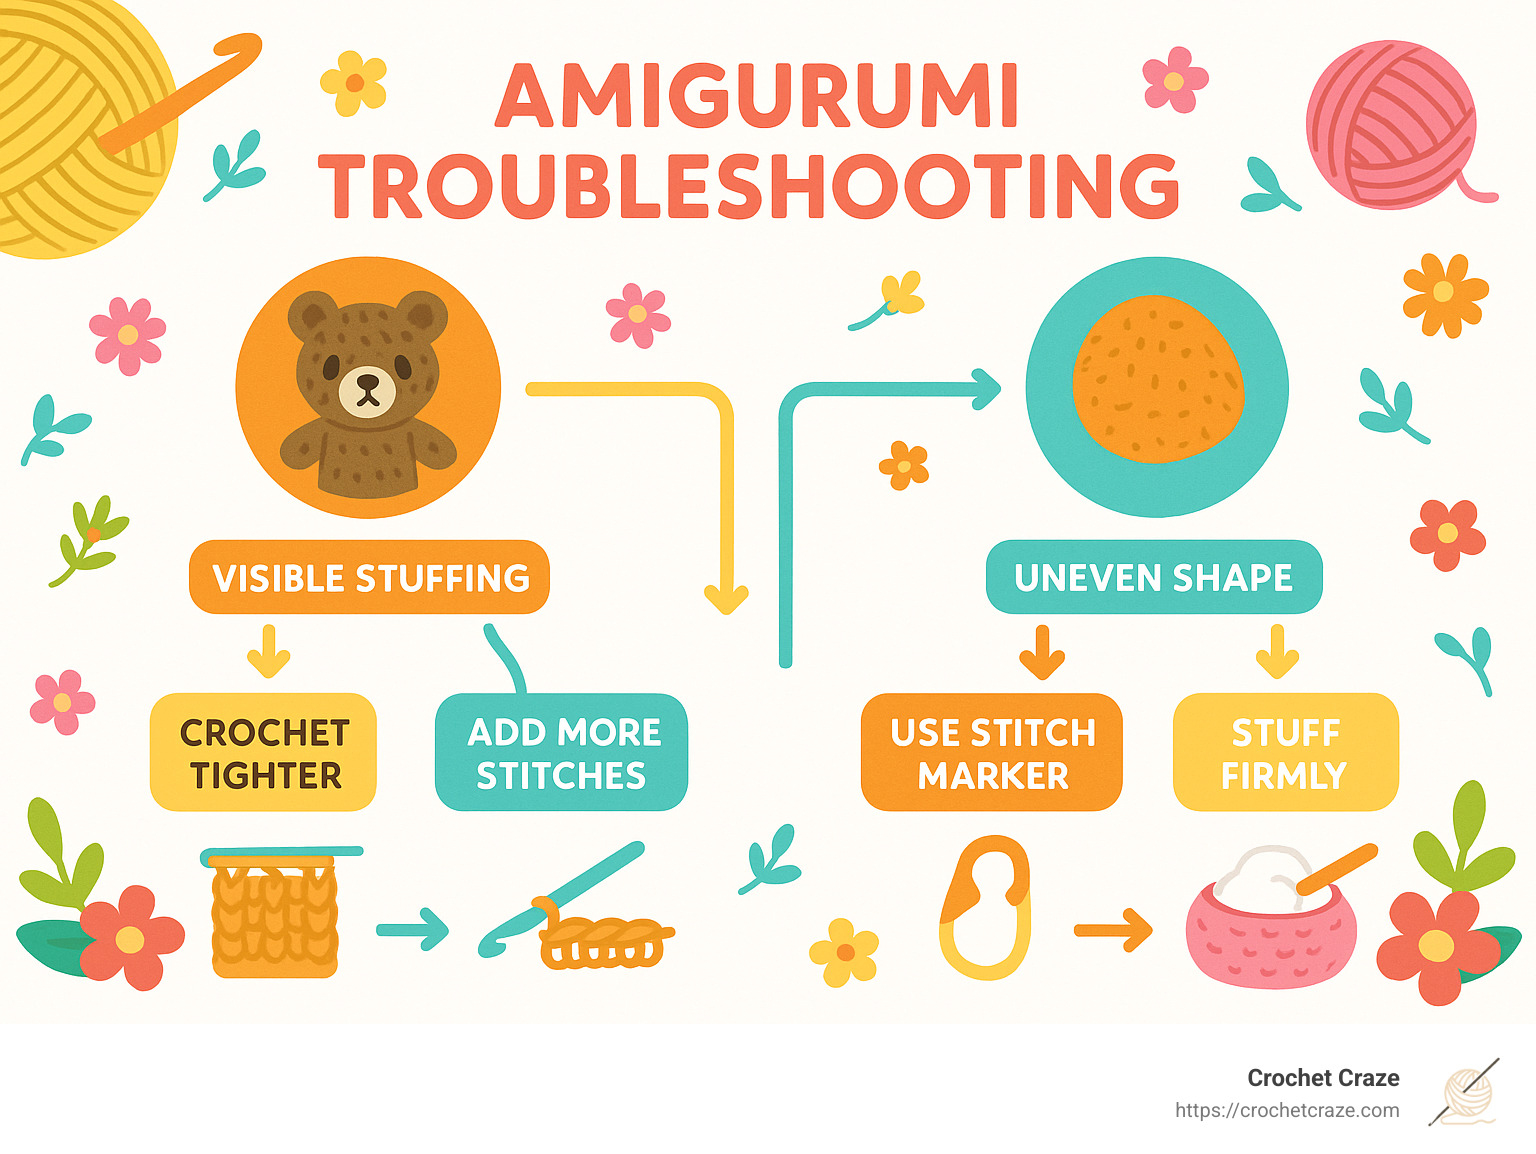
When white stuffing shows through your stitches (especially noticeable in darker colored projects), the solution is usually tighter stitches or a smaller hook. For dark amigurumi, you can also find gray or black polyester stuffing that won’t be as noticeable if it peeks through.
Uneven shapes happen to everyone, especially beginners. The main culprits are usually inconsistent tension or missed stitch counts. Using stitch markers and counting frequently can prevent this, but if you’ve already completed a lopsided amigurumi, sometimes gentle “blocking” (reshaping while damp) can help.
If you notice gaps appearing when changing colors, check your tension during the transition. I find that keeping the yarn slightly tighter during color changes and carefully weaving in the ends helps close those pesky holes.
Floppy limbs that won’t stay positioned can be frustrating, but there’s an easy fix! Either stuff the limbs more firmly or insert pipe cleaners to create posable arms and legs. Just be sure to fold the ends of the pipe cleaners to prevent them from poking through.
One of the most common issues for beginners is the magic ring coming undone. To prevent this, always secure the tail by weaving it through the first round twice, going in opposite directions. This creates a “lock” that keeps your center closed tight.
Easy First Projects to Try
Ready to put your new skills to work? These beginner-friendly projects are perfect for your first attempts:
The Baby Monster pattern has earned its impressive 4.7/5 rating from nearly 300 crocheters for good reason. With its forgiving shape and simple design, it’s ideal for practicing basic techniques without the pressure of perfect execution. Plus, every monster is unique – so any quirks in your stitching just add character!
For using up leftover yarn, the Fluffy Bunny pattern is perfect. As one crafter put it: “If you’d like to relax between 2 projects, or to use the end of a skein, fluffy bunnies are for you!” The simple shape comes together quickly, giving you that satisfying feeling of completion.
The Kawaii Bunny pattern is another excellent starter project that uses only basic stitches while introducing you to the joy of creating cute characters. The pattern has room for creative customization, allowing you to make each bunny uniquely yours.
If you’re someone who dreads the sewing-up process, the No-Sew Stingray might be your perfect match. This clever pattern minimizes assembly, making it ideal for those who prefer continuous crocheting. One delighted maker shared: “I am beyond thrilled with this delightful mega stingray amigurumi creation!”
Keeping Your Creations Clean
Knowing how to properly clean your amigurumi ensures they’ll stay lovable for years. Here’s my tried-and-true method for hand-washing:
Start by filling a basin with lukewarm water and a small amount of mild detergent. Gently submerge your amigurumi and squeeze the soapy water through it – avoid rubbing or wringing which can damage the stitches. Rinse thoroughly in clean water until all soap is gone. To remove excess water, press (don’t twist!) the amigurumi against the side of the basin, then reshape while damp and allow to air dry completely away from direct heat sources.
For special amigurumi with safety eyes, electronic components, or delicate embellishments, spot cleaning might be safer than full immersion. Use a damp cloth with a tiny bit of mild soap to target soiled areas without saturating the entire piece.
Different fibers need different handling – acrylic is wonderfully durable and washable, cotton may shrink slightly but generally washes well, while wool requires extra gentle care to prevent felting. When in doubt, test your cleaning method on a small, inconspicuous area first.
With these personalization techniques, care tips, and troubleshooting solutions, you’re well-equipped to create amigurumi that not only look adorable but will stay that way for years to come. And remember, every little imperfection is part of what makes handmade items special!
More info about Amigurumi Trips: Crafting Quirky Crochet Creations
Frequently Asked Questions about Amigurumi
What basic stitches do I need to start?
One of the most wonderful things about amigurumi for beginners is its simplicity. Unlike complex crochet projects that require mastering dozens of different stitches, you only need a handful of techniques to create adorable stuffed creatures.
At the absolute minimum, you’ll need to know:
- Single crochet (sc): This is the workhorse stitch that forms the fabric of your amigurumi
- Increase (inc): Simply working two single crochets into the same stitch to expand your piece
- Decrease (dec): Preferably the invisible decrease technique we covered earlier
- Magic ring: The foundation that gives your amigurumi that clean, hole-free beginning
I remember when I first started, I was relieved to find I didn’t need to memorize a complicated stitch dictionary. As one fellow beginner shared with me: “Amigurumi primarily uses only single crochet and magic ring to achieve 3D shapes.” This accessibility is exactly what makes amigurumi such a perfect entry point for crochet newcomers.
You might occasionally use a few additional stitches like the chain stitch for starting certain pieces or creating details like tails, and the slip stitch for joining or creating flat seams. But honestly, you can create dozens of different amigurumi designs knowing just the core four techniques.
How do I choose the right hook size?
When it comes to amigurumi for beginners, forget what your yarn label suggests. The golden rule is to go down 1-2 sizes smaller than the recommended hook size. This creates that tight, dense fabric that holds your stuffing in place and gives amigurumi its distinctive look.
Let me give you some practical examples. If you’re using a worsted weight yarn that suggests a 5.0mm hook on the label, reach for a 3.5mm or 4.0mm hook instead. Working with DK weight yarn? A 2.5mm-3.0mm hook will likely give you the perfect fabric.
As an experienced crafter once told me (and I’ve found this advice invaluable): “Choose a crochet hook 2–3 sizes smaller than recommended yarn gauge for tight stitches.” This simple adjustment makes all the difference between a professional-looking amigurumi and one that looks homemade.
How do you know if you’ve chosen the right size? Your crocheted fabric should be tight enough that stuffing won’t peek through the stitches, but not so tight that you struggle to insert your hook into previous rounds. The finished piece should hold its shape firmly without being too rigid or too floppy.
If you’re unsure, I always recommend doing a small test swatch. Crochet a few rounds of a simple sphere and add a bit of stuffing. If you can see white fluff poking through, go down a hook size. If your hands are cramping because you can barely force the hook through the stitches, go up a size.
Where can I find beginner-friendly video tutorials?
For many of us (myself included!), seeing a technique demonstrated is far more helpful than reading written instructions. When I was learning amigurumi for beginners, video tutorials were absolutely essential to my success.
YouTube is a treasure trove of free amigurumi instruction. Search for terms like “amigurumi basics” or “amigurumi for absolute beginners” to find comprehensive guides. Look for channels that show close-up shots of the stitches—you want to clearly see hand positioning and yarn movement. Channels like “Planet June” and “Club Crochet” offer particularly excellent content for newcomers.
Many modern crochet kits now include QR codes that link directly to video tutorials for that specific project. These are fantastic because they’re perfectly matched to the pattern you’re working on. One customer review I read perfectly captured their value: “The kit includes both a well-organized printed booklet and QR codes linking to step-by-step video tutorials, catering to different learning preferences.”
Here at Crochet Craze, we’ve developed our own Video Hub specifically designed for beginners. Our tutorials break down each technique step by step, with helpful tips addressing the common pitfalls we’ve seen beginners encounter. We’ve worked hard to make our videos approachable and easy to follow.
Crochet Patterns for Beginners Video
From my own experience, I’ve found the most effective learning approach combines written patterns with video tutorials. I recommend reading through the pattern first to understand the overall structure, then watching videos for any techniques you’re unsure about. As you work, keep both resources handy to reference as needed.
Need proof that good visual instruction can make all the difference? I recently heard about an 8-year-old who learned to crochet entirely from a kit with video tutorials. If a child can master these techniques with the right guidance, I’m confident you can too!
Conclusion
Congratulations! You’ve now learned the essential 5 steps to mastering amigurumi for beginners. What an trip we’ve been on together, exploring this delightful craft from start to finish!
Remember when we first started? We gathered our simple toolkit – just some worsted weight yarn, a hook that’s a bit smaller than recommended, some stitch markers, and stuffing. Nothing fancy needed to create something magical! Your hands have now learned the rhythm of the magic ring, the consistency of single crochet, the expansion of increases, and the subtle art of invisible decreases.
Those pattern abbreviations that once looked like a foreign language? Now you understand the secret code that open ups thousands of adorable creations. You’ve seen how “(sc 2, inc) around” transforms a flat circle into a dimensional sphere like magic.
The way you stuff and shape your amigurumi makes all the difference between “homemade” and “handcrafted.” When you take that extra moment to distribute the stuffing evenly or position the safety eyes just right, you’re elevating your work to something truly special.
And how wonderful to see your personality shine through in your creations! Whether it’s embroidering a sleepy face instead of a surprised one, or choosing sunset colors instead of pastels, these personal touches make your amigurumi uniquely yours.
Don’t worry if your first few projects aren’t perfect. Mine certainly weren’t! As one beginner shared after completing their first project: “It has inspired me to pick up crochet again after many years.” Each little creature you make teaches you something new, and before you know it, you’ll be modifying patterns and even designing your own characters.
That’s the true joy of amigurumi – the creative freedom it offers once you’ve mastered these foundational skills. The possibilities unfold endlessly before you, limited only by your imagination.
We at Crochet Craze would love to see where this journey takes you. Our community of crafters is always ready to celebrate your successes, help troubleshoot challenges, and share in the joy of creating. Your handmade treasures bring happiness not just to you as the maker, but to everyone lucky enough to receive them.
Ready for your next trip in amigurumi? Explore our beginner crochet resources for more patterns, tutorials, and inspiration to fuel your creativity. The yarn is waiting, the hook is ready – happy crocheting, friends!