
If your scarf or swatch looks like a taco, you’re not alone. Knitting stockinette curling is common. This intro explains why it happens and offers fixes you can use now or later.
Learn why stockinette curls and how tension and stitch shape matter. Discover flat stockinette tips for different yarns. These methods come from Ravelry, knitting forums, and books by Elizabeth Zimmermann and Debbie Bliss.
Keep reading for steps to prevent curling in knitting. Your pieces will lie flat, look polished, and save you time. Try these solutions while knitting or when you’re done.
Key Takeaways
- Stockinette naturally curls because knit and purl rows pull differently; edge treatments change that behavior.
- Quick fixes—slipping edge stitches or a simple wet block—often tame the curl immediately.
- Garter, seed, and slipped-stitch borders are reliable flat stockinette tips for scarves and blankets.
- Choose yarns with drape like silk or linen blends to reduce curling; handle acrylic carefully when blocking.
- I-cord and knit-on edgings add weight and a clean finish that resists rolling.
Why knitting stockinette curling happens
You’ve noticed the edges roll, and you want to know why. Stockinette naturally curls because the two fabric faces act differently. This imbalance is key to understanding why stockinette curls and what to do next.
How knit vs. purl stitch geometry creates curl
The knit stitch is tighter on the right side, while the purl is bulkier on the wrong side. This difference causes the fabric to curl toward the knit side. The purl side pushes inward, making the fabric round over.
Uneven tension and its role in edge rolling
Small differences in stitch size can lead to uneven tension curling. Many knitters unknowingly tighten knit rows and loosen purl rows. This mismatch makes the edges roll more because one side shrinks more than the other.
Even knitting in the round with only knit stitches can lead to curling. This shows that tension isn’t the only factor. It’s also influenced by stitch geometry and edge structure.
When yarn fiber and weight make curling worse
Yarn choice affects curling. Heavy yarns can pull edges down, making curls more noticeable. On the other hand, lightweight yarns with good drape, like silk, linen, or bamboo blends, tend to hang flatter and fight curling better.
Acrylic yarns behave differently when blocked. They may relax with steam but can spring back after washing. So, consider long-term stability if you choose synthetic fibers.
For more on curling behavior and simple fixes, check the crochet curling guide.
Quick fixes you can try right now
You don’t want to rip out hours of work. These three quick fixes can make a big difference. Try each one to see what works best for your yarn and how you knit.
Slipping edge stitches helps stop curl by making a firm edge. Slip the first stitch of each row purlwise with the yarn in front. Then, work your pattern and slip the last stitch purlwise before turning.
On purl rows, keep the slip consistent. This makes the edge stack neatly. For a thicker border, use the four-row slipped method.
Test a 6–8 row swatch with slipping. You’ll see less curl where the slipped column is. This trick works on scarves, garment hems, and blanket edges.
Trying a different cast-on to change edge behavior is important. A knitted cast-on gives a firm start and can reduce flaring. A long-tail cast-on produces medium elasticity and a tidy look.
Tubular cast-ons add stretch and a soft edge. Cast on a small sample using each method and compare. If your bottom edge puckers, switch to a looser cast-on. If the edge waves, try a firmer one.
Blocking basics for immediate improvement help natural fibers behave. For wool, wet block: soak, gently squeeze, lay flat, shape, and pin to size until dry. Light steaming can relax synthetic blends, but avoid pressing an iron directly.
Blocking stockinette smooths stitches and reduces curl. Keep expectations realistic: blocking helps a lot with cotton and wool, but less with acrylic. If you knit for durability, remember acrylic may revert after laundering unless treated aggressively, which can harm hand and drape.
Add a garter stitch or seed stitch border to prevent curling
You can stop stockinette curl without changing the whole fabric. A narrow garter or seed edge adds weight and a clean look. Choose the style you like and match the border width to your project’s size.
For narrow pieces like scarves, start small. Two edge stitches can help, but many designers and knitters on Ravelry recommend three stitches per side for reliable flatness. Those extra stitches make a subtle but visible difference when the rest of the fabric wants to roll.
When you reach wider projects, measure your blanket and rethink the border. A 60″ blanket often needs far more than three edge stitches. Increase the blanket border width to several inches or use multiple garter or seed rows to balance the stockinette pull.
How many edge stitches to add for scarves vs. blankets
Scarf: use 2–3 border stitches per side for most yarn weights. If you want a pronounced frame, choose 3.
Blanket: scale up. For large panels, aim for a border several inches wide. Narrow borders rarely stop curling on wide pieces.
Step-by-step border rows for top/bottom and sides
Sides: work 2–3 stitches in garter stitch or seed stitch at each edge every row. Example pattern: Row 1: knit all. Row 2: knit 2–3 edge sts, purl across, knit last 2–3 edge sts.
Top and bottom: work 6–10 rows of garter or seed stitch. Many knitters prefer at least 6 rows; that yields about 1–2 inches depending on yarn and needle size. If you want extra stability, add more rows.
When a wider border is necessary
Choose a wider garter or seed border when the body of your piece is large or heavy. Wide panels create more horizontal pull, so increase the border width proportionally or use several inches of edging to counteract roll.
| Project | Suggested edge stitches per side | Top/bottom rows | Notes |
|---|---|---|---|
| Scarf (narrow) | 2–3 | 6–8 | Three edge stitches give consistent flatness; 6 rows usually enough for light yarns. |
| Scarf (wide or bulky) | 3–4 | 8–10 | Bigger yarns need extra border stitches and more rows to balance drape. |
| Blanket (throw ~50–60″) | 4–8 or more | 10+ | Increase blanket border width; narrow bands rarely stop roll on large pieces. |
| Baby blanket / lapghan | 3–5 | 8–10 | Moderate width usually sufficient; adjust for yarn and pattern. |
Use a slipped-stitch border that preserves stockinette look
You want your fabric to look flat and neat. A slipped-stitch border does just that. It makes the edge strong without changing the fabric’s look.
For a stable edge without a bold look, try the four-row slipped border. It uses slipped and purl rows to keep the edge smooth. Your fabric will look like stockinette.
This method is easy to follow and repeat. It’s great for scarves, sweater bodies, and more. It keeps your fabric looking uniform.
Four-row slipped border:
- Row 1: knit 1, slip 1, knit across until last 2 sts, slip next, knit last.
- Row 2: purl all stitches.
- Row 3: slip 1, knit 1, slip 1, knit across until last 3 sts, slip next, knit 1, slip last.
- Row 4: purl all stitches.
Slipping the first and last stitches helps. These stitches are firmer, keeping the edge flat. Your main fabric stays smooth.
Go for this if you want a clean look. It’s perfect for those who prefer stockinette. It adds stability without being too obvious.
| Feature | Slipped-stitch border | Garter/Seed border |
|---|---|---|
| Visual impact | Near-invisible, preserves stockinette | Visible texture change |
| Edge stability | Strong, isolates curl | Very strong, adds weight |
| Best use | Scarves, garment fronts, minimal design | Blankets, contrast edges, structural hems |
| Technique complexity | Simple four-row repeat | Very simple knit/purl repeats |
| Resulting edge | slipped stitch stockinette edge that looks flat | textured, pronounced border |
Add a decorative lacy border for style and stability
You want an edge that looks delicate yet keeps your piece flat. A knit-on lace border gives you that balance. It adds gentle weight and a tidy finish while staying true to the knitted fabric’s look.
Try this simple knit-on lace edge for scarves: Row 1 (RS): k1, yarn over, k2tog, knit to last 3 sts, k2tog, yarn over, k1. Row 2: purl all, including wrapped yarns. This pattern makes a light, decorative lace edge that helps the stockinette lie flat and reads as part of the main fabric.
Simple knit-on lace edge you can add to scarves
If you prefer to add the lace after the body is done, pick up stitches along the edge or use a provisional cast and knit the border. The knit-on lace border blends with the body so the finish looks intentional and seamless.
How many extra stitches to cast on for a lace edge
When you plan a cast-on for lace edge, allow extra stitches for the wrap and pattern repeats. Add three extra stitches on each side—six total—so the lace has space to bloom without pulling. That small buffer prevents puckering and keeps the decorative lace edge even.
Crochet vs. knit-on border: pros and cons
Choosing between crochet vs knit-on border depends on your goals. A crochet border gives immediate firmness and weight, which is ideal if edges curl badly or you need a sturdy finishing band.
The knit-on lace border keeps the piece flexible and visually matched to the stockinette. Pick knit-on when you want the edge to read as part of the knitting.
For inspiration and practical tips on preventing curled edges while adding borders, check this helpful guide from A Bee in the Bonnet: preventing curled edges.
| Feature | Knit-on lace border | Crochet border |
|---|---|---|
| Visual integration | Blends with knitted fabric for a cohesive look | Reads as a distinct trim, can contrast in texture |
| Stability | Adds moderate weight and flexibility | Provides firm, immediate weight to stop curling |
| Ease of after-the-fact application | Requires picking up stitches or knitting on edge | Often easier to apply to finished piece with single crochet |
| Best use | When you want a decorative lace edge that matches the body | When you need a sturdy finish and extra stiffness |
| Cast-on considerations | Plan extra stitches; add three per side for lace | No cast-on if crocheting after; plan for stitch density |
Try an i-cord or pick-up-and-knit edging for a polished finish
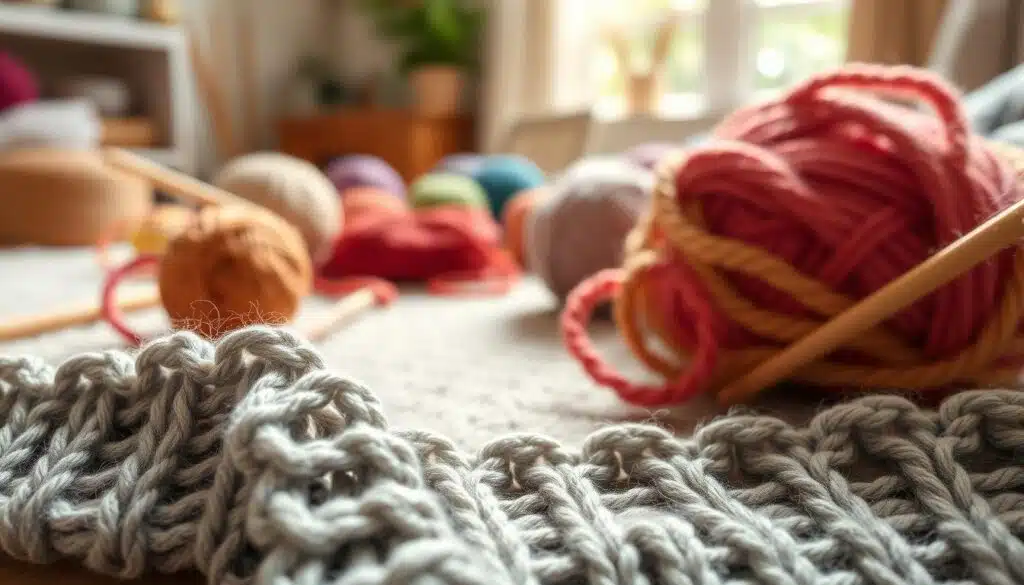
Small, rounded edges make a big difference. An i-cord edging gives a neat, tubular look. It adds weight and firmness to edges, making them lie flat and preventing curl.
How i-cord adds weight and structure to openings
An i-cord makes edges denser than a simple bind-off. It traps bulk, pulling the edge into a neat line. Use heavier yarn or smaller needles for a firmer i-cord.
Picking up stitches evenly to avoid puckering
For a pick-up-and-knit border, even spacing is key. Pick up one stitch per bound-off stitch or follow a pattern rate. Uneven pickup causes puckers that distort the fabric.
Adjust the pickup rate based on your fabric’s stretchiness. Stretchy stockinette may need fewer stitches for a smooth finish. Use diagrams at knitting finishing techniques for guidance.
Using an i-cord to tighten an opening and prevent rolling
For a tighter opening, pick up slightly fewer stitches than edge loops. Skipping stitches shortens the cord, pulling the edge in. This creates a built-in hem that stops curling without bulky seams.
| Edge Goal | Method | Pickup Rate | Effect |
|---|---|---|---|
| Neckline neatness | Pick-up-and-knit with i-cord | 1 per bound-off stitch | Smooth, rounded finish with light weight |
| Prevent strong curling | Firm i-cord with smaller needles | 1 per bound-off stitch or slightly fewer | Added weight and structure; i-cord to stop curling |
| Tightened opening | Shortened i-cord pickup | Skip every 8–12 stitches | Edge pulls in; stable neckline or cuff |
| Maintain stockinette look | Subtle pick-up-and-knit border | Match fabric elasticity | Minimal visual change; prevents rolling |
When and how to block your stockinette pieces
Blocking makes your knitting look amazing. You can use wet blocking for fibers like wool or a gentle steam method for others. Choose the best method based on your yarn and project.
Wet vs. steam: choose the right technique
Wet blocking is great for wool, alpaca, cotton, and linen. Soak the piece in warm water with a bit of soap. Let it sit, then rinse and press out water with a towel. Pin it to shape to relax the fibers.
Steam blocking is softer. Use a steamer or iron from a distance to relax fibers without soaking. It’s best for blends and delicate fibers that might felt.
Blocking acrylic: what you must never do and safe alternatives
Acrylic doesn’t block well and can shrink back. Avoid direct heat or ironing to prevent damage. Use light steam from a distance for acrylic, testing on a swatch first.
If steam is too risky, try adding structure instead. Use an i-cord edge, a slipped-stitch border, or a sewn hem. These can give acrylic the stability it needs.
What blocking will and won’t do for rolling edges
Blocking can help prevent curling and improve stitch definition. But, stockinette often curls naturally. Use blocking with other techniques for the best look.
Repeat wet blocking on animal fibers after washing to keep shape. For tricky cases, try steaming by hand and check the edges before making big changes.
Prevent the edges of your knit scarf from curling with these tips. They help you choose the right edge stitches and blocking methods.
Choose yarn and fiber to minimize curling
Choose fibers that let gravity help. Light, drapey blends hang flat and prevent curling. You can design garments to use the fabric’s weight for a neat shape.
Fibers with drape that resist curling
Silk, linen, and bamboo blends are soft and drape well. They slide smoothly, creating a flat edge. Look for yarns labeled as drapey or fluid, and touch the yarn before buying.
When a lighter weight yarn helps more than heavier yarns
Light yarns like laceweight or fingering reduce curling. Thin fabrics block well and stay flat when pinned. Switching to a lighter yarn can fix curling issues.
Why acrylic behaves differently and how to compensate
Acrylic yarns curl because they don’t block well and spring back. Steam can help, but it’s not permanent. To keep acrylic flat, use i-cord edges, knit-on borders, or a sewn backing. For washable items, repeat finish methods after washing.
Alternative stitch choices to avoid stockinette roll
Choose stitches that naturally lie flat to avoid the hassle of curled edges. Patterns with balanced knits and purls on both sides work best. This way, your sweater or scarf will stay flat without needing special blocking.
Balanced stitch patterns with knits and purls on both sides
Garter stitch, seed or moss stitch, and reversible textures keep fabric tension even. When both sides have knits and purls, the fabric doesn’t curl. Use these stitches at edges or across panels for a reliable finish.
Ribbing, moss/seed stitch, and textured panels as curling solutions
Ribbing is great for stretchy, tidy borders. A 1×1 or 2×2 rib creates a built-in anchor along edges and necklines.
Moss stitch vs stockinette is a simple choice: moss gives flatness and texture, while stockinette rolls. For a flat look, choose moss or seed stitch bands around hems and cuffs.
Designing a flat piece from the start vs. fixing later
Designing for flatness is better than fixing curl later. Include balanced stitch sections as borders or wide textured panels. This saves time and keeps your design intact.
If curling happens after finishing, try knitted-on borders, picked-up ribbing, or sewn foldover hems. For more ideas on non-rolling edges, see this helpful roundup: every non-rolling edge for stockinette.
| Solution | Best Use | Effect on Curl | Notes |
|---|---|---|---|
| Garter stitch border | Scarves, blankets, hems | High reduction | Simple, reversible, flat edge that works for most yarns |
| 1×1 or 2×2 ribbing | Cuffs, necklines, edges | Strong reduction | Stretchy finish; ribbing to stop curling while allowing give |
| Moss/seed stitch | Decorative borders, whole panels | Very effective | Moss stitch vs stockinette: moss wins for flatness and texture |
| Foldover hem (seamed) | Sweater bottoms, heavier garments | High reduction | Adds weight and a clean finish; requires seaming |
| I-cord or picked-up edging | Sleeve openings, necklines | Moderate to high | Polished look; may need larger needle or extra rows to add weight |
| Added textured panels | Body of garment | Moderate | Breaks stockinette runs and distributes tension across the piece |
Finishing techniques to stabilize finished curling pieces
You’ve tried borders and blocking, but your stockinette is curling. Use techniques that add weight or structure to keep edges flat.
Sewing a backing or adding interfacing for stability
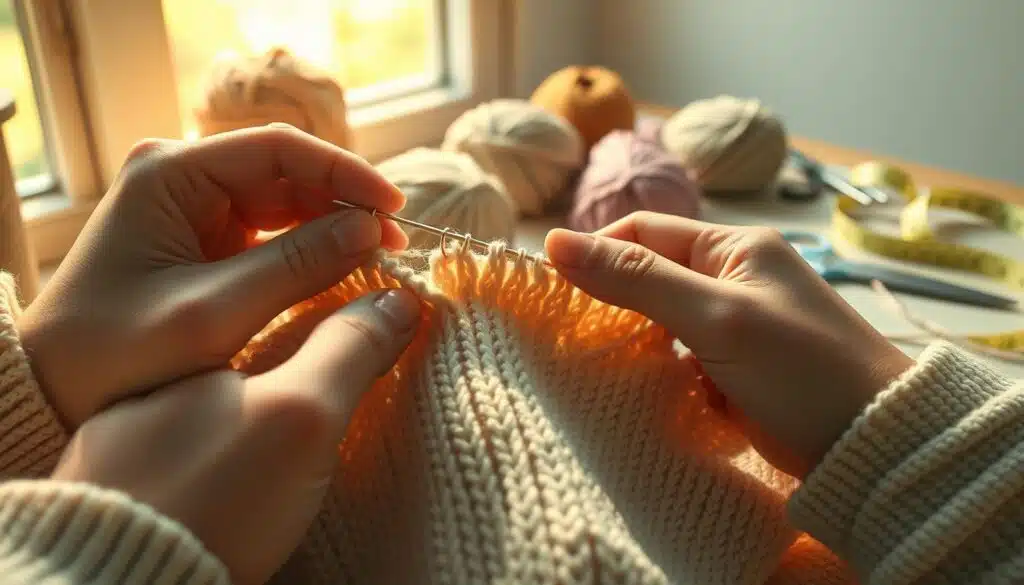
For blankets and heavy scarves, sew a woven backing to the wrong side. This adds weight and keeps the knitting flat. For less bulk, fuse a light cotton interfacing before stitching. Use a stable stitch like a narrow zigzag or mattress stitch.
Folded, seamed hems and how they stop top/bottom curling
A turned hem creates a neat edge that resists curl. Work an inch of stockinette, add a purl row, then fold and tack the hem. This method works well for scarves, hats, and sweater hems.
Adding wire, starch, or other stabilizers where appropriate
Use small-gauge craft wire for crisp, bendable edges. For firm borders, try plant-fiber pieces with starch. But avoid starch on wool and silk. Synthetic fibers can use sewn-in stabilizers or interfacing.
Pick the right method for your fiber. A throw might need a full backing. A hat brim might use wire. A lightweight scarf might just need a folded hem.
Conclusion
Stopping stockinette curling is easy with a few quick fixes and some long-term plans. For a fast solution, try slipped-stitch edges or a narrow band at the start and end. These can help fix curling edges.
If you need something more lasting, add a sturdy border. Options include i-cord, knit-on lace, or garter rows. These add weight and structure to your scarf.
For better results, plan ahead. Choose yarns with good drape or lighter weight. Pick balanced stitch patterns and block them right for the fiber. With acrylic, use careful steam blocking and structural edges instead of wet blocking.
For a flat finish, try sewn backings, folded hems, or interfacing. These methods can help achieve the look you want.
For real-world tips, check out a blog post on edging and lining. It offers hands-on advice. Remember, stockinette’s curl is charming, but you now have tools to tame it. Use borders, blocking tricks, and yarn-smart choices to polish your projects.
FAQ
Why does stockinette curl and can you explain the knit vs. purl geometry?
Stockinette curls because knit and purl stitches don’t sit the same way. Knit stitches lie flat on the right side. Purl bumps push inward on the wrong side, so the fabric naturally rolls toward the knit face. This imbalance in stitch geometry, plus the difference in stitch height, creates the classic roll.
Is uneven tension the main cause of edge rolling?
Uneven tension can make curling worse but it’s not the whole story. Many knitters knit tighter on knit rows and looser on purl rows, which amplifies the roll. But even perfectly even tension won’t stop stockinette from curling; the stitch geometry and fabric behavior drive it. Knitting in the round (all knits) also curls, so tension alone doesn’t explain it.
How do fiber and yarn weight affect curling?
Fiber and mass matter. Drapey fibers like silk, linen, and bamboo blends hang and flatten more readily. Lightweight yarns (lace/fingering with airy blends) often block and hang flatter. Heavier yarns and dense acrylics tend to accentuate the roll because weight pulls the edges under or resists effective blocking.
What quick fixes can I try right now to reduce curling?
Fast wins: slip the first and last stitch of every row to thicken the edge, add 2–3 garter or seed stitches at each side, or wet/steam block if your fiber tolerates it. For scarves, pick up a few extra border rows at the top and bottom. These are immediate and low-effort.
How does slipping edge stitches tame the curl?
Slipping the first and/or last stitch each row makes a firmer, denser edge that isolates the rolling to those outer loops. The slipped stitches act as a buffer so the visible fabric stays flatter, and you keep the stockinette look across the rest of the piece.
Will trying a different cast-on help stop the bottom edge from rolling?
Yes—cast-on choice changes edge tension. Knitted cast-on is tighter, long-tail is medium, and tubular is stretchier. A tighter start can reduce roll at the very bottom, but results vary. Try a few cast-ons on a swatch to see what pairs best with your yarn and pattern.
What are the blocking basics I should know?
Wet blocking (soak, shape, pin, dry) is most effective for wool and plant fibers. Steam blocking is gentler and useful when you can’t soak. Blocking relaxes fibers and can dramatically reduce curl, but it usually won’t permanently flatten acrylic and plain stockinette may retain some tendency to roll.
How many garter or seed edge stitches should I add for scarves and blankets?
For scarves and narrow pieces, 2–3 garter/seed stitches per side usually do the trick; many knitters prefer three for reliable flatness. For large blankets a narrow border isn’t enough—use a proportionally wider border (several inches or more) to counter the body’s pull.
Can you give step-by-step border rows for top/bottom and sides?
Side edges: work 2–3 garter or seed stitches at each edge every row (example: Row 1 knit all; Row 2 knit 2–3 edge sts, purl across, knit last 2–3). Top/bottom: work 6–10 rows of garter or seed stitch (many knitters aim for at least 6 rows or 1–2 inches depending on yarn).
When do I need a wider border instead of a narrow one?
When your project is large—blankets or wide panels—a slim 2–3 stitch border won’t balance the stockinette body. Increase the border width or use several inches of garter/seed or a textured panel so the border’s stability can counteract the central curl.
What is the four-row slipped-stitch method and how does it help?
The four-row slipped-stitch sequence thickens and stabilizes the edge while preserving a stockinette look across the body. The sequence uses slipped stitches and alternating rows (k/p pattern) so the very edge takes the roll and the main fabric stays flat. It’s ideal when you want near-stockinette edges without obvious texture changes.
Why do slipped stitches isolate the curling edge?
Slipped loops create a denser, less flexible column of fabric at the edge. They absorb the tendency to roll so the rest of the fabric lies flat. Think of them as sacrificial stitches that protect the visible surface from curling.
When should I choose slipped-stitch over a garter or seed border?
Choose slipped-stitch when you want the edge to look almost like stockinette. Use garter/seed when you don’t mind a clear textural border or want maximum anti-curl power. Slipped-stitch is great for scarves, garment bodies, and places where a matched look matters.
How do I add a simple knit-on lace edge to a scarf?
A basic knit-on lace: on RS row k1, YO, k2tog, knit across until last 3 sts, k2tog, YO, k1. WS row: purl across including wraps. This gives a delicate decorative edge that also adds slight weight and structure.
How many extra stitches do I need to cast on for a lace edge?
Plan on about three extra stitches per edge (six total) when adding a knit-on lace, because the lace uses extra yarn and wrapped spaces. Adjust with your swatch if the lace pattern consumes more yarn or rows.
Crochet vs. knit-on lace — which is better for stopping curl?
Crochet borders are stiffer and add immediate weight; they’re easy to retrofit and very effective. Knit-on lace matches the knitted fabric’s drape and looks seamless but is less stiff. Pick crochet for a firm, stable finish and knit-on lace when you want visual continuity and gentle support.
How does i-cord help prevent rolling and where should I use it?
I-cord gives a rounded, dense, weighted edge that resists roll. It’s perfect for necklines, cuffs, and scarves. Because it’s compact and slightly heavier than the fabric edge, it pulls the edge flat and looks neat and finished.
Any tips for picking up stitches evenly when adding an i-cord or pick-up-and-knit edging?
Pick up at a steady rate—commonly one stitch per bound-off stitch or one per a set number of rows. Maintain an even tension and adjust the pickup rate to avoid puckers: if fabric is stretchy, pick up a bit more densely; if tight, space pickups slightly wider.
Can I use i-cord to tighten an opening like a neckline?
Yes. Intentionally pick up slightly fewer stitches (skip occasionally) so the i-cord is a touch shorter than the opening. That gentle draw tightens the edge and prevents rolling while giving a clean, tailored finish.
When should I wet block versus steam block my stockinette pieces?
Wet block natural fibers (wool, cotton, linen) for the strongest reshaping—soak, shape, pin, dry. Use steam blocking for delicate fibers, blends, or when you can’t soak. Steam is gentler but less permanent than a full wet block for some fibers.
Can I block acrylic and what are the risks?
Acrylic resists wet-block memory and often reverts after washing/drying. Steam can relax acrylic but risks heat damage if too close. Avoid pressing; use light, cautious steam from a distance. For acrylic, rely more on structural edgings, sewn backing, or stable borders.
Will blocking eliminate stockinette curl forever?
Blocking can greatly reduce curl, but it rarely “cures” plain stockinette forever. Expect some return of the tendency over time or after washing, with synthetic yarns. Combine blocking with edges or stabilizers for the best long-term result.
Which fibers have the best drape to help resist curling?
Silk, linen, and bamboo blends have good drape and can hang flatter, using gravity to help resist edge roll. These fibers suit garments and scarves where hanging weight helps flatten stockinette.
When is choosing a lighter weight yarn better than switching finishing techniques?
Lighter yarns reduce mass and gravitational torque, so they often block flatter and hold shape better. If your design allows a lighter weight, that can be an elegant fix without adding bulky borders or heavy edgings.
Why does acrylic behave differently, and how do I compensate?
Acrylic’s fiber memory resists wet blocking and often springs back after laundering. Compensate with structural edges (i-cord, garter/seed borders), sewn-in backings, or careful steam. For washable projects, design with repeatable finishing in mind, not relying on a one-time block.
What stitch patterns naturally avoid stockinette roll?
Balanced patterns that put knits and purls on both sides work best: garter, seed/moss, 1×1 or 2×2 ribbing, and other reversible textures. These stitches distribute geometry evenly and create flat fabric without extra finishing.
When should I design a flat piece from the start instead of fixing curling later?
Plan for flatness from the start when the project needs to look neat without extra finishing—garments, throws, or anything worn flat. Incorporate balanced edges, textured borders, or wider panels. Retrofitting is possible but less predictable, on large projects.
How can sewing a backing or adding interfacing stabilize a finished piece?
Sewing a woven fabric backing (cotton or linen) adds weight and structure, forcing edges to lie flat. Interfacing or a sewn-on band gives permanent stability for throws, scarves, or wearable pieces that need a crisp edge.
Do folded hems and seamed hems stop top and bottom curling?
Yes. Working a few inches of stockinette/purl rows, folding, and tacking or seaming creates a stable turned hem that resists rolling. It’s a neat solution for bottoms and tops where a crisp line is desired.
Can I add wire, starch, or stabilizers to stop rolling?
You can: sew a small-gauge wire into a hem casing for brims or edges that must stay flat. Starching works on plant fibers but avoid it on animal fibers. For synthetics, use sewn-in stabilizers or interfacing instead of chemical stiffening. Use caution—wire and stiffeners change drape.
What’s the simplest go-to strategy for most knitters to stop stockinette from curling?
If you want a quick, reliable fix: add 2–3 garter/seed stitches at each side, slip the first and last stitch every row, and block according to fiber. For final polish, add an i-cord or a few rows of garter at the top and bottom. Those moves cover most real-world problems without drama.