
Circular Needle Knitting: 10 Powerful Benefits for Effortless Success 2025
The Seamless Magic of Circular Needle Knitting
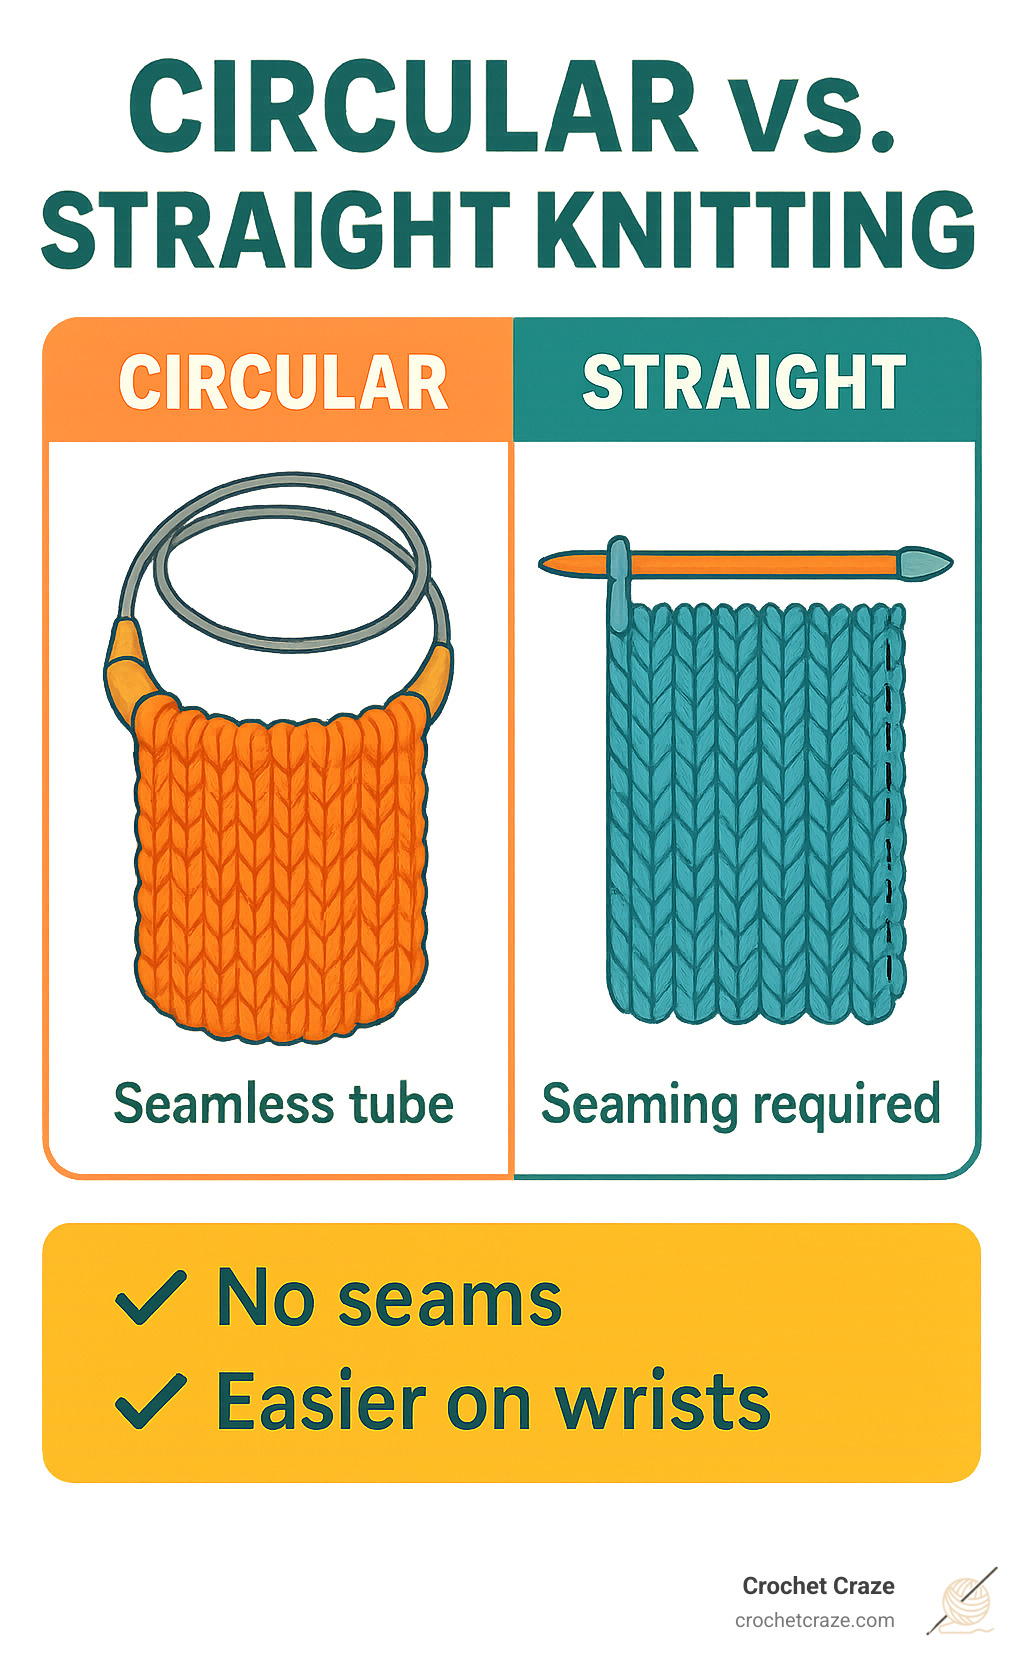
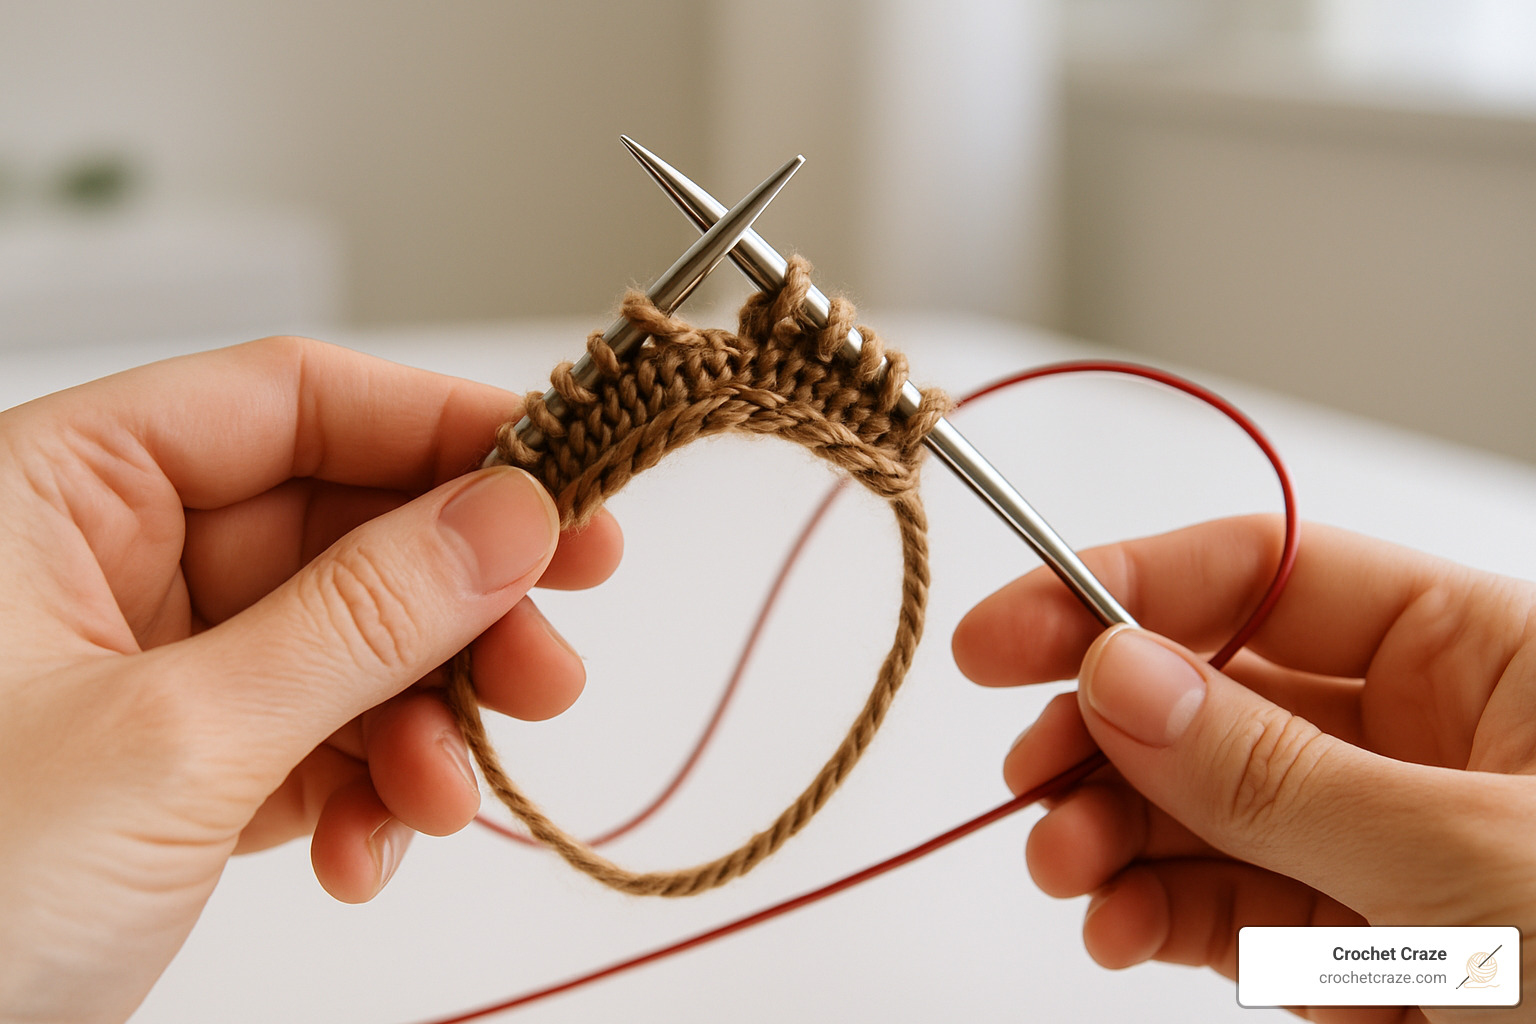
Circular needle knitting is a technique that uses two needle tips connected by a flexible cable to create seamless tubular projects or flat pieces with many stitches. Here’s what you need to know:
- What they are: Two pointed needle tips connected by a flexible cable
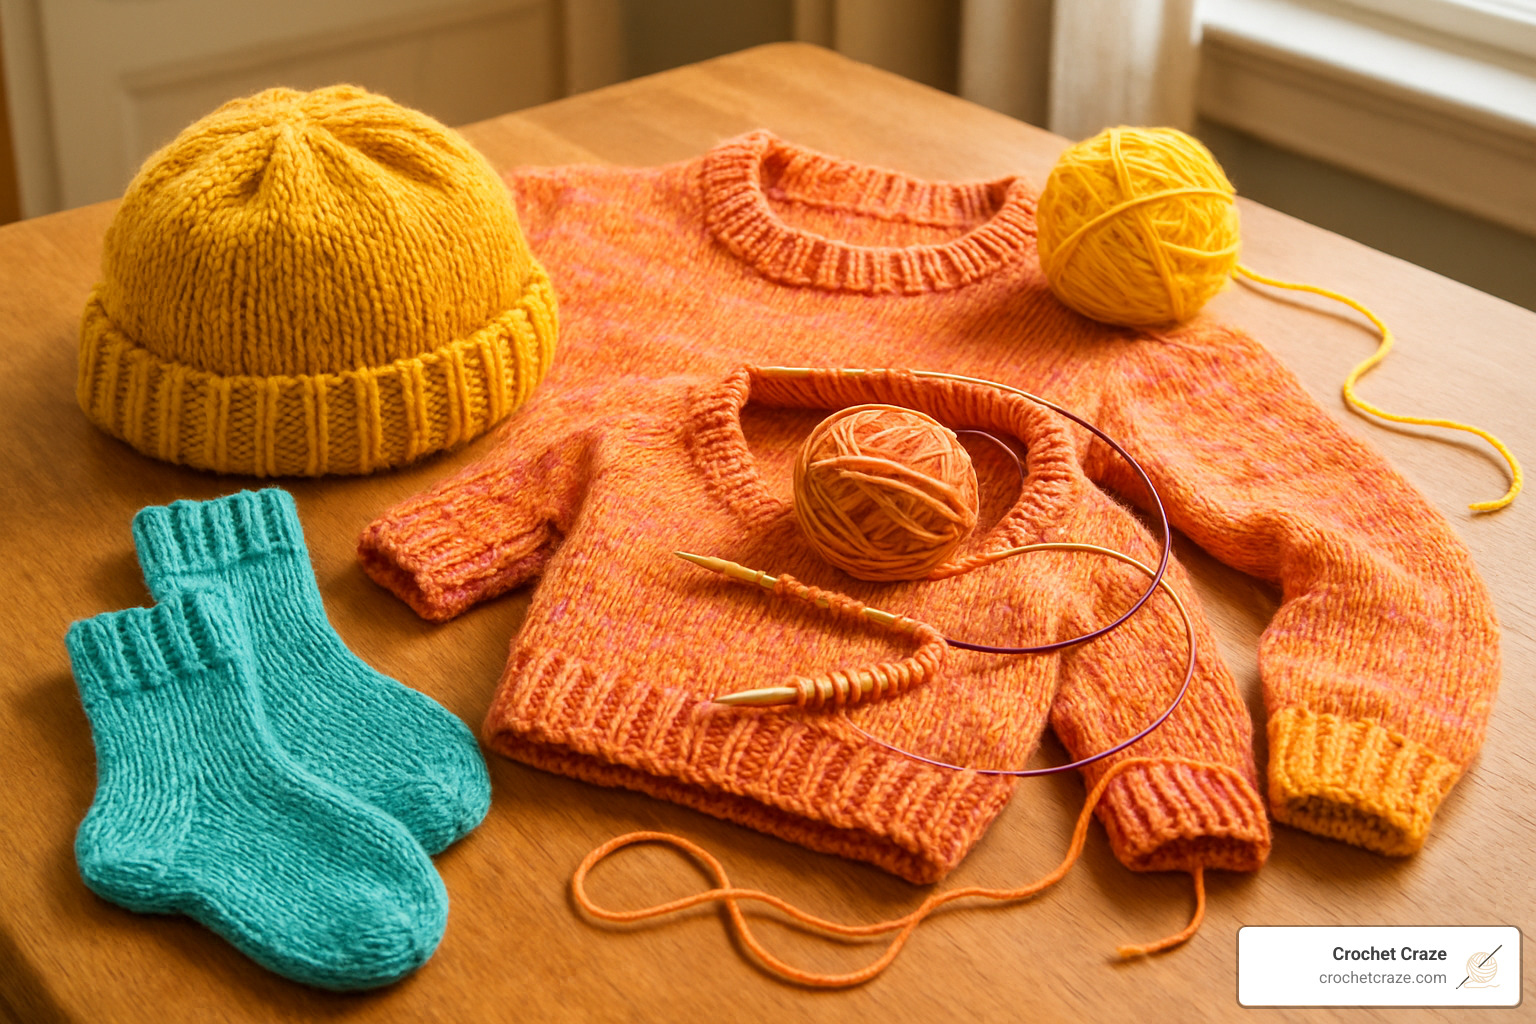
- Best for: Hats, sweaters, socks, sleeves, cowls, and large flat projects
- Main advantages: No seams, easier on wrists, holds more stitches than straight needles
- Needle length rule: Choose a circular needle slightly shorter than your project’s circumference
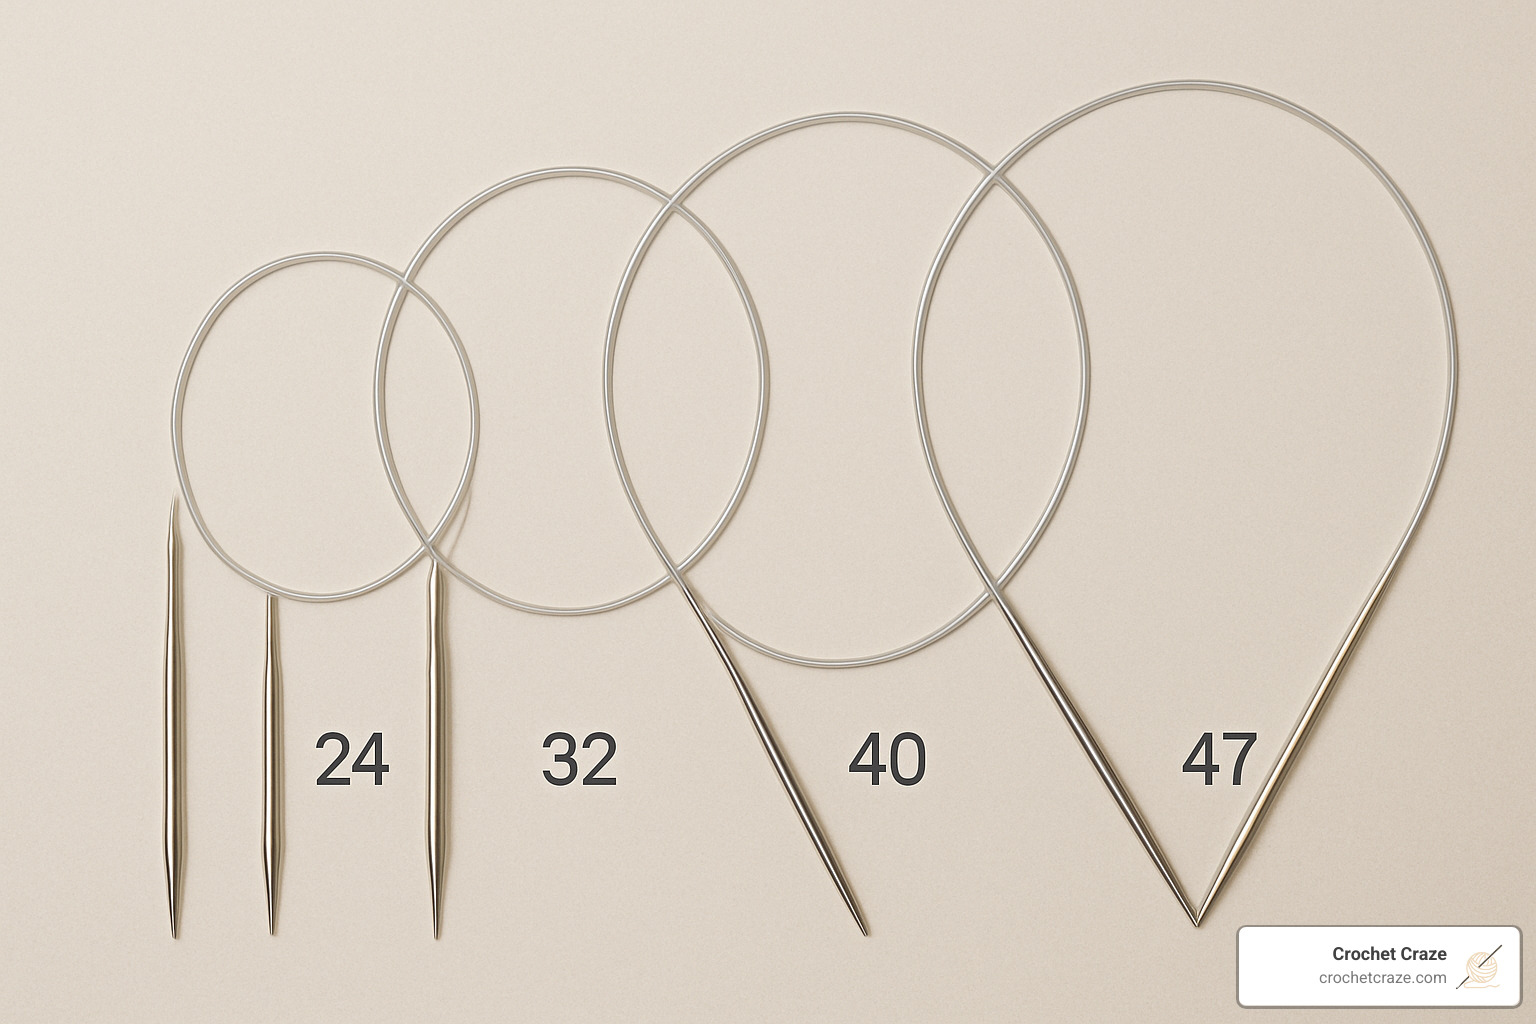
- Common lengths: 16″ (hats), 24″ (sleeves/kids’ sweaters), 32″ (adult sweaters)
If you’ve ever struggled with juggling multiple double-pointed needles or felt the weight of a blanket on straight needles, circular needles might be your new best friend.
The beauty of circular needle knitting lies in its versatility. You can create seamless tubes by joining your stitches in the round, or knit back and forth for flat pieces that would normally require straight needles.
“Knitting in the round is one of the easiest techniques to master,” as many experts note, despite how intimidating it might look to beginners. Once you get the hang of it, you’ll wonder why you didn’t try it sooner!
My name is Sonji Huerta, and while I’m newer to yarn crafts, I’ve found circular needle knitting to be a game-changer for creating everything from simple hats to more ambitious sweater projects. I’ve spent countless hours mastering the techniques of joining in the round, preventing twisted stitches, and understanding the right needle length for different projects.
Relevant articles related to circular needle knitting:
– garter stitch knitting
– garter stitch sweater
Why Choose Circular Needles?
There’s something almost magical about the way circular needle knitting has transformed the craft since its first U.S. patent in 1918. What started as simple steel wire cables connecting needle tips has blossomed into the smooth, flexible tools that knitters everywhere now reach for first. But what makes these curved wonders so special?
I fell in love with circular needles during my first sweater project, and I bet you’ll appreciate them too. The genius of their design lies in how they distribute your project’s weight evenly across both hands and the flexible cable. Your wrists and shoulders will thank you, especially during those cozy marathon knitting sessions when you’re determined to finish “just one more row” (which somehow turns into twenty).
The joy of creating truly seamless garments is perhaps the most celebrated feature of circular needle knitting. Without seams, your hats, sweaters, and socks not only look more professionally crafted but also maintain better stretch and drape. A seamless sweater feels different when worn – with consistent tension throughout and no bulky seams to create pressure points or weak spots.
While our modern circular needles might seem like a recent innovation, knitting in the round has fascinating ancient roots. Archaeological findies show early knitters using sets of five hooked needles as far back as the 14th century to create seamless tubes. We’re simply carrying on a tradition that’s been perfected over centuries!
Benefits Over Straight Needles
When I switched from straight needles to circulars, the difference was immediate. Your experience might be similar when you find these advantages:
Less wrist strain becomes apparent almost immediately. Rather than supporting your project’s entire weight with your wrists, the cable acts as a hammock, cradling those stitches comfortably. Your hands stay relaxed, allowing for longer, more enjoyable knitting sessions.
Larger stitch capacity makes ambitious projects feasible. While straight needles might max out around 50-60 stitches, a typical 32″ circular needle happily accommodates 150+ stitches. Suddenly, that dream blanket doesn’t seem so intimidating!
Travel-friendly design means your knitting becomes truly portable. The compact nature of circular needles prevents them from poking through bags or losing their stoppers. As one knitter told me, “I apologized to my seat neighbor after bumping them with straight-needle knitting. Since switching to circulars, my elbows stay tucked in and my projects are more socially acceptable on public transport!”
Versatility might be the biggest selling point – circular needles work for both round and flat knitting. Many knitters eventually replace most of their straight needles entirely, using circulars for everything from tiny baby hats to enormous blankets.
Even weight distribution makes knitting more comfortable over time. The cable holds most of your stitches, preventing the lopsided feeling that can make one hand tire faster than the other.
Projects Best Suited to Circles
While circular needle knitting works for almost anything, certain projects showcase their strengths particularly well:
Hats are perfect circular needle projects, with a 16″ needle being ideal for adult hats with a circumference of 18-22 inches. The seamless construction creates a clean finish with no uncomfortable seam pressing against your forehead.
Sweaters become less intimidating when worked on circulars. Bodies work beautifully on 24″ or 32″ needles, while sleeves can be managed with 16″ circulars or the magic loop method. The joy of finishing a sweater and having only minimal seaming (or none at all) can’t be overstated!
Socks transform from fiddly challenges to portable pleasure when worked using the magic loop technique with a long (32″ or 40″) circular needle. No more juggling multiple double-pointed needles or losing one under the couch cushions.
Blankets and other large projects benefit tremendously from circular needles. The cable’s ability to hold hundreds of stitches means your entire afghan can grow in one piece, without the weight straining your wrists.
Cowls and snoods make excellent first projects for circular knitting beginners. These seamless neck accessories work up quickly and give you practice with joining in the round without the complexity of shaping.
Essential Gear for Circular Needle Knitting
Ready to dive into circular needle knitting? Let’s talk about what you’ll need to get started! Just like straight needles, circulars come in a wide range of sizes (from tiny US 0/2mm all the way up to chunky US 15/10mm and beyond), but with an important extra feature – cable length.
Needle Components and Materials
Every circular needle has three main parts working together to make your knitting experience smoother:
The two needle tips do the actual knitting work, the flexible cable holds your stitches, and the joins connect everything together. Think of it as a knitting system rather than just a tool!
When it comes to needle tip materials, you’ve got wonderful options to match your knitting style:
Bamboo or wood tips feel warm and cozy in your hands – perfect for cold winter knitting sessions! They gently grip slippery yarns like silk or bamboo, preventing stitches from sliding off accidentally. They’re also blissfully quiet if you’re knitting during your partner’s favorite TV show.
Metal tips are the sports cars of the knitting world – sleek, fast, and responsive. If you’re a speed knitter or working with “sticky” yarns like cotton or wool, metal tips let your stitches glide effortlessly. They’re incredibly durable and often have sharper points for detailed lace work.
Carbon fiber tips offer the best of both worlds – they’re lightweight like wood but strong like metal. They warm to your touch quickly and resist breaking, making them worth considering if you’re hard on your tools.
Don’t overlook the cable! A good cable should be flexible without being floppy, and ideally won’t retain “memory” (that annoying tendency to stay coiled up). Nothing disrupts your knitting flow like fighting with a cable that keeps curling up on itself.
Picking the Right Length
Here’s where circular needles really shine – but also where beginners can get confused. The golden rule to remember: your circular needle should generally be shorter than the circumference of your project.
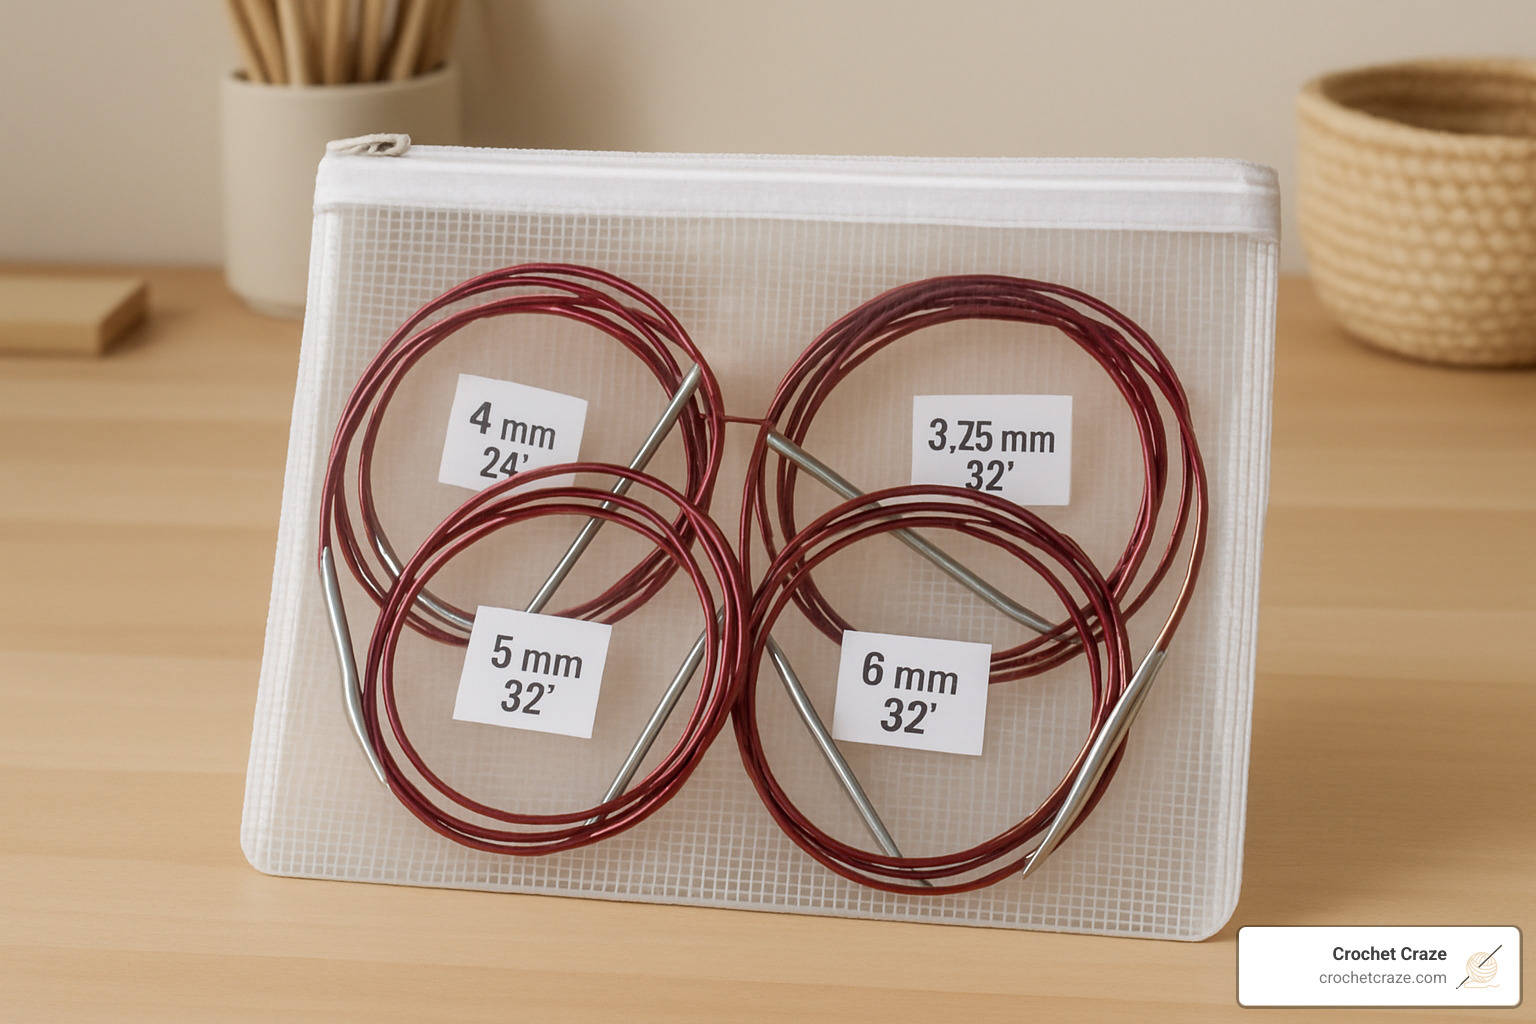
Think about it this way – your stitches need to comfortably reach around the cable without stretching or bunching. Here’s a simple guide to standard lengths:
9″ circulars work for tiny tubes like baby hats and socks, though the very short tips can feel awkward in some hands.
16″ circulars are perfect for adult hats (which typically have an 18-22″ circumference), cowls, and neckwarmers.
24″ circulars handle children’s sweaters (around 26″ circumference), shawls, and smaller flat projects with ease.
32″ circulars are incredibly versatile – use them for adult sweater bodies, larger cowls, baby blankets, or the magic loop technique.
40″ and longer circulars tackle big projects like blankets, extra-large sweaters, or can be used for magic loop on smaller items.
Using the wrong length can make knitting frustrating. If your needle is too long, your stitches will stretch uncomfortably around the cable. Too short, and your stitches will be crowded together, making them hard to work with. As my knitting teacher once told me, “If you’re making a hat with a 20″ circumference, grab a 16″ circular – using a 32″ would be like trying to wear pants that are way too big!”
For more detailed information about the various options available, check out our guide to Circular Knitting Needle Kits. And if you’re curious about how yarn weight affects your needle choice, the Craft Yarn Council’s research on yarn weights is incredibly helpful.
Circular Needle Knitting: Casting On & Joining
Every knitting project starts with casting on, and circular needle knitting is no exception. While any cast-on method works, the long-tail cast-on creates a particularly nice, stretchy edge for circular work.
Here’s how to cast on and join your work into a circle:
First, cast on your stitches using your favorite method. Some knitters add an extra stitch as insurance for the joining process – a little trick that can make joining smoother.
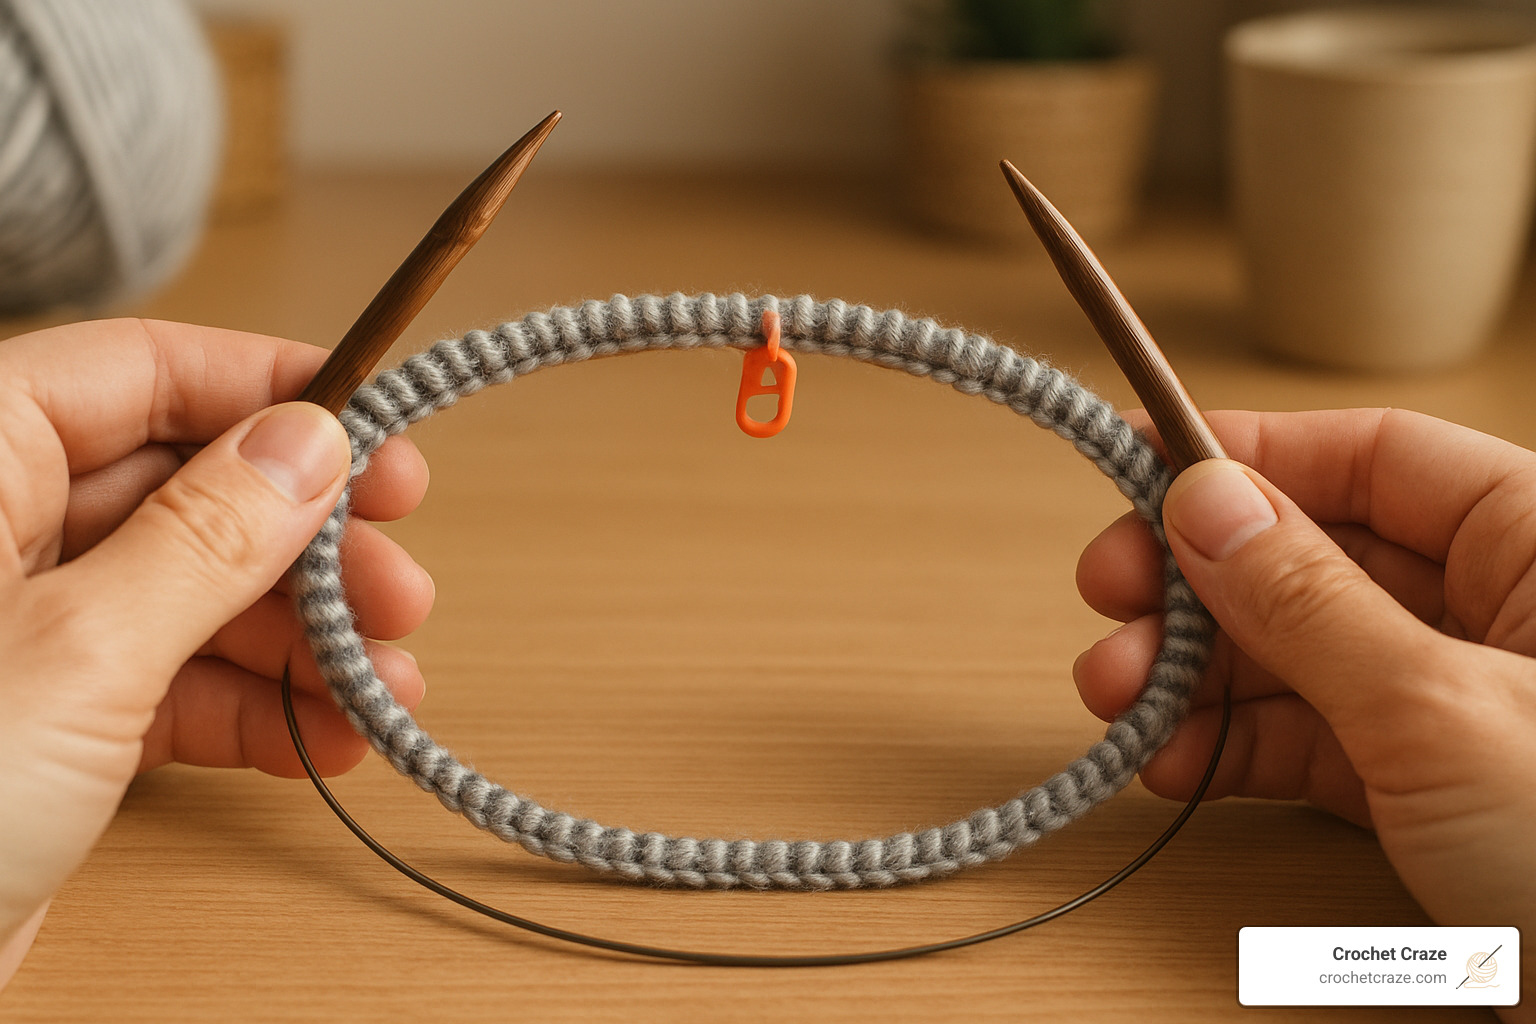
Next, place a stitch marker on your right needle. This bright little helper will show you exactly where each round begins – trust me, you’ll be grateful for this visual cue twenty rounds later!
Now comes the most crucial step – check for twists. Lay your needles on a flat surface and make sure all the stitches face the same direction, with the cast-on edge running straight along the bottom. A twist at this stage creates a Möbius strip that can’t be fixed without starting over. Take the extra few seconds to check – your future self will thank you!
Ready to join in the round? For a nearly invisible join, try this neat trick: slip the first cast-on stitch from the left needle to the right needle, then pass the last cast-on stitch over it. Place the resulting stitch back on the left needle, and begin knitting with your working yarn.
Finally, tighten those first few stitches. The first stitch should be firm, and the second stitch even firmer, which prevents the dreaded “ladder” (gap) that can form at the join.
With these fundamentals in place, you’re ready to watch your project grow into a beautiful seamless tube – one of the true joys of circular needle knitting!
Step-by-Step Basics
Ready to dive into your first circular needle knitting project? Let’s break down the process into manageable steps that will have you knitting in the round with confidence before you know it.
Start by casting on your stitches using your preferred method. I find that a long-tail cast-on works beautifully for most circular projects, creating a nice stretchy edge that’s perfect for hats and sweater necklines.
Next, take a moment to distribute your stitches evenly around the cable. This simple step makes a world of difference! Slide them along until they’re balanced around the needle, preventing that awkward bunching that can make it hard to see what you’re doing.
Now comes the most critical moment – checking for twists. This is where many beginners hit their first roadblock. Lay your work flat on a table and carefully examine the cast-on edge. It should form a smooth circle without crossing over itself at any point. Take your time with this step – a twisted join means starting over!
When you’re confident everything is aligned properly, it’s time to join in the round. Position your needles so the working yarn is coming from the stitch on your right needle. Place a stitch marker on the right needle (this will mark the beginning of each round), and knit into the first stitch on your left needle. Congratulations – you’re officially knitting in the round!
One of the joys of circular needle knitting is creating stockinette stitch without purling. Since you’re always working on the right side of the fabric, simply knitting every stitch naturally creates that beautiful, smooth stockinette surface. It’s like getting the pretty side of the fabric without the work of purling!
As you knit, count your rounds using your stitch marker as a guide. Each time you reach the marker, slip it from left needle to right needle, and you’ve completed another round. Some knitters keep a simple tally on paper, while others use row counters that attach to your needle.
For beginners especially, I recommend using lifelines every few rounds. These are simply strands of dental floss or thin, smooth yarn that you thread through all your live stitches. If you make a major mistake, you can rip back to the lifeline rather than starting completely over – a true sanity-saver!
Preventing Twist at the Start
The dreaded twist is the nemesis of circular knitting beginners everywhere. Once you’ve joined and knit a few rounds, there’s no fixing a twist without starting over. But with a few careful steps, you can avoid this heartbreak entirely.
First, lay your work flat on a table before joining. This gives you the clearest view of your stitches and makes it easier to spot potential problems. The cast-on edge should be facing downward, creating a clear inner circle.
Next, check your braid alignment. Look closely at your cast-on edge – you’ll notice it has a distinct “braided” appearance on one side. These bumps should all be on the inside of your circle, with the smoother edge facing outward.
Before joining, triple-check your work by holding it up and following the cast-on edge with your finger all the way around the circle. This extra moment of attention can save you hours of work later!
After joining, tighten strategically by giving those first two stitches a bit more tension than usual. This secures the join and helps prevent both twisting and the formation of a gap at the beginning of your round.
I like to think of the cast-on edge as the inside lane of a racetrack – it should form a continuous curve without crossing over itself anywhere along the way.
Circular Needle Knitting: Fixing Twists & Ladders
Even experienced knitters encounter occasional issues with circular needle knitting. Knowing how to identify and solve common problems will keep your projects moving forward smoothly.
If you suspect you might have a twist after working a few rounds, take a moment to lay your work flat. A properly joined piece will form a clean tube shape. If it resembles a figure-eight or Möbius strip, you’ve got a twist. Unfortunately, the only solution is to start over – but don’t be discouraged! Even veteran knitters have to do this sometimes.
“Ladders” are those annoying vertical gaps that can form between needles in circular knitting. These occur most commonly at the transition points between needles. To prevent these pesky ladders, give the second stitch on each new needle a little extra tug to tighten it up. This simple adjustment in tension can make all the difference.
Choosing bamboo or wooden needles can also help prevent laddering, as they grip the yarn better than slick metal needles. If you’re using the magic loop method, make sure to pull your loops tight before knitting the first stitch of each section.
A clever trick from one of our regular Crochet Craze knitters: “If you notice laddering starting to form, try shifting where your rounds begin by a few stitches every few rounds. This distributes any tension issues throughout your work rather than creating one visible line down the side of your project.”
For more helpful techniques and solutions to common knitting challenges, check out our Knitting Tips collection, where we address everything from tension issues to fixing dropped stitches.
Advanced Techniques & When to Switch Methods
Once you’ve mastered the basics of circular needle knitting, you might be ready to tackle more challenging projects. The beauty of circular needles is their versatility—they can handle everything from tiny sock cuffs to massive blankets with the right techniques.
Magic Loop Technique
The magic loop method is a game-changer for knitting small tubes without double-pointed needles. I remember my first attempt—my hands felt like they were performing a strange yarn ballet! But once it clicked, I never went back.
Here’s the magic loop in a nutshell:
1. Start with a long circular needle (32″ or longer) and cast on your stitches.
2. Slide half your stitches to the middle of the cable.
3. Pull a loop of cable out between your stitches, creating two halves.
4. Position both needle tips pointing right, with your stitches divided equally.
5. Knit the front needle stitches, then pull the back loop forward and work those.
This technique is perfect for socks, sleeve cuffs, and baby hats—anything with a small circumference that might otherwise require double-pointed needles.
Two Circulars Method
If magic loop feels like too much cable wrangling, the two circulars method might be your sweet spot. This approach uses—you guessed it—two circular needles of the same size to create small tubes.
Simply cast all stitches onto one needle, divide them evenly between both needles, then use each needle to knit only its own stitches. Many knitters find this method creates fewer ladders than magic loop, especially when working with slippery yarns.
“I switched to the two circulars method for my sock knitting after struggling with ladders,” one knitter told me. “Now my socks have perfectly even tension all the way around.”
When to Use Double-Pointed Needles
While I’m a huge fan of circular needle knitting, I’ll be the first to admit that sometimes traditional double-pointed needles (DPNs) are the right tool for the job. Consider reaching for DPNs when:
Very small circumferences make even 9″ circulars awkward—think baby socks or doll clothes. The complex decreases at the crown of a hat sometimes work more smoothly on DPNs, giving you better control as your stitch count rapidly decreases. And some traditional techniques like certain colorwork patterns were designed with DPNs in mind.
When decreasing a hat crown on circulars, you’ll eventually hit that point where there are too few stitches to stretch around the cable. That’s your signal to transfer to DPNs of the same size to finish the job.
For more on seamless transitions between techniques, check out the latest research on invisible joins.
Knitting Flat on Circulars
One of my favorite findies as a beginner was that circular needles aren’t just for tubes! Circular needle knitting can also mean working flat pieces by simply turning your work at the end of each row, just like with straight needles.
This approach shines for large projects like afghans and blankets where the weight would be uncomfortable on straight needles. Your stitches stay securely on the cable with no risk of sliding off the ends, and you can fit hundreds of stitches if needed.
“I made my first afghan on circular needles without joining in the round,” shares one Crochet Craze community member. “I simply turned my work at the end of each row as if using straight needles, but without the arm strain of supporting a heavy project on long straights.”
Interchangeable vs Fixed Systems
As your circular needle knitting addiction—I mean, hobby—grows, you’ll need to decide between fixed circulars and interchangeable systems.
Fixed circulars have permanently attached tips and cables, available in specific combinations of length and size. They’re generally less expensive individually and there’s no risk of them coming unscrewed mid-project (a knitter’s nightmare!).
Interchangeable systems feature tips that screw onto various cable lengths, letting you mix and match to create different combinations. While the initial investment is higher, they’re more cost-effective for knitters who need many sizes and lengths. They’re also perfect for travelers who want to pack light but be prepared for any project inspiration that strikes.
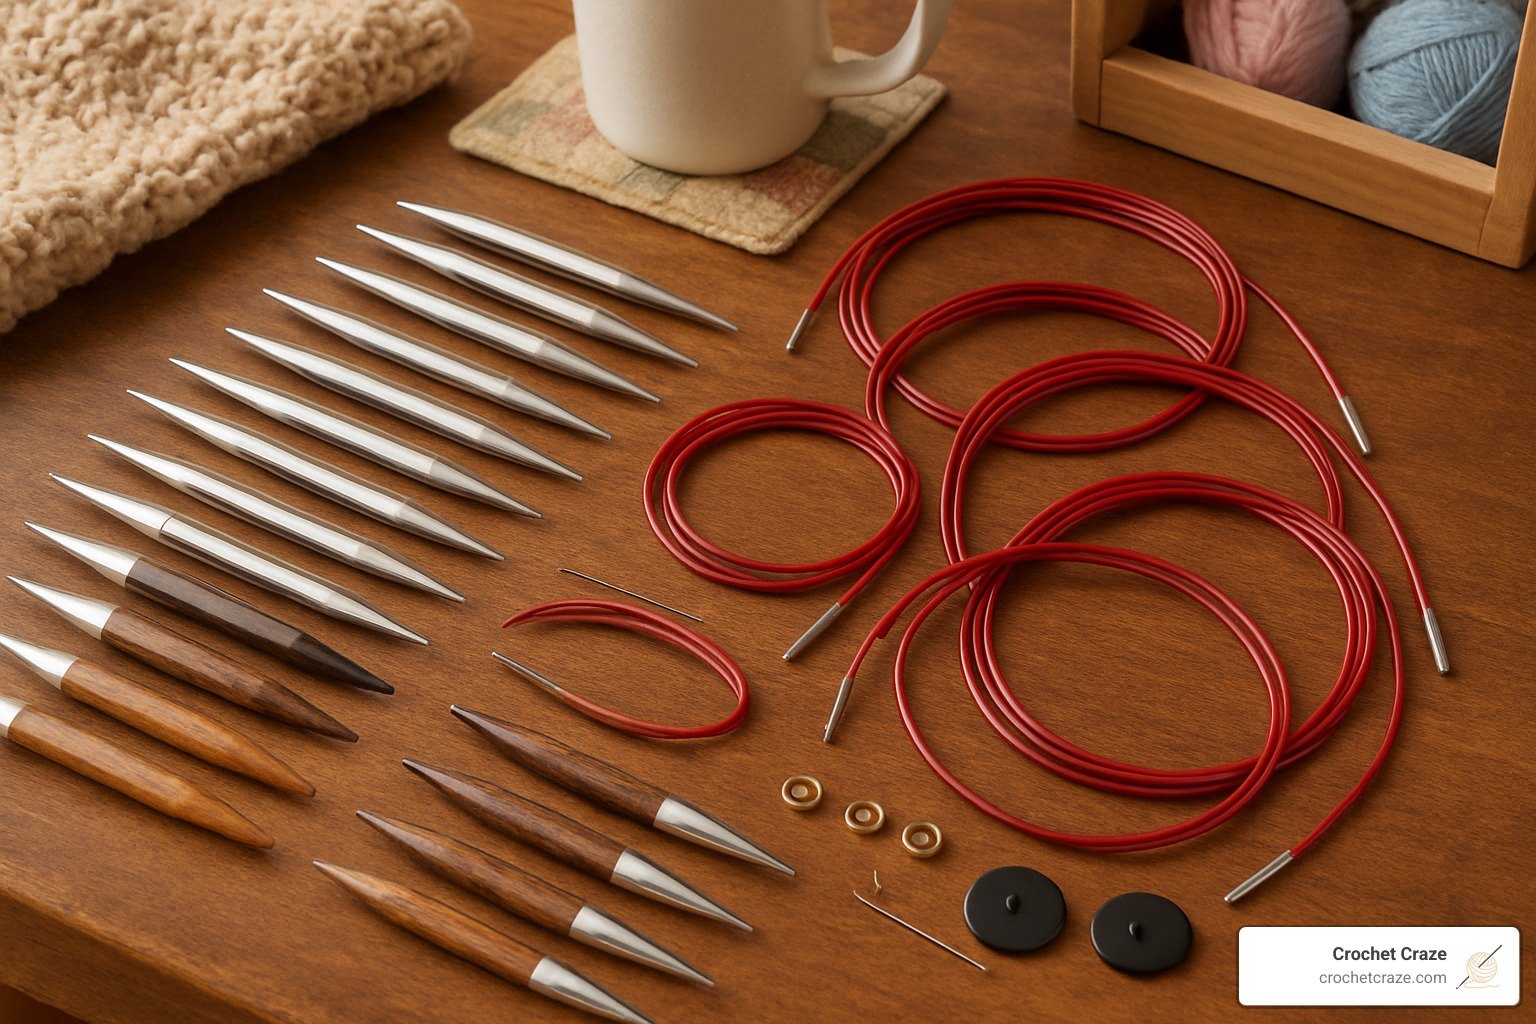
Most interchangeable systems start with 24″ cables since the 16″ length requires shorter tips that aren’t usually compatible with standard tips. For more detailed information about your options, visit our guide to Circular Knitting Needle Kits.
With these advanced techniques in your toolkit, you’ll be ready to tackle virtually any knitting project with confidence and ease. Practice makes perfect—each new technique might feel awkward at first, but soon your hands will find their rhythm!
Troubleshooting, Care & Storage
Let’s face it—even the most experienced knitters hit a snag now and then with circular needle knitting. I’ve certainly had my share of “oops” moments! The good news is that most problems have simple solutions, and with proper care, your circular needles will serve you faithfully for years.
Dropped Stitches
That heart-stopping moment when you notice a stitch has made a break for freedom! Don’t panic—it happens to all of us. When working in the round, rescue your runaway stitch by sliding a crochet hook through the dropped loop, then catch each horizontal “rung” of yarn above it, pulling each one through the loop. Work your way up until you reach your current row, then slip that rescued stitch back onto your left needle. Crisis averted!
Uneven Tension
Have you noticed those pesky “ladders” forming where your needles meet? This common tension issue is especially noticeable in circular needle knitting. To smooth things out, give the second stitch on each needle a little extra tug when you knit it. Wooden needles can also help, as they grip the yarn better than slippery metal ones. Blocking your finished project works wonders for evening out tension—it’s like magic for knitted fabric!
Cable Memory and Kinks
Nothing disrupts the flow of circular needle knitting like a stubborn, kinked cable that refuses to relax. Here’s my favorite fix: submerge just the cable (keep those tips dry!) in warm water for a few minutes, then hang it with lightweight objects attached to the tips—I use large paper clips. Let it dry completely, and voilà—a well-behaved cable!
For a quick fix when you’re eager to start a project, run just the cable under warm water for about 30 seconds, then stretch it straight and hold for a minute. Your cable will be much more cooperative.
Common Beginner Errors
We all make mistakes when learning circular needle knitting—consider them badges of honor on your crafting journey!
Backwards joins happen when your working yarn comes from the left needle instead of the right when joining in the round. Double-check this connection point before knitting your first stitch.
Mismatched gauge can surprise you when switching between flat and circular knitting. Your tension often changes when knitting in the round, so always make your gauge swatch in the same style as your project.
Slipping yarn off tips is particularly frustrating. If your stitches keep escaping, try needles with sharper points or switch to grippy bamboo needles that hold stitches more securely.
Twisted stitches after joining are a common heartbreak. Always check your work after completing the first round—it’s much better to restart immediately than to continue with a twisted project that can’t be fixed later.
Maintaining Your Needles
Treat your circular needles well, and they’ll return the favor with years of faithful service.
For wooden or bamboo needles, an occasional wipe with a slightly damp cloth keeps them clean. If they feel dry or rough, apply a tiny amount of food-grade mineral oil. For rough patches, gently buff with fine-grit sandpaper.
Metal needles need minimal care—just wipe them clean with a soft cloth after use. If tarnish appears, a bit of metal polish will restore their shine. Always check the joins where tips meet cables for any rough spots that might snag your yarn.
For all cables, avoid sharp bends and direct heat, which can permanently damage them. Store them loosely coiled rather than tightly folded to prevent cable memory from forming.
“I learned the hard way about proper storage,” one knitter told me. “After leaving my circulars in a tangled heap, I spent more time untangling than knitting! Now I know better.”
Speaking of storage, there are several smart ways to organize your circular needle knitting collection. Dedicated circular needle organizers with labeled pockets work beautifully. Zippered cases with individual slots keep everything visible and accessible. Hanging organizers with size-labeled compartments save space while keeping your tools sorted.
I personally store my circulars by coiling them gently and placing them in labeled zip pouches—one for each size. This prevents cable memory and keeps everything organized when inspiration strikes for my next project.
For more detailed information about circular needle care and options, check out our comprehensive guide to Circular Knitting Needles.
Frequently Asked Questions about Circular Needle Knitting
What size and length needle should I start with?
If you’re just dipping your toes into circular needle knitting, choosing your first needles can feel overwhelming. Let me simplify it for you:
A US 8 (5mm) needle is your best friend when starting out. This middle-of-the-road size works beautifully with most medium-weight yarns, giving you enough grip without being too slippery or too sticky.
For length, a 24″ circular needle is the Swiss Army knife of knitting – versatile enough for both flat projects and smaller circular work. It’s not too unwieldy for beginners but gives you room to grow.
As for material, bamboo or wood needles are particularly forgiving for newcomers. They provide just the right amount of grip to keep your stitches from sliding off while you’re still mastering tension control.
Your first project? Consider a simple hat using 16″ circulars or a cozy cowl on 24″ circulars. Both work up quickly enough to keep you motivated and teach you the fundamental skills of circular needle knitting without overwhelming you.
How do I know when to switch to double-pointed needles or magic loop?
You’ll reach a point in many circular projects (especially hats) where your decreases create a circumference too small for your circular needle. This usually happens when you’ve decreased to about 40% of your original stitch count – that’s your signal to switch techniques.
For most adult hat crowns, the magic number is around 60-80 stitches, depending on your yarn weight and needle size. When your stitches start bunching uncomfortably or stretching too far across the cable, it’s time for a change.
Other situations calling for a technique switch include:
* Working tiny circumferences less than 9″ across (like baby socks)
* Following patterns that specifically instruct you to change methods
* Creating tubes that are too small to stretch comfortably around your circular needle
Many knitters have a preference between double-pointed needles and magic loop for these situations. Neither is “better” – it’s about what feels most comfortable in your hands.
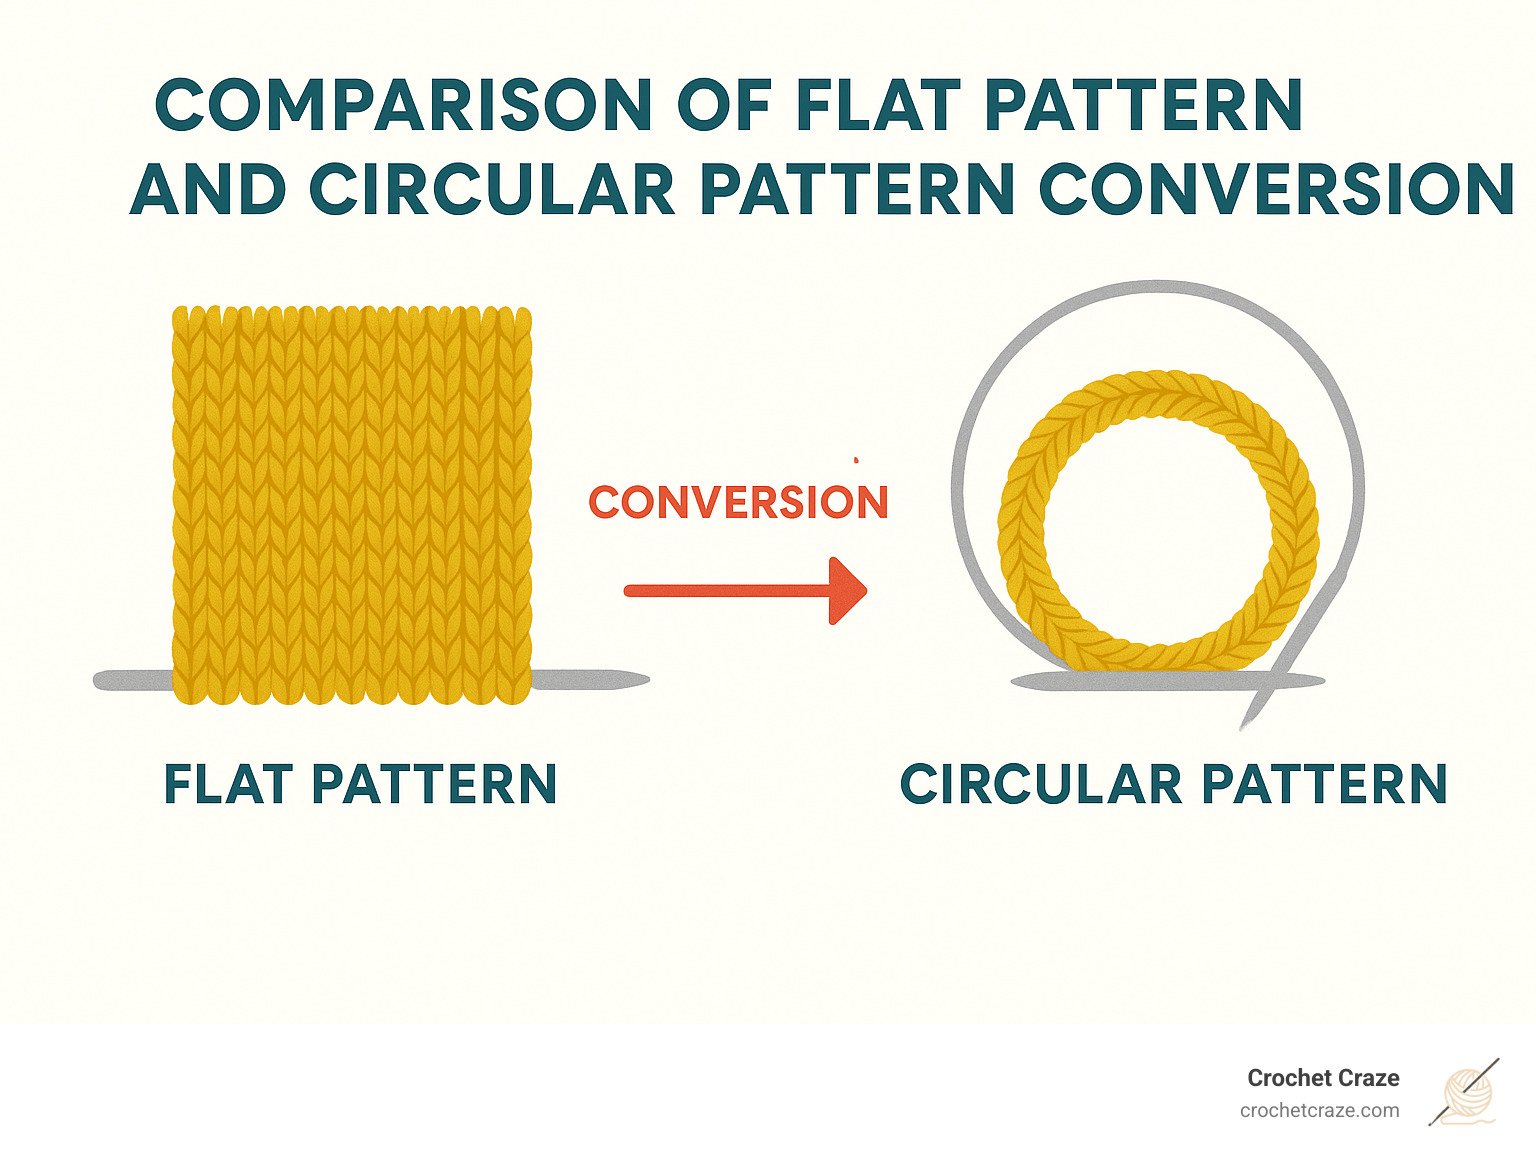
Can every flat pattern be converted to circular needle knitting?
While circular needle knitting opens up wonderful possibilities, not every flat pattern transitions seamlessly to the round. I’ve learned this through both triumphant conversions and humbling failures!
Patterns that convert beautifully include basic stockinette or garter stitch designs without complex shaping. Think simple scarves transformed into cowls or basic sweater fronts and backs worked as one piece.
However, proceed with caution when converting patterns with:
* Structural seams that provide stability (like shoulder seams in heavier sweaters)
* Complex shaping that relies on working flat (some set-in sleeves)
* Lace or cable patterns written specifically for flat knitting with wrong-side rows
If you’re determined to convert a flat pattern to circular, you’ll need to:
1. Remove any seam allowances mentioned in the pattern
2. Adjust stitch counts to work when joined in the round
3. Translate wrong-side rows to right-side rows (those purl rows in stockinette become knit rows)
4. Redistribute shaping to work evenly around rather than at edges
I remember converting my first flat sweater pattern to circular – eliminating those 3-stitch seam allowances and recalculating the decreases to spread evenly around the body rather than just at the sides. The seamless result was worth the math!
Some designs intentionally use seams for structure, so consider whether your project needs that support before converting. A seamless baby blanket? Absolutely! A heavy cabled cardigan? You might want to keep those reinforcing seams.
Conclusion
Mastering circular needle knitting opens up a world of possibilities that transforms your crafting journey. As you’ve seen throughout this guide, circular needles offer best versatility and comfort that straight needles simply can’t match.
The beauty of circular needle knitting lies in its seamless results. Remember when you first struggled with those awkward seams on your early projects? Those days can be behind you now. Your hats, sweaters, and cowls can flow with professional continuity that will make friends ask, “Where did you buy that?”
Your skills have gradually built up through this guide – from understanding the right tools to joining without twists, and perhaps even venturing into magic loop territory. Each of these techniques adds another arrow to your crafting quiver, allowing you to tackle increasingly ambitious projects with confidence.
Take care of those circular needles that have become your trusted companions. A little maintenance goes a long way – keeping cables properly stored prevents those annoying kinks that can frustrate even the most patient knitter. Your bamboo tips will thank you for an occasional gentle cleaning, and your metal needles will maintain their slick surface with proper storage.
Circular needle knitting isn’t just about the tools – it’s about the freedom they provide. Freedom from wrist strain during long knitting sessions. Freedom from the limitations of project size. Freedom to create in coffee shops, on buses, or anywhere life takes you, without poking your neighbor with long straight needles!
At Crochet Craze, we’ve seen countless crafters blossom once they accept circular techniques. That initial uncertainty (“Am I holding this right?”) quickly transforms into the quiet confidence of creating beautiful, seamless projects that once seemed beyond reach.
Whether you’re celebrating the completion of your first hat or planning an ambitious sweater, every round you knit builds not just your project, but your crafting identity. The skills you’ve developed here will serve you through countless future creations.
Ready to keep expanding your knitting horizons? Explore our other resources:
– Stitches & techniques
– Circular Knitting Needle
– Knitting Tips
Happy knitting, and may your circular needles bring you years of crafting joy!