Knitting symbols are like a secret code in every pattern you’ll love. Learning the basics—cast on (CO), bind off (BO), knit (K), and purl (P)—lets you decode symbols with ease. Patterns use abbreviations and symbols to save space and keep things neat. This knowledge makes you independent at knitting.
Begin with simple steps: CO 12 sts (the slip knot counts as one stitch), Row 1 (RS) Knit, Row 2 (WS) Purl. These terms create stockinette stitch (st st) by alternating K and P. Garter stitch is knit every row, making a fabric that looks the same on both sides.
Measure your work flat from needle to cast-on row. Note if a pattern ends on a right side or wrong side row. Websites like LearnToKnit.com and YarnStandards.com list all knitting abbreviations and examples. With a handy cheat sheet, reading patterns becomes easier and more fun.
Key Takeaways
- Master CO, BO, K, and P first to unlock most patterns.
- Knitting pattern symbols and abbreviations save space and speed up reading.
- St st equals alternating knit and purl rows; garter is knit every row.
- Measure flat and note RS/WS to match pattern direction.
- Use reliable resources like LearnToKnit.com and YarnStandards.com for full abbreviation lists.
Why knitting symbols matter: read patterns like a pro
Your pattern key is like a secret code until you learn it. Knitting symbols turn long instructions into short, easy-to-read shorthand. By learning common abbreviations like K, P, CO, BO, YO, and Rep, you save time. This lets you focus more on making and less on deciphering.
How symbols save space and reduce pattern clutter
Designers use symbols to avoid long, repetitive steps. Asterisks and brackets show when to repeat a sequence, keeping the pattern clean. You won’t see every stitch spelled out, just the important ones. This clarity helps you focus on technique, not reading.
Right side vs. wrong side — why symbols clarify which row you’re on
Patterns mark rows as RS or WS to show right side wrong side knitting. This label tells you how a stitch should look in the finished fabric. For example, stockinette looks different on each side, so clear RS/WS cues are key to keeping your texture and edges neat.
How mastering symbols speeds up garment and accessory knitting
Recognizing pattern abbreviations quickly helps you make faster decisions about yarn, needles, and shaping. Matching yarn label symbols to stitch instructions prevents mistakes that waste time. Once you master the shorthand, you’ll knit faster and have the confidence to try new yarns or sizes.
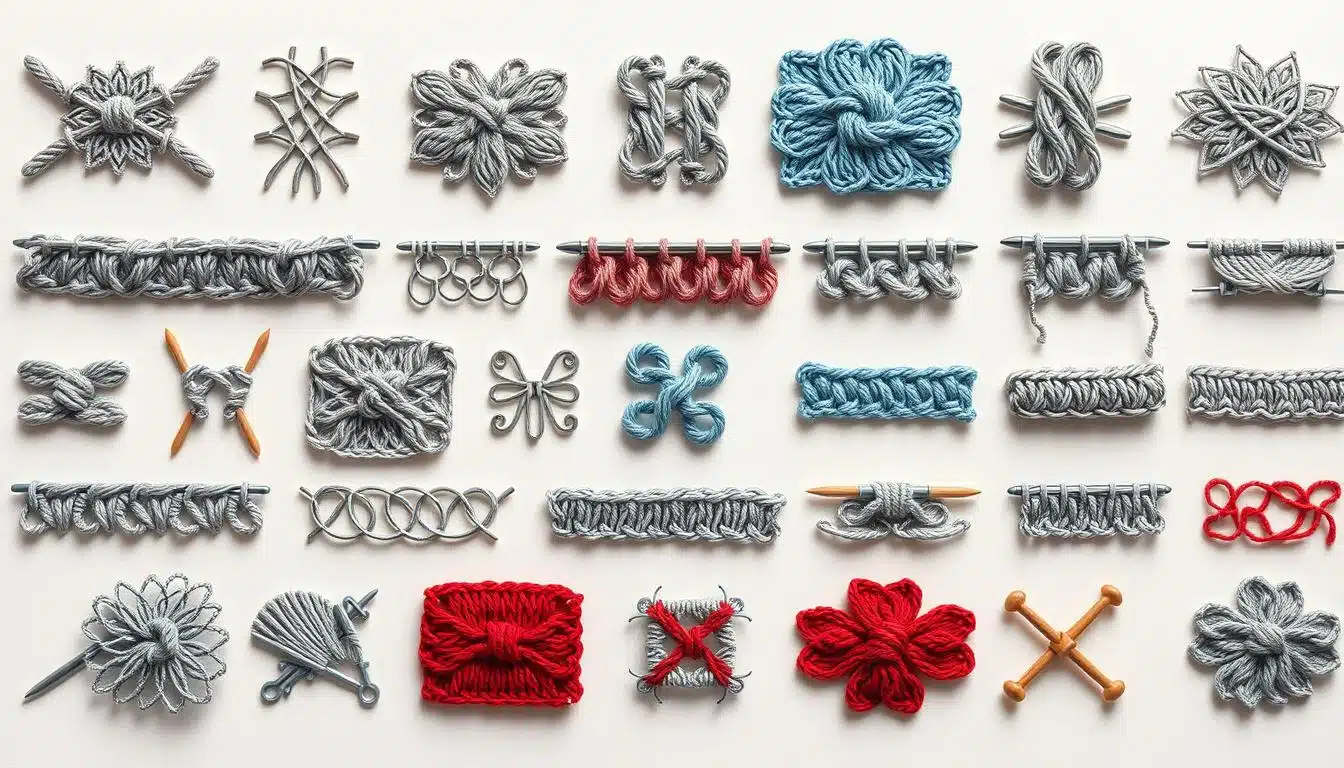
Essential stitch symbols and their abbreviations
Learning a few key stitch symbols makes patterns easier to understand. Start with the basics and you’ll read any row with confidence. This guide covers K P abbreviations, common actions, and shaping marks that appear often.
K (knit) and P (purl): the building blocks
K or k means knit; P or p means purl. These two moves create your fabric. Mastering them will reduce mistakes and speed up your work.
Patterns mix these to create ribbing, stockinette, and seed stitch. Knowing K P abbreviations makes chart symbols and written lines easy to follow.
YO, CO, BO: common action symbols explained
YO creates a hole for lace; CO starts a project; BO finishes an edge. These symbols appear in nearly every pattern key, saving you time.
Yarn overs need yarn that shows stitch definition. The choice of yarn affects the look of your lace or texture, so pick wisely.
For more stitch guides and visuals, check out a stitch guide if you prefer step-by-step photos.
Inc and Dec family: M1, kfb, k2tog, ssk and how they change fabric
Increases add stitches; decreases remove them. M1, kfb, and pfb are common increases. Each one changes the fabric’s lean or bulk, so designers choose them carefully.
k2tog leans right, ssk leans left. Use these to shape hips, necklines, and sleeve caps. Ignoring increases and decreases means your garment won’t fit right.
Sl, psso, and slipped-stitch symbols for shaping and texture
Sl (slip) means move a stitch without working it. psso, or pass slipped stitch over, creates a neat decrease or edge. Slipped-stitch symbols are key for tidy selvages and decorative patterns.
Slips with K and P change texture without adding yarn. This technique is great for subtle structure or bold lines.
| Symbol | Abbreviation | Common use |
|---|---|---|
| knit | K / k | Body of fabric, stockinette, shaping |
| purl | P / p | Reverse side texture, ribbing |
| yarn over | YO | Lace holes, increases with eyelets |
| cast on | CO | Begin a piece or pick up edges |
| bind off | BO | Finish edge cleanly |
| make one | M1 / M1K / M1L | Subtle increase with directional lean |
| knit two together | k2tog | Right-leaning decrease |
| slip, slip, knit | ssk | Left-leaning decrease |
| slip | Sl / sl1k / sl1p | Shaping, neat edges, texture |
| pass slipped stitch over | psso | Finish decreases, tidy lines |
Use this outline as your quick-reference while you knit. Keep a printed key nearby, check gauge, and pick increases and decreases that suit your yarn and desired look. When you read stitch symbols with these basics, patterns stop being puzzles and start being projects you can finish with flair.
Repeats, brackets, and grouping symbols decoded
Patterns use a special language. Learning about repeats and symbols makes knitting easier and faster. This guide will help you understand asterisk repeats, brackets, and parentheses.
Asterisk repeat marks are key in patterns. An asterisk (*) means repeat what comes next until told to stop. For example, *K2, P2; rep from * across makes ribbing easier and keeps you on track.
Brackets in knitting group stitches together. A line like [YO, K2tog] 6 times means do that set six times. Brackets are useful for complex repeats.
Parentheses in knitting mean stitches are worked together. If a pattern shows (K1, P1, K1) in next st, you combine those stitches. This creates a textured bobble or popcorn.
Nested symbols are used for complex patterns. A pattern might use *, brackets, and parentheses together. Always check the pattern key to understand these marks.
Checking your work is important. Make sure your stitch count matches the pattern’s. If it doesn’t, you can fix it early to avoid mistakes.
- Read the key first to learn a pattern’s specific conventions.
- Mark repeats on paper or with a highlighter as you work.
- Use stitch markers to separate grouping symbols on the needle.
Chart symbols vs. written abbreviations: when to use each
Charts are like maps for visuals, while written abbreviations are like recipes for step-by-step notes. Both are useful but in different ways. Charts show patterns in a grid, while written lines detail every stitch.

When reading knitting charts, remember that orientation is key. For flat knitting, read right-to-left on right-side rows and left-to-right on wrong-side rows. For knitting in the round, always read right-to-left. The pattern key will tell you which way each symbol leans and what it does.
Match chart symbols to written abbreviations by using the pattern’s legend. A yarn over in text is “yo,” while on a chart it’s an empty circle or a small loop icon. K2tog in text is a slanted mark leaning right, and SSK is a left-leaning slash. The key will use U.S. terminology, so you’ll see K for knit and P for purl.
Switching between chart and written instructions mid-pattern is simple. Just line up row numbers and mark off each row. Use a sticky note to track your column if a motif repeats. Treat chart symbols as shorthand for the written row; check the key and match chart to text before moving forward.
Gauge and yarn can affect how chart motifs look on your finished piece. Thicker yarn may close up lace symbols, while finer yarn will show delicate openwork. Swatch and read knitting charts at your gauge to ensure the stitch pattern looks as intended.
Below is a quick reference to help you convert common chart symbols to written abbreviations at a glance. Use it to save time when switching between grid and line.
| Chart Symbol | Written Abbreviation | What it does |
|---|---|---|
| Empty circle | yo | Makes a yarn over to create a hole; increases stitch count |
| Right-leaning slash | k2tog | Knits two stitches together for a right-leaning decrease |
| Left-leaning slash | ssk | Slip-slip-knit for a left-leaning decrease |
| Blank square | k | Work knit stitch on the indicated side |
| Dot or filled square | p | Work purl stitch on the indicated side |
| Triangle or V | sl, psso | Slip stitches for shaping or pass slipped stitch over for decreases |
Needles, gauge, and yarn label symbols that affect pattern symbols
Before starting your knitting, it’s important to understand how tools and yarn interact. A yarn label symbols panel gives you the needle size and gauge to aim for. This small piece of information can greatly affect how stitch symbols are interpreted and how your fabric turns out.
Needle icons and recommended sizes for different yarns
Patterns use abbreviations like dpn and rnd and may include icons or numbers for needle size. These hints match the yarn weight numbers on the label. For example, a worsted yarn might suggest a 4 mm needle, while a bulky yarn might recommend a 9 mm.
Choosing needles that match the pattern is best. Switching needle type or size can change how your stitches look and how symbols are interpreted.
Why a gauge swatch (4×4 / 10×10) matters to pattern symbols
Making a gauge swatch is essential. Knit a 4×4 (10×10 cm) swatch to measure your stitches and rows. Compare this to the knitting gauge on the label to see if you need to adjust your needle size.
If your gauge is off, your lace eyelets and cable twists will look different. A tighter swatch will compress yarn over spacing, while a loose swatch will make cables flop. Swatching helps avoid the need to frog later.
Yarn weight numbers (0–7) and how they influence stitch look
Yarn weight numbers range from 0 for lace to 7 for jumbo. Each step up makes the fabric chunkier and often requires larger needle sizes. These numbers help choose symbols that will show up clearly.
Designers pick symbols knowing a 3 (Light/DK) will create delicate texture, while a 5 (Bulky) will highlight bold shapes. Always check the yarn weight numbers on the label before adjusting a pattern.
| Yarn Weight Number | Common Name | Typical Needle Size | Example Gauge (4×4 in / 10×10 cm) | How Symbols Appear |
|---|---|---|---|---|
| 0 | Lace | 1–2.5 mm | 30+ sts / 40+ rows | Very fine, lace symbols look airy |
| 1 | Super Fine (Fingering) | 2.25–3.25 mm | 27–32 sts / 36–42 rows | Detailed stitch patterns visible |
| 2 | Fine (Sport) | 3.25–3.75 mm | 24–28 sts / 32–38 rows | Good for textured symbols |
| 3 | Light (DK) | 3.75–4.5 mm | 22–24 sts / 30–36 rows | Balanced stitch clarity and drape |
| 4 | Medium (Worsted) | 4.5–5.5 mm | 18–22 sts / 24–30 rows | Classic look, symbols read cleanly |
| 5 | Bulky (Chunky) | 5.5–8 mm | 12–18 sts / 18–24 rows | Bold texture, symbols become graphic |
| 6 | Super Bulky | 8–12 mm | 8–12 sts / 12–18 rows | Huge stitches, symbol detail may blur |
| 7 | Jumbo | 12 mm+ | Less than 8 sts / 12 rows | Very bold; symbols become motifs |
For a quick guide on interpreting yarn label symbols, check out how to read yarn labels. Use this guide and a proper gauge swatch to match needle size and yarn weight numbers to your pattern for reliable results.
Shaping and garment symbols used in sweaters and sleeves
Shaping in knitting is like solving math problems and following dance steps. Symbols guide you through making necklines, armholes, and shoulders fit perfectly. A simple sketch and marks help avoid mistakes.
Left front and right front labels show which side you’re working on. When knitting left front right front, follow the same pattern on both sides. This keeps your sweater balanced.
Patterns say “Work same as left, reversing shaping” to guide you. This means changing where increases and decreases happen. For example, if the left front has decreases at the start, move them to the end on the right front.
“At the same time” means do two things together. Like binding off for the shoulder and shaping the neck in one row. Always check row notes to avoid missing stitches.
Armhole shaping uses special abbreviations. You’ll see RS/WS for sides, rem sts for remaining stitches, and decrease symbols like k2tog. These symbols help you follow the pattern.
Use a table to track mirror shaping if you like visual aids:
| Task | Left Front | Right Front (reverse) |
|---|---|---|
| Edge decreases | k2tog at RS beginning | ssk at RS end |
| Neck shaping | Bind off center then dec each RS | Dec each RS then bind off center |
| Armhole | BO 4, dec 1 every RS | BO 4, dec 1 every RS mirrored |
Mark your schematic with arrows to show decrease directions. If a pattern lists row-by-row shaping, add those numbers to your drawing. This helps avoid mistakes.
Learn armhole abbreviations as a special language. Practice reversing shaping to make your sweater fit perfectly on both shoulders.
Common decrease and increase symbol nuances
You want neat shaping and balanced fabric. The right decrease symbols are key. A quick intro will save you from unexpected twists in lace and garment edges.
Left-leaning decrease and right-leaning decrease choices change the way lines fall across your work. Use the exact decrease shown to keep symmetry and stitch patterns intact.
Below is a compact guide to the most used decreases and common increases that designers specify. If a pattern omits detail, check the pattern key or follow standard convention to match the intended look.
Study the table to compare what each symbol does, where you’d pick it, and the visual effect it creates on stockinette or patterned fabric.
| Symbol / Abbrev | Action | Lean & Effect | When to Use |
|---|---|---|---|
| ssk | Slip 1 knitwise, slip 1 knitwise, knit through back loops | Left-leaning decrease; subtle, tidy line | Shoulder shaping, raglan lines, when symmetry matters |
| k2tog | Knit two together | Right-leaning decrease; cleaner on right side | Closed decreases in lace, shaping that mirrors ssk |
| skp / skpo | Slip 1, knit 1, pass slipped stitch over | Left-leaning decrease; slightly open edge | Single decreases that blend into texture patterns |
| S2KP2 / SSPP2 | Slip 2 together, knit/purl 1, pass slipped stitches over | Centered; centered double decrease with strong vertical emphasis | Crown shaping, focal points in lace and cable centers |
| sssk / sssp | Slip 3, work together through back loops (knit/purl) | Strong left-leaning decrease across multiple stitches | Bold directional shaping, dramatic shoulder or motif edges |
| M1, M1K, M1L, M1P | Make one stitch; direction depends on variant | M1 variations produce left or right slant or purl bump | Balancing shaping, invisible increases, and preserving pattern |
When a designer asks for a centered double decrease, they mean a clear vertical drop in the stitch count that anchors the fabric. Treat S2KP2 and SSPP2 as visual punctuation points.
M1 variations can be subtle. M1K and M1L tend to mirror surrounding stitches, while M1P gives a purl-facing bump useful on wrong-side shaping. Pick the variant the pattern names to avoid altering texture.
If you must substitute, test on a swatch. Match tension, lean, and prominence before changing a specified decrease or increase.
Carefully reading special abbreviations and pattern-specific symbols

Most patterns start with a pattern key. This key lists special knitting abbreviations used in the design. Look at the key before you start knitting to avoid stopping to look up terms.
Designers use their own shorthand to save space or clarify moves. If you see something you don’t recognize, check the pattern key and standard U.S. list. Making a quick sketch or swatch of the stitch can help test any unknown instruction.
Some patterns follow industry standards, while others use their own rules. Check the pattern key for notes on British vs. American terms. Mark these differences in your project notebook to avoid surprises.
Uncommon knitting symbols can appear in cables, lace, or novelty stitches. If you see a unique symbol, copy it into your notes and write a short step list beside it. This turns one-time deciphering into a permanent tool.
Keep track of yarn label data along with any nonstandard abbreviations. Note the weight number, gauge, recommended needle size, and dye lot next to the pattern key entry. This helps with substitutions and troubleshooting if a stitch fabric looks off.
Below is a compact reference you can paste into your notebook. Use it to capture pattern key items, designer shorthand, and uncommon knitting symbols you meet on the next project.
| What to record | Why it helps | Example entry |
|---|---|---|
| special knitting abbreviations from the key | Keeps pattern language consistent and prevents mid-row guessing | “tbl = through back loop; listed in pattern key, US terms” |
| designer shorthand and notes | Clarifies designer intent for shaping or repeat placement | “Work same as Left, reversing shaping — sketch mirror row” |
| uncommon knitting symbols with drawing | Provides a visual quick-reference for rare stitches | “Popcorn symbol: make 5, drop, lift loop — draw icon” |
| yarn label and gauge | Links stitch appearance to yarn specifics for swaps | “Worsted, #4, 18 sts = 4 in on US 8, dye lot 321” |
| personal shorthand and corrections | Saves time on future projects and documents fixes | “M1L noted as M1L* in my notes when done left-leaning” |
Quick-reference cheat sheet: printable symbol summary for your project
Keep a compact cheat sheet with you to make patterns easier. This guide gives you the basics for quick decisions at the needles. It’s also a handy printable knitting cheat sheet for your project bag.
What to stash in your knitting bag essentials
- K — knit
- P — purl
- CO — cast on
- BO — bind off
- YO — yarn over
- SL — slip stitch
- REP — repeat
- RS / WS — right side / wrong side
Carry a mini guide for repeats and end-of-row cues. “*…rep from *” means repeat the sequence between asterisks until told to stop. “End K2” means finish with two knit stitches. Parentheses show multiple stitches worked into one.
Printable chart symbols to have on hand
- k2tog — right-leaning decrease
- ssk — left-leaning decrease
- M1 — make one increase (M1R / M1L variations)
- kfb — knit in front and back for a simple increase
- p2tog — purl two together
- psso — pass slipped stitch over
- sl1k / sl1p — slip one as if to knit or purl
- Symbols for grouping: * (repeat), [ ], ( ), { }
Print a sheet of printable knitting symbols. It maps each chart icon to its written abbreviation. This visual match saves time when switching between charts and text. Keep the sheet in your bag for easy access.
Your yarn label checklist for smart substitutions
| Checklist Item | Why it matters |
|---|---|
| Yarn weight number (0–7) | Matches the pattern’s thickness and drape |
| Recommended needle size | Helps you pick needles that will meet gauge |
| Knitting gauge (stitches x rows = 4 in x 4 in) | Critical for fit; always swatch to match |
| Fiber content | Affects wash care, stretch, and stitch definition |
| Net weight / yards (meters) | Tells you how many skeins you’ll need |
| Dye lot number | Keeps color consistent across skeins |
| Care instructions | Prevents surprises at laundry time |
Make a small printed copy of this yarn label checklist and tuck it with your needles. For a quick primer on reading label details, check out the Loopy Lamb’s guide here.
Final tip: treat this cheat sheet as living. Add designer-specific abbreviations you encounter and note swatch results. This way, your printable knitting symbols and yarn label checklist evolve with your projects. You’ll walk into every pattern with confidence.
Conclusion
Learning the basics of knitting symbols is key. Start with CO, BO, K, P, and standard abbreviations. Repeat markers like * and () are also important. This makes patterns easy to follow.
Patterns assume you know basic skills like casting on. Practice these skills and make a gauge swatch. This will help you master knitting patterns quickly.
Abbreviation lists follow U.S. terminology. But, every pattern has a key to explain unique symbols. Keep a cheat sheet handy to save time and avoid mistakes.
Yarn label symbols are just as important as stitch symbols. Make sure to match yarn and needle to the pattern. Swatching helps avoid fit issues.
When reversing shaping, sketch the pieces. Mark your place in charts or written rows. Note any special yarn or tension choices.
To improve fast, bookmark a reliable guide and practice on simple projects. For a detailed resource, check out knitting symbols and notations. With these tools, you’ll learn symbols efficiently and enjoy better results.
FAQ
What are the absolute basics you need to read a knitting pattern?
First, learn to cast on (CO) and bind off (BO). Also, know how to knit (K) and purl (P). Patterns assume you know a slip knot counts as a stitch and understand right side (RS) versus wrong side (WS) row notes.
Once you’ve got those basics, you can follow abbreviations like YO, SL, Rep, Inc, and Dec. You can also read most written instructions or their chart equivalents.
Why do patterns use symbols and abbreviations instead of full words?
Symbols and abbreviations save space and reduce clutter. This lets designers show complex repeats and shaping compactly. Asterisks, brackets, and parentheses tell you what to repeat or work together.
They make ribbing, lace, and cable sequences easier to scan and execute. This is without long, repetitive text.
What’s the difference between RS and WS, and why does it matter?
RS (right side) is the face of the fabric you want seen; WS (wrong side) is the back. Stockinette stitch has a clear RS and WS (knit on RS, purl on WS).
Symbols and row labels tell you which side you’re on. This ensures motifs, lace holes, and shaping sit correctly on the visible face of the garment.
Which stitch abbreviations should I memorize first?
Start with K (knit), P (purl), CO (cast on), BO (bind off), YO (yarn over), SL (slip), REP (repeat), RS/WS, k2tog, and ssk. These cover most basic shaping and texture.
Add M1, kfb, p2tog, psso, sl1k, and sl1p as you tackle garments and lace.
How do yarn overs (YO), cast on (CO), and bind off (BO) appear in patterns?
YO creates a deliberate hole for lace; it’s usually written as YO or shown as a circle in charts. CO starts your piece and is often noted with a number of sts (e.g., CO 12 sts).
BO finishes edges; you’ll see BO 20 sts or similar. The pattern key explains any designer-specific shorthand.
What are the common increases and decreases and how do they affect fabric?
Common increases include M1, kfb, and kfb variants; decreases include k2tog (right-leaning) and ssk (left-leaning). Each method changes fabric appearance and stitch lean.
Designers specify the method to keep symmetry and stitch pattern. If you swap methods, you may alter the look and fit.
How do slip stitches, psso, and slipped-stitch techniques show up in shaping?
Slipped-stitch abbreviations like sl1k or sl1p indicate moving a stitch without working it. This creates neat edges or pattern texture. PSso (pass slipped stitch over) is a shaping decrease used in lace and finishing.
These actions control edge definition and shaping lines.
How do asterisks, brackets, and parentheses work in pattern instructions?
An asterisk (*) marks the start of a repeat; “rep from *” repeats the sequence across the row. Brackets [ ] and braces { } group stitches you repeat a specific number of times.
Parentheses ( ) usually mean work the enclosed stitches into one stitch or treat them as a grouped action in the next stitch. Always check the pattern’s key for exact use.
How do I read knitting charts versus written row instructions?
Charts are visual: each box is a stitch symbol. For flat knitting, read RS rows right-to-left and WS rows left-to-right; for knitting in the round, read every row right-to-left.
Written instructions use abbreviations row by row. The pattern key maps chart symbols to written abbreviations like k, p, yo, k2tog, and ssk.
Any tips for switching between chart and written instructions mid-pattern?
Line up row numbers, mark off rows with a sticky note or pen, and double-check orientation (RS/WS). Make sure chart repeats match the written stitch multiple and that your stitch count stays correct.
If you substitute yarn or needle size, swatch to confirm the charted motifs will read clearly at your gauge.
How do needle size, gauge, and yarn weight symbols affect pattern symbols?
Yarn labels show weight numbers (0–7), recommended needle size, and gauge (stitches × rows per 4 in/10 cm). Those values determine how lace holes, cables, and texture read.
A YO or delicate lace pattern on a bulky yarn will look very different than on lace-weight yarn. Always swatch the gauge specified by the pattern.
What do the Craft Yarn Council weight numbers mean (0–7)?
They’re standardized categories: 0 Lace, 1 Super Fine, 2 Fine, 3 Light/DK, 4 Medium/Worsted, 5 Bulky, 6 Super Bulky, 7 Jumbo. Higher numbers equal thicker yarns and different drape, which affect how symbols like YO or cable twists appear.
How should I measure gauge correctly?
Knit a swatch at the recommended needle size, lay it flat, and measure from needle to cast-on row across 4 in (10 cm). Count stitches and rows to match the pattern’s gauge (e.g., 20 sts × 28 rows = 4 in).
Adjust needle size if your gauge differs and swatch again until it matches.
What do patterns mean when they say “Work same as Left, reversing shaping”?
That tells you to mirror the shaping you did on the Left piece so the Right piece faces the other way. Reverse the sequence of increases and decreases—if decreases were at the beginning of RS rows on the left, place them at the end of RS rows on the right.
Sketching a quick schematic helps avoid mistakes.
What does “at the same time” mean in shaping instructions?
It means perform two shaping actions concurrently. For example, you might bind off for the armhole while continuing decreases for the neckline on the same row or sequence. Track both actions on your schematic or notes so you don’t miss either instruction.
How do left-leaning and right-leaning decreases differ and why choose one?
Right-leaning decreases (k2tog) slope to the right; left-leaning decreases (ssk, sl1k, pass) slope left. Designers pick them to make shaping lines that mirror each other or to maintain pattern flow.
Using the wrong lean can unbalance visual symmetry in garments and lace.
What are centered double decreases and when are they used?
Centered double decreases (e.g., S2KP2 or similar notation) remove two stitches symmetrically so a single stitch sits centered above them. Designers use them for strong vertical shaping lines, crown decreases, and motif centering in lace or textured patterns.
What are the M1 variations and how do they change the fabric?
M1 (make one) increases add a stitch without an obvious hole. Variants like M1K, M1L, M1P, and M1R create either knit or purl increases and lean left or right. Choosing the correct M1 keeps the increase invisible or balanced in pattern repeats.
What if a pattern uses a nonstandard abbreviation or a special stitch name?
Check the pattern’s key or glossary—designers always define special abbreviations at the start. If a book or magazine uses an unfamiliar symbol, consult the included legend. If it’s not clear, look for the designer’s notes or search trusted resources like LearnToKnit.com and YarnStandards.com for standard U.S. terminology.
Should I keep a personal abbreviation and yarn-label notebook?
Yes. Note any pattern-specific shorthand, your chosen increase/decrease methods, swatch gauge, yarn weight number, needle size, dye lot, and care. This makes substitutions and future projects easier and prevents surprises when you switch yarns or revisit a pattern.
What core abbreviations should I print or carry in my knitting bag?
Keep a compact list: K, P, CO, BO, YO, SL (sl1k/sl1p), REP, RS/WS, k2tog, ssk, M1, kfb, p2tog, psso. Also include symbols for repeats (*), brackets [ ], and parentheses ( ) so you can decode most written patterns quickly.
What should be on a yarn label checklist I bring to the yarn store?
Record the yarn weight number (0–7), recommended needle size, gauge (stitches × rows = 4 in/10 cm), fiber content, net weight/yards, dye lot, and care instructions. Add your swatch notes and whether the yarn shows stitch definition for lace or cables.
How do I make pattern reading less intimidating as a beginner?
Start by learning the basics (CO, BO, K, P) and a short core abbreviation list. Practice reading simple repeat instructions with asterisks and brackets. Swatch to match gauge, keep the pattern key handy, and sketch shaping when reversing pieces.
A cheat sheet and a compact notebook will speed you to confident pattern reading.