Amigurumi, the Japanese art of crocheting small stuffed animals and creatures, has captured the hearts of crafters worldwide. These adorable plushies combine creativity with technique, offering endless possibilities for personalized gifts and collectibles. Whether you’re new to crochet or looking to expand your skills, learning amigurumi opens up a world of charming projects that bring joy to both makers and recipients.
This comprehensive guide walks you through everything you need to know about creating your first amigurumi, from understanding basic techniques to troubleshooting common challenges. With patience and practice, you’ll soon be crafting your own menagerie of cute crocheted companions.
Essential Materials and Tools
Before beginning your amigurumi journey, gathering the right supplies ensures a smoother crafting experience. The beauty of amigurumi lies in its simplicity—you need surprisingly few materials to get started.

Yarn selection forms the foundation of your project. Most amigurumi makers prefer worsted weight yarn or cotton thread for their durability and stitch definition. Cotton yarn holds its shape exceptionally well, making it ideal for toys that will be handled frequently. Acrylic yarn offers affordability and comes in countless colors, perfect for experimenting with different designs.
Your crochet hook should match your yarn weight, though many amigurumi crafters prefer using a hook one or two sizes smaller than recommended for the yarn. This creates tighter stitches that prevent stuffing from showing through. A 3.5mm to 4mm hook works well for most standard amigurumi projects.
Additional supplies include polyester fiberfill for stuffing, safety eyes in various sizes, a yarn needle for sewing pieces together, stitch markers to track rounds, and sharp scissors. Having these tools ready before starting helps maintain momentum throughout your project.
Mastering Basic Amigurumi Stitches
Amigurumi relies primarily on single crochet stitches worked in continuous rounds or spirals. Understanding these foundational techniques is crucial for creating smooth, professional-looking pieces.

The magic ring (also called adjustable ring) serves as the typical starting point for amigurumi. This technique creates a tight, closed center perfect for heads and bodies. To make a magic ring, wrap yarn around your fingers twice, insert your hook under the first loop, grab the working yarn, and pull through. Chain one, then work your required number of single crochets into the ring. Pull the tail to cinch the center closed.
Single crochet forms the backbone of amigurumi construction. Insert your hook into the stitch, yarn over, pull through the stitch (two loops on hook), yarn over again, and pull through both loops. Working in continuous rounds without joining creates the seamless appearance characteristic of amigurumi.
The invisible decrease maintains the smooth surface of your work while reducing stitches. Insert your hook into the front loop only of the next two stitches, yarn over, and pull through both front loops, then yarn over and pull through the two loops on your hook. This technique prevents the bumps that regular decreases create.
Understanding increases and decreases allows you to shape your amigurumi. Increases (working two single crochets in one stitch) expand your work, while decreases (working two stitches together) reduce it. These techniques create the curves and contours that bring amigurumi characters to life. For more in-depth guidance on individual techniques, explore our Amigurumi Stitch Tutorials for All Levels.
Following Your First Pattern
Reading amigurumi patterns becomes intuitive once you understand the common abbreviations and formatting conventions. Patterns typically provide stitch counts in parentheses and use abbreviations like sc (single crochet), inc (increase), and dec (decrease).
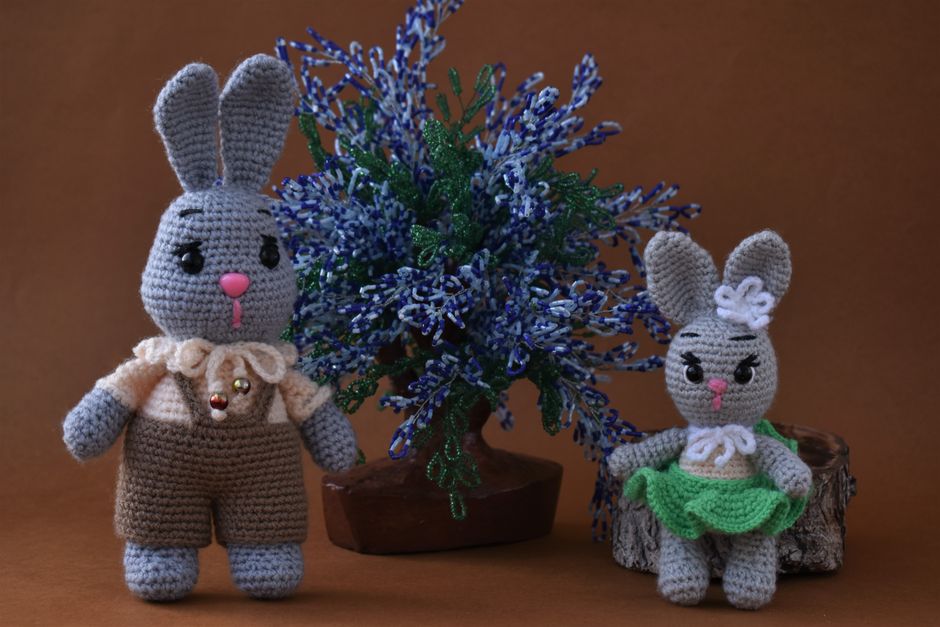
Most patterns begin with the head or body, working from the bottom up or top down. A typical starting round might read: “Round 1: 6 sc in magic ring [6]” indicating you should work six single crochets into the magic ring, resulting in six total stitches. Round 2 might instruct: “(inc) x 6 [12]” meaning you increase in every stitch six times, doubling your stitch count to twelve.
Counting stitches after each round prevents mistakes from compounding. Place a stitch marker in your first stitch of each round, moving it up as you progress. If your count doesn’t match the pattern, go back and find the error immediately—it’s much easier to fix mistakes early than after several more rounds. If you need some inspiration for what to make, check out our Free Amigurumi Crochet Patterns Guide.
When patterns indicate working in rows rather than rounds, you’ll chain and turn at the end of each row. This technique creates flat pieces like ears, wings, or clothing items that you’ll later attach to the main body.
Assembly and Finishing Techniques
Assembly transforms individual crocheted pieces into a cohesive character. Taking time with this stage elevates your finished amigurumi from good to exceptional.
Stuffing requires balancing firmness with shape. Add fiberfill gradually, using small pieces to achieve even distribution. Stuff firmly enough that the piece holds its shape but not so tightly that stitches stretch and distort. For heads, stuff extra firmly to support features like eyes and noses. Use a chopstick or stuffing tool to push fiberfill into narrow areas like arms and legs.
Installing safety eyes happens before closing and stuffing the head. Position eyes using pins first to ensure proper placement and spacing. Once satisfied, push the post through the fabric from the outside and secure with the washer inside. Safety eyes cannot be removed once installed, so double-check positioning before final attachment.
Sewing pieces together uses a yarn needle and matching yarn. The whipstitch or ladder stitch creates nearly invisible seams. Pin pieces in place before sewing to maintain alignment. Take small, even stitches through both pieces, pulling gently to join without puckering.
Adding embroidered details brings personality to your amigurumi. Use embroidery thread or thin yarn for noses, mouths, and other facial features. Simple stitches like straight stitches and French knots create expressive faces. According to Britannica, needlework crafts have been practiced across cultures for centuries, evolving into the diverse fiber arts we enjoy today.
Common Challenges and Solutions
Every amigurumi maker encounters obstacles while learning. Recognizing common issues and their solutions accelerates your progress and prevents frustration.
Holes between stitches typically result from loose tension or using too large a hook. Work with tighter tension, ensuring stitches sit snugly together. Switching to a smaller hook size often resolves this problem immediately. Your stuffing should not be visible through the stitches when held up to light.
Misshapen pieces often stem from inconsistent stuffing or tension variations. Stuff gradually and evenly, checking the shape frequently. If your tension loosens as you work, take breaks to maintain consistency. Just as physical activity benefits from regular practice, crochet skills improve with consistent, mindful repetition.
Losing your place in patterns happens to everyone. Use stitch markers religiously, marking the first stitch of each round. Keep a row counter or paper nearby to track completed rounds. Highlight each line in your pattern as you finish it, creating a visual record of your progress.
Limbs that won’t stay attached require stronger joining methods. Use dental floss or strong thread for limbs that need extra security. Sew through the body multiple times, creating sturdy connections. For jointed limbs that should move, install safety joints before stuffing and closing pieces. For those looking to start with simpler projects that minimize these challenges, explore our Easy Amigurumi Projects for Beginners.
Building Your Amigurumi Skills
Advancing beyond basic projects opens up increasingly complex and rewarding creations. As your confidence grows, challenge yourself with new techniques and larger projects.
Start with simple shapes like spheres and cylinders before attempting complex characters. Ball-shaped amigurumi teaches you to control increases and decreases perfectly. Once comfortable with basic shapes, progress to projects combining multiple components.
Experiment with different yarn weights and textures. Thicker yarns create larger amigurumi faster, while thread weight allows for miniature masterpieces. Fuzzy or textured yarns add interesting effects for animals with fur or unique textures.
Learning color changes expands your design possibilities. Change colors by completing the last step of your final stitch in the old color with the new color. Carry unused colors inside your work to avoid weaving in excessive ends. Stripes, patterns, and multicolored designs become achievable once you master seamless color transitions.
Like maintaining healthy sleep habits, developing your crochet skills requires consistency and patience. Set aside regular time for practice, even if only fifteen minutes daily. Steady, incremental progress builds lasting skills more effectively than sporadic intensive sessions.
Join online communities where makers share patterns, tips, and encouragement. Learning from others’ experiences accelerates your growth and provides inspiration for future projects. Document your progress through photos to appreciate how far you’ve come. You can find many ideas and patterns in our comprehensive guide to Crochet Animal Patterns.
Conclusion
Crocheting amigurumi combines technical skill with creative expression, resulting in adorable handmade treasures that bring smiles wherever they go. Starting with basic materials and foundational stitches, you can create increasingly sophisticated projects as your confidence grows. Remember that every expert crocheter began exactly where you are now, with their first stitches and inevitable mistakes.
The key to amigurumi success lies in patient practice, attention to detail during assembly, and willingness to learn from each project. Whether you’re crafting gifts for loved ones, building a personal collection, or exploring a new creative outlet, amigurumi offers endless possibilities for enjoyment and accomplishment. Pick up your hook, choose your first pattern, and begin your amigurumi journey today—your first adorable creation awaits.