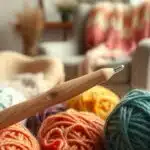
Welcome! You’re about to learn how to crochet a scarf that looks great and won’t take up your whole weekend. This easy guide will show you the supplies, simple stitches, and quick wins that make crochet fun and satisfying. You can make a classic flat scarf or try an infinity scarf crochet for a cozy look.
Most beginner crochet scarf projects use worsted or bulky yarn so you see progress fast. You’ll need about 200 yards of worsted-weight yarn or a skein of Lion Brand Wool-Ease Thick & Quick. A J (6.0 mm) or K (6.5 mm) hook and a darning needle are also needed. The guide covers making a slipknot and foundation chain, single and double crochet rows for a flat scarf, and a quick tube method for an infinity scarf crochet—all in plain steps you can follow on the first try.
This guide also helps you troubleshoot tight starting chains, uneven edges, and missed stitches so you keep going without frustration. Whether you want an easy crochet scarf pattern to gift or your first wearable project, these instructions are built to boost your confidence and deliver a beautiful result fast.
Key Takeaways
- Choose worsted or bulky yarn and a recommended hook to work up a beginner crochet scarf quickly.
- Try single crochet rows for a flat scarf or join a long chain and work treble stitches for an infinity scarf crochet.
- Keep supplies minimal: yarn, hook, scissors, tapestry needle, and stitch markers if you like.
- Simple stitch repetition helps you practice tension and build consistent rows.
- Quick troubleshooting tips make fixing tight chains and uneven edges easy.
Why a Scarf Is the Perfect Beginner Crochet Project
You want to win on your first try. A scarf is a quick success. With bulky yarn and a large hook, you can make a scarf in a few hours. This fast success is why many start with a scarf.
Scarves are simple because they repeat the same stitch. This repetition helps you get better at controlling your stitches. It also makes it easier to find and fix mistakes, helping you learn faster.
Scarves need only a few supplies, making them affordable and easy to start. You’ll need one or two skeins of yarn, a hook, scissors, and a tapestry needle. This simplicity lets you focus on learning, not managing lots of tools.
Small mistakes don’t ruin a scarf. Even if it’s not perfect, it will be cozy. If you make a mistake, you can easily fix it without wasting a lot of time. This flexibility is why beginners love scarves.
Look for patterns that are quick and simple. Try a flat scarf or an infinity tube. These projects are fast, making you feel accomplished and ready for more.
| Benefit | Why it helps you | Beginner-friendly options |
|---|---|---|
| Fast completion | Quick wins build momentum and reduce frustration | Bulky yarn with large hook; quick infinity or simple flat scarf |
| Practice tension | Repeating one or two stitches trains consistent gauge | Single crochet for dense fabric; double crochet for speed |
| Low cost | Requires only yarn, hook, scissors, needle | One or two skeins of worsted or bulky weight |
| Forgiving errors | Minor imperfections rarely affect wearability | Uneven edges are acceptable; easy to frog and redo rows |
| Confidence boost | Completing a wearable item encourages more projects | Small, quick projects lead to more confidence crochet projects |
Essential supplies and yarn choices for beginners
Start simple. Choose materials that make learning easy. The right yarn and basic tools are key for your first scarf.

Yarn weight and fiber recommendations
For easy learning, pick worsted-weight or bulky yarn. Worsted is great for beginners because it’s forgiving. Bulky yarn, like Lion Brand Wool-Ease Thick & Quick, makes big stitches and quick progress.
Think about how much yarn you’ll need. A worsted scarf needs about 200 yards (180 m). Bulky scarves are shorter but warmer. Cotton or bamboo is good for summer scarves. Wool or wool blends are best for warmth.
How to pick the right crochet hook size from yarn label
Always check the yarn label for the recommended hook size. Labels usually list sizes like J (6.0 mm), K (6.5 mm), or N15 for bulky yarns. If your stitches are too tight, try a bigger hook. If they’re too loose, go down a size.
For more help, follow a trusted tutorial or pattern. The One-Day Wonder: Crafting a Cozy Scarf has step-by-step guides and hook tips.
Other tools you’ll want on hand
Keep scissors, a tapestry or darning needle, and stitch markers ready. A measuring tape helps you get the right width and length. Having a second crochet hook lets you adjust tension easily.
Optional extras include a printed PDF pattern or a video tutorial. Also, blocking mats and pins for a neat finish. Good crochet tools make learning fun and less frustrating.
How to read a basic scarf pattern and what terms mean
Before you start crocheting, get familiar with pattern language. Reading crochet patterns is like cracking a secret code. You’ll learn the shortcuts and notes that guide stitch counts, shaping, and the scarf’s size.
Common abbreviations make instructions brief. You’ll learn ch = chain, sc = single crochet, dc = double crochet, tr = treble, and sl st = slip stitch. Remember, turning chains at the start of rows set the stitch height—ch 1 for sc rows and ch 3 for dc rows. Knowing these abbreviations saves time and avoids errors.
Reading counts is your next skill. Patterns often show bracketed stitch counts like chain 150 (150). Always double-check counts after joining or finishing a row. This ensures your repeats are correct and prevents surprises on the last row.
Gauge for scarf shows how dense the fabric will be. A sample might read “X stitches and Y rows = 4”/10 cm.” For scarves, exact gauge is not critical. Yet, checking gauge helps estimate yarn use and width. If your gauge is tighter, the scarf will be narrower and need more rows. If looser, it will be wider and use fewer rows.
Scarf dimensions are easy to adjust. Typical widths are 5–6 inches; skinny scarves are 3.5–4 inches; wide scarves 7 inches or more. Lengths vary: short 50–55 inches, standard 60–65 inches, long wraps 70+ inches. Infinity loops often start with a long chain—like chaining 150 to join and work in the round.
How pattern variations change look and difficulty depends on stitch choice and construction. Single crochet makes dense, warm fabric. Double and treble stitches create drape and a lighter feel. Working in the round makes a tube or infinity scarf without edges, which can be easier. Flat rows let you add fringe, borders, or color changes more easily.
Use small swatches to test stitch patterns and measure gauge for scarf projects. This step saves yarn and time. When you see bracketed counts or turning chains, pause, count, and proceed. Your finished scarf will match the pattern’s intent and your personal style.
how to crochet a scarf — step-by-step beginner pattern (simple tube/infinity and flat options)

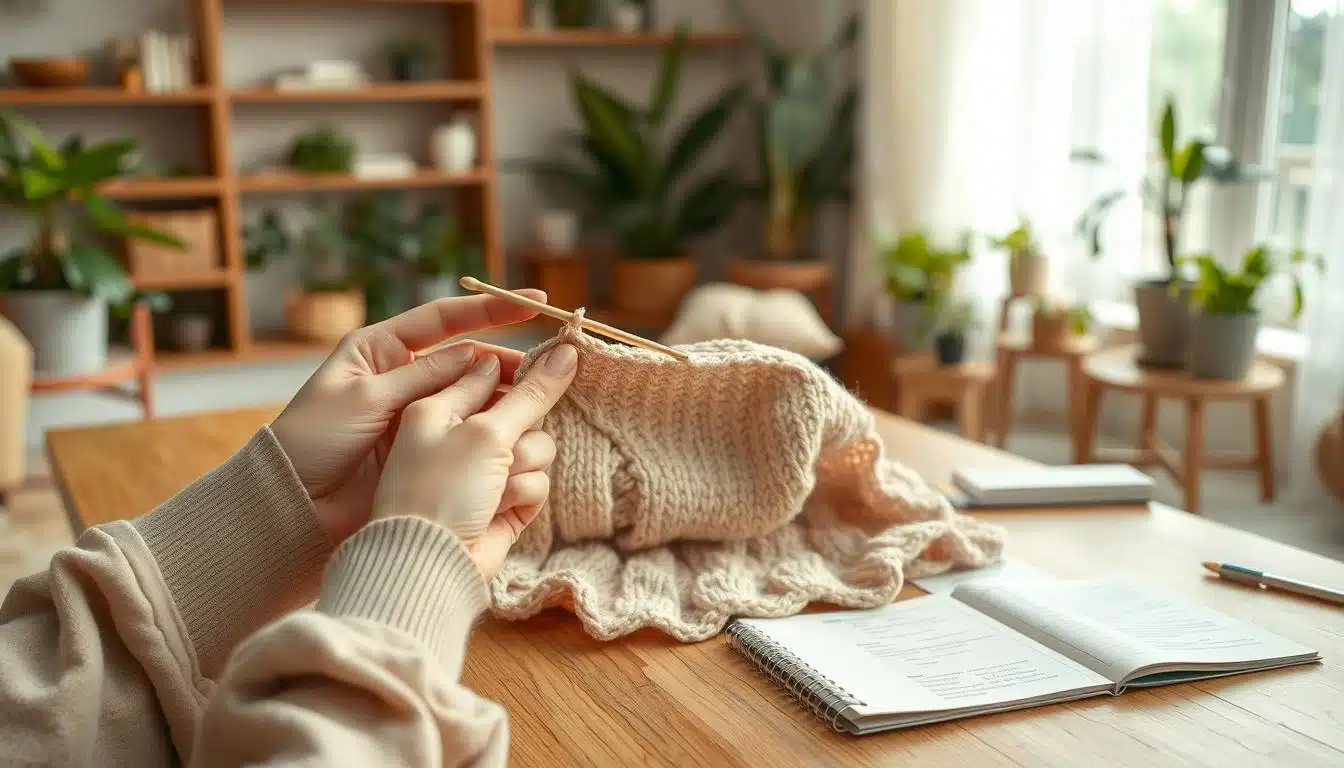
Want to make a cozy scarf easily? This guide will show you how to crochet a scarf step by step. You can go from yarn to warm scarf in a few evenings. Watch the video if you’re new, or follow the written notes for a clear path.
Making a slipknot and foundation chain
Start with a crochet slipknot on your hook. Learn a neat crochet slipknot so your starting loop won’t slip off the hook mid-row. Choose a hook that feels loose with your yarn; tight chains make the whole project stiff.
Use foundation chain tips: count stitches as you go and keep an even tension. For a chunky flat scarf, use a short chain (like chain 11 for a 5″ width). For an infinity tube, chain a long length—about 150 chains for a doubled chunky loop. If chains feel tight, switch to a larger hook.
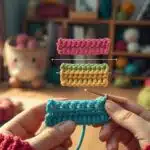
Single crochet and double crochet row instructions for flat scarf
For a single crochet flat scarf, insert your hook into the 2nd chain from the hook and SC across. Turn, ch 1, SC back across each row. Keep the stitch count steady; a starting chain of 11 will give you 10 SC per row.
For a double crochet flat scarf, chain a foundation suited to your stitch height (for example chain 13, then ch 3 to count as the first DC). Dc into the specified chain spacing, turn with ch 3 at the start of each row, and repeat until you reach the desired 70″ length or about 120 rows for bulky yarn.
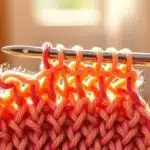
Quick infinity scarf method: join chain and work in rounds with treble/long stitches
To make a tube, chain the long length and check that the chain is not twisted. Join the ends with a slip stitch to form a loop. Ch 4 to count as a treble, then TR into the same space and into each chain around. Join to the top of ch-4 and repeat rounds until the tube reaches the depth you want.
This infinity scarf crochet pattern gives a chunky, warm loop when doubled around your neck. Fast rounds build texture fast, which makes the project fun and quick.
How to finish: fastening off and weaving in ends
When you reach the length or number of rows needed, complete the last stitch and cut yarn, leaving a 6″ tail. Pull the tail through the final loop to secure. Thread the tail onto a tapestry needle and weave it into the fabric for a hidden finish.
If you want an infinity loop from a flat scarf, seam the two short ends with mattress stitch for an invisible join. For neat joins when switching skeins, use yarn-joining techniques to avoid bulky knots.
For the written pattern used in this guide and a supporting video tutorial that walks through each stitch, visit this free pattern and video. For a quick refresher on stitch shapes and variations, consult a reliable stitch guide to expand your skill set.
Troubleshooting common beginner problems
Crochet troubleshooting saves time and keeps your scarf looking sharp. First, check your foundation chain tension. If it’s too tight, the hook won’t slide in easily. Try a larger hook or make a few extra loose chains.
For loose chains, drop a hook size or tighten your hold slightly. This will help your edges sit straighter.
Dealing with tight or loose starting chains
If your first row resists your hook, switch to a hook one size up for the starting chain. Then, return to your working hook for the body. For loose chains, tighten your starting tension or use a smaller hook.
Practice a few rows with scrap yarn until you feel comfortable.
Fixing uneven edges and missed stitches
Uneven edges often come from skipped stitches at row ends. Count at the end of each row and place a removable stitch marker on the first and last stitch. If an edge looks scalloped several rows in, frog back to the last good row and rework.
Light blocking with steam or wet block can correct small edge quirks and improve drape.
How to count stitches and maintain stitch count across rows
Train your eye to count crochet stitches after completing a row. Use a stitch counter, or mark every tenth stitch with a contrasting scrap. For rounds, count total stitches after you join so you know how many usable spaces remain.
To learn pattern literacy and stitch appearance, explore resources like beginner crochet guides and troubleshooting pages on Crochet Craze. They show how to fix missed stitches and keep consistent rows.
- Rework tight single stitches by inserting your hook through both loops to even tension.
- When you spot a missed stitch, rip back only as far as necessary to correct it; scarves forgive small errors.
- Practice consistent yarn delivery to avoid one stitch tighter than the next.
Keep calm and keep practicing. If you learn to spot where you lose or gain stitches and count crochet stitches regularly, your scarf will grow even, wearable, and pleasing to the eye.
Ways to customize your beginner scarf
You can make a simple scarf your own by thinking about size, texture, and color. Changing the starting chain, yarn, or hook size can make a big difference. This guide will help you customize your crochet scarf with confidence.
Adjusting width and length to personal preference
To change the width of your scarf, adjust the starting chain. For bulky yarn, start with 11 chains for a 5–6″ width. Thinner yarns need more chains.
To change the length, add more rows or rounds. Use a scarf size guide: short scarves are 50–55″, standard 60–65″, and long wraps 70″+. For an infinity scarf, chain about 150 for a double-loop fit.
Adding fringe, tassels, or a simple border
To add fringe, cut yarn strands with a cardboard template. Fold and pull through an edge stitch, then secure with a knot. Place fringe on both ends for balance.
Tassels look great at corners or ends. For a clean finish, work a single crochet, double crochet, or treble border around the piece. Petal or surface-stitch edgings add a decorative touch without complex shaping.
Color options and simple color changes
Choose solid shades for a classic look, or variegated or ombre yarn for interest. To change colors, finish the last stitch with the new color. Leave 6–8″ tails to weave in later.
Use surface slip-stitching or embroidery to add stripes, monograms, or accent lines after finishing. For step-by-step basics, check a beginner guide like this crochet tutorial for tips on gauge, hook size, and yarn choices.
- Gauge tip: Make a 10cm x 10cm swatch to count stitches and rows before scaling a pattern.
- Yarn choice: Natural fibers like merino or alpaca give warmth and drape; blends with acrylic add durability for active use.
- Hook influence: A 6.5mm hook produces tighter stitches, a 10mm hook gives chunkier texture and faster progress.
Care, blocking, and finishing tips to make your scarf last
You’ve finished your scarf and it deserves gentle treatment. Good crochet scarf care keeps fibers happy, maintains shape, and extends wear. Follow these quick, practical steps to keep your handmade piece looking lovely for months to come.
Washing and drying based on yarn fiber
Always check the yarn label first. Acrylic and many synthetic blends can be machine washed and tumbled on low. Wool and wool blends need gentler hands: fill a basin with cool water and a mild wool wash, swish gently, then press out moisture without wringing. Superwash wool may be machine safe, but follow the manufacturer’s directions to avoid surprises.
How to wash crochet scarf for best results
If you must use a machine, place the scarf in a mesh bag and choose a delicate cycle. To dry, reshape on a flat towel and let it air dry. Avoid hanging heavy scarves for long periods; the weight pulls the fabric out of shape. A low-heat dryer stint can work for sturdy synthetics, but heat speeds wear on natural fibers.
Light blocking to even edges and improve drape
Blocking smooths stitches and improves drape. For wool, pin the damp scarf to blocking mats and let it dry completely. For acrylic, skip aggressive steaming; use gentle steam from a safe distance or dampen and shape by hand. When you block crochet scarf pieces, pay attention to straightening edges and evening tension.
Finishing and weaving ends
Weave in tails with a tapestry needle along the reverse of the fabric, following stitch lines to hide joins. Use invisible join techniques for color changes or skein transitions. Trim excess yarn close to the weave only after you are sure the ends are secure.
How to store crochet scarf so it stays pristine
Fold or roll scarves and place them in breathable containers. Avoid hanging heavy scarves to prevent stretching. For wool, tuck a cedar block or lavender sachet nearby to deter moths. When you store crochet scarf, keep it cool and dry to prevent mildew and fiber damage.
Gifting presentation and longevity tips
Fold neatly, wrap in tissue paper, and tuck care instructions with fiber content and cleaning steps. Recommend how to wash crochet scarf and whether to block crochet scarf before first wear. A small card with care notes helps the recipient keep the piece looking great for years.
Project ideas to try after your first scarf
You’ve finished a scarf and now you’re looking for something quick to keep your momentum. Small projects like dishcloths and potholders are great. They use the same skills as your scarf, are easy on your wallet, and give you a sense of accomplishment right away.
Want to challenge yourself? Try a simple beanie to learn how to join rounds. Add a border or surface slip stitch to a scarf to practice neat edges and texture. Mixing granny squares into small projects helps you start combining motifs and seams.
Choose patterns that match your pace. Free crochet tutorials in video form are great for hands-on learning. Written patterns and printable PDFs are good for slowing down and following each step. If you liked your scarf pattern, you can use it as a base to plan variations and future ideas from this pattern.
Looking for reliable places to find projects and get feedback? Check out blogs like MakeAndTake and FeltMagnet, and popular YouTube channels for step-by-step lessons. Read pattern comments and look at photos before starting to avoid surprises.
Here are quick suggestions to guide your next steps:
- Beginner crochet projects: dishcloth, potholder, headband.
- Skill builders: borders, surface stitch practice, simple motifs like granny squares.
- Next crochet projects for variety: beanie hat, wrist warmers, simple tote.
- Resources: where to find crochet patterns, free crochet tutorials, PDF downloads, and video walkthroughs.
Share your projects with hashtags or local craft groups to get feedback and find more patterns. You’ll improve faster by practicing and hunting for patterns together with short, satisfying projects.
Conclusion
You now know how to crochet a scarf. Start with a simple stitch like single or double crochet. Choose a yarn that’s easy to work with, like worsted or bulky. Use the hook size recommended on the yarn label, adjusting if needed for your tension.
Follow the flat or infinity pattern step by step. Practice making even chains. Keep your stitch count the same to avoid mistakes.
For a beginner’s wrap-up, remember to weave in ends neatly. Use light blocking to even out edges. Always follow the care instructions for your yarn.
Scarves are great for beginners because they’re quick and forgiving. If you learn better by watching, use video tutorials, photo guides, or printable PDFs.
As you get better, try small projects like dishcloths or simple hats. You can also add a border and fringe to your scarf. Pick a color you love, grab a cup of coffee or hot cocoa, and start chaining. Before you know it, you’ll be wearing your handmade scarf.
FAQ
How is this guide organized and who is it for?
This guide is for beginners. It’s a step-by-step guide to crocheting a scarf. It covers quick projects, gives supply lists, and explains basic stitches.
It also offers troubleshooting tips. This helps you build confidence as you learn.
Why is a scarf a great first crochet project?
Scarves are quick and forgiving. They use repetitive stitches that help you practice tension and consistency.
They need minimal supplies and allow easy corrections. You can finish them in a single sitting with bulky yarn and a large hook.
What yarn weight and fibers should I choose?
Beginners should use worsted-weight or bulky yarn. Worsted is versatile and uses about 200 yards for a standard scarf.
Bulky yarn works up faster and may need one or two skeins. Choose acrylic for easy care or wool/wool blends for warmth. For summer scarves, pick cotton or bamboo blends.
How do I pick the right hook size?
Check the yarn label for the recommended hook. Common examples are J (6.0 mm) or K (6.5 mm) for worsted/bulky.
If your foundation chain is too tight, go up a size. If the fabric is too loose, drop down one.
What basic tools do I need beside yarn and a hook?
You’ll need scissors, a tapestry/darning needle, and stitch markers. A measuring tape is also handy. Optional extras include a second hook size, blocking mats and pins, and a printed PDF or video tutorial.
What do the common abbreviations mean?
Common terms include ch = chain, sc = single crochet, dc = double crochet, tr = treble (long stitch), and sl st = slip stitch. Turning chains are used at the start of rows.
How important is gauge for a scarf?
Gauge is less critical for scarves than for fitted garments. It helps predict width and yardage. If your gauge is tighter, your scarf will be narrower and use more rows.
If looser, it will be wider and use fewer rows. Checking gauge helps avoid running out of yarn.
What dimensions should I aim for?
Typical widths are skinny ~3.5–4″, standard ~5–6″, and wide 7″+. Lengths are short ~50–55″, standard ~60–65″, and long wrap 70″+. For an infinity scarf, chain long enough to loop comfortably twice.
How do I make an even foundation chain?
Make a slipknot, then chain the required number loosely. If your chain is too tight, try a larger hook for the foundation chain or relax your tension.
If it’s too loose, drop down a hook size or tighten slightly. Practice gives you consistent chains quickly.
Walk me through a simple flat scarf using single crochet.
Chain a foundation (e.g., chain 11 for a bulky yarn to get ~5″ width). Insert hook into the 2nd chain from hook and single crochet across.
Turn, ch 1, and SC across each row, maintaining the same stitch count. Count stitches after the first row to confirm consistency. Repeat until you reach desired length.
How do I crochet a quick infinity/tube scarf in the round with treble?
Chain a long length (example ch 150), ensure the chain isn’t twisted and join with a slip stitch. Ch 4 (counts as first tr), treble into the same stitch, then TR into each chain space around.
Join the round with a sl st to the top of the ch-4, repeat rounds for depth, fasten off, and weave in ends. Doubling the finished tube gives a cozy, chunky infinity look.
How do I finish and secure my scarf?
To fasten off, complete the last stitch, cut the yarn leaving a tail, pull the tail through the final loop to secure, and weave ends with a tapestry needle along the reverse. To join a flat scarf into an infinity, overlap ends and stitch with mattress stitch or whipstitch using a darning needle.
What should I do if my edges are uneven or I miss stitches?
Count your stitches at the end of each row and use stitch markers to mark the first and last stitch. If uneven edges appear, frog back to the last correct row and rework.
Minor edge irregularities can often be improved with light blocking.
My starting chain is too tight — how do I fix it?
Use a larger hook for the foundation chain (one size up from your working hook) or practice looser tension on the chains. If the chain is too loose, switch to a smaller hook or tighten your tension slightly.
Adjusting hook size is the quickest fix.
How do I count stitches in round work?
After joining the foundation chain to form a circle, count the number of usable chain spaces (joined ch 150 becomes 149 workable spaces in many examples). Ensure you place one stitch in each chain space and count after the round to confirm consistency.
Use a removable stitch marker to mark the beginning of the round if needed.
How much yarn will I need?
For a standard flat scarf in worsted-weight, plan for at least ~200 yards (180 m). Bulky projects need fewer yards but more weight—expect one skein for short projects or two skeins for longer/very chunky scarves.
Can I change colors or add stripes easily?
Yes. To change colors, complete the last step of the final stitch with the new color so the new color pulls through on the last loop. Leave 6–8″ tails to weave in later. Variegated yarns add interest without color changes, too.
How do I add fringe or tassels?
Cut multiple yarn strands to the same length using a cardboard template. Fold groups and insert through edge stitches, then knot to secure. Attach fringe to both short ends for a flat scarf; tassels can be added to corners or ends for decoration.
What border options are easy for beginners?
Simple single crochet or double crochet borders worked evenly around the edge give a clean finish. You can also try a slip-stitch border for minimal bulk. Work slowly around corners and count stitches to keep the border even.
How should I wash and dry my finished scarf?
Follow the yarn label. Acrylics are usually machine washable and dryable on low heat. Wool and wool blends often need gentle hand washing and flat drying; if the yarn is superwash, it may be machine-washable on gentle. Always lay wool flat to dry to avoid stretching.
Is blocking necessary for scarves?
Blocking helps even edges and improve drape, but it’s optional. For acrylic, gentle steam or damp shaping works. For wool, pin to blocking mats and let dry fully. Blocking is most useful for flat scarves to straighten edges and relax tension.
How should I store or gift a scarf?
Fold or roll scarves and store in a breathable container. Avoid hanging heavy crocheted items to prevent stretching. For gifting, fold neatly, add tissue paper or a simple box, and include care instructions noting fiber content and washing guidance.
What are good next projects after a scarf?
Try dishcloths or potholders to build flat-row skills, then move to simple beanie hats worked in the round. Stretch your skills with borders, surface slip-stitching, or small motifs like granny squares. You’ll find free patterns, printable PDFs, and video tutorials on well-known craft blogs and YouTube channels to guide you.
Where can I find step-by-step tutorials and patterns?
Use written patterns, downloadable PDF patterns, photo tutorials, and video tutorials. Search reputable crochet blogs, pattern platforms, and YouTube channels for beginner-friendly guides. Look for step-by-step photos and pattern comments to help troubleshoot as you learn.
Any quick tips to ensure a satisfying first scarf?
Choose a forgiving yarn (worsted or bulky), use the recommended hook but adjust for your tension, pick a simple stitch (SC or DC), count stitches frequently, weave in ends neatly, and add light blocking if needed. Pick a color you love, grab a warm drink, and enjoy the process—you’ll finish faster than you think.