You want socks that fit perfectly, like they were made just for you. The flap-and-gusset method is a top choice for making socks. It lets you control how well they fit, how long they last, and how comfy they are.
This method works with many types of needles. You can use two 2.5mm DPNs, the addiCraSyTrio, or magic loop on long circulars. This way, you can keep your favorite ways of knitting socks while making a heel that’s strong and lasts.
The heel flap starts with half the stitches you cast on. It’s worked back-and-forth in a slip-1, k1 pattern. This makes the heel sturdy and comfy. The size of the heel can change based on your yarn, needles, and how tightly you knit.
If you like watching videos, Summer Lee Design Co. has a Magic Loop series. It shows how to do the flap-and-gusset steps with long circulars.
Flap-and-gusset is great for making socks that fit just right. You can choose how high the flap is and adjust the gusset decreases. This lets you make a heel that’s strong and feels like part of your foot. For tips on stitch counts, needle swaps, and common mistakes, check out sock knitting tips for detailed help.
Key Takeaways
- The flap-and-gusset is a classic top-down socks technique that balances fit and durability.
- Work the heel flap with half the cast-on stitches and use slip-1, k1 for a reinforced heel.
- Flap-and-gusset adapts to DPNs, addiCraSyTrio, and magic loop methods.
- Flap length and row count change with your gauge and needle size; measure as you go.
- Choose flap height and gusset decreases to tune fit for instep height and foot width.
Why the Heel Matters: Fit, Durability, and Comfort
Your heel is key to a good sock fit. It forms a V-shaped cup around your foot. This decides if the sock stays put or slips.
Adjusting the heel flap length helps fit high or low insteps. This ensures the sock fits snugly without gaps.
How the heel affects sock fit and wear
The heel shape affects how the sock hugs your foot. A neat edge at the heel makes it easier to pick up stitches. This reduces holes that can make the sock uncomfortable.
Choose a longer flap for high instep feet and a shorter one for low instep feet. This improves the sock fit from heel to toe.
Durability benefits of reinforced heels
Reinforced heel patterns add protection where socks get worn out. A slip-stitch heel makes the fabric thicker. This resists wear and tear, leading to fewer holes and a longer-lasting sock.
You can fix or replace the heel section without ruining the rest of the sock. This modular design boosts durability. It keeps the sock comfortable and cushioned where it matters most.
Choosing the right heel style for your wearer (instep height and foot width)
Choose a heel style that fits the wearer. For high instep feet, use a taller heel flap. For wide feet, add gusset stitches to clear the arch without pulling.
The classic flap-and-gusset design is structured and easy to customize. For a practical guide on adapting flap depth and gusset pickup, see this heel flap guide.
Key takeaways: measure and try the sock on during gusset decreases. Choose reinforced slip-stitch patterns for extra cushioning. Adjust flap depth and gusset counts for the perfect fit and comfort for any foot width or instep height.
Overview of Heel Flap and Gusset Techniques
The flap-and-gusset method is great for a sturdy heel that fits different foot shapes. You make a cushioned flap on half the stitches. Then, you turn it into a V and add a gusset that blends with the round.
This method is clear for shaping. Slip-1 edges make picking up easy. It adds padding where needed and has simple decreases to return to the original stitch count.
What is a heel flap and gusset and why sock knitters love it
To make the heel flap, you work fabric back-and-forth on half the stitches. Then, you turn it with decreases to form a cup. Next, you pick up stitches along the edges to close the gaps and shape the gusset.
Knitting communities love it for its fit and durability. It’s perfect for those who value reliable shaping and reinforcement. For a detailed guide, check out a modern daily knitting article.
Classic flap-and-gusset vs other heel types (short-row, boomerang)
There are many heel types to choose from. The classic heel is sturdy and easy to reinforce. Short-row heel shapes the cup with partial rows, making it look smoother with fewer stitches to pick up.
The boomerang heel is a type of short-row heel that creates a sleek curve. It looks elegant on thin yarn and reduces bulk at the heel. Each type has its own trade-offs in reinforcement, appearance, and stitch pickup.
| Feature | Classic heel | Short-row heel | Boomerang heel |
|---|---|---|---|
| Reinforcement | High; slip-stitch options available | Low to medium; depends on wraps and short-row style | Medium; smoother fabric, fewer reinforcement options |
| Pick-up stitches | Many; both edges of flap require picking up | Few; usually none or minimal | Few; designed to avoid large pickup rows |
| Fit adjustability | Excellent; gusset decreases fine-tune width | Good; shaping by short rows adjusts depth | Good; smooth shaping but less room for added padding |
| Visual finish | Traditional, defined seam | Smoother, less visible joins | Very smooth, minimal join lines |
| Best for | Durable everyday socks and custom fits | Lightweight socks and minimal bulk | Dress socks and sleek silhouettes |
When to choose flap-and-gusset for customizability
Choose this method for extra cushioning over the heel bone and easy fit adjustments. It’s great for high insteps or wider forefeet, adding extra stitches without changing gauge.
It works well with long circulars or the magic loop. For a practical guide on magic loop for sock heels, check a magic loop sock guide.
Use flap-and-gusset for durability, adjustability, and reliable shaping. It’s the classic choice for top-down socks and a go-to for knitters who value fit and longevity.
Tools and Materials for Smooth Heel Work
Before starting the heel flap, get your tools ready. The right tools help you shape neatly and keep your tension even. Choose tools that feel good in your hands and match the sock you’re making.
Selecting needles
Many knitters change needles for the heel flap. Two DPNs are great for back-and-forth work; 2.5mm pairs are often used in tutorials. Short circulars might be hard for a flat flap. Magic loop needles are a good option if you don’t like DPNs.
Yarn choices and gauge
Choose yarn that’s good for socks and can handle wear. A wool/nylon blend is good for the slipped-stitch reinforcement in many heel flaps. Keeping your gauge right is key: it affects the flap rows and gusset fit. If your gauge is off, adjust your needle size.
Notions that save time
Stitch markers help you remember gusset points and round starts. Use a stitch holder for live stitches when working the gusset or switching to the foot. A tapestry needle is great for finishing ends and mending gaps. If using magic loop, a spare DPN or cable helps with edge stitches.
| Item | Why it helps | Recommended options |
|---|---|---|
| DPNs | Stable for back-and-forth flap rows and tight control of edges | addi DPNs in 2.5mm–3.0mm |
| Magic loop needles | One-needle solution for both circular and flat work without juggling points | Long circulars 32″–40″, see Summer Lee’s demonstrations for technique |
| Small circular / sock needles | Good for knitters who prefer fewer joins; useful for seamless foot | 9″ circulars, addi Sockwonder, 2.25mm–3.25mm |
| Yarn for socks | Durability and stitch definition for reinforced slip-stitch heels | 75% wool / 25% nylon blends, fingering weight |
| Stitch markers | Mark gusset decreases and round starts to prevent mistakes | Ring and locking markers in bright colors |
| Stitch holder | Holds live stitches safely while you shape heels or gussets | Yarn-based holders or metal holders that match your needle size |
| Tapestry needle | Weave in ends, graft toes, and darn small pickup gaps | Blunt-tip needles, size appropriate for fingering yarn |
Preparing to Knit the Heel Flap
You’re about to start the most important part of making socks. Good heel preparation saves time and prevents gaps. Keep your needles organized and plan the flap length. Follow a clear stitch-count rule to center the flap on the sole.
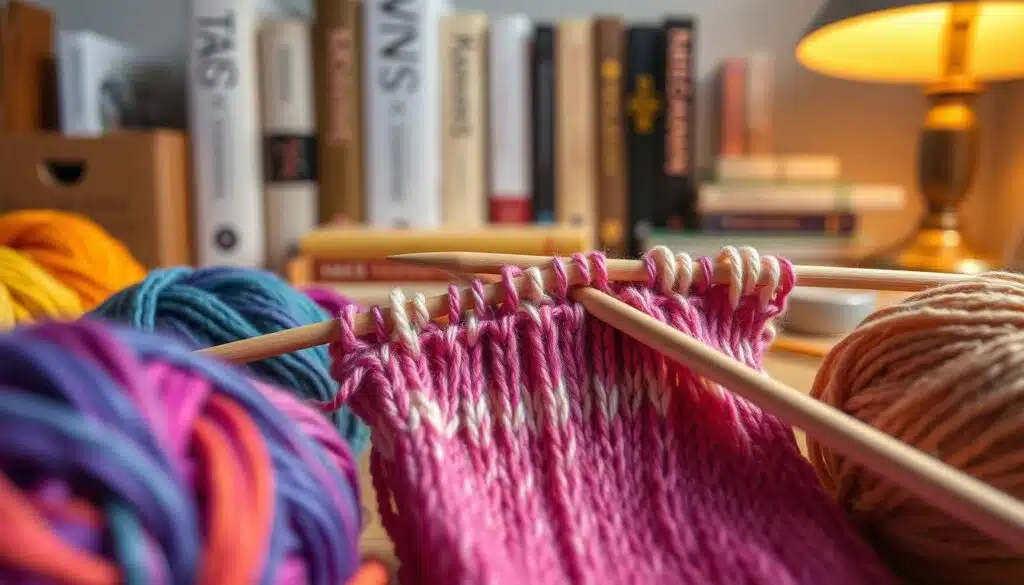
Begin with the half cast-on rule: use half of your cast-on stitches for the heel flap. For example, if you cast on 60, use 30 stitches for the heel. If your total cast-on changes by four stitches, adjust the edge row to keep the pattern balanced.
Working on the magic loop? Keep those half stitches on the short circular section. Summer Lee’s method shows how to work the flap without switching to DPNs. This keeps the fabric tidy and your rhythm going.
When using DPNs, follow addi guidance: put all heel stitches on one needle for easier handling. Tuck spare needle ends into the tube to keep them out of your way. Use a stitch marker for the beginning of round, but remove it while working the flap.
Transfer stitches carefully when moving them between needles or to a holder. Slide stitches instead of pulling to avoid twisting. Check tension to prevent a gappy edge. A smooth transfer prevents weak spots later.
Set up a slip-stitch edge by slipping the first stitch on every row. This creates a neat, slightly looser loop. It makes picking up easier and reduces the chance of holes where the gusset meets the flap.
Plan the flap length before turning the heel. Measure against the back of the heel or compare to a well-fitting sock. Adjust rows for a custom fit without reknitting.
| Step | Action | Tip |
|---|---|---|
| Decide stitch count | Use half cast-on rule (e.g., 60 → 30) | Adjust one purl per 4-stitch change in total cast-on |
| Needle choice | Magic loop: work on short circular; DPNs: place heel stitches on one needle | Keep spare needles tucked in the tube |
| Transfer method | Slide stitches when moving to holders or needles | Avoid twisting; maintain even tension for clean joins |
| Edge setup | Slip first stitch every row to form a slip-stitch edge | Creates easier picking-up and fewer gaps |
| Flap length | Measure against heel or use standard row counts per size | Add rows for high instep, shorten for narrow feet |
Knitting a Reinforced Heel Flap
You want a heel that lasts and feels cushioned. The reinforced heel flap, made with a slip-1 pattern, gives you that dense, comfy fabric. Below, you’ll find a guide that shows you how to do it, how to measure, and fixes for any holes.
Step-by-step heel flap using slip-1 and k1 ribbing
Start the flap on half the cast-on stitches. Row 1 (setup): K2, *Sl1, K1* across to half stitches, end K1, turn. Knit the first stitch when turning to close the gap that later becomes a pickup trouble spot.
Row 2: Sl1, Purl to end. Row 3: *Sl1, K1* to end. Repeat Rows 2 and 3 until the flap reaches your target length, finishing on Row 3. The slip-1 pattern with k1 ribbing makes a cushioned interior and a firm exterior that holds up to wear.
Measuring heel flap length for sizes and insteps
Measure the wearer’s heel height, or use a guideline like 2 inches for an average adult. If the recipient has a high instep, add rows. Your gauge matters: check how many rows equal an inch and multiply to reach the desired heel flap length.
Magic Loop users follow the same slip-1 sequence on a long circular. Addi tutorials note reinforced cap options and lifted-stitch variants if you want extra durability or a different profile.
Common pitfalls and quick fixes
Holes at the edge are the classic annoyance. Prevent them by knitting the first stitch of the setup row instead of slipping it. If a hole appears when you pick up stitches, pick up an extra stitch or mend it later with a tapestry needle and a small darning stitch.
For a neater pickup edge, try picking up the first loop instead of the second loop on each slipped stitch; Winwick Mum and many experienced knitters swear by that trick. If your flap gap persists, add a garter-edge treatment by knitting k2 at the edges on right-side rows to create sturdier pickup points.
| Issue | Cause | Quick Fix |
|---|---|---|
| Hole where gusset meets flap | First stitch slipped on setup row or tension mismatch | Knit the first stitch on setup row; pick up an extra stitch when picking up for gusset |
| Sparse pickup edge | Picking up wrong loop or loose edge stitches | Pick up the first loop, or pick both loops for a firmer join |
| Flap too short for high instep | Following generic 2″ rule without measuring | Measure heel height; add rows to reach correct heel flap length |
| Uncomfortable interior | Missing slip-1 reinforcement | Use slip-1 pattern with k1 ribbing for cushioned fabric |
Turning the Heel: Techniques and Troubleshooting
When you reach the heel turn, you move from a flat flap into a cup that cradles the heel. Follow a clear sequence so the V-shaped heel cup forms neatly and your sock fits like it was made for that foot.
Set-up row: slip 1, purl the specified number of stitches, P2tog, p1, then turn. On the next wrong-side row, slip 1, knit to the decrease, SSK decrease, knit 1, then turn. Repeat, adding one stitch between the slip and the decrease each row until the heel stitches are used up.
Keep decreases tidy by using the right technique. For P2tog, purl two together on the purl side so the decrease lies flat. For a clean left-leaning decrease on the knit side, use SSK: slip two stitches knitwise, slip them back, then knit into the back loops.
Needle system won’t change the logic. Whether you work on Addi circulars, DPNs, or magic loop, the decrease rhythm stays the same. The Magic Loop method adapts the rows to long circulars while preserving the steps; a detailed demo is available at this walkthrough.
If your V-shaped heel cup looks lopsided, check tension on slipped edge stitches and the placement of decreases. Tighten picked-up stitches before you start the turn and maintain even tension while working the SSK decrease and P2tog rows.
Adjusting heel turn for size is simple. Change the initial purl count in the set-up row to match different cast-on totals. For every extra block of four stitches in the cast-on, add one purl to the set-up (for example, 64 cast-on → Slip1, P17, P2tog, P1, turn). This tweak keeps the V-shaped heel cup proportional to the sock.
As you practice, you’ll find a rhythm. Count your remaining heel stitches if you expect about 18 left on a 60-stitch sock. If you split your heel into thirds for charts or try a cap or boomerang heel, the same decrease logic helps you blend the heel into the foot smoothly.
Picking Up Stitches and Shaping the Gusset
After finishing the heel flap, you need to pick up stitches along the flap. Do this with the outer face of the heel flap toward you. This makes your pick up loops sit tidy against the edge. If you prefer a circular needle, use the working needle to pick up without swapping to DPNs; Addi and other brands show this well for magic-loop knitters.
Picking up every slipped stitch means one stitch for every two rows of a slip-1 flap. Many knitters, including Winwick Mum, recommend picking up the first loop of the slipped stitch for a neater edge. You may pick both loops or the second loop if that suits your tension. Count as you go: a typical 60-stitch sock yields about 19 picked-up stitches per side, but gauge and flap length change that number.
Picking up every slipped stitch versus picking both loops
Pick up every slipped stitch for a clean, even edge and predictable stitch count. Picking both loops broadens the edge and can close small gaps, but adds bulk. If you want a crisp seam, take the first loop. If you need fill-in at a loose or wide flap, pick up both loops.
How many stitches to pick up (practical guide and tips for gaps)
Start by counting the slipped rows on one side. If your heel flap was longer than standard, expect to pick up more stitches. When a gap appears between the last picked-up stitch and the first instep stitch, pick up one or two extra stitches in that gap. You will remove those extras during gusset shaping with decreases.
Practical example: cast on 64 stitches and you may pick up an extra stitch or shift counts slightly during the first round. For specifics on adapting counts and the heel-turn sequence, refer to this detailed guide for heel flaps and turns: heel flap and heel turn notes.
Placing markers and preparing for gusset decrease rounds
After picking up one side, place a marker to show the gusset boundary. Knit across the instep, pick up the other side, and then knit across the heel. Use distinct markers for the two gusset edges so you know which decreases belong to each side.
- Place markers just before the top-of-foot stitches and just after them; that clarifies gusset marker placement when you begin decreases.
- If you used magic loop, make sure the working needle is positioned so your first round begins at the heel center.
- Double-check total stitch count. Aim to return to your original cast-on total after gusset shaping.
With tidy pick up loops and clear gusset marker placement, you’re set to start the decrease rounds. Keep decreases on the heel sides, not across the instep, and you’ll blend the heel into the foot with a smooth, custom fit.
Gusset Decreases and Blending the Heel into the Foot
You want your heel to blend smoothly into your foot. Start by following a clear pattern for your gusset shaping. This keeps your instep stitches intact while you work on the heel wings.
Round 1: Knit to 3 stitches before the end of the heel needle, k2tog, k1, place marker, knit across the instep, slip marker, k1, SSK, knit to marker. Round 2: Slip marker, knit to next marker, slip marker, knit to 3 stitches before marker. Round 3: K2tog, k1, slip marker, knit to next marker, slip marker, k1, SSK, knit to marker. Repeat rounds 2 and 3 until you return to your original cast-on count. This method keeps the decreases on the heel sides and preserves instep stitch count for a balanced fit.
Using k2tog and SSK at the gusset edges makes the foot fit snugly. It doesn’t tighten the instep. If you use magic loop, mirror these rounds for your needle split. Many makers suggest adding a plain round between decrease rounds to ease tension and spot any unevenness early.
Know when to stop: halt decreases when your total stitch count equals the cuff or shaft count. Try a gentle sock try-on as soon as you reach that number. Winwick Mum and other fit-focused knitters advise testing on the foot now. If the fit feels roomy, continue a few more decrease rounds. If tight, skip the next decrease round or add a plain round to preserve width.
Keep a simple checklist while you work: count stitches after each decrease round, confirm instep stitches remain unchanged, and watch for gaps where you picked up stitches earlier. Extra picked-up stitches can be removed during gusset decreases without sacrificing comfort.
| Step | Action | Why it helps |
|---|---|---|
| 1 | Knit to 3 sts before needle end, k2tog, k1 | Creates a neat decrease that shapes the heel wing without puckering |
| 2 | Place marker, knit instep across, slip marker | Preserves instep stitch count so gusset decreases don’t distort the top |
| 3 | K1, SSK, knit to marker | Balances decreases on the opposite gusset edge for even shaping |
| 4 | Alternate with a plain round | Allows you to check tension and prevents over-shaping |
| 5 | Stop when stitch count equals cast-on; perform sock try-on | Ensures fit before moving into the foot and toe shaping |
Alternatives, Variations, and Custom Fit Tweaks
You’ve learned the basics of flap-and-gusset socks. Now, let’s explore new ways to change the feel and fit. Choose the method that fits the foot you’re knitting for and your style.
Gusset classic vs short-row boomerang
The gusset classic offers structure and easy customization. It works well for many foot shapes and makes adding extra stitches simple. For a smoother heel curve, try the short-row boomerang. It shapes a neat cup with less picking-up work.
Cap heel choices
The cap heel is a mix between flap and short-row methods. It can be knit like a flap but with fewer stitches to pick up. Adding reinforcement makes it durable for daily wear.
Reinforced cap and lifted stitch options
Lifted stitch patterns add strength inside the sock. Keeping edge stitches tight and using lifted-knit or slipped stitches in the middle helps. This method pairs well with reinforced cap techniques for stability without bulk.
Custom sock fit tweaks
It’s easy to adjust the fit. Add rows to the heel flap for a higher instep. For a wider foot, pick up more gusset stitches. Change the purl count in the heel turn if your cast-on is different.
Here’s a quick guide to help you choose based on feel, effort, and fit flexibility.
| Heel Type | Wear Profile | Ease of Customization | Best For |
|---|---|---|---|
| Gusset classic | Structured, roomy with reinforced options | High — easy to lengthen flap or add gusset stitches | Sock knitters who want precise custom sock fit |
| Boomerang heel | Smooth, low-seam curve | Medium — fewer picked-up stitches, tweak short-row depth | Wearers who dislike seams or prefer sleeker heels |
| Cap heel (reinforced cap) | Stable, cushioned top with tidy edges | Medium — add lifted stitch rows for internal strength | Heavy wear socks needing long-lasting reinforcement |
| Lifted stitch reinforcement | Extra durability without bulk | High — can be added to many heel types | Anyone wanting longer-lasting heels |
Conclusion
A classic heel flap and gusset is not hard to master. Start by setting up the flap and adding slip-1 reinforcement. Then, follow the heel-turn decreases and pick up stitches carefully.
Run your gusset decreases last. This method lets you try on the sock as you go. You can fix small gaps by picking up an extra stitch or doing some darning later.
Choose the needle system that makes you happy. You can use DPNs, magic loop, or a small circular. The method works with all tools.
Use proportional rules to tailor the fit. For example, half-the-cast-on for flap width and pick-up-per-two-rows for neat edges. This helps fit insteps and wider feet.
Brands like addi show how reinforced variants can make socks last longer. Cap heels or lifted stitches are great for this. Remember, slip-1 reinforcement, a clear heel-turn routine, careful pickup, and disciplined gusset decreases make socks cozy and long-lasting.
Embrace the process. With practice, you might even enjoy knitting the heel next time.
FAQ
How does the heel affect sock fit and comfort?
The heel forms a V-shaped cup that holds your heel snugly. It prevents the sock from slipping or gaping. A well-fitted heel keeps the sock stable and avoids bunching at the ankle.
If the heel is too short, you’ll get a gap. Too long, and the sock will sag. Adjusting the flap length and gusset lets you customize the fit for different foot shapes.
Why use a reinforced heel flap instead of plain stockinette?
Reinforcing the heel flap with a slip-1, k1 pattern makes the fabric tougher. It’s more durable and less prone to holes. The slipped-stitch edge also makes the stitches neater and stronger.
This method is great for high-wear areas like the heel. It uses a bit more yarn but is worth it for the extra durability, perfect for wool/nylon blends.
When should I choose flap-and-gusset over short-row or cap heels?
Opt for flap-and-gusset for predictable shaping and cushioning. It’s ideal for adjusting to high insteps or wide feet. You can customize the fit by adjusting the flap length or adding extra gusset stitches.
Short-row heels offer a smoother curve and fewer pickups. Cap heels or lifted-stitch variants focus on durability. Choose based on your fit preferences and desired reinforcement.
How many stitches do I put on the heel flap?
Use half your cast-on stitches for the heel flap. For example, a 60-stitch cuff becomes a 30-stitch flap. Adjust the number of stitches based on your cast-on total to maintain balanced shaping.
Can I work the heel flap with Magic Loop, or do I need DPNs?
You can use Magic Loop for the heel flap. The sequence is the same; just work the half-stitches on the short loop. Choose the needle system that keeps you comfortable.
What’s the standard slip-1 heel flap pattern and row count?
A common setup is: Row 1 (RS): K2, *sl1, k1* across the flap, ending K1, turn. Row 2 (WS): Sl1, purl to end. Repeat sl1, k1 on right-side rows and sl1, p on wrong-side rows until the flap measures roughly 2 inches.
On average, this is about ~35 rows for many gauges. But your gauge and needle size will change the row count. Measure the wearer or the heel height you need.
How do I avoid holes when picking up stitches along the heel flap?
Slip the first stitch of each heel row and knit the very first stitch on the setup row to reduce gaps. When picking up, target the slipped-stitch loop and pick up one stitch for every two rows of flap.
If a gap appears, pick up an extra stitch in the gap or close it later with a darning stitch using a tapestry needle.
How do I turn the heel—what’s the decrease pattern?
Heel turning uses alternating short rows with decreases to form the V-shaped cup. Work decreases like SSK on the right side and P2tog on the wrong side, adding one extra stitch between the slip and the decrease each turn.
Continue until the heel stitches are used up and the V is formed. Exact stitch counts vary with cast-on totals, so follow the proportional setup for your sock.
What’s the best way to pick up stitches for the gusset?
Hold the heel flap with the slipped-stitch bumps facing you and pick up one stitch for every two rows (one pickup per slipped loop). Some knitters pick the first loop for a neater edge; others pick both loops.
Place a marker after picking up the first side, knit across the instep, pick up the other side, then knit across the heel stitches so the round start lands in the middle of the heel stitches.
How many stitches should I pick up from each side of the flap?
A typical 60-stitch sock yields roughly 19 picked-up stitches per side, but this varies with your gauge and flap length. If there’s a visible gap, pick up an extra stitch or two and remove them during gusset decreases.
Always place markers to identify gusset boundaries before you begin decreases.
How do I do gusset decreases and when do I stop?
Do gusset decreases by working K2tog on the heel side and SSK on the other heel side, while knitting the instep stitches in between. Alternate a decrease round with a plain round and repeat until you’re back to your original cast-on stitch count.
Stop decreasing when you’ve returned to the cuff stitch total; try the sock on during these rounds to fine-tune fit.
My foot is wider than average—should I pick up extra gusset stitches?
Yes. Pick up additional stitches along the flap edge to give more width; you’ll remove the extras during gusset decreases if needed. You can also reduce the number of decrease rounds or stop decreasing a bit earlier to preserve width.
Always try the sock on during gusset shaping to check comfort.
How do I adjust the flap for a high instep?
Increase the number of flap rows. A longer flap raises the V-cup and gives more coverage for a high instep. Measure the wearer’s heel height and knit until the flap reaches that measurement, keeping your slipped-stitch reinforcement consistent.
What needle sizes and yarns are best for a reinforced flap-and-gusset?
Use the needle size that matches your sock gauge—many patterns use 2.5mm for fingering-weight sock yarn. Choose a durable sock yarn (wool/nylon blends) for strength and elasticity. Different needle systems (addi DPNs, addiCraSyTrio, Sockwonder, or a long circular for Magic Loop) all work; consistency of gauge matters most so the slipped-stitch reinforcement behaves as expected.
Which notions help the process go smoothly?
Bring stitch markers to mark gusset points and round starts, stitch holders or waste yarn to park live stitches, and a tapestry needle for weaving ends and mending any pickup gaps. A spare DPN or cable can be handy if you switch between needle systems for pickups or fiddly moments.
How do I fix a big gap where the flap meets the foot after picking up?
Pick up one or two extra stitches in the gap and then remove them during subsequent gusset decreases. If the gap is already visible, thread a tapestry needle and take a small darning stitch to close it. Preventively, pick the correct loop when picking up and maintain even tension to minimize gaps.
Are there reinforced or variant heels if I want more durability?
Yes. You can use reinforced cap heels, lifted-stitch techniques, or add garter-edge stitches at the flap edges. These options increase wear resistance and are useful for heavy-wear socks. They require small pattern tweaks but follow the same shaping logic as the classic flap-and-gusset.
Any final practical tips for knitting the flap-and-gusset?
Take it slowly and read each section before you start. Slip the first stitch of every heel row, knit the first stitch on the setup row, try the sock on during gusset decreases, and use distinct markers for gusset boundaries. If you hit a hole, don’t panic—pick up an extra stitch or darn it later.
With slip-1 reinforcement, careful picks, and disciplined decreases, you’ll enjoy knitting the heel next time. Happy socking.