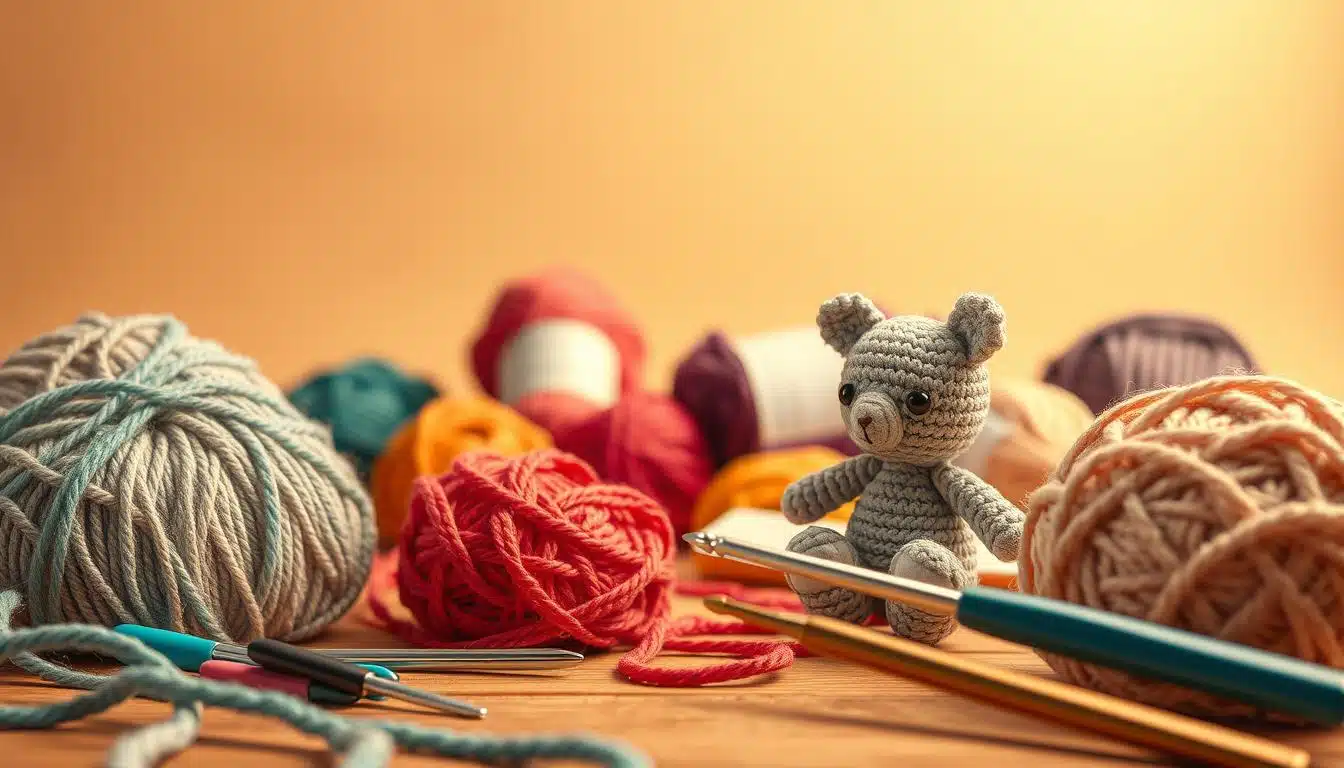
You want your amigurumi to smile brightly, not look off-kilter. This guide teaches you to fix bumpy stitches for a lasting smile. You’ll learn simple embroidery tricks and a patient method.
This is a hands-on guide to finishing crochet toys. It uses a backstitch and wrapping technique with tools you likely have. Cotton embroidery floss offers color choices, and a sharp needle makes piercing stitches easy.
Learn to mark curves with ball-headed pins and drape yarn for even tension. You’ll also hide knots for a professional finish. The steps are easy to follow, so you can practice on various animals and build confidence quickly.
Key Takeaways
- Use cotton embroidery floss and a sharp needle for precise amigurumi embroidery.
- Pin-and-drape secures a smooth curve before you commit stitches.
- Backstitch plus wrapping gives durable, even amigurumi smiles.
- Choose non-bleeding yarn for easy crochet toy finishing and washing.
- Practice on small projects to master tension and symmetry quickly.
Why Amigurumi Is the Perfect Craft for You
Looking for a craft that fits into your busy schedule? Amigurumi is perfect. It’s all about small crochet toys that you can finish in a few sessions. You can work on one piece at a time, like the head, body, or limbs, and create something adorable.
What makes amigurumi different from other crochet projects
Amigurumi is unique because it focuses on small, cute toys. Unlike garments, which need measurements and yardage, amigurumi is all about shape and personality. The stitch tension is key because small holes can ruin the look of tiny toys.
Finishing touches are also important. They make your amigurumi look handmade and special.
Emotional and creative benefits of making small toys
Working on amigurumi can quickly boost your mood. The repetitive stitches calm your mind and give you a sense of accomplishment. Seeing your progress in just an hour motivates you to keep going.
Amigurumi also lets you get creative. Change the yarn color, adjust the eyes, or add a scarf to change the whole look. Websites like Craft Passion and CrochetCraze offer free patterns and tutorials to help you try new things.
Why finishing details like faces matter for character
Faces make a crocheted toy come to life. A small embroidered mouth or different eye placement can make a big difference. Spending a bit more time on details makes your toy feel more real.
For beginners, start with the basics. Pay attention to tension, choose the right hook and yarn, and practice simple facial stitches. Work on one piece at a time to build your skills and keep the fun in the craft.
Essential tools and materials for successful amigurumi
Begin with a compact kit that includes tools for shaping, sewing, and adding tiny details. Choosing the right amigurumi tools saves time and keeps your work neat. With a few smart choices, you can easily move from basic shapes to detailed faces without starting over.
Yarn types: cotton embroidery floss vs. standard yarn
For fine details like faces, use cotton embroidery floss. It’s available in almost any color and can be adjusted for thickness. This makes it ideal for creating eyes, smiles, and small details.
For larger features and the body of your toy, standard yarn is better. Make sure it’s colorfast to prevent dye bleeding. Always test a swatch first.
Needles, hooks, and the sharp embroidery needle tip trick
Use a sharp embroidery needle for crochet to easily pass through stitches. Its sharp tip helps avoid distortion and ensures smooth lines. A blunt tapestry needle is best for weaving in ends and hiding tails.
The size of your crochet hook affects the texture and density of your stitches. Smaller hooks are good for stuffing, while larger ones make the fabric softer. Choose your hook size based on the yarn and the toy’s purpose.
Extras: pins, stitch markers, stuffing, and scissors
Ball-headed pins are great for marking curves without getting lost in the fabric. They’re perfect for guiding mouth or eyebrow curves. Stitch markers help keep track of rounds and prevent mistakes.
Polyester polyfill is best for stuffing because it compresses well and holds shapes. Keep sharp scissors for clean cuts and precise thread work. Try to finish your embroidery before assembling pieces to hide tails and knots inside a single piece.
Selecting the right yarn and colors for durable toys
Your yarn choice affects your amigurumi’s mood and life span. Choose materials based on the toy’s use. Test for washability and stitch clarity before starting your project. Good yarn balances feel, durability, and embroidery ease.
Colorfastness: avoid bleeding when toys are washed
Always choose colorfast yarn or yarn labeled as machine-washable. Toys get handled and washed, so non-colorfast yarn can stain. Cotton embroidery floss dyes well, but test a small swatch in warm water first.
Choosing contrast colors for facial features
For amigurumi faces, pick high-contrast shades for details. Black, dark brown, navy, or deep gray work well and last through washing. Contrast makes eyes and smiles stand out without extra bulk.
Weight and texture decisions: plush vs. crisp finishes
Choose yarn weight based on the toy’s purpose. Plush, bulky yarns make cuddly toys but hide embroidery. Lighter weight yarns, like cotton blends, create a crisp fabric that’s better for fine stitching.
Test a small swatch to judge texture and colorfastness. Try embroidery stitches on it to see how the yarn accepts details before starting your project.
| Fiber | Pros | Cons | Best Use |
|---|---|---|---|
| Acrylic (Paintbox, Knit Picks Brava) | Affordable, wide color range, washable | May pill, can stretch over time | Budget-friendly amigurumi with lots of color options |
| Cotton (Scheepjes, Rico) | Sturdy, great stitch definition, low pilling | Less stretch, can split with poor-quality brands | Defined faces and crisp embroidery |
| Wool blends (Berroco, Paintbox Wool Mix) | Flexible, warm color palettes | May be itchy, pricier, needs careful washing | Textured toys with natural fiber feel |
| Chenille | Ultra-soft, plush finish | Bulky, sheds, hard to embroider | Cuddly loveys where facial detail is minimal |
For more brand recommendations and comparisons, see this best yarn for amigurumi guide. Use this info to pick the right yarn and weight for your project before starting.
Preparing your pieces: blocking, stuffing, and positioning
Before you start stitching, take a moment to prepare. Blocking your crochet work makes stitches even and fluffs them out. This makes your amigurumi face details easier to work with.

When stuffing your amigurumi, use small amounts of polyfill. Push it gently with a blunt tool to keep the face smooth. Too much stuffing can make it tight and bumpy, while too little can leave gaps.
Pin your embroidery to guide your stitches and avoid mistakes. Use ball-headed pins to mark the mouth and stitch spots. Make sure the pins are evenly spaced for a smooth curve around the face.
Many crocheters like to finish the face details before sewing the parts together. This way, you can hide knots and tails inside one section. It makes your stitching easier and keeps your angles comfortable.
Here’s a quick guide to help you choose the best prep method for your embroidery.
| Prep Step | How to do it | Benefit | Watchout |
|---|---|---|---|
| Blocking crochet | Steam or damp-block flat pieces, reshape and pin to dry | Evens stitches, creates predictable surface for embroidery | Over-stretching can distort gauge |
| Stuffing amigurumi | Insert small tufts, use blunt tool to smooth under face area | Firm, smooth canvas for clean stitches | Overstuffing causes tensions and visible bumps |
| Pin placement for embroidery | Use ball-headed pins to mark curve, space pins evenly | Consistent stitch spacing and symmetric features | Pins too close to seam allowance can shift when sewing |
| Finishing before assembly | Embroider on single piece, secure tails inside | Cleaner interior, easier needle angles | Must confirm final position relative to other parts |
crochet amigurumi tutorial
Start with a simple, step-by-step mindset. This crochet amigurumi tutorial guides you through two finishing methods. You can choose what works best for your piece and your hands.
One method uses backstitch with a wrapping technique for smooth lines. The other method uses a pin-and-drape approach for consistent curves.
Overview of the step-by-step approach used in this guide
Mark your curve with evenly spaced pins for a visual guide. Drape a strand of yarn along the curve to check placement. If you choose backstitch and wrapping, use short, even stitches.
Let the wrapped strand smooth the bumpy surface. For the pin-and-drape method, secure small anchoring stitches under the draped yarn. Work from the center toward the ends to keep symmetry.
Finish by knotting and sinking tails inside the head for a tidy look.
Suggested practice project list
Pick three practice patterns that test different head shapes and facial placement. A toucan offers a long beak and off-center features. A Highland cow has a fluffy forehead and short muzzle.
A dodo gives you rounded cheeks and wide placement. These amigurumi practice projects help you learn scale, tension, and how placement changes the expression. Use cotton embroidery floss for fine detail or a standard worsted for bolder smiles.
How to pace yourself: pick the right time and light for finishing
Work when you are rested and daylight is good. Natural light reveals contrast and subtle shifts in placement. Avoid late-night finishing when fatigue blurs judgment.
Take short breaks, test the placement visually, and stitch slowly at first. Practicing these small steps across several amigurumi practice projects will make how to embroider amigurumi smile feel natural and confident.
Embroidering a smiling mouth on a bumpy crochet surface
Getting a neat smile on textured crochet takes a little planning and a steady hand. Start by placing pins or a short guide strand to settle the shape. This quick setup makes embroidering amigurumi mouth work far less fiddly and keeps your curve consistent as you stitch.
Preparing the yarn tail and anchoring your first stitch
Insert your needle near the curve and bring it up at the first marked point. Leave a short tail of a few centimeters so you can knot later. This anchored tail gives a secure start and helps hide yarn tails when you finish.
Using backstitch and wrapping technique for smooth curves
Work a row of backstitches along the marked line. Insert the needle one stitch-length ahead, bring it up another stitch-length ahead, then insert at the end of the previous stitch. This backstitch for crochet produces a solid guideline that resists the bumps in the fabric.
For a softer, layered line, use the wrapping stitch amigurumi trick. Wrap the working yarn around each stitch in the same direction with even tension. Insert under each stitch and draw the yarn through to build a plump, smooth mouth that hides the underlying texture.
Keeping your working yarn as a guide while stitching
Hold a spare strand or your working yarn against the head to judge size and curve before stitching. Treat the live yarn as a sightline. Your next stitch should follow that line, not every bump in the crochet.
Finishing: bringing yarn through, knotting, and hiding tails inside
Make the last stitch at the curve end and bring the needle through to the inside of the head using an existing opening. Tie the tail and working yarn together with a secure knot. Trim tails to about 1 cm and pull the knot fully inside to hide yarn tails while keeping the seam invisible.
| Step | Action | Tip |
|---|---|---|
| Mark | Use pins or guide strand to set the curve | Pin at equal intervals for symmetry |
| Anchor | Bring needle up at first point and leave a short tail | Tail helps secure the starting knot |
| Base stitch | Work a row of backstitch for crochet along the curve | Keep stitch-length consistent |
| Layer | Use wrapping stitch amigurumi to smooth bumps | Wrap same direction with steady tension |
| Guide | Hold working yarn against the surface as a live guide | Adjust spacing visually before committing |
| Finish | Bring yarn inside, knot, trim, and sink knot | Trim tails to ~1 cm to hide yarn tails neatly |
Step-by-step guided method with pin-and-drape technique
Start by centering your work and taking a deep breath. You will mark a smooth smile line, drape a guiding strand, and lock that curve in place with neat securing stitches amigurumi makers trust.
Mark the curve
Insert ball-headed pins along the desired mouth arc. Space them evenly and check the line from the front and the side. This step turns an intuitive curve into a repeatable guide for consistent results.
Drape the yarn
Bring the working yarn out at one end, then pull it up at your first pin point. Let the strand rest just under each pin so it forms the visible arc you want. The drape gives you a clear path to follow when you stitch.
Make securing stitches
Insert your needle at the end point and bring it out under the draped strand at the next pin. Reinsert the needle in the same hole on the opposite side of the drape, then bring it out under the draped strand at the following pin. Tighten each stitch so the draped yarn sits snug and even.
Add extra stitches when needed
If you notice gaps or uneven tension, add small securing stitches between pins. These extras stop distortion and keep a smooth arc. Use short, evenly spaced stitches to maintain the face’s expression.
Final knot and sink
After your last securing stitch, bring the needle out through the exact hole where you began so both tails exit together. Tie the starting tail and the working yarn in a tight knot, cut the tails to about 1 cm, and use a yarn needle to bury the ends inside the head. Swivel the tails until the knot disappears and then remove the pins to reveal the finished smile.
Quick reference
| Step | Action | Tip |
|---|---|---|
| Mark | Place ball-headed pins evenly along the smile curve | Check alignment with eyes and nose for symmetry |
| Drape | Lay working yarn under pins to form the arc | Keep the yarn relaxed, not taut, for natural curve |
| Secure | Make securing stitches under draped yarn | Tighten each stitch so the strand stays flush |
| Extra | Add stitches where gaps appear | Prevent puckering by spacing stitches evenly |
| Finish | Knot tails together and sink inside the head | Cut tails to ~1 cm and swivel to hide the knot |
Use this pin-and-drape amigurumi routine as your go-to when you want a tidy, expressive mouth. If you prefer a video or more patterns to practice, check a helpful resource at easy crochet projects. With practice, this amigurumi smile step-by-step method will become second nature, and your mastered securing stitches amigurumi technique will keep faces looking crisp and cheerful.
Troubleshooting common issues and pro tips
When your amigurumi face won’t cooperate, a few fixes can save the day. First, check the stuffing, tension, and stitch choice. Small changes now can prevent bigger problems later.

Handling uneven stitches and bumpy surfaces
Uneven stitches? Try a backstitch with a wrapping technique for a smoother line. Adjust the stuffing under the face to fix lumps. Make sure it’s firm but not too full.
Work slowly and keep your tension even with each stitch.
What to do if color bleeds or yarn splits
Test yarns for colorfastness before you start embroidering. Prewash samples or dab them with a damp cloth to check for bleeding. Use non-bleeding embroidery floss for details.
If yarn strands split, use single or doubled threads from embroidery floss. Separate them to the thickness you need. Sharp needles and neat thread management help avoid fraying.
Left-handed vs. right-handed adaptations
If you’re left-handed, mirror the pin-and-drape order. Practice on scrap heads until it feels natural. Your dominant hand should wrap the yarn for even tension.
Tutorials from suppliers like Clover and Tulip show how to adapt for your handedness. This can speed up your learning.
When to add extra stitches or reposition pins for symmetry
For lopsided curves, move pins and add securing stitches in wider gaps. Small changes before the final knotting make a big difference. If the curve is off, unpick carefully with a sharp needle.
Then redo the sequence with fresh pins and even spacing.
Practice projects and resources to build confidence
Want to get better at smile embroidery and finishing? Start with small, varied heads to practice placement and curve control. Mixing shapes helps you adjust your tension and stitch choice for the perfect smile.
Try these free patterns
Work on amigurumi practice patterns with different scales and profiles. A toucan pattern will teach you to place a smile on a narrow beak. A highland cow pattern lets you practice stitch hiding and soft curves. A dodo pattern challenges you with rounder cheeks and deeper seams.
Photo and video resources
Use photo guides when you need to pause and follow steps. Amigurumi video tutorials show hand motion, tension, and wrapping in real time. Pair step photos with a quick video clip for a balanced approach.
Where to ask and share
Post photos and questions on Instagram, Ravelry groups, or pattern site comment sections. Join mailing lists and crafting communities for threaded help and direct Q&A. Check out Wooly Wonders Crochet’s guide for practice projects and video support.
- Practice tip: start each try with the same stitch marker placement to compare results.
- Resource tip: search for specific amigurumi video tutorials when you need motion, not just photos.
- Sharing tip: caption your posts with the pattern name so feedback refers to the exact head shape, like toucan amigurumi pattern, highland cow pattern, or dodo pattern.
Layer photo tutorials that cover joining, color change, and marker usage with your smile practice. This will speed up skill transfer and make your finished toys look professional.
Conclusion
You’ve learned two key ways to shape a smile in your crochet amigurumi. The backstitch with wrapping gives silky curves, while the pin-and-drape method offers a controlled arc. To get the best results, use ball-headed pins, a sharp needle, and colorfast floss.
These methods work best when you’re well-prepared. This tutorial conclusion helps you choose the right technique for your project. It’s all about knowing when to use each method.
Don’t forget these practical tips: work in bright, calm light and practice on simple patterns. Try the small sphere project to boost your confidence. Always finish amigurumi faces before putting them together for a clean look.
If you need a quick refresher, check out the free foundation guide here Amigurumi Foundation eBook.
Keep improving by sharing your work and asking questions online. Seeing how others solve stitches can help you too. This embroidery recap reminds you that small details make a big difference in your amigurumi.
For help with uneven stitches or split yarn, this guide is a great resource fixing crochet mistakes.
FAQ
What makes amigurumi different from other crochet projects?
Amigurumi are small, stuffed crochet toys. Tiny details like eyes and mouth define their personality. They are usually made in parts, like head and limbs, so you can practice one thing at a time.
What emotional and creative benefits will I get from making amigurumi?
Making amigurumi gives you quick wins that boost your confidence. It also helps you relax and feel happy. You can easily change their look by swapping colors or adding accessories.
Why do finishing details like faces matter so much?
Faces make a big difference in how cute and expressive a toy looks. Even a small change can make a big impact. Putting in the effort to make the face look good makes the toy look professional.
Should I use cotton embroidery floss or regular yarn for faces?
Cotton embroidery floss is best for faces because it comes in many colors. You can also adjust its thickness. But, make sure the yarn you use won’t bleed color when washed.
What needle should I use to embroider on crochet fabric?
Use a sharp embroidery needle to go through the crochet stitches easily. This helps you make smooth lines. Also, have a blunt yarn needle ready to hide the ends after you knot them.
What extras should I have before I start a face?
You’ll need ball-headed pins, stitch markers, polyfill, and sharp scissors. Good lighting and a steady surface are also important. Blocking or gently shaping the pieces before you start can help too.
How do I choose yarn colors to avoid bleeding?
Look for threads and yarns labeled as colorfast or tested for washing. Cotton embroidery floss usually dyes well, but always check the wash instructions. Test dark colors on a scrap if you plan to wash the toy.
Which contrast colors work best for small facial features?
Use dark colors like black, dark brown, navy, or charcoal gray for contrast. These colors are clear from a distance and make small details like smiles stand out.
How does yarn weight and texture affect facial embroidery?
Thicker yarns like plush or chenille can make the surface bumpy and hide your embroidery. Lighter yarns like sport or DK give a smoother canvas. Choose yarn that matches the toy’s look and test a swatch.
How should I stuff around the face for the smoothest results?
Fill the face area evenly and avoid overstuffing. Use small tufts of polyfill and a blunt tool to push them into place. This makes the face firm but not hard, helping you embroider smoothly.
Why is it better to embroider before final assembly?
Embroidering before assembly makes it easier to hide the ends inside. It also avoids awkward needle angles. This makes your amigurumi look professional and well-made.
What is the general step-by-step approach in this guide?
The guide teaches two techniques: a backstitch with wrapping for smooth lines, and a pin-and-drape method for curves. Start with pins, drape yarn, and then secure it with stitches. Finish by knotting and hiding the ends inside.
Which practice projects are recommended to learn smiles?
Try making a toucan, a Highland cow, and a dodo. These patterns offer different head shapes and scales. They help you practice placement, curve control, and stitch tension.
How should I pace myself when doing facial finishing?
Work when you’re rested and have good light. Avoid finishing late at night when you might make mistakes. Take breaks and check your work before you commit to stitches.
How do I prepare the yarn tail and anchor the first stitch?
Insert the needle near the curve and bring it up at the first marked point. Leave a short tail for later. Work on a well-stuffed but smooth surface for best results.
What’s the backstitch plus wrapping technique?
Work a row of backstitches along your curve. Bring the needle up a stitch-length ahead, insert it at the end of the previous stitch, repeat. Then wrap the working yarn around each base stitch to smooth the curve.
How do I use the working yarn as a guide while stitching?
Hold a separate guide strand against the head to find shape and size. Keep the working yarn draped along the pins as a live guide. Stitch next to or under that draped strand to follow the curve.
How do I finish the mouth and hide knots inside the toy?
Make your final stitch, then bring the yarn through to the inside via an existing opening. Knot the starting tail and working yarn together tightly. Trim tails to about 1 cm, then use a yarn needle to push the knot and tails inside until hidden.
How do I mark a consistent smile curve with pins?
Use ball-headed pins spaced evenly along your desired smile line. Check the position relative to eyes, ears, and other features. The pins act as stitch locations and keep the curve consistent while you drape and secure yarn.
What is the pin-and-drape securing-stitch technique?
Bring your working yarn out at one end and drape it along the pins. Secure by inserting the needle at the end point, bringing it out under the draped yarn at the next pin, then reinserting and repeating. Tighten each stitch so the draped yarn sits snugly and forms a smooth arc.
What if I see gaps or uneven pin spacing while securing the curve?
Add extra securing stitches between pins to fill gaps and keep the curve smooth. Small extra tacks prevent distortion and maintain an even arc. You can always unpick cautiously and reposition pins if needed.
How do I make the final knot so it hides cleanly inside?
After the last securing stitch, bring the needle out at the starting insertion point so both tails exit together. Knot tails securely, trim to ~1 cm, then use a yarn needle to push and maneuver the knot and ends into the head cavity until they disappear.
How do I handle uneven stitches or a bumpy surface?
Use the backstitch-plus-wrapping method to build a smoother line. Adjust stuffing under the face to even bumps and work on a firmer surface. If necessary, unpick and reposition pins; small adjustments before knotting yield big fixes.
What should I do if color bleeds or floss splits while stitching?
Prewash or test threads and yarns for colorfastness on a scrap before use. For splits, use separated strands of embroidery floss instead of a fraying yarn. Replace any problem yarn with a colorfast alternative.
How do left-handed makers adapt the techniques?
Mirror the pin-and-drape stitch sequence to suit left-handed motion. Practice on scrap heads to find comfortable stitch directions. Use your dominant hand for consistent tension in wrapping and securing stitches.
How can I fix asymmetry if the smile looks lopsided?
Reposition pins and add extra securing stitches in wider gaps to balance the curve. Small tweaks before knotting help most; if required, unpick carefully and restitch after adjusting pin placement.
Where can I find tutorials and communities to ask questions or share photos?
Use photo tutorials for step-by-step pacing and videos for motion and handedness demos. Share results and ask for feedback on Instagram, Ravelry groups, pattern comment sections, and crafting mailing lists or forums to get targeted help.
Which free patterns should I practice on to master the smile?
Practice on the suggested free patterns: toucan, Highland cow, and dodo. They provide varied head shapes and scales so you can test placement, tension, and curve techniques across different surfaces.