
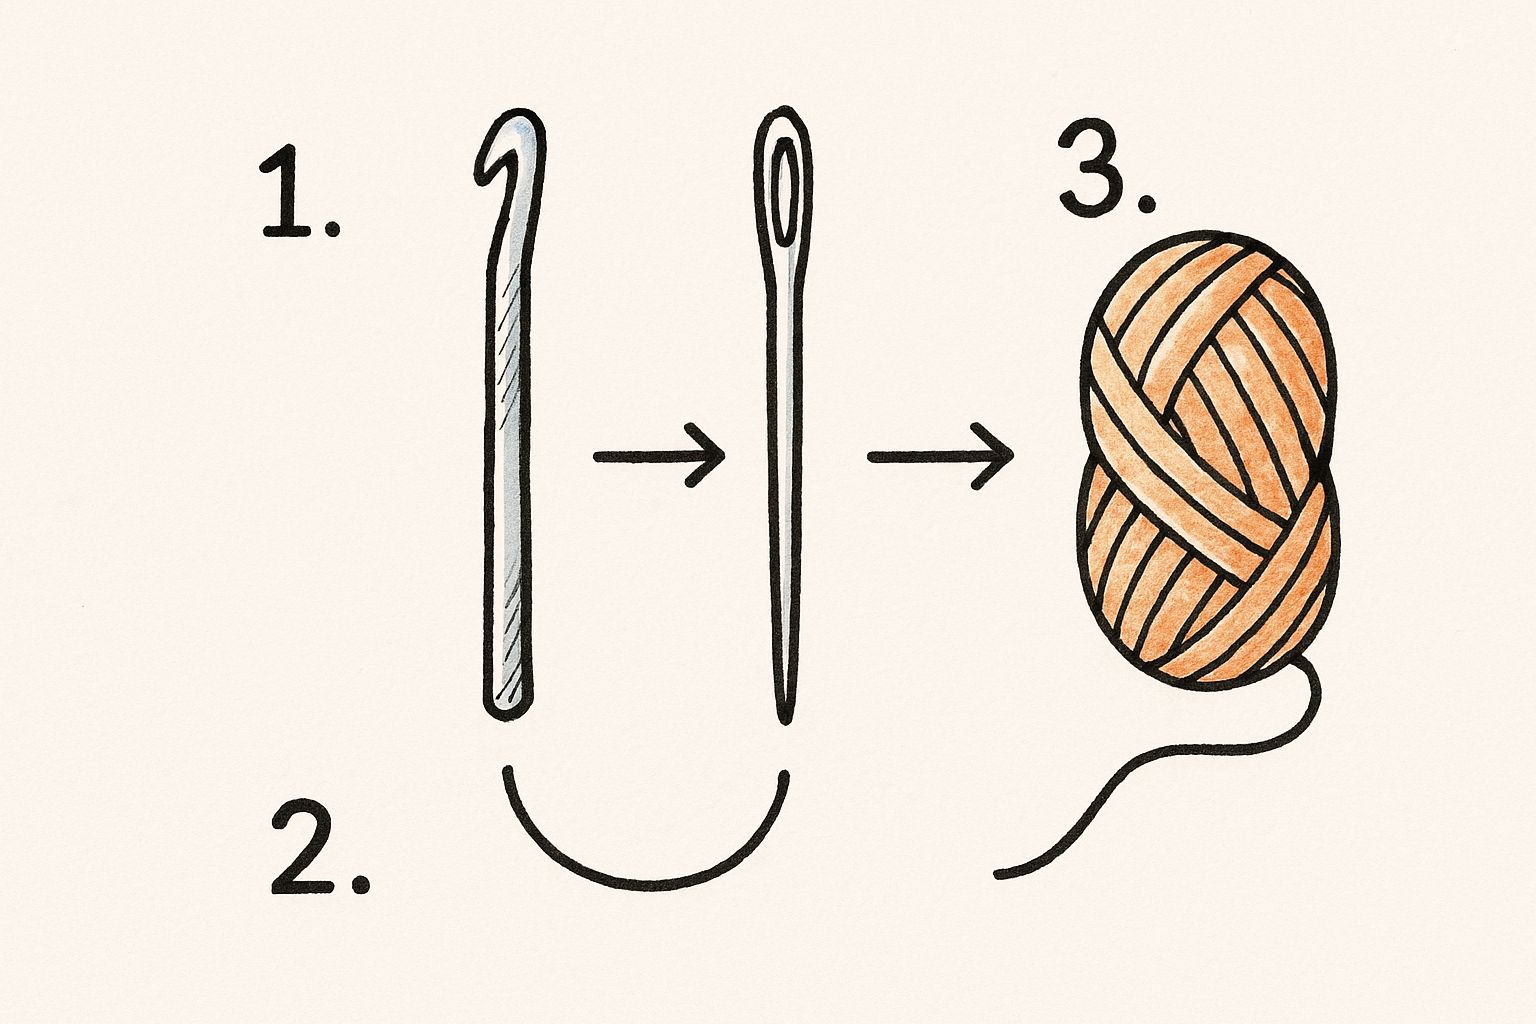
Weaving in Ends Crochet for a Perfect Finish
Let’s be honest—that messy pile of yarn tails at the end of a project is the one thing standing between you and a finished piece that looks truly professional. It’s the final hurdle, the step that separates a project that screams “homemade” from one that whispers “handmade with skill.” Weaving in ends in crochet isn’t just about tidiness; it’s a foundational skill that ensures the integrity and longevity of your work. Mastering this final step is what elevates a good piece of crochet into a great one.
The Secret to a Professional Crochet Finish
I get it. After all the fun of picking yarn, mastering a new stitch, and seeing your creation come to life, weaving in ends feels like a chore. It’s the post-party cleanup nobody wants to do. But if you can shift your mindset, you’ll see it for what it truly is: the critical final step that secures your hard work for good. When you see weaving in ends as the final act of creation, a moment to polish and perfect, the task transforms from a burden into a satisfying ritual.
You aren’t just hiding yarn tails. You’re locking every stitch in place, ensuring your project can survive a lifetime of washing, wearing, and loving. A perfectly woven end just melts into the fabric, becoming an invisible part of the structure. This preserves the drape and feel of your stitches exactly as you intended, without creating stiff spots or awkward bumps. A well-finished piece moves and flexes naturally, showcasing the beauty of the yarn and the pattern.
This finishing touch is a bigger deal than you might think. It’s a cornerstone of the entire craft industry. Just look at the global market for crochet dresses, which was valued at USD 1.68 billion and is still growing. That entire market is built on pieces that are finished flawlessly, where every end is secured invisibly and durably. Industry data consistently shows that one of the first things beginners struggle with—and are most eager to master—is how to tackle those pesky ends. It directly impacts whether their work holds up or falls apart. A project that unravels after one wash is a heartbreaking lesson in the importance of proper finishing.
Why Those Final Touches Are Everything
Think of weaving in ends like the final inspection on a construction site. A builder wouldn’t just leave loose wires hanging out, and a crocheter shouldn’t leave yarn tails flapping in the wind. It’s about more than just looks; it’s about structural integrity.
-
Durability is King: This is what stops your beautiful work from unraveling. A simple knot can (and often will) work its way loose over time, especially with smooth yarns or machine washing. But a tail woven securely through the surrounding fibers creates immense friction, locking it down for good. This mechanical lock is far more reliable than any knot.
-
A Polished Look: A clean finish just looks better. There are no distracting bumps or stray yarns to take away from the beauty of your stitchwork. It’s the difference between looking good and looking expensive. When ends are woven in meticulously, the eye is drawn to the overall pattern and texture, not the small imperfections.
-
It Has to Function: For anything that will see real-world use—like garments, blankets, and amigurumi—a secure finish means it can handle being machine washed, stretched, or cuddled by a toddler without disintegrating. Functionality is paramount, and secure ends are the key to a functional, long-lasting item.
By taking the time to weave in your ends properly, you’re not just finishing a project; you’re signing your name to it. It’s the final flourish that says, "This was made with care and expertise."
Once you master a few solid techniques, you’ll stop dreading this final step. Instead, it becomes a satisfying ritual that transforms your handmade items from pretty good to absolutely exceptional. You’ll begin to appreciate the zen-like focus required and the pride that comes from a perfectly executed finish. The confidence you gain will open up new possibilities for more complex and professional-looking projects.
Ready to level up your finishing game? First, you’ll need the right tools for the job. Having these on hand will make the process faster, easier, and a lot more enjoyable.
Your Essential Toolkit for Weaving Ends
Here’s a quick rundown of the tools that will give you a clean, secure finish on any crochet project. You don’t need all of them, but having the right one for your specific yarn and project makes a world of difference. Investing in a small, dedicated set of finishing tools can dramatically improve your results and reduce frustration.
|
Tool |
Best For |
Pro Tip |
|---|---|---|
|
Darning/Tapestry Needles |
All-purpose weaving on most yarn weights. A must-have. |
Get a pack with various sizes! A large eye makes threading bulky yarn a breeze, while a smaller needle is perfect for delicate fingering-weight projects. Metal needles are durable, but plastic ones can be gentler on some yarns. |
|
Bent-Tip Needles |
Hooking under stitches in tight spaces, like amigurumi or ribbing. |
The bent tip gives you leverage to scoop up fibers without splitting the yarn. It’s a game-changer for working on small, dense pieces where maneuvering a straight needle is awkward. |
|
Yarn Bobbins |
Managing multiple color changes (tapestry or intarsia crochet). |
Wind a small amount of each color onto a bobbin to prevent your yarn from turning into a tangled mess. It keeps things neat and saves your sanity, especially in projects with complex color charts. |
|
Needle Threader |
Quickly threading fluffy or fuzzy yarns (like mohair). |
A simple, cheap tool that saves you ages of frustration. If your yarn splits or is hard to see, this is your best friend. Look for ones designed specifically for yarn, as they are sturdier than those for sewing thread. |
|
Sharp, Tiny Scissors |
Snipping the tail close to the fabric for an invisible finish. |
Use a dedicated pair of snips just for your yarn. They’ll stay sharper and give you a cleaner cut than your all-purpose kitchen scissors. A clean snip prevents the end from fraying and becoming visible. |
Choosing the right tool is the first step. With these in your project bag, you’re already halfway to a finish you can be proud of. Proper tools make the job feel less like a chore and more like a craft in itself.
The Standard Method for Weaving In Your Ends
This is it—the foundational technique every single crocheter needs in their toolkit. I’m not just talking about a simple in-and-out stitch with a darning needle. Mastering the standard method is about learning a system for creating a finish that’s both ultra-secure and practically invisible. It’s the difference between a project that looks handmade and one that looks hand-crafted. This technique works for the vast majority of projects and forms the basis for more advanced adaptations.
The core principle I swear by is the "rule of three." To properly lock a yarn tail into your fabric, you have to change directions at least three times. Think of it like a safety pin; one pass isn’t secure, but weaving it back and forth creates so much friction that the end simply cannot wiggle its way loose, even after years of use and countless trips through the washing machine. Each change in direction acts as a lock, preventing the yarn from slipping back out the way it came.
The Secret to an Invisible Finish
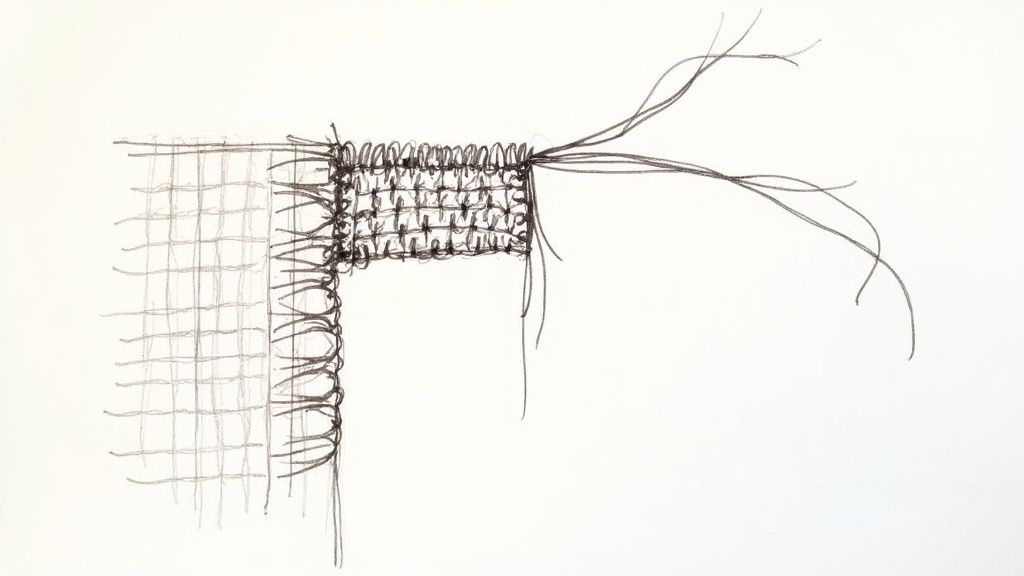
For a truly professional look, the goal is to hide that end so it’s completely undetectable from the right side of your work. My favorite place to do this is within the back "bumps" of the stitches. This is especially true if you want to understand how to do a basic crochet stitch and see how it’s formed—knowing your stitch anatomy is a game-changer here. The back of the stitch offers a hidden channel where the tail can be secured without disrupting the uniform appearance of the front.
Flip your work over. When you’re looking at the back of single crochet stitches, for instance, you’ll see a series of little horizontal bumps. Weaving your needle under these bumps keeps the tail neatly tucked away on the wrong side, leaving the pretty "V" of the stitches on the front untouched and perfect. The first pass can go horizontally under these bumps for a few stitches. For the second pass, you go back in the opposite direction, offsetting your path slightly. For the final, third pass, you can change direction again, perhaps going vertically for a stitch or two before making your last horizontal pass.
My personal go-to trick is to split the plies of the surrounding yarn. As you pass your needle through, intentionally pierce through the strands of the existing stitches. This creates incredible friction and makes it almost impossible for that pesky end to ever pop out. I use this on everything from blankets to beanies. Just be careful not to pierce through to the front of the work.
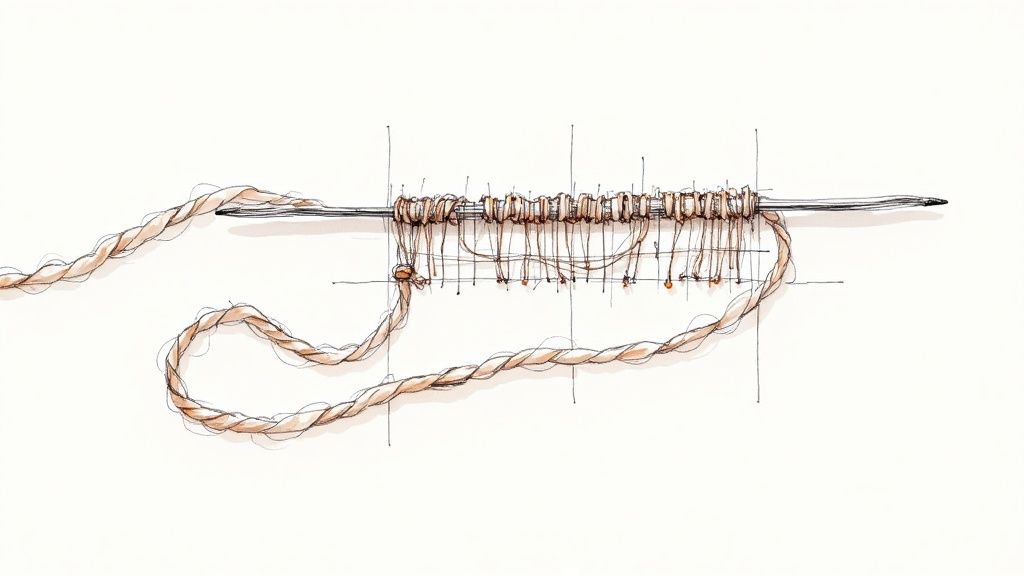
The image below gives you a feel for the essential tools and the general flow of this weaving process.
This sketch really shows the relationship between your hook, yarn, and that all-important tapestry needle. The key takeaway? Finishing isn’t some separate, annoying chore. It’s an integral part of the crochet workflow, requiring its own specific tool to properly complete the job your hook started. The needle becomes an extension of your creative process, just like the hook.
Adapting Your Technique for Different Stitches
The basic method for weaving in ends crochet is a fantastic start, but let’s be real—what happens when your project breaks the mold? Not every stitch is a neat, tidy single crochet. A one-size-fits-all weaving method just won’t cut it for every project, and learning to adapt is what separates a good finish from a great one. The key is to analyze the fabric you’ve created and choose a path that respects its structure.
Different stitches create fabrics with unique heights, densities, and textures, and they demand different solutions. If you try to weave horizontally across tall stitches like double or treble crochet, you’ll often get a tight, obvious line that kills the fabric’s natural drape. It can cinch the stitches together, creating an awkward pucker that’s impossible to unsee once you’ve noticed it. This is a common mistake that can ruin the flow of a garment or shawl.
This is where a simple change in direction makes all the difference. The trick is to work with the stitch, not against it.
Weaving Vertically in Tall Stitches
When you’re staring down a field of tall stitches (like double, treble, or even taller stitches), think vertically. Instead of wrestling your needle horizontally across the rows, guide it up and down through the vertical posts of the stitches themselves. This approach cleverly tucks the tail inside the stitch’s natural structure, making it completely invisible from the right side and preserving the fabric’s intended movement.
Just like with the standard method, you’ll still want to change directions a few times to lock it in. For example, you can weave down the post of one stitch, pop over and weave up the post of its neighbor, and then back down a third. This creates the necessary friction without restricting the fabric’s flow, preserving the beautiful drape you worked so hard to create. This is especially important for items like scarves and blankets where a supple hand-feel is desired.
Hiding Ends in Delicate Lacework
Lacy, openwork patterns are a whole different beast. With all that negative space, it feels like there’s nowhere to hide a pesky yarn tail. The secret here is to become a copycat. You need to follow the existing path of the yarn in your pattern, essentially camouflaging the end within the architecture of the stitches.
Trace the flow of a chain space or follow the solid edge of a shell stitch with your needle. By mimicking the original yarn’s journey, your woven-in end becomes a seamless part of the design itself, not an ugly afterthought. Stick to these more solid areas to make your ends disappear. For example, if you have a V-stitch, you can weave the end up one side of the ‘V’ and down the other.
Securing Ends in Colorwork
For projects with tons of color changes, like tapestry or intarsia crochet, dealing with the sea of ends is a huge part of the process. The goal is a join that’s both rock-solid and invisible from the front. This is where strategic planning pays off.
One of the best tricks in the book is to crochet right over your tails as you work. When you switch colors, just lay the old tail and the new tail along the top of the stitches from the previous row. Then, work your new stitches directly over them, trapping the tails inside the fabric. Crocheting over them for at least 4-5 stitches gives them a solid anchor before you snip the leftovers. Trust me, this little hack will slash your finishing time. After trapping the tail, you should still leave a couple of inches to weave in properly in the opposite direction to ensure it never escapes.
How to Fix Common Weaving Problems
Even when you do everything right, weaving in ends can go sideways. It happens to all of us. You get to the final step, and suddenly, you’re wrestling with a pesky tail that just won’t cooperate. Don’t panic—think of this as your personal troubleshooting guide for those little headaches that stand between you and a perfect finish. Knowing how to solve these problems is just as important as knowing the initial technique.
One of the most common frustrations? A yarn tail that’s ridiculously short. We’ve all been there. You snip the yarn, only to realize you’ve left yourself with barely enough to thread a needle. This is why the 6-inch rule is so crucial! But if you find yourself in this situation, instead of fighting with it, just grab a smaller crochet hook. Poke it through your intended weaving path in the fabric, snag that tiny tail with the hook, and pull it through the stitches. It’s a lifesaver and much less frustrating than trying to thread a needle with a half-inch of yarn.
Another pro-level move is to tackle the problem before it even starts. If you see you’re running out of a skein, join the new yarn with a Russian Join or a Magic Knot. The Russian Join involves threading the yarn ends back through themselves to create a seamless, thicker strand, completely getting rid of two tails you’d have to deal with later. The Magic Knot creates a very small, secure knot but can sometimes be felt in the final fabric. Researching these joining methods can be a huge time-saver for large projects.
Preventing Ends from Popping Out
There is nothing more soul-crushing than seeing a perfectly woven end wiggle its way out after the first wash. It’s a classic problem that makes a handmade item look unfinished. This usually happens for one of two reasons: either your weaving path was too simple (not enough direction changes), or your tension was off. If an end works itself loose, it just means it didn’t have enough friction to stay put. This is particularly common with slippery yarns like silk, bamboo, or mercerized cotton.
The secret to a secure finish that lasts is creating as much friction as you possibly can. Don’t just weave in a boring straight line. You need to change directions at least three times—go horizontally, then vertically, and even diagonally if the stitches allow. This forces the tail to work against the grain of the fabric, locking it in for good. Splitting the plies of the yarn as you weave is your best defense against popping ends.
Avoiding Bulky Ridges and Bumps
Another tell-tale sign of a rushed weaving job is a stiff, bulky ridge where you tucked in your end. This is especially common with chunky yarn and can ruin the soft, drapey feel of your fabric. To fix this, first, check your tension. You want the woven tail to have the same relaxed tension as the rest of your crochet work, not pulled tight. Pulling too tightly will pucker the fabric and create that rigid line. After weaving, gently stretch the area to ensure it moves naturally.
Also, here’s a game-changing tip: split the plies of the yarn you’re weaving into. Instead of just sliding your needle under the neighboring stitches, pass it directly through the strands themselves. This helps the tail meld into the fabric instead of just sitting on top of it. The bulk gets distributed, and you’re left with a finish that’s so smooth, no one will ever know where you hid your ends.
For a deeper dive into other common crochet headaches, our fixing crochet mistakes troubleshooting guide is packed with more solutions to get you back on track.
Making Finishing Part of Your Process
Let’s be honest: procrastinating on weaving in ends is a classic crocheter move. We’ve all been there. You finish that last stitch on a gorgeous blanket, feel a rush of pride, and then… you see it. The sea of yarn tails. Suddenly, what should be a moment of triumph turns into a massive, dreaded chore that can sit in your work-in-progress pile for weeks, or even months.
But what if you could sidestep that end-of-project burnout entirely? The trick is to stop thinking of weaving in ends as a separate, final chore and start treating it as an integral part of the creative flow. This mental shift is powerful.
By adopting a "weave as you go" mindset, you can transform your entire process. It’s a total game-changer, especially for big projects like afghans or cardigans that feel like they generate a million little ends. Your future self will thank you, I promise. This approach breaks down a monumental task into tiny, manageable steps.
Embrace the Weave-As-You-Go Mindset
So, what does this actually look like? Instead of letting those yarn tails pile up, tackle them every few rows or after finishing a specific section. For instance, if you’re making a granny square blanket, weave in the ends for each square the moment you snip the yarn. By the time you’ve made all your squares, the only ends left will be the ones from joining them together. It feels so much more manageable that way and gives you a clean slate for the assembly phase.
This simple habit connects you with a skill that millions of crafters are mastering. With the global knitting and crochet market projected to jump by a staggering USD 12,279.9 million by 2029, it’s clear that finishing techniques are a hot topic. As more people take up the craft, the demand for high-quality, professional-looking results increases. If you’re curious about the numbers, you can delve into the market forecast here.
Adopting a weave-as-you-go habit isn’t just about saving time at the end; it’s about maintaining your creative momentum. It keeps your workspace tidy and your motivation high, preventing that feeling of dread that can creep in. Finishing a project becomes a smooth, continuous process from start to finish.
When you finish a project with the same care and pride you started it with, your hard work truly shines. This approach is fantastic for any project, but it’s especially clutch for delicate items like those in our guide to easy crochet projects with thin yarn, where a neat finish is everything and bulky ends can be very obvious.
Let’s face it, even when you think you’ve got the hang of it, weaving in ends can bring up a dozen little questions. You’re at the finish line of your project, and suddenly you’re second-guessing everything. Here are some of the most common head-scratchers I hear from fellow crocheters, all answered to help you get that polished, professional look you’ve worked so hard for.
One of the biggest temptations is taking a shortcut. Can’t you just tie a knot and call it a day? I get it, especially when you’re staring down a mountain of tails on a granny square blanket. But trust me, knots are a risky move. They create these little hard bumps that mess with the beautiful drape of your fabric. Worse, they have a sneaky habit of working themselves loose over time, especially with washing. After all that effort, a knot is the last thing you want holding your masterpiece together. Weaving creates a secure finish through friction, which is far more reliable.
Choosing Your Tools and Materials
So, what’s the best needle for the job? This is a question I get all the time. Your absolute best friend here is a blunt-tipped tapestry or darning needle. The blunt tip is key—it glides through your work without splitting the yarn fibers, unless you’re doing it on purpose for extra security. I always recommend getting a pack with a few different sizes. A big eye is a lifesaver for chunky yarn, and you’ll be amazed at how bent-tip needles can wiggle into tight spots, especially in amigurumi.
Here’s a rule I live by: always leave a tail that’s at least 6 inches (or about 15 cm) long. It might feel like you’re being wasteful, but it gives you plenty of yarn to comfortably thread your needle and weave in at least three different directions for a super-secure finish. Fighting with a tiny, stubborn tail is a frustration you just don’t need. It’s false economy to leave a short tail; the time you save in yarn is lost tenfold in frustration.
And what about those notoriously slippery yarns, like silk or mercerized cotton? For these slick characters, you have to be extra diligent. Their smooth surface means less natural friction, so they are more prone to popping out. Instead of weaving in just three directions, I’ll often go for five or six, making sure to change direction frequently and work through different parts of the stitches. The real game-changer is to purposefully split the plies of the surrounding stitches as you go. This creates the friction needed to lock that slippery yarn in place for good.
Ready to turn these pro tips into beautiful, finished projects? Join the Crochet Craze community today! We provide all the beginner-friendly tutorials, patterns, and support you need to build your skills from the ground up. Start your creative journey with us at https://crochetcraze.com.