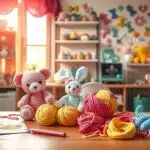
You’re about to explore amigurumi crochet, a fun way to make cute plushies. These look like tiny characters and make everyone smile. With simple patterns and stitches, you can make a charming toy in just a few hours.
Amigurumi is great for beginners. Projects are small, need few supplies, and teach basic skills. Books like Mariska Vos-Bolman’s Amigurumi Made Easy guide you with photos and videos.
Do you like video guides better? The No-Sew Amigurumi Crochet Made Easy eBook has patterns and videos. It’s perfect for selling at craft fairs or joining The Crochet Club for support.
Key Takeaways
- Amigurumi crochet makes fast, satisfying crochet plushies ideal for gifts or markets.
- Start with simple shapes to learn increases, decreases, and working in continuous rounds.
- Use DK or worsted yarn and a smaller hook for tight, gap-free fabric.
- Video tutorials and step-by-step books speed up beginner amigurumi progress.
- Explore resources and yarn options, including recommendations linked on Mary Maxim.
Why Amigurumi Crochet Is the Most Fun Way to Craft Plushies
The history of amigurumi is a mix of tradition and fun. It started in Japan and spread worldwide through books and social media. Designers like Mariska Vos-Bolman made it a modern hobby, blending textile design with toy making.
Origins and popularity of amigurumi
Amigurumi’s journey began in small Japanese studios and reached global fans. Early methods, like magic rings and tight single crochet, created durable toys. This evolution keeps amigurumi popular among hobbyists for its charm and durability.
Why crocheters in the United States are hooked
Instagram and TikTok show fast growth in crochet toy trends. Short videos and pattern teasers spread ideas quickly. Many U.S. crocheters use no-sew options and video tutorials to make gifts and sales easier.
Benefits of making handmade plush toys for gifts and craft markets
Handmade plush toys have a special emotional value. They sell well at craft fairs and online because buyers love customization. No-sew patterns and clear tutorials help you make more with less effort, ideal for holiday gifts or local bazaars.
Learning about tension, invisible joins, and yarn choice can lead to professional-looking results. For tips on avoiding gaps and speeding up assembly, check out this resource: 7 tips for crocheting amigurimi and.
Essential Tools and Best Yarn Choices for Amigurumi Crochet
To make cute, sturdy plushies, you need a tight kit. Start with the basics and add smart extras. This will make your projects look polished and last through playtime. Think of this as your starter roadmap to the best gear and yarn for small-scale crochet toys.
Must-have hooks, stuffing, and safety eyes
Choose hooks that match your yarn weight and gauge. Brands like Clover and Tulip offer ergonomic hooks that reduce hand strain. A 2.5–4.0 mm hook is best for common amigurumi yarn weights for tidy stitches.
For soft, stable shapes, pick polyester stuffing. This stuffing compresses evenly and recovers well after squeezing. It keeps limbs plump and predictable.
Use plastic safety eyes for a secure, child-safe finish. Look for reliable brands and the correct shaft length for your fabric thickness. Insert safety eyes before closing the head for a neat result.
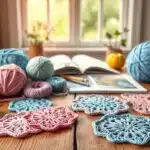
Best yarn types for soft, durable amigurumi (acrylic, cotton blends)
For most projects, medium acrylic and cotton blends are your safe bets. Acrylic yarns from Red Heart and Lion Brand give durability, color range, and easy care. Cotton blends like Lion Brand 24/7 Cotton add a smooth stitch definition that suits small details.
If you want plush softness, pick a worsted or DK acrylic with a tight twist. For more structure, a cotton blend keeps the shape and holds embroidery. Test a small swatch to find the best yarn for amigurumi for each pattern.
Extra helpful tools: stitch markers, tapestry needles, and blocking supplies
Stitch markers keep you sane when you track rounds. Use reusable plastic or split-ring stitch markers so you can move them quickly between stitches.
Tapestry needles make finishing fast. Use blunt needles for weaving ends and sharp ones for embroidered faces. They tidy seams and hide tails inside limbs.
Blocking supplies are optional but useful for flat pieces like ears or limbs. A small spray bottle, pins, and a foam board help shape details before assembly.
| Item | Why it matters | Recommended brands | Typical size/type |
|---|---|---|---|
| Crochet hooks | Controls stitch tension and finish | Clover, Tulip, Boye | 2.5–4.0 mm for amigurumi |
| Yarn | Determines softness, durability, and stitch clarity | Red Heart, Lion Brand, Paintbox | Worsted/DK acrylic or cotton blends |
| Stuffing | Keeps shapes plump and even | Pillowtex, Fairfield | Polyester fiberfill |
| Safety eyes | Secure, polished facial detail | Darice, Prym, Emy | Plastic with locking backs, various sizes |
| Stitch markers | Track rounds and increases | ChiaoGoo, Clover | Reusable plastic or split-ring |
| Tapestry needles | Weave ends and embroider features | John James, Bohin | Blunt and sharp sizes (large eyes) |
| Blocking supplies | Shape flat pieces for neat assembly | Generic craft brands | Foam board, pins, spray bottle |
Beginner-Friendly Techniques to Get You Started
Begin your amigurumi adventure with some key tricks. These will save you time and make your toys look great. You’ll learn about the magic ring, single crochet, and the importance of finishing touches.
Mariska’s Amigurumi Made Easy and quick Instagram clips will guide you. They show each step clearly.
Magic ring basics and alternatives
The magic ring is perfect for making neat centers for heads and limbs. Start by looping the yarn, then pull a hook through it. Chain one and work into the ring. Pull the tail tight to close the hole.
If stitches slip or you find it easier, use an adjustable loop. You can also start with a small chain joined into a ring.
Single crochet and invisible decreases
Single crochet is key for most patterns because it makes a dense fabric. Keep your tension even and count your stitches. This helps avoid mistakes.
For shaping, use invisible decreases to hide joins. This keeps your curves smooth. An invisible decrease tutorial will show you how to do this.
Fastening off, weave in ends, and clean closures
Finish your pieces by fastening off with a short tail. Use a tapestry needle to weave in ends securely. Nicki’s no-sew ebook has great tips for this.
To close holes, thread the tail through remaining stitches and pull tight. Adjust the stuffing as needed. Use hidden stitches to lock the closure and trim the excess close to the fabric.
Practice these techniques with small projects. Start with a tiny ball for the magic ring. Then, try a small amigurumi head for single crochet and invisible decreases. Finish each piece neatly for a polished look.
No-Sew Amigurumi Options and Time-Saving Tricks

Want to finish faster and have a cleaner look? No-sew amigurumi patterns are the way to go. They let you attach limbs, ears, and tails as you crochet. This means your toy comes together without the need for separate stitching.
This method saves you time on finishing and keeps your project fun. It’s all about making your crochet journey smoother and quicker.
How no-sew patterns avoid sewing on limbs and accessories
Designers use special rounds that end with visible loops for attaching parts. You can tuck ends, stitch through live stitches, or work connecting chains. This way, parts join without needing a yarn needle.
Patterns labeled no-sew often include photo steps or short videos. These help you learn visually, which is super helpful.
Techniques to join pieces seamlessly while crocheting
Join-as-you-go amigurumi methods let you create seamless crochet joints. You link rounds or motifs as you add them. Work a slip stitch or single crochet connection at the edge of a finished piece, then continue into the new piece so the seam disappears into the fabric.
Use firm stuffing and a stitch marker to keep counts accurate while you attach parts. Tight gauge and crisp stitch definition help the join look polished. If you want extra guidance, check a curated list of free no-sew options at no-sew amigurumi patterns.
When to choose no-sew vs. sewn construction for your project
Pick no-sew when you want speed, beginner-friendly assembly, or a smooth finish. It’s perfect for plushies that won’t face heavy play. Time-saving crochet tips help you batch similar joins, reducing setup and cleanup time for multiple toys.
Choose sewn construction for pieces that need extra strength, fine sculpting, or tricky angle placement. Sewn joins are better when durability and precise positioning matter more than a quick finish.
amigurumi crochet Patterns and Project Ideas You’ll Love
Looking for a project that fits your schedule and skill level? Start with simple shapes and then move to quirky faces. Next, try mash-ups that catch people’s attention. The right amigurumi patterns will guide you from your first stitches to more complex projects.
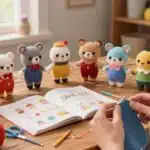
Begin with simple animals and shapes to learn. Mariska’s Amigurumi Made Easy offers 16 easy designs with photos and videos. These patterns help you practice basic stitches and stuffing without feeling overwhelmed.
Beginner crochet animals like tiny bears, chicks, and mushrooms boost your confidence quickly. Use worsted acrylic or cotton blends, a comfortable hook, and a short pattern for a quick win. Each small success makes the next project less daunting.
Intermediate patterns add personality to your creations. Nicki’s ebook has 30 no-sew patterns and nine tutorials. These focus on facial expressions, posture, and tiny costume details, teaching you to make a simple head look different.
Color choices, embroidery, and simple crochet add depth to your amigurumi. Try changing eye placement, tilting ears, or adding a cape. These small changes can make your amigurumi uniquely yours.
Advanced designs combine parts, textures, and shaping for stunning results. Instagram creators often share clever mixes that inspire new ideas. Learning advanced techniques opens up possibilities for articulated limbs, layered clothing, and hybrid creatures.
Advanced techniques include joining motifs as you go, creating internal armatures, and using stitch patterns for texture. Use photos and short videos to check your shaping. Then, remix elements from trusted patterns.
Use the chart below to match projects to your goals. It helps you choose a pattern that fits your time, skill level, and audience for sales or gifts.
| Project Level | Example Pattern | Key Skills Learned | Ideal Time |
|---|---|---|---|
| Beginner | Mini bear from Mariska’s collection | Magic ring, single crochet, stuffing | 1–3 hours |
| Lower Intermediate | Simple doll with embroidered face | Color changes, surface embroidery, shaping | 3–6 hours |
| Intermediate | No-sew character from Nicki’s ebook | Facial expression, clothing pieces, no-sew joins | 6–12 hours |
| Advanced | Mash-up creature with layered garments | Advanced amigurumi techniques, armature, articulated limbs | 12+ hours |
Step-by-Step Project Planning: From Yarn to Finished Toy
Start by picking patterns that match your skill level and goals. Mariska’s book has clear photos and pattern structure. This makes reading crochet patterns less scary, so you can choose projects with confidence.
Reading patterns and choosing appropriate skill-level projects
Scan pattern sections for stitch lists, abbreviations, and finished dimensions. If the pattern has detailed photos and a difficulty tag, it will save time during production. Nicki’s ebook organizes content by skill, which helps you match each design to your current abilities.
When you test a new pattern, track how long each section takes. Use that data to refine future time estimates and to pick patterns that fit your production rhythm.
Organizing materials, notes, and printable pattern PDFs
Create a kit for every design: yarn, hook, eyes, stuffing, and labels. Keep one notebook or spreadsheet for notes on tension, color swaps, and stitch counts. Save printable crochet PDFs and ad-free eBooks for quick reference at your work table.
Attach a printed care tag from your pattern file to each finished toy. This small step boosts perceived value and helps buyers at markets understand care instructions.
Time estimates, batching parts, and finishing workflow for craft fairs
Break projects into repeatable tasks: body, limbs, assembly, and finishing. Batching limbs or faces speeds production. Instagram makers often post batching workflows that show how making parts in groups reduces setup time and errors.
Plan a craft fair crochet workflow that includes quality control, pricing, and display prep. Nicki’s printable PDF includes a clickable table of contents and time-saving no-sew tips that many sellers use to hit deadlines.
Use a short production table to track hours per step and target quantities. This makes scheduling simple and lets you tweak the plan before you commit to large runs.
| Task | Estimated Time | Batch Size |
|---|---|---|
| Head/body crochet | 45–90 minutes | 4–8 pieces |
| Limbs and ears | 15–30 minutes each | 8–16 pieces |
| Assembly and sewing | 20–40 minutes | 4–8 toys |
| Finishing and tags | 10–20 minutes | 4–8 toys |
When you want a practical walkthrough, visit amigurumi for beginners for helpful tutorials and pattern links. Use those resources to refine your amigurumi project planning, strengthen your reading crochet patterns skills, and store reliable printable crochet PDFs for every design.
Video Tutorials, eBooks, and Resources to Speed Your Learning
Learning is faster when you see stitches move. Short videos break down hard moves and make steps easy. For hands-on learning, look for amigurumi video tutorials that let you pause, rewind, and see things twice.
Why video tutorials make mastering stitches easier
Visual cues help you get the right tension and placement. Mariska’s book has step-by-step photos and simple video demos. These help beginners get past common hurdles.
Instagram creators share short reels that clear up assembly and stitch flow. These quick videos introduce you to new trends, color combos, and hashtags. They keep you inspired.
Recommended eBooks and ad-free PDFs with large fonts and images
For clean prints, choose a well-made ebook over freebies with ads. Nicki’s No-Sew Amigurumi Crochet Made Easy has 30 patterns and 15+ video tutorials. It’s an ad-free PDF that’s easy to print and read.
This ebook gives you lifetime access and downloadable content. It has large images to help you understand. Working offline with an ad-free PDF saves time and keeps your space clean.
For more patterns and tutorials, check out amigurumi tutorials hub. It’s a great place to grow your collection.
Communities and support: Facebook groups, Instagram, and membership clubs
Learning alone is slower. Joining crochet communities helps you learn faster. You get feedback, tips, and encouragement from others. Nicki links her ebook to the Facebook group “Crocheting with Nicki” for sharing and advice.
Membership clubs offer more structure. The Crochet Club gives you access to 500+ patterns, extra videos, live meetings, and direct help. This mix of guides, video tutorials, and community support speeds up your learning.
Troubleshooting Common Amigurumi Crochet Problems
When your plushie doesn’t turn out right, you need fast, effective fixes. Mariska’s visual tutorials and Nicki’s ebook techniques can help. They make fixing amigurumi problems less stressful and more rewarding.

Fixing gaps and closing holes when attaching pieces
Gaps can appear where limbs join the body. To fix gaps in amigurumi, tighten the join by using smaller insertion points. Pick up fewer stitches at the seam. If the hole is hard to fix, work a round of slip stitches around the attachment. Then, weave the tail through the edge and pull tight.
Nicki’s tutorials show how to do seamless decreases. This keeps stuffing from showing through.
Dealing with uneven stuffing and lumpy shapes
Stuffing problems can mess up your toy’s shape. Use even stuffing tips: add fiber-fill a little at a time. Use a chopstick or stuffing tool to push it into tight spots. Massage the toy as you stuff to smooth out lumps.
Instagram makers suggest adding filling bit by bit. If a spot is too full, remove a few stitches, adjust the fill, and then close with a neat whipstitch.
Correcting stitch count errors and preventing pattern drift
Miscounts can happen when you’re distracted. To correct stitch count, stop when you notice the mistake. Unravel back to the last correct round and recount from there. Use stitch markers on the first stitch of each round to avoid repeats.
Regularly recounting helps prevent pattern drift. Resources like quick fix guides offer step-by-step solutions. These guides help you fix mistakes between projects.
Short checks are best: recount after every increase or decrease. Check join points before fastening off. Use consistent tension. These habits turn amigurumi troubleshooting into a routine, not a crisis.
Finishing Touches That Make Your Amigurumi Stand Out
Perfect amigurumi finishing turns a simple doll into a character people love. Use small details to add expression and charm. Mariska’s patterns show clear photos to guide your final steps and lift your work from good to memorable.
Embroidering facial expressions and adding personality
When you embroider amigurumi faces, pick thread colors that match the yarn palette. Test stitches on a scrap to find the right tension. Simple straight stitches and French knots give you eyes, lashes, and smiles with natural variation.
Nicki’s ebook teaches neat stitches and placement so expressions read well from a distance. If you want a softer look, use dull embroidery floss and a small tapestry needle for subtle textures.
Choosing and attaching safety eyes, noses, and embellishments
Decide early if you will attach safety eyes or embroider them for toys meant for small children. To attach safety eyes securely, push them through joined rounds and snap the washer on firmly behind the fabric.
Nicki recommends plastic safety eyes and noses for durability. For non-sew embellishments, consider hot-felted accents, sewn-on felt pieces, or button joins that are rated for toys. Test each embellishment for secure attachment before gifting or selling.
Care labels, gifting presentation, and selling your handmade toys
Include crochet toy care labels that list fiber content, washing instructions, and safety notes. Printable laundry/care tags from Nicki’s resources make presentation look professional and save you time.
When you sell handmade toys, package them with a small care card and a branded tag. Instagram is a great place to study how other makers stage photos and add props that boost perceived value.
Clear amigurumi finishing, neat ways to embroider amigurumi faces, safe methods to attach safety eyes, and tidy crochet toy care labels all help you sell handmade toys with confidence.
Conclusion
You’re now ready to master amigurumi crochet. Mariska Vos-Bolman’s pattern book shows how clear photos and videos help. They make projects easy to follow, so you can learn amigurumi quickly and without getting stuck.
Instagram keeps the inspiration coming with short tutorials and feedback from others. This means you’ll always have new ideas. By combining social motivation with the right resources, your skills will grow fast and stay fun.
The No-Sew Amigurumi Crochet Made Easy ebook by Nicki offers 30 patterns, 9 tutorials, and 15+ videos. It’s an ad-free, printable PDF that you can access forever. It includes step-by-step lessons, support from a Facebook group, and tips on selling your work. This gives you everything you need to practice, sell at craft fairs, and enjoy making.
Keep using these resources and keep practicing. See each small toy as a chance to learn. With the right tools and a bit of effort, you’ll master amigurumi techniques. These will turn simple stitches into adorable keepsakes and profitable items. Happy stitching—your next favorite plush is waiting.
FAQ
What is amigurumi and where did it come from?
Amigurumi is a Japanese art of making small stuffed toys. It involves crocheting or knitting tiny animals and characters. The style has evolved from Japanese craft traditions, thanks to designers like Mariska Vos-Bolman from Amsterdam.
Instagram and maker communities have made it a global trend. They share finished pieces, tutorials, and pattern variations.
Why are so many crocheters in the United States into amigurumi?
Amigurumi is perfect for busy makers because it’s compact and portable. Social platforms like Instagram inspire quick variations and designs. Resources like Mariska’s “Amigurumi Made Easy” and video-rich ebooks help beginners start selling or gifting their toys.
What are the main benefits of making handmade plush toys?
Handmade plushies are personal gifts and profitable craft-fair items. You control the materials, size, and expression. They stand out in photos on Instagram, helping build a brand or hobby portfolio.
Which hooks, stuffing, and safety eyes do you actually need?
Choose a hook size that matches your yarn. Polyester stuffing is stable and soft. Use quality plastic safety eyes/noses for child safety. You’ll also need stitch markers, tapestry needles, and optional blocking supplies.
What yarns work best for amigurumi?
Soft, durable yarns like worsted acrylic or cotton blends are best. They hold shape and photograph well. Mariska recommends soft yarns, and The Woolery lists amigurumi-friendly yarns and tools.
What extra tools speed up amigurumi projects?
Keep stitch markers, blunt tapestry needles, a small stuffing tool, and care labels handy. For craft fairs, a tidy PDF pattern, sticky notes, and batching plan save time.
How do I start with the magic ring and are there alternatives?
The magic ring creates a tight starting circle. Tutorials in Mariska’s book and ebooks show how. Alternatives include starting with a small chain or adjustable loop method.
What’s the difference between regular and invisible decreases, and why care?
Regular decreases are quick but can leave a notch. Invisible decreases create a smoother join. Many tutorials focus on invisible decreases for professional-looking amigurumi.
How do you fasten off and weave in ends so they don’t show?
Fasten off with a secure knot or slip stitch. Then, thread the tail through a tapestry needle and weave it through stitches. For no-sew patterns, hide ends inside limbs or use join-as-you-go techniques.
What exactly is no-sew amigurumi and why try it?
No-sew amigurumi uses join-as-you-go techniques to avoid sewing. It speeds up production and appeals to beginners. Nicki’s “No-Sew Amigurumi Crochet Made Easy” ebook focuses on these methods with 30 patterns and 15+ videos.
How do you join pieces seamlessly while crocheting?
Join-as-you-go methods include crocheting parts directly onto the body. Use slip-stitch joins or work through both layers to attach limbs. Video tutorials show these motions step-by-step.
When should I choose sewn construction over no-sew?
Sewing is better for durability and precise placement. Choose sewing for designs needing reinforced seams or layered embellishments. No-sew is faster for quick markets and giftable minis.
What are good starter patterns for beginners?
Simple starter animals use basic shapes. Mariska’s “Amigurumi Made Easy” includes 16 beginner-friendly animal patterns. Nicki’s ebook adds many no-sew starters. Look for patterns labeled “beginner” that focus on single crochet rounds.
How do I add personality to intermediate character patterns?
Change facial expressions with embroidery, tweak color placement, add tiny accessories, or play with eye size and spacing. Instagram creators often post variations that spark ideas.
What techniques are used in advanced amigurumi designs?
Advanced patterns combine shaping, color changes, surface crochet, and attachment tricks. Videos and photo-rich ebooks help you learn these moves step-by-step.
How do I choose patterns by skill level and read pattern instructions?
Pick projects labeled for your experience. Read through the entire pattern before starting. Check abbreviations and gauge notes. Photo sequences and video tutorials in Mariska’s and Nicki’s resources make it easier to visualize each step.
How do I organize materials and printable pattern PDFs?
Use a folder or binder for printed, ad-free PDFs. Keep a project pouch for yarn, hook, eyes, and stuffing. Nicki’s ebook offers a clickable table of contents and printable care labels.
How long does a typical amigurumi project take and how do I batch parts?
Time varies by size and complexity. Small starters can take an hour or two, larger characters several evenings. For craft fairs, make limbs and accessories in batches, then assemble in a finishing session.
Why are video tutorials so helpful for learning stitches?
Videos show motion—where to insert the hook, how to hold the yarn, and how decreases look in real time. They speed up learning and reduce errors. Both Mariska’s book and no-sew ebooks include short videos that complement step-by-step photos.
Which ebooks or ad-free PDFs would you recommend?
Mariska Vos-Bolman’s “Amigurumi Made Easy” is a great photo- and video-supported paperback. For no-sew options, Nicki’s “No-Sew Amigurumi Crochet Made Easy” ebook provides 30 patterns, 9 tutorials, 15+ videos, and a printer-friendly, ad-free PDF with lifetime access.
Where can I find community support and feedback?
Join Facebook groups like “Crocheting with Nicki,” follow amigurumi creators on Instagram, or join membership clubs such as The Crochet Club. These spaces offer pattern help, troubleshooting tips, feedback, and inspiration from makers worldwide.
How do I fix gaps and close holes when attaching pieces?
Use invisible decreases, stuff gradually while you close, and try join-as-you-go methods to eliminate gaps. Tutorials show special magic ring tricks and ways to close holes while crocheting. If a gap appears, a short round of extra single crochets or a tidy whipstitch can seal it.
What do I do about uneven stuffing and lumpy shapes?
Add stuffing in small increments and distribute it evenly with a stuffing tool or chopstick. Check shaping frequently, adjust fiber-fill placement, and rework problem rounds if needed. Many creators recommend smoothing and rolling the stuffing as you go to avoid lumps.
How can I correct stitch count errors and prevent pattern drift?
Use stitch markers to mark the start of each round and recount regularly. If you find an error, unpick (frog) back to the mistake or adjust counts in the next round if minor. Video tutorials often demonstrate how to spot and fix common miscounts before they affect the shape.
How do you embroider faces and make expressions that sell?
Start with simple lines and small eyes; practice on scrap swatches. Use contrasting thread for clear expressions and place features symmetrically. Nicki’s ebook and Mariska’s photo guides offer practical tips for embroidered faces, placement, and how subtle changes create big personality shifts.
What’s the proper way to attach safety eyes and noses?
Insert safety eyes before stuffing and secure with their locking backs. Position them with pins, step back to check spacing, and follow the pattern’s recommendation for eye size. Use plastic safety noses the same way and avoid gluing—locks are safer and more durable for toys.
Should I include care labels and how do I present finished toys?
Yes—printable care labels add professionalism. Include fiber content, washing instructions, and age recommendations. Presentation matters: tidy packaging, a clear care tag, and a small care card can help sales at craft fairs and on Etsy. Nicki’s ebook includes printable care/laundry tags to streamline this.
Can I sell finished toys made from these patterns?
Generally, yes—both Mariska’s and Nicki’s resources position finished items as sellable products. The usual restriction is you cannot resell the pattern itself. Check each pattern’s license for commercial use, and always credit designers when required.