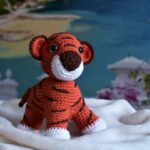
Three Ways to Attach Amigurumi Limbs: Sewn-On, Yarn, and Joints
Every little arm, leg, tail and ear you crochet has to get onto the body somehow, and the way you do it changes how your toy looks, moves and survives a good squeeze. When people talk about crochet amigurumi limbs and joints, they usually mean one of three families of methods. Learn them once and you can pick the right one for each project instead of guessing.
Sewn-on limbs are the classic approach. You finish the body and the limbs, then whip-stitch each limb to the body with yarn. A close cousin is single-crochet attaching, where you join a limb to the body along a single row. It suits floppy limbs especially well, and it’s a friendly place for beginners to start because you’re using a stitch you already know. Sewn-on limbs stay put and need no hardware, which makes them a natural fit for toys headed to small children.
Yarn-jointed limbs use a length of yarn running through the body and the limb so the limb can swing. Timing is the thing to remember here. Unlike hardware joints, yarn attachment means finishing the body, arms and legs first, then connecting everything at the end. You get a soft, hardware-free swivel.
Hardware joints are the third family. Disc joints come in three pieces: a disc with a stem, a washer, and a lock washer or fastener. The stem passes through the limb and the body, and the washer locks it on the inside. Unlike the other two methods, these go in as you work, before the body is closed up, so you have to plan ahead. The payoff is a limb that rotates smoothly, with the teddy-bear look so many crocheters adore.
Buttons can act as joints too, threaded through the limb and body with strong yarn or thread. Each method has its own feel, so try more than one on small practice pieces before you commit to a big project. If you’re still getting comfortable with the basics, our crochet techniques for amigurumi guide makes a good companion read.
Choosing the Right Joint Size and Limb Method for Your Project
The best method for crochet amigurumi limbs and joints depends on who the toy is for, how it should move, and how confident you feel. Here’s a simple way to think it through.
Start with the recipient. For babies and toddlers, sewn-on or single-crochet limbs are the safest bet, since there’s no hardware to work loose. For display pieces and gifts for older children or adults, joints and poseable limbs are a lot of fun. If you’re making something to give away, our roundup of cute amigurumi ideas for gifts can help you match a design to the person.
Think about the movement you want. A sewn-on limb stays where you put it. A yarn joint lets a limb swing. A disc joint rotates, but only in one plane, which suits arms that wave or legs that sit. If you want a limb that holds any shape you bend it into, you need a wire armature, covered in the next sections.
Match the joint to the limb. For hardware joints, the practical rule is to use the largest joint that fits inside the limb, so it lies flat against the body. Too small, and it wobbles and can pull through the fabric. Too large, and it distorts the limb or won’t fit at all. Hold the disc up against the unstuffed limb opening to judge it before you commit. Joint packs list sizes in millimetres, so compare that diameter to the width of your limb where it attaches.
Be honest about your skill and patience. Sewn-on limbs are the most forgiving, since you can unpick and reposition. Joints are less so, because once the lock washer is pressed on, it’s hard to undo. If this is your first jointed toy, try a simple pattern from our free amigurumi patterns and keep the stakes low.
Marking, Measuring and Attaching Limbs Step by Step
Before you start on crochet amigurumi limbs and joints, gather your finished body (not yet fully closed if you’re using joints), your finished limbs, stitch markers or scrap yarn, a yarn needle, pins, and your joints if you’re using them.
Step 1: Decide where each limb goes
Lay the body in front of you and settle on placement. Arms usually sit a few rounds below the neck and legs toward the bottom, but the exact spot depends on your design. Hold the limbs against the body and look at the whole toy before you mark anything.
Step 2: Mark the positions
Don’t eyeball it. Place stitch markers at the exact spot for each limb, and count rounds on both sides of the body so left and right match. Counting your stitches is what keeps arms and legs symmetrical, which is the thing beginners struggle with most. If you’re unsure how to read the round counts in your pattern, our amigurumi pattern abbreviations explained post will help.
Step 3: Pin and check alignment
Pin each limb in place, then step back. Make sure each one lies straight across the line of stitches rather than twisting at an angle. Look from the front, the side and the back. Moving a pin is far easier than fixing a sewn seam.
Step 4: Attach with your chosen method
For sewn-on limbs, thread your needle with a long tail and whip-stitch around the limb opening, catching one stitch of the limb and one of the body each time, working evenly all the way round. For single-crochet attaching, join the limb to the body row by row with single crochet for a neat, sturdy seam.
For hardware joints, push the stem through the limb opening and through the body fabric at your marked spot. Do this before the body is stuffed and closed. Slide the washer on from the inside, then press the lock washer on firmly until it sits snug. For yarn joints, wait until everything is finished, then thread yarn through the limb and body and tie it off securely.
Step 5: Stuff, close and compare
Stuff each limb firmly enough to hold its shape before it’s fully attached, then finish the body. Compare left and right one more time. If one limb sits a round higher than the other, now’s the time to adjust it, not after the final knot.
Making Limbs Poseable with Joints and Wire Armatures
Making crochet amigurumi limbs and joints poseable is where the craft gets playful, and it suits a not-your-grandma’s-crochet attitude perfectly. It helps to know there are two kinds of movement. A jointed limb holds its position but only rotates in one plane. A wired limb holds any shape you bend it into.
Joints for simple movement. A disc joint lets an arm swing forward and back, or a leg bend at the hip so the toy can sit. That’s enough for most teddy bears, bunnies and dolls, and it needs nothing beyond the joint set.
Wire armatures for full poses. To make a limb fully poseable, you put wire or an armature inside the crochet piece. The wire runs through the centre of the limb, and you bend it to pose your toy standing, waving or curled up. Wire is rigid, so a few habits help:
- Cap or fold over the wire ends so they never poke through the fabric.
- Wrap the wire in a layer of stuffing or soft padding so it doesn’t rub against the stitches.
- Keep the wire well inside the limb, leaving a little crochet fabric beyond the tip.
- Bend gently and avoid sharp, repeated folding, which can fatigue the wire over time.
A wire armature adds complexity, so save it for a project where poseability is the whole point, like a collectible figure or a display piece. For a first try, start with a short, simple limb so you can see how the wire behaves inside the crochet before building a whole figure.
Poseable pieces generally work better as display toys, or as gifts for older children and adults, than as toys for little ones. Internal wire and hardware are not what you want in something that will be chewed or pulled apart. Our beginner guide to amigurumi stuffed animals covers general toy-making fundamentals if you’d like a refresher before adding wire.
Keeping Limbs Secure and Safe: Troubleshooting Loose Limbs and Safety Tips
Even careful makers run into trouble with crochet amigurumi limbs and joints now and then. Here are the usual causes and fixes.
The limb flops or leans. Often it wasn’t stuffed firmly enough, or the attachment spot was a stitch or two off. Restuff the limb through its opening before closing, or re-sew with extra passes of yarn on the weak side.
The limb pulls away from the body. This happens when the seam was worked too loosely or only caught a single strand. Go back in with strong, tightly twisted yarn or doubled thread and work another round of stitches, anchoring into more than one body stitch each time. Weave in the end deeply and tie it off.
A hardware joint wobbles or pulls through. The joint is probably too small for the limb, or the lock washer isn’t pressed on firmly. If you can still reach inside the body, tighten it. If not, you may need to carefully unpick and refit with a larger joint, since the largest one that fits inside the limb sits flat and holds best.
Limbs loosen after washing or play. Hardware and stuffing both shift with rough handling. If you’re caring for a finished toy, our guide on how to wash amigurumi toys safely at home explains how to clean toys without stressing the seams.
Safety comes first with children. Hardware joints, safety eyes and wire all count as small or rigid parts that can cause harm if they come loose. For babies and toddlers, the safest route is to skip hardware entirely and use securely sewn-on limbs with embroidered details. If you do make a jointed toy for a child, read the official guidance on toy safety first, such as the U.S. Consumer Product Safety Commission’s guidance on children’s products, and check that no parts can be pulled free.
One last habit is worth building: the tug test. Once a limb is attached, give it a firm, steady pull in every direction before you gift the toy. If anything shifts, fix it now. Stitch by stitch, you’ll get better at this, and soon you’ll know instinctively which method each toy deserves. When you finish your first jointed creation, we’d love to see it once our community features launch.