
Amigurumi is the craft of crocheting small stuffed figures, from simple round buddies to detailed characters with clothes and accessories. The word comes from Japanese and combines crochet with stuffed toy making. If you have held a hook before, even briefly, you already have enough skill to start. This all-in-one tutorial walks you through tools, basic stitches, reading patterns, assembly, and troubleshooting, so you can finish your first amigurumi with confidence in 2026. If you are completely new to the craft, start with what amigurumi is and how it works before diving into the steps below.
What Is Amigurumi and Why Start Now?
Amigurumi figures are typically crocheted in continuous rounds, which means you work in a spiral instead of joining each round with a slip stitch. This creates a seamless fabric with no visible seam line, which is exactly what you want for a smooth toy surface. Most beginner projects use single crochet, the shortest and most stable basic stitch, worked tightly so the stuffing does not show through. If you are unsure which stitch to use, this breakdown of single crochet vs double crochet explains why single crochet dominates amigurumi.

The appeal is simple. Amigurumi is portable, forgiving, and fast enough to finish a small project in a weekend. You do not need expensive equipment. A few hooks, a couple of yarn balls, some stuffing, and a pair of safety eyes will get you started. Patterns range from absolute beginner shapes like balls and eggs to intermediate designs with color changes, shaping, and tiny clothing. As your confidence grows, your project list grows with it.
Tools and Materials You Actually Need
You can start amigurumi with a short supply list. Here is what matters and why.

- Yarn: Smooth, light-colored worsted or DK weight yarn is easiest to learn on. Light colors hide uneven tension and make individual stitches easier to see. Cotton and cotton blends hold shape well and show stitch definition clearly. Avoid fuzzy or textured yarns for your first few projects, because they make counting stitches difficult.
- Crochet hook: A hook one or two sizes smaller than the yarn label recommends helps you create a dense fabric. If your worsted yarn suggests a 5 mm hook, try a 3.5 mm or 4 mm hook for amigurumi.
- Stitch markers: You will place one at the start of each round. Safety pins, bobby pins, or scrap yarn all work. Markers are not optional for beginners, because losing your place in a spiral is the most common source of errors.
- Polyester fiberfill: Standard toy stuffing works well. Stuff firmly but not so hard that the stitches stretch open.
- Safety eyes or embroidery floss: Plastic safety eyes come in many sizes and are simple to install. If your project is for a baby or toddler, embroider the eyes with yarn or floss instead, because plastic eyes can detach.
- Tapestry needle and scissors: A blunt-tipped needle is ideal for weaving in ends and sewing parts together.
That is the complete starter kit. Everything else is optional. A row counter helps for larger projects, and a small pair of sharp scissors is a nice upgrade, but neither is required for your first figure.
Essential Stitches and Techniques
Amigurumi uses a small set of core stitches. Learn these five and you can make the majority of beginner patterns. The abbreviations below appear constantly in amigurumi PDF patterns, so they are worth memorizing.
The Magic Ring (MR)
Most amigurumi begins with a magic ring, also called a magic circle or adjustable ring. It creates a tight, closable center with no hole. To make one, wrap the yarn around your fingers to form a loop, insert your hook into the loop, pull up a strand of working yarn, chain one to secure, then work the required number of single crochet stitches into the loop itself. Gently pull the short tail to close the center hole. If the magic ring feels awkward at first, chain two or three and work your first round into the first chain instead. The result is slightly less tidy, but perfectly functional for a first project.
Single Crochet (sc)
Insert your hook into the stitch, yarn over, pull up a loop (two loops on hook), yarn over again, and pull through both loops. That is one single crochet. Nearly every amigurumi stitch is a variation of this, so comfort with single crochet is the foundation of the craft.
Increases (inc) and Decreases (dec)
An increase means working two single crochet stitches into the same stitch, which adds one stitch to the round. A decrease pulls two stitches together into one. The invisible decrease is the standard for amigurumi, because it leaves a cleaner surface with less visible texture. To work one, insert your hook through the front loops only of the next two stitches, then complete a single crochet as usual. Increases shape the body outward, decreases pull it inward. Nearly all shaping in amigurumi comes down to these two moves.
Working in Continuous Rounds
Instead of joining each round, you spiral upward. Place your stitch marker in the first stitch of the round. When you reach the marker, move it up to the new first stitch. Counting becomes second nature after a project or two, and many crocheters count stitches every round to catch errors early.
The Slip Stitch (sl st)
Slip stitches connect pieces, close openings, and join rounds when a pattern calls for it. Insert the hook, yarn over, and pull the loop through both the stitch and the loop on your hook in one motion. It is a simple, flat stitch used mostly for finishing work.
Your First Project: A Simple Ball or Egg
The classic first amigurumi is a ball. It teaches the magic ring, continuous rounds, increases, and decreases in a single small project. Here is a general shape you can follow. Exact stitch counts vary by yarn and hook, so use this as a framework and adjust after measuring your work.
- Start: Make a magic ring and work 6 single crochet into it. (6 stitches)
- Round 2: Increase in every stitch. (12 stitches)
- Round 3: Alternate single crochet and increase around. (18 stitches)
- Round 4: Alternate two single crochet and increase around. (24 stitches)
- Rounds 5 to 8: Work even in single crochet around, no increases or decreases. This creates the middle of the ball.
- Shaping down: Reverse the increase pattern with decreases. Decrease around to about 12 stitches.
- Stuff: Add fiberfill before the opening gets too small. Pack it firmly in small pieces so the shape stays even.
- Close: Continue decreasing until the hole is small, then close with a tapestry needle by threading through the front loops of the remaining stitches and pulling tight. Weave in the ends.
A ball of about 4 to 5 cm is an ideal first finish. Make two or three in different colors to build muscle memory before moving to a character pattern. Once a ball feels natural, an egg, a mushroom, or a small animal head follows quickly, because each uses the same shaping logic. For more beginner-friendly options, browse these easy crochet animals for beginners that build on the same skills.
Reading Amigurumi Patterns and Assembling Your Figure
Amigurumi patterns are written in shorthand. A line such as “R3: (sc, inc) x 6 [18]” means round three, alternating one single crochet and one increase six times, for a total of 18 stitches. The round brackets group a repeat, and the number in brackets is your stitch count at the end of the round. Checking that count after each round catches mistakes before they compound. Reputable pattern shops, including libraries like the ones at Crochet Craze, provide both written instructions and photo tutorials, so you can see what each step looks like.
Assembly is where many beginners lose patience, so plan for it from the start. Position parts with pins before sewing. Use the same yarn or a matching thread and stitch through the outer loops of both pieces with small, firm stitches. Sew limbs at a slight angle for a natural look, and place eyes before closing the head. When you fasten off, leave a long tail for sewing. Weave in all ends thoroughly; loose ends are the main cause of toys coming apart over time. For a deeper walkthrough, see this complete guide to crocheting a stuffed animal.
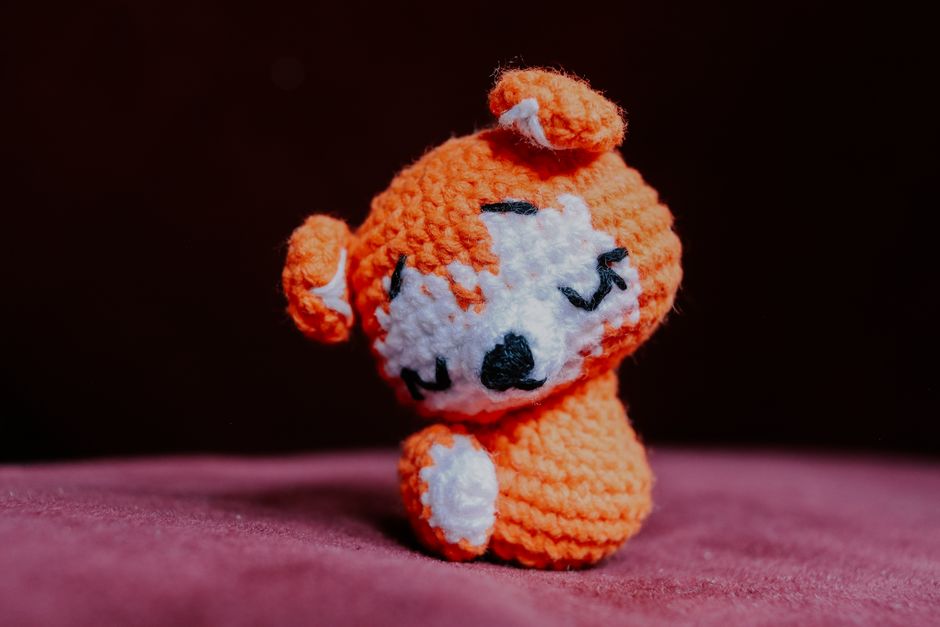
A few finishing details lift a handmade piece considerably. A light brush with a soft brush smooths the fabric, and careful placement of the facial features gives the figure personality. Embroidered cheeks, a simple nose, and slightly angled ears can turn a plain sphere into a recognizable character.
Troubleshooting Common Beginner Problems
Most early problems have simple fixes.
- Stuffing shows through the fabric: Your tension is too loose or your hook is too large. Try a smaller hook or a denser yarn.
- Your piece keeps curling or warping: Missed or extra stitches are the usual cause. Count every round and recount if the shape looks off.
- The hole at the start never closes: The magic ring was not pulled tight, or the yarn slipped. Pull the tail firmly before working the second round.
- Uneven color changes: Work the last stitch of a round in the new color and move your marker. Visible “jogs” at color changes are normal in spirals and can be minimized with careful tension.
- Hand pain during long sessions: Loosen your grip, choose an ergonomic hook, and take breaks every twenty minutes. Amigurumi tension is tighter than regular crochet, so pacing matters.
Practice is the real fix for nearly everything. Two small balls teach more than an hour of reading about stitches. Keep your first figures, even the lumpy ones. They show you how far you have come, and in a few months you will notice how much your tension has evened out.
Where to Go After Your First Project
Once a basic ball feels comfortable, try adding a second color, then a pair of ears or limbs. Beginner-friendly patterns designed as keychains or small animals are a natural next step, because they are quick and forgiving. From there, explore different yarn weights and hook sizes to see how the same pattern changes. Many crocheters keep a notebook of round counts, hook sizes, and yarn brands, which makes repeating successful projects much easier.
Community helps too. Sharing photos, asking questions, and comparing notes with other crocheters keeps motivation high, especially when a project stalls. Whether you follow a photo-heavy guide or a written pattern, the process is the same: start small, count carefully, stuff evenly, and finish each piece completely before starting the next.
Amigurumi rewards patience more than talent. With a hook, a ball of yarn, and a few rounds of practice in 2026, you can make a handmade character that lasts for years. Start with a ball this week, and let the craft grow from there.


