
Crochet Stitches for Beginners: Easy Guide to Get Started
The four horsemen of crochet are the slip knot, chain stitch, single crochet, and double crochet. Honestly, once you’ve got these four down, it’s like learning the alphabet. You can suddenly read the language of crochet and start making almost anything you can dream of.
Your Journey into Crochet Starts Here
So, you’re ready to dive into the wonderfully creative, sometimes tangled, but always rewarding world of crochet. Before you even touch a hook, let me tell you why so many of us get hooked (pun absolutely intended). It’s so much more than just making hats; it’s a mindful escape that lets you create something real and beautiful with your own hands. The pure satisfaction of finishing that first, probably wobbly, project is a high you’ll chase forever. This tangible result is a powerful motivator and a source of immense pride, connecting you to a long tradition of artisans and makers.
And you’re in good company! This isn’t just a fleeting trend. The global knitting and crochet market hit around USD 0.2 billion in 2023 and is still growing strong. It points to a real, lasting love for handmade crafts. If you’re a data nerd like me, you can get lost in the details in this comprehensive industry report. This growth signifies a cultural shift towards valuing slow fashion, unique handmade items, and the mental health benefits that come from creative pursuits.
Getting Started with the Right Tools
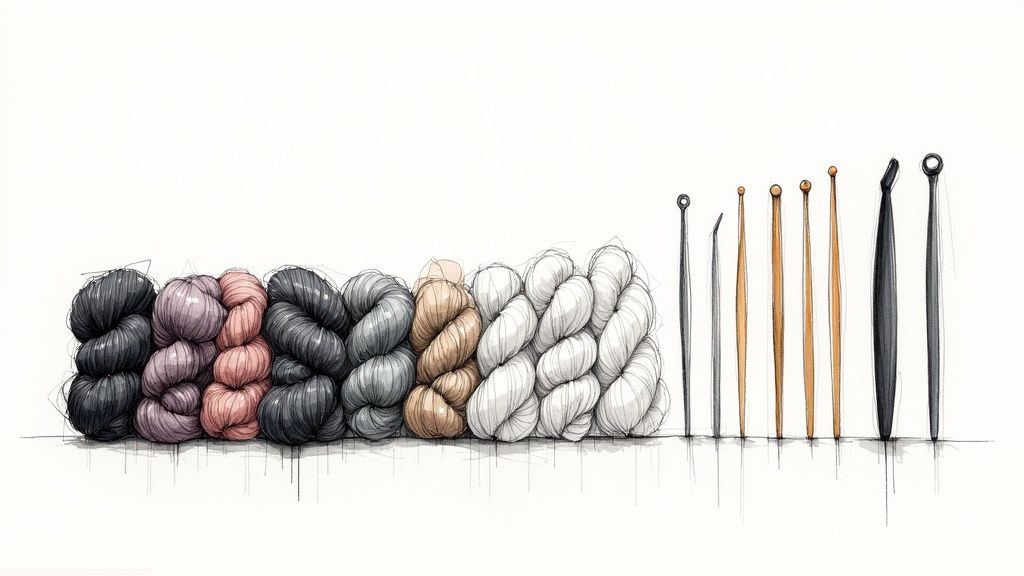
You don’t need to raid the craft store to begin. Seriously, all you need are two things: a hook you’re comfortable with and some yarn that doesn’t make you want to cry. Overcomplicating your initial setup is a common beginner mistake that can lead to unnecessary stress. Keep it simple and focus on the fundamentals.
-
Your First Hook: Go for a size H/8 (5mm) hook. It’s the Goldilocks of hooks—not too big, not too small. It’s just right for learning how to manage your hook and yarn without a lot of fumbling. Hooks come in various materials like aluminum, bamboo, and plastic. An aluminum hook is often recommended for beginners because the yarn glides smoothly over its surface, making it easier to maintain even tension.
-
Choosing Yarn: Grab some worsted-weight (that’s a medium #4) yarn in a light, solid color. Trust me on this. Trying to learn on dark or fuzzy yarn is a recipe for frustration because you can’t see your stitches. Look for yarns made of acrylic or cotton; they are affordable, durable, and don’t split easily, which is perfect for practice. Avoid novelty yarns with textures, sparkles, or multiple color changes until you’re more confident.
With these two essentials, you’re ready to tackle the core skills. Think of the slip knot and chain as getting to the starting line, while the single and double crochet are the building blocks you’ll use to actually construct fabric.
My best advice for any beginner is to prioritize comfort and visibility. A smooth metal hook and a simple, light-colored acrylic or cotton yarn will make your first few hours of practice far less frustrating. Your hands are learning new movements, so make it as easy on them as possible.
Patience Is Your Most Important Supply
Alright, as you get ready to make that very first loop, take a deep breath. Your most critical supplies are patience and practice. Your first attempts might look a bit… organic. Wobbly, uneven, maybe even a little holey. That’s completely, 100% normal. Every single expert crocheter you see online started in the exact same spot, wrestling with tangled yarn and inconsistent stitches.
Embrace the wonkiness and celebrate the tiny wins. Each correctly formed stitch is a victory. If you find you’re a visual learner and want some structured guidance, our guide to the 12 best crochet books for beginners in 2025 has some fantastic resources. Your goal right now is to build muscle memory and find a comfortable rhythm. Don’t aim for perfection on day one; aim for progress. With every stitch, you’re one step closer to making something amazing.
Creating Your First Slip Knot and Chain
Every single crochet project you’ll ever make starts right here. I’m talking about two simple but non-negotiable foundations: the slip knot and the chain stitch. Think of this as turning on the sewing machine or threading a needle for the first time—it’s the one thing that opens the door to everything else. Getting this initial setup down is your first big win and a huge step in avoiding frustration later.
First, we’ll tackle the slip knot, which is what creates that very first adjustable loop on your hook. From there, we’ll jump into the chain stitch (ch), the literal backbone of almost every flat crochet project. My goal here isn’t just to show you the motions, but to help you build the muscle memory that leads to smooth, even, and confident stitching. This initial stage is all about teaching your hands how to communicate with the yarn and hook.
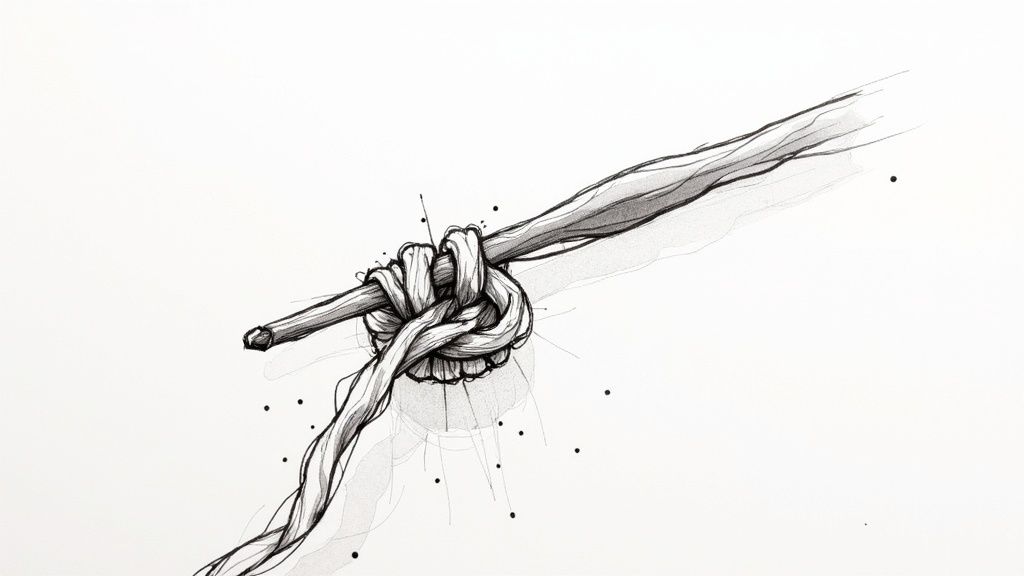
Mastering the Slip Knot
The slip knot might sound a little technical, but don’t let the name fool you. It’s just a clever loop that can tighten or loosen around your hook with a gentle tug. That adjustability is its most important feature, giving you total control over the starting tension of your work. An incorrect knot can lead to a project that unravels or is impossible to work into.
Here’s my go-to method for making one:
-
Make the Loop: Start by draping the yarn over your index and middle fingers, letting the tail end hang down in front. Now, wrap the working yarn (the part connected to the ball) behind those fingers and cross it over the tail end, forming a little ‘X’.
-
Hold It Steady: Pinch that ‘X’ in place with your thumb. You should see a loop formed around your fingers. This stability is key to the next step.
-
Pull It Through: With your crochet hook, slide it under the first strand of the ‘X’ (the one closest to your fingertips) and hook the second strand. Pull this second strand under the first and right off your fingers.
-
Tighten (Gently!): When you pull on both the tail and the working yarn, the loop will tighten into a neat little knot. The loop on your hook should feel snug, but it absolutely must be able to slide up and down the hook easily. If it’s too tight, you won’t be able to pull your next stitch through it.
Don’t sweat it if this takes you a few tries. My first dozen slip knots were a mess—either so tight I couldn’t move them or so loose they just unraveled. The goal is a knot that feels secure but glides freely.
Here’s the secret: a perfect slip knot only tightens when you pull the working yarn. If pulling the short tail end makes the loop on your hook smaller, you’ve accidentally tied a regular knot. Just pull it out and try again until the working yarn is the one in control.
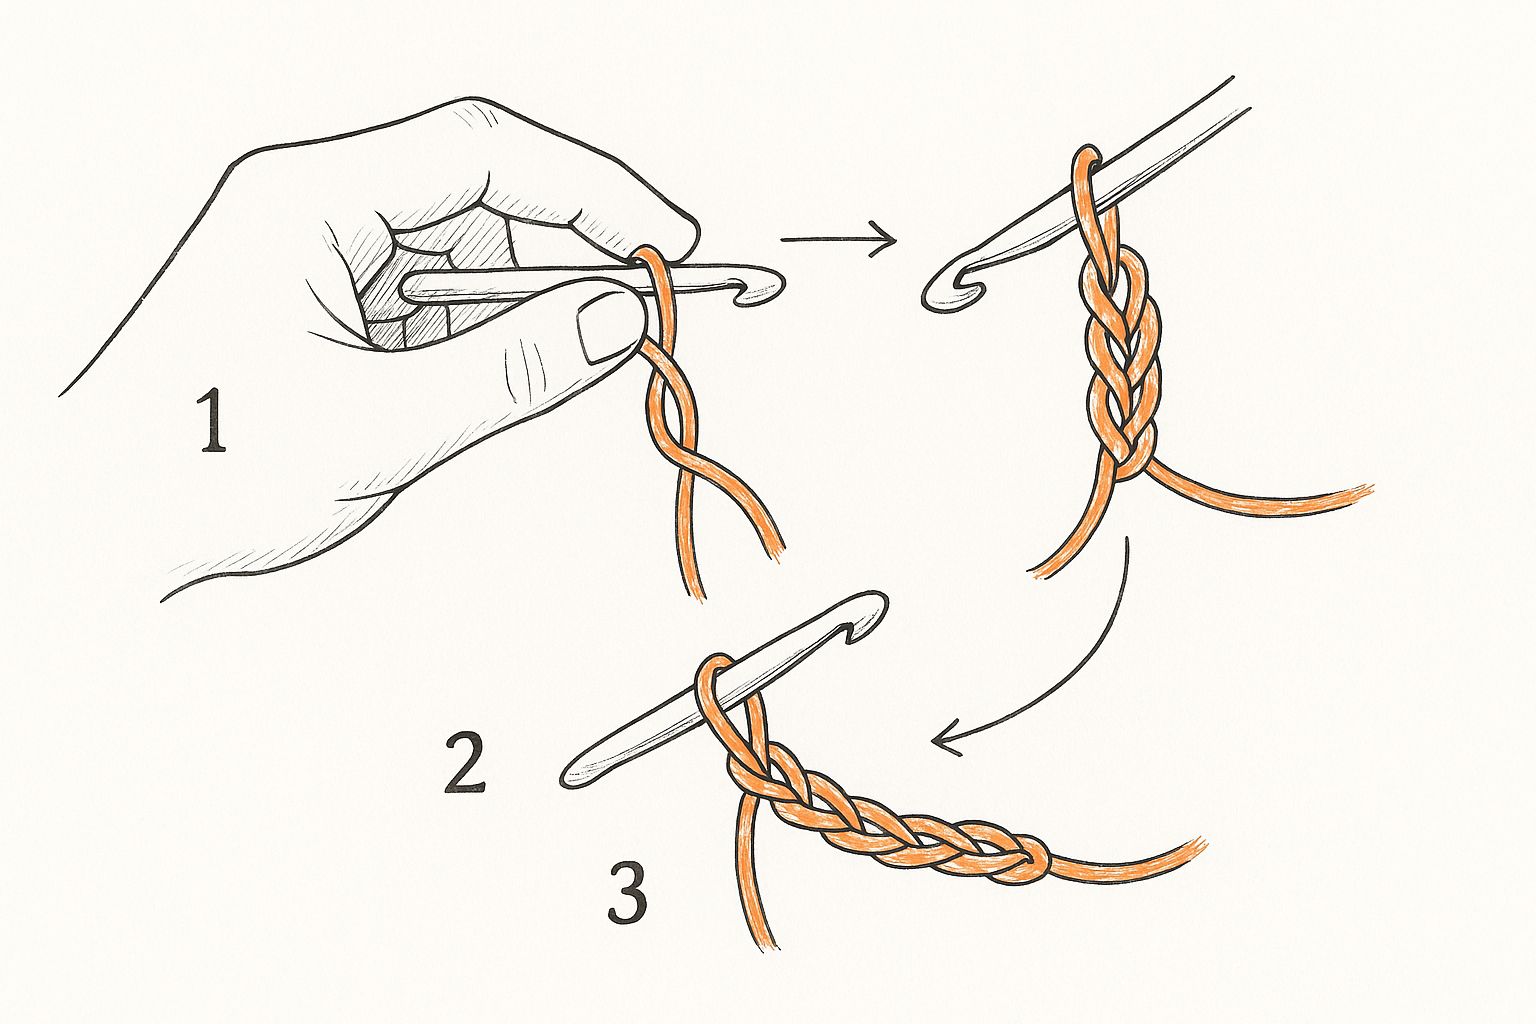
Building Your Foundation Chain
With that slip knot sitting pretty on your hook, you’re officially ready to make a foundation chain. This is just a series of interconnected loops that will become the base of your first row. This is where you’ll start to find your rhythm and establish your tension—which is just a fancy way of saying how tightly or loosely you hold your yarn. Trust me, getting consistent tension is one of the most vital skills you’ll learn.
The motion is beautifully simple: yarn over, pull through.
To get started, hold the hook (with the slip knot on it) in your dominant hand. Use your other hand to gently pinch the tail of the slip knot to keep it from wiggling around. Now, use your hook to grab the working yarn from back to front. This move is called a yarn over (or yo). Finally, rotate the head of your hook down just a bit as you pull it through the loop that’s already on your hook.
That’s it! You just made your first chain stitch. Now just repeat that motion—yarn over, pull through—to create a chain as long as you want. Pay attention to how the chain looks. Each stitch should resemble a small "V."
Troubleshooting Your First Chains
It is extremely common for a beginner’s foundation chain to be way too tight. If you find yourself fighting to get your hook into the chains to work your first row of stitches, your tension is probably too firm. Honestly, this is a rite of passage for almost every new crocheter. A tight chain can cause the bottom edge of your project to pucker and curve, and it’s nearly impossible to fix later.
Here are a few tricks I’ve learned over the years to fix it:
-
Size Up Your Hook: This is my favorite hack. Try making your foundation chain with a hook that’s one size larger than what the pattern calls for. For example, if your project uses an H/5mm hook, make your chain with an I/5.5mm hook, then switch back to the smaller hook for the rest of the project. This automatically creates looser chains.
-
Focus on the Loop: After you pull a new loop through, consciously lift your hook up just a little bit. This makes the loop sitting on your hook a little bigger and looser before you start the next chain. It prevents you from cinching down on the stitch.
-
Practice for Practice’s Sake: Before you even think about starting a real project, just make long practice chains. Chain 50 or 100 stitches, then pull it all out and do it again. The only goal here is to build muscle memory and find a comfortable, consistent tension that doesn’t feel strained. Your hands will thank you for it later, I promise.
Alright, you’ve wrestled that foundation chain into submission, and it’s looking pretty good. Now for the real magic. This is the moment where those simple loops stop being a flimsy string and start becoming actual fabric. Whether it’s the beginning of a scarf or your new favorite dishcloth, this is where it all begins.
The two stitches that do most of the heavy lifting in crochet are the single crochet (sc) and the double crochet (dc). Honestly, get these two down, and you can make almost anything. We’ll walk through each one, but I want you to pay attention not just to how to make them, but how they feel and the kind of fabric they create.
This sketch here is a great visual for what we’re about to do—pulling yarn through loops to build something solid, row by row. It all starts with that first stitch into the foundation.
The Mighty Single Crochet (sc)
Think of the single crochet as the short, sturdy workhorse of the stitch world. It creates a dense, solid fabric with almost no gaps, which is exactly why it’s the go-to for projects that need to be tough and hold their shape. I’m talking amigurumi (those cute crocheted toys), durable pot holders, and market bags that won’t stretch out. Because of its tight weave, it’s also excellent for items that will see a lot of wear and tear.
Ready to make your first row? Grab that foundation chain.
-
Skip the first chain right next to your hook. Seriously, don’t touch it. That little guy is your "turning chain," and it’s what gives you the height to start the row without it puckering.
-
Poke your hook into the second chain from the hook. I always tell beginners to slide the hook under both of the top loops that form the little "V" of the chain. It makes for a sturdier edge. Some patterns may ask you to work into the "back bump" of the chain for an even cleaner edge, but starting with the V is simpler.
-
Yarn over and pull up a loop. Wrap the yarn over your hook (back to front) and gently pull it through the chain stitch. You should now have two loops chilling on your hook.
-
Yarn over again and pull through both loops. One more yarn over, and this time, pull through both of the loops on your hook.
That’s it! You’ve officially made a single crochet stitch. It’s going to feel awkward and slow at first—everyone’s does. But trust me, after a few rows, it becomes a smooth, almost meditative rhythm. Keep doing this in every chain stitch until you get to the end.
A Common Beginner Pitfall: If you’re fighting to get your hook into the foundation chain, stop. Take a breath. This is a classic sign that your chain tension was way too tight. It’s tempting to push through, but you’ll save yourself a massive headache if you just pull it out and start over with a looser grip. Forcing the hook can stretch your yarn and your patience.
The Versatile Double Crochet (dc)
Next up is the double crochet. This stitch is about twice as tall as a single crochet, which means one glorious thing: your projects work up fast. It creates a softer, more flexible fabric with a bit more drape and airiness. This makes it perfect for cozy blankets, flowing scarves, and clothing where you want movement and breathability.
The steps are a little more involved, but you’ll catch on quick.
-
First, yarn over. Before your hook goes anywhere near the chain, wrap the yarn over. This initial yarn over is what gives the stitch its height.
-
Insert your hook and pull up a loop. Skip the first three chains from your hook (this bunch acts as your very first double crochet stitch) and insert your hook into the fourth chain. Yarn over and pull a loop through. You’ll now have three loops on your hook.
-
Yarn over and pull through the first two loops. Here’s the key part. Yarn over, but only pull through the first two loops on your hook. You’ll be left with two loops.
-
Yarn over one last time and pull through the final two loops. And you’re done!
You’ve just made a double crochet. See? It has more steps, but it’s just a sequence of movements you already know. The rhythm is "yarn over, pull through two, yarn over, pull through two." This multi-step process is what builds the height of the stitch.
Beginner Crochet Stitch Comparison
To really get a feel for how these stitches behave, it helps to see them side-by-side. The stitch you choose completely changes the look, feel, and even the time it takes to finish your project. Understanding their differences is key to choosing the right stitch for your vision.
|
Stitch Name |
Abbreviation |
Relative Height |
Common Use Case |
|---|---|---|---|
|
Single Crochet |
sc |
Short & dense |
Amigurumi, dishcloths, sturdy bags |
|
Double Crochet |
dc |
Tall (about 2x the sc) |
Blankets, scarves, sweaters, shawls |
Knowing when to use a short, dense stitch versus a tall, drapey one is a huge part of becoming a confident crocheter. These two stitches are the building blocks for just about everything. The single crochet creates structure, while the double crochet provides speed and softness.
Keeping Your Edges Straight: A Beginner’s Guide
One of the most classic beginner struggles is the unintentional triangle—a project that gets wider or narrower with each row. Don’t worry, we’ve all been there. This almost always comes down to two things: wonky turns or losing track of your stitches. It’s a visual sign that something is off with your stitch count.
Turning Your Work the Right Way
When you finish a row, you have to turn your work to start the next one. But before you flip it, you need to add a "turning chain" to get your yarn to the right height for the new row. This turning chain prevents the edge from being pulled down and distorted.
-
For Single Crochet: At the end of the row, chain one (ch 1), then turn. This chain does not count as a stitch. You’ll make your first sc in the very first stitch of the row (the one you just finished).
-
For Double Crochet: At the end of the row, chain three (ch 3), then turn. This chain does count as your first dc stitch. You’ll skip the stitch at the base of your chain and work your next dc into the second stitch of the row.
Getting this down is a total game-changer for straight edges. For a deeper dive with helpful photos, check out our mastering crochet stitches a visual guide.
The Un-Glamorous but Crucial Art of Counting
I know, I know, it sounds boring. But I absolutely cannot stress this enough: count your stitches at the end of every single row. If your foundation chain had 20 stitches, every row needs to have 20 stitches. No more, no less. It’s the only foolproof way to ensure your project maintains its shape.
A stitch marker placed in the first and last stitch of each row is a lifesaver. It’s a tiny bit of effort that saves you from the heartbreak of realizing your project is lopsided 10 rows later.
Adding Texture with the Half Double Crochet
Once you’ve got the single and double crochet down, you’re ready to meet one of the most versatile and, frankly, underrated stitches in a beginner’s toolkit: the Half Double Crochet (hdc). This is a personal favorite of mine because it hits a sweet spot that the other two just can’t.
It’s the perfect middle ground. The hdc gives you more height and works up faster than a single crochet, but it creates a much denser, less gappy fabric than a double crochet. The result is a unique, slightly nubby texture with a wonderful drape, making it my secret weapon for plush hats, cozy sweaters, and baby blankets that feel both substantial and soft.
The Unique Motion of the HDC
What really sets the half double crochet apart is its finishing move. The first few steps will feel familiar if you’ve practiced double crochet, but the final pull-through is where the magic happens. It can feel a bit clumsy at first, but trust me, it quickly becomes a smooth and satisfying rhythm.
Here’s a breakdown of the motion:
-
Yarn Over First: Just like a double crochet, start by wrapping the yarn over your hook before you stick it into your work.
-
Insert and Pull Up: Poke your hook into the stitch you’re working into and pull up a loop. You should now have three loops sitting on your hook.
-
The Final Pull-Through: This is the key. Yarn over one last time, then pull that yarn through all three loops on your hook in one go.
That final “pull through three” is what gives the hdc its signature texture and height, which sits neatly between its shorter and taller cousins. This unique construction creates a fabric that is both warm and flexible.
Why the HDC Is a Game-Changer
When I was first learning, I stuck to single and double crochet for ages. But the moment I got comfortable with the half double crochet, it completely changed the look of my projects. A simple beanie made with hdc has a more professional, less "holey" look than one made with dc, but it works up so much faster than with sc.
I use it all the time for wearable items like cardigans. The fabric it creates is flexible enough to move with you but still feels warm and cozy. Unlike double crochet, which can sometimes create larger gaps that snag on jewelry or buttons, the hdc fabric is more solid and reliable. It offers the speed of a taller stitch without sacrificing the fabric’s integrity.
One of the best things about the half double crochet is the subtle third loop it creates at the back of the stitch. Working into this "third loop only" (a more intermediate technique) produces a beautiful, knit-like ribbing that is perfect for sleeve cuffs and sweater hems. It’s one of the first "fancy" techniques you can try once you master the basic hdc.
Practice Makes Perfect
Like any new skill, that hdc motion might feel awkward. It’s common for the hook to get snagged trying to pull through all three loops at once. Your hook might catch on one of the loops, or the tension might feel off.
If you’re struggling, here’s a tip from my own trial-and-error days: after you yarn over for that final pull, slightly rotate the head of your hook downwards as you pull it through. This tiny little twist helps it glide through all three loops much more smoothly.
Try making a small practice swatch—maybe 20 stitches wide and 10 rows high—using only half double crochet. This will help build your muscle memory and let you see the lovely fabric it creates firsthand. It’s a foundational stitch that adds a whole new level of texture to your crochet toolkit.
Using the Slip Stitch to Join and Finish
Don’t let its tiny size fool you; the slip stitch (sl st) is one of the most hardworking tools in your crochet repertoire. It’s the shortest of all the basic stitches, and its main job isn’t to build up fabric. Instead, think of it as the essential glue and scaffolding that connects, moves, and shapes your work with surprising precision. It’s a utility stitch, a problem-solver that experienced crocheters rely on constantly.
This stitch is incredibly simple, which is exactly why it’s so versatile. You just insert your hook, yarn over, and pull that yarn through both the stitch and the loop on your hook in one fluid motion. Its lack of height is its superpower—it gets the job done without adding any unwanted bulk.
Creating Seamless Rounds
One of the most common and vital jobs for the slip stitch is joining your work to create seamless rounds. This is your go-to move for starting projects like hats, baskets, amigurumi bodies, and infinity scarves. It’s the magic trick that turns a flat, boring chain into a perfect circle, allowing you to build three-dimensional objects.
Let’s walk through a real-world scenario. Imagine you’ve just chained 30 stitches to start a simple cowl. Here’s how you’d form the ring:
-
First, carefully lay your chain flat. You absolutely must make sure there are no twists in it. A twisted chain will haunt you by creating a permanent, awkward twist in your finished project. Run your fingers along the chain to ensure all the "V"s are facing the same direction.
-
Next, insert your hook into the very first chain stitch you made (the one right next to your slip knot).
-
Finally, yarn over and pull the yarn through both the chain stitch and the loop that’s already on your hook.
And just like that, you’ve connected the two ends of your chain. You now have a perfect circle, ready to build your cowl from the ground up. This technique is non-negotiable for pretty much any project worked "in the round."
A Quick Tip from Experience: When you use a slip stitch to join, it’s ridiculously easy to pull it too tight. If you do, trying to work into that stitch on the next round becomes a nightmare. I always make a point to consciously pull up on my hook just a tiny bit after I complete the join. This keeps the loop from cinching down and saves me a ton of frustration later.
Finishing and Moving with Slip Stitches
Beyond just joining, the slip stitch has another critical role: creating clean, professional-looking edges. By working a row of slip stitches along the border of a project—like a blanket or dishcloth—you can create a neat, cord-like edge that stops it from curling and gives it a polished look. This simple finishing touch can elevate the appearance of your work significantly.
The slip stitch also gives you a clever way to move your yarn across a row without adding any height. Sometimes a pattern will ask you to start your next set of stitches a few spaces over from where you are. Instead of cutting your yarn and rejoining it, you can simply slip stitch your way across those few stitches to get your hook where it needs to be. It’s a fantastic trick that keeps your work tidy and seriously cuts down on the number of ends you have to weave in later.
Solving Common Beginner Crochet Problems
Let’s be honest: every single person who picks up a crochet hook eventually hits a wall. That moment of pure, tangled frustration? It’s a rite of passage. Hitting a snag is a completely normal, and frankly, essential part of learning. It’s in solving these problems that you truly begin to understand how the stitches work together.
So, think of this as a friendly chat with someone who has made every single one of these mistakes and lived to tell the tale. We’ll tackle the biggest hurdle of all: inconsistent tension. Then, we’ll solve the mystery of projects that magically gain or lose stitches, causing those dreaded crooked edges.
Taming Your Tension
Does your crochet fabric look a bit… lumpy? Are some rows tight and dense while others are loose and gappy? This is a classic sign of inconsistent tension, and it’s something every beginner wrestles with. Trust me. Tension is affected by your mood, your posture, and even how tired you are.
Finding a steady, even tension is less about a “right” way to hold your yarn and more about finding what is comfortable and repeatable for you. Some people wrap the yarn around their pinky, others weave it through their fingers. Experiment until you find a method that allows the yarn to feed smoothly.
My best advice? Stop focusing on the project and just practice. Grab some scrap yarn and make a simple swatch, maybe 20 stitches wide, using a basic stitch like single crochet. The only goal here is to make the stitches look as uniform as possible. Don’t worry about what it becomes; this is purely about building muscle memory.
A common mistake is gripping the hook and yarn like your life depends on it. Relax your hands! A death grip leads to tight, tiny stitches that are a nightmare to work into. Your fabric should be firm, but not stiff as a board. Try to take breaks, stretch your hands, and consciously check if you are tensing your shoulders or wrists.
The Case of the Disappearing Stitches
One of the most disheartening experiences is realizing your perfectly rectangular scarf has started to look like a triangle. When your project gets narrower with each row, it’s almost always because you’re accidentally skipping the first or last stitch of the row. These stitches can be deviously hard to spot, especially that very last one, which can get twisted to the side. Conversely, if your project gets wider, you might be adding an extra stitch at the end of a row, often by working into the turning chain by mistake.
This is where a simple stitch marker becomes your best friend. Seriously.
-
Place a stitch marker in the very first stitch you make in a row.
-
Place another one in the last stitch of that same row.
This little trick makes it impossible to miss them when you come back on the next row. It takes a few extra seconds but saves you from the agony of having to unravel hours of work. It’s a small habit that pays off in a huge way.
If you find yourself making the same errors over and over, don’t be afraid to pull out your work (we call it "frogging" because you "rip-it, rip-it"). For a more detailed walkthrough on spotting and fixing these common issues, our comprehensive guide on fixing crochet mistakes is a fantastic resource.
Weaving In Ends for a Flawless Finish
Finishing a project only to have your ends pop out after the first wash is a true crafting tragedy. Weaving in your ends securely is what gives your work that professional, long-lasting finish. The key is to avoid just running the yarn in a straight line along an edge. That’s a recipe for disaster, as the yarn can easily work its way loose.
Instead, use a darning needle to weave the tail back and forth in different directions through the backs of your stitches. I like to go one way for an inch or so, then change direction and go back through a slightly different path. For extra security, I change direction a third time. This friction is what locks the yarn in place, ensuring it stays hidden and secure, forever.
Your Crochet Questions Answered
When you’re first starting your crochet adventure, a million questions will pop up. Trust me, I’ve been there. Having a quick, straightforward answer can be the difference between moving forward with excitement and getting stuck in a hopeless tangle.
Think of this as your personal cheat sheet. I’ve rounded up some of the most common questions I hear from beginners to clear things up and keep you happily hooking. Getting these small details right from the start is what builds a solid foundation for every project you’ll ever make.
What’s the Big Deal with UK vs. US Crochet Terms?
Okay, this is a big one. Knowing this before you dive into a pattern will save you from a world of frustration. A "double crochet" in a UK pattern is not the same as a "double crochet" in a US pattern, and mixing them up is a classic rookie mistake that can derail your entire project. The fabric will be a completely different height and density than intended.
Thankfully, there’s a dead giveaway:
-
Look for "single crochet" or "sc": If you see this stitch or its abbreviation, you are 100% working with a US pattern. The UK system doesn’t even have a "single crochet" stitch. It just doesn’t exist in their terminology.
-
Notice the stitch progression: UK terms always sound one "step" taller than US terms. For example, a UK double crochet (dc) is the same stitch as a US single crochet (sc). A UK treble crochet (tr) is what Americans call a double crochet (dc).
Most modern patterns will tell you which terms they’re using right at the beginning. If not, the presence of an "sc" is your tell-tale sign.
As a rule of thumb, always scan the pattern notes before you even think about making your first stitch. If you’re still not sure, a quick search for a "UK to US crochet conversion chart" will give you a side-by-side comparison and clear up any confusion instantly.
Can I Use Different Yarn Than the Pattern Suggests?
Yes, you absolutely can! This is called yarn substitution, and it’s a fantastic way to use up yarn you already own or experiment with different fibers. But—and this is a big but—to get a result that looks anything like the original design, you have to match the yarn weight.
Yarn weight is just a fancy term for how thick the strand is. If a pattern calls for a worsted weight (#4) yarn and you grab a bulky (#5) yarn instead, your final piece will be way bigger than intended. For the best results, stick to the same weight category. Also, pay attention to fiber content. Substituting a stretchy wool for a stiff cotton can affect the drape and fit of a garment, even if they are the same weight.
Is Blocking My Work Really Necessary?
I get this question all the time. Blocking is the final step where you wet or steam your finished crochet piece and pin it into its perfect shape to dry. Will the crochet police come after you for skipping it? No. But can it dramatically improve your work? Absolutely.
Blocking is what takes a project from "homemade" to "handmade." It magically evens out your stitches, opens up delicate lace patterns, and gives your project a professional, polished drape that you just can’t get otherwise. For natural fibers like wool and cotton, wet blocking works wonders. For acrylics, gentle steam blocking is often the best method. It’s a final act of care that respects the time and effort you put into your creation.
The crafting world is booming, and with it, the desire to create truly high-quality items. Between 2024 and 2028, the global knitting and crochet market is projected to grow by a massive USD 10.69 billion. This incredible growth is fueled by people just like you, who are eager to master foundational skills—from basic stitches to finishing techniques like blocking. You can read more about the growing crochet market and its trends.
Ready to turn all these stitches and tips into something beautiful you can actually wear or use? Here at Crochet Craze, we have hundreds of patterns, step-by-step video tutorials, and a friendly community to guide you. Start your first project today and discover the joy of crochet at https://crochetcraze.com.