
How to Read Crochet Patterns Without Getting Lost
Diving into a new crochet project can feel a little like trying to read a foreign language. But here’s a secret: learning how to read crochet patterns is way easier than it looks. Think of a pattern as a treasure map, using a secret code of abbreviations and symbols to guide you from a simple ball of yarn to a finished piece, whether it’s a cozy blanket or that cardigan you’ve been eyeing on Pinterest. It’s a skill that unlocks a universe of creativity, allowing you to move beyond simple video tutorials and bring any designer’s vision to life.
Your Guide to Understanding Any Crochet Pattern
Honestly, a crochet pattern isn’t some complex, unbreakable code. It’s really just a recipe. Just like a good recipe lays out the ingredients and instructions, a pattern gives you everything you need to create something beautiful by hand. The best part? From a simple dishcloth to an intricate sweater, they almost all follow the same predictable structure. This consistency is your best friend as you learn. You’ll quickly recognize the sections and understand their purpose, which dramatically lowers the learning curve.
This shared format is what makes crochet so inviting. Once you crack the code on one, you can pretty much tackle any design with confidence. It’s a universal language that ties makers together from all over the world, letting you bring a designer’s vision to life exactly as they dreamed it up. This standardization means that a pattern from a designer in Japan can be understood by a crafter in Canada, fostering a global community connected by a shared passion.
Before we get into the nitty-gritty of stitches and rows, let’s look at the basic layout of almost any pattern you’ll pick up. Think of these as the “cheat sheet” sections that set you up for success. Mastering these initial components will make the rest of the pattern feel far more approachable and less like a mysterious puzzle.
Core Components of a Crochet Pattern
This table breaks down the essential sections you’ll find in almost every crochet pattern and what they mean for you. Paying close attention to these elements before you even pick up your hook is a habit of successful crocheters.
| Component | What It Tells You | Why It’s Important |
|---|---|---|
| Skill Level | Is this project for a beginner, intermediate, or advanced crocheter? | Helps you pick a project you’ll actually enjoy finishing, not one that makes you want to throw your yarn out the window. It manages expectations and prevents burnout. |
| Materials List | The specific yarn (weight, fiber), hook size, and other tools (scissors, stitch markers) you’ll need. | Gets you prepared. There’s nothing worse than getting halfway through and realizing you have the wrong hook size. Using the suggested materials ensures your project will look and feel as the designer intended. |
| Gauge Swatch | A small test square you make to check your tension against the designer’s. It’s a critical measurement. | This is non-negotiable for clothes! It ensures your finished piece will actually fit and won’t end up doll-sized (I’ve been there). It is the single most important step for wearable items. |
| Finished Size | The final dimensions of your project. | Especially important for garments and blankets, so you know exactly what you’re making and if it’s the right size for you or your home. It helps you visualize the end result and confirm it meets your needs. |
Once you get a handle on these key pieces, the rest of the pattern will feel much less intimidating. These sections are your foundation for a successful project.
The Anatomy of a Crochet Pattern
Before you even think about making that first slip knot, do yourself a favor and scan the entire pattern. I mean it. This quick read-through is a lifesaver, giving you a feel for the project’s flow and what you’re getting into. It’s like looking at a map before you start a road trip. You’ll notice the major turns, the long straightaways, and any tricky intersections ahead of time. You’ll usually spot a few key sections right at the top that are your roadmap for the whole project.
These upfront details typically include:
- Skill Level: A heads-up on whether the pattern is a gentle start or a wild ride. This helps you mentally prepare for the techniques involved.
- Materials List: The designer’s specific recommendations for yarn, hook size, and any notions like scissors or stitch markers. Sticking to these suggestions is the best way to replicate the sample project.
- Gauge Information: That all-important measurement that guarantees your project will be the size it’s supposed to be. Don’t skip it! We’ll dive deeper into this later, but know that it’s crucial.
- Finished Size: The final dimensions of your project, so you know if that sweater will fit you or your cat. For garments, this section may include a schematic or a table of sizes for bust, waist, and length.
It’s no secret this craft has blown up recently. In fact, global search interest in crochet skyrocketed by 213% between 2008 and 2023. This is largely thanks to the flood of online patterns that make it easier than ever to get hooked. Understanding these guides is your key to unlocking this whole creative world, moving from a passive consumer of tutorials to an active creator.
A pattern isn’t just a set of instructions; it’s a shared language. Learning to read it means you can participate in a global conversation with designers and fellow crafters, bringing their creative visions to life with your own two hands.
If you’re just starting out, having a solid reference book on your shelf can make all the difference. When you’re ready to build up your library, check out our guide on the 12 best crochet books for beginners in 2025 for some fantastic resources. A good book can be a patient teacher you can turn to anytime you’re stuck on a stitch or term.
Translating Crochet Abbreviations and Terms
Jumping into a written crochet pattern for the first time can feel like trying to read a secret code. You’re staring at a jumble of letters like ch, sc, dc, and sl st, and it’s enough to make you want to throw your hook across the room. I’ve been there. But trust me, this isn’t random gibberish; it’s a brilliant shorthand that keeps patterns clean and easy to follow once you crack it. This system of abbreviations is standardized for clarity and efficiency, allowing for complex instructions to be conveyed in a small amount of space.
Think of abbreviations as simple nicknames for the stitches you already know. Instead of a designer writing out “make one single crochet stitch” a hundred times, they just write “sc.” Once you get the hang of a few key terms, you’ll be breezing through pattern rows faster than you thought possible. It’s the real secret to unlocking a world of projects beyond YouTube tutorials, giving you the freedom to create from any written source.
For instance, you might see a line in a pattern that looks like this:Ch 1, sc in next 5 sts, inc in next st, turn.
It looks cryptic, but it’s just a quick set of instructions. Here’s what it’s telling you to do:
- Chain 1: Make one chain stitch. This is usually your turning chain to get the height for the next row and often doesn’t count as a stitch itself. The pattern notes will usually specify whether the turning chain counts as a stitch.
- sc in next 5 sts: Work one single crochet into each of the next five stitches from the row below. This is a straightforward instruction to work five identical stitches in a row.
- inc in next st: Make an increase in the very next stitch. This typically means working two single crochets into the same stitch to add to your count. The pattern will define what an “inc” consists of if it’s not the standard two stitches in one.
- turn: Flip your work over to start crocheting back in the other direction. This is for projects worked in flat rows, like scarves or blankets.
Decoding Common Stitch Abbreviations
Any good pattern will give you a key, a list of all the abbreviations used so you’re never left stranded. But honestly, most patterns use the same core set of terms you’ll see again and again. Memorizing these is like learning the alphabet of crochet.
Here are the big ones:
- ch: chain
- st(s): stitch(es)
- sl st: slip stitch
- sc: single crochet
- hdc: half double crochet
- dc: double crochet
- tr: treble (or triple) crochet
- inc: increase (making two or more stitches where there was one)
- dec: decrease (joining two or more stitches to become one)
If you’re still a bit fuzzy on what these look like, our visual library can be a lifesaver. You can see how these abbreviations translate into actual hook movements in our guide on mastering crochet stitches. Seeing the stitch performed can solidify your understanding far better than words alone.
The Big US vs UK Terminology Divide
Okay, here’s a classic tripwire for new crocheters. Patterns written in US terms use different names for the exact same stitches as patterns written in UK terms. A UK “double crochet” is the same stitch as a US “single crochet”—a massive difference that can completely throw off your project. This is not just a minor detail; it’s a fundamental difference that changes the height and fabric of your work entirely.
A great pattern designer will always state whether they’re using US or UK terms right at the top. If they don’t, look for “single crochet” (sc). It only exists in US terminology. If you see ‘sc’, you’re safe to assume it’s a US pattern.
This is why you have to check which system a pattern uses before you even think about grabbing your hook. Getting it wrong will completely alter the size, drape, and look of whatever you’re making. An item made with US double crochet will be much taller and looser than the same item made with UK double crochet (which is a US single crochet).
To help clear things up, here’s a quick comparison of the most common stitches.
US vs. UK Crochet Terminology Comparison
| US Term (Abbreviation) | UK Term (Abbreviation) | Description of Stitch |
|---|---|---|
| slip stitch (sl st) | slip stitch (ss) | Inserts hook, yarn over, pull through stitch and loop on hook. Used for joining. |
| single crochet (sc) | double crochet (dc) | The most basic stitch, creating a dense, tight fabric. |
| half double crochet (hdc) | half treble crochet (htr) | A stitch with a height between a single and double crochet. |
| double crochet (dc) | treble crochet (tr) | A taller stitch, creating a looser fabric that works up quickly. |
Keep this chart handy! It’s one of the most useful tools you can have, especially when you start exploring patterns from international designers on platforms like Etsy or Ravelry.
Understanding Special Stitches
Every now and then, a designer will throw in a unique stitch to create a specific look, like a puffy bobble, a dense cluster, or a textured popcorn stitch. Don’t panic! These will always be explained in a “Special Stitches” section, usually right at the start of the pattern, often after the abbreviation list. This is your pattern’s personal dictionary for any unusual techniques.
Think of this section as a mini-tutorial. It will break down the special stitch into the basic steps you already know (like chains and double crochets) so you can follow along and create the intended texture perfectly. For example, a “bobble stitch” might be defined as “Yarn over, insert hook into stitch, yarn over, pull up a loop, yarn over, pull through two loops] 5 times in the same stitch. Yarn over, pull through all 6 loops on hook.” It looks complex, but it’s just a combination of basic moves.
Learning this “language” of crochet is what turns you from someone who can follow a video into someone who can make anything. And you’re not alone! The knitting and crochet market is set to grow by an estimated USD 10.69 billion between 2024 and 2028, partly because of awesome training resources that help people master skills just like this. As more crocheters get confident reading patterns, the whole creative community thrives. You can read more about this craft market boom on PR Newswire. Getting comfortable with these terms puts you right in the middle of it all.
Reading Visual Patterns with Crochet Charts
If you’re a visual person like me, walls of written instructions can sometimes feel like trying to assemble furniture with the manual in another language. This is where crochet charts, also known as symbol diagrams, become your absolute superpower. They give you a bird’s-eye view of the project, turning dense lines of text into a clear, graphical map. Many people find charts faster and more intuitive to follow once they understand the basics.
Charts have their own language, using a standardized set of symbols where each little icon represents a specific stitch. Instead of reading “dc in next 3 sts,” you’ll just see three double crochet symbols sitting next to each other. This visual shorthand makes understanding stitch placement so much more intuitive, especially when you get into complex lace or funky textured patterns where the relationship between stitches is key.
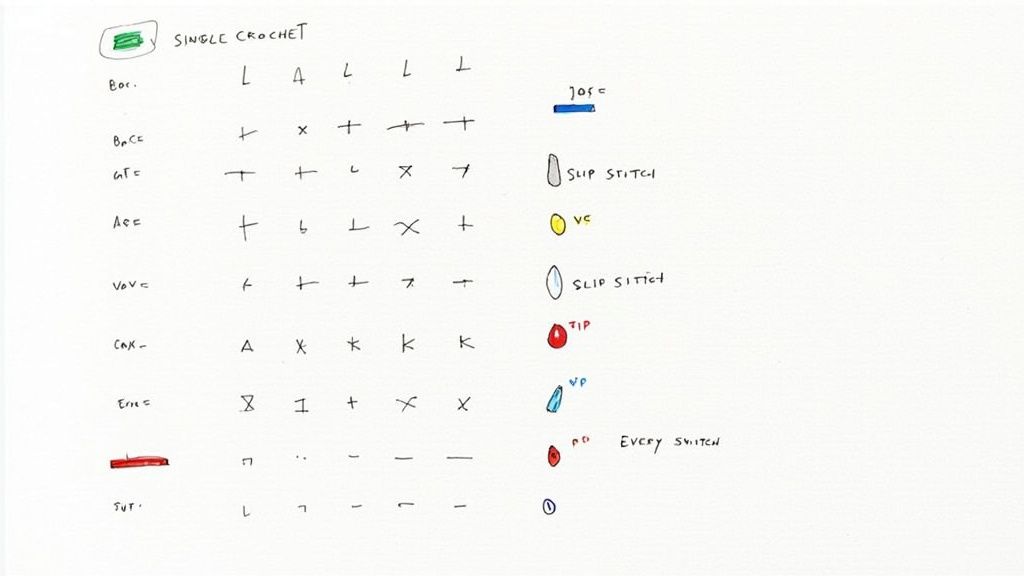
Decoding the Symbols
Every good pattern that includes a chart will also have a symbol key or legend. Think of this key as your personal Rosetta Stone, translating each icon back into a stitch you already know and love. While some symbols can vary a little between designers, many are pretty universal, thanks to standards set by organizations like the Craft Yarn Council.
You’ll see these pop up all the time:
- An oval or circle (○) almost always means a chain stitch (ch).
- A dot or a small filled-in circle (●) is your trusty slip stitch (sl st).
- A plus sign (+) or an ‘x’ is the common symbol for a single crochet (sc).
- A ‘T’ with one horizontal line across it (T) usually stands for a double crochet (dc). A half-double crochet is often a simple ‘T’, and a treble crochet is a ‘T’ with two lines across it.
The real beauty here is how these diagrams show you exactly where each stitch goes in relation to the others. All the guesswork is just gone. You can see precisely which chain space or stitch from the previous row you need to work into.
Reading Charts for Flat vs. Round Projects
Now, how you read a chart totally depends on whether you’re working in rows or in the round. Getting the starting point and direction right is the key to making the chart work for you. The row numbers are usually marked on the side of the chart.
For Flat Projects (Worked in Rows):
- You’ll almost always start at the bottom of the chart.
- Row 1 is read from right to left (for a right-handed crocheter).
- Then, for Row 2, you read from left to right.
- You keep zig-zagging your way up the chart, mimicking exactly how you turn your physical work over at the end of each row. Odd-numbered rows represent the “right side” (RS) of the work, and even-numbered rows represent the “wrong side” (WS).
For Projects in the Round (like Granny Squares):
- Here, you start smack-dab in the center of the chart.
- You’ll work your way outwards in a spiral, reading each round counter-clockwise.
- This format gives you a perfect little preview of how your project will look as it grows, making it easy to spot the logic of the pattern’s expansion.
Crochet charts are the bridge between written words and the actual fabric you’re creating. By mapping out every stitch visually, they give you the confidence to tackle more intricate designs with way more accuracy and a lot less frustration.
A Practical Example with a Granny Square Chart
Let’s take the classic granny square. A chart makes that iconic cluster pattern totally clear. The visual layout mirrors the final product.
- Round 1: You’d see a circle of chain symbols right in the middle, joined with a slip stitch dot. Branching off that central ring, you’ll see groups of three double crochet ‘T’ symbols (the “clusters”), with chain ovals separating them in the corners.
- Round 2: The chart then shows you exactly where to work into the corner spaces you just made. The symbols for the new clusters and corner chains are placed precisely where your hook needs to go, removing any ambiguity about stitch placement.
This kind of direct visual guide is a huge reason why crochet has become so much more accessible. In fact, a report showed the global knitting and crochet market hit about USD 0.2 billion in 2023, and it’s projected to climb to USD 0.29 billion by 2032. That growth is thanks in no small part to digital resources like charts and videos that help more people “speak” the language of patterns. You can read more about this trend from Business Research Insights. At the end of the day, charts and written instructions are a team, giving you two ways to understand the same information so you’re never left feeling lost.
Mastering Repeats and Stitch Counts
Once you’ve cracked the code on abbreviations and charts, the next level-up is getting the hang of a pattern’s rhythm. This is where repeats and stitch counts become your best friends, turning what looks like a wall of text into the gorgeous, flowing textures that make crochet so satisfying. Repetitive sequences are the heart of most crochet patterns, creating the fabric’s structure and design.
Think of it like the chorus of a song—this is the part that creates the main, repeating motif. Learning to recognize and execute these repeats smoothly is a hallmark of an advancing crocheter.
At the end of every single row or round, most patterns will give you a number, usually in parentheses or brackets, like <42 sts>. This is your stitch count, and honestly, it’s the most important checkpoint you have. It’s your built-in quality control, telling you instantly if you’ve dropped a stitch or accidentally added one. Catching a mistake here will save you from the soul-crushing task of unraveling hours of work later. Trust me, we’ve all been there. Making a habit of counting your stitches at the end of every row is a discipline that pays off immensely.
Decoding Pattern Repeats
To build those lovely textures and shapes, designers rely on specific instructions that get repeated across a row. But to keep patterns from being a mile long, they use symbols instead of writing out the same sequence over and over again.
You’ll usually see these common repeat indicators:
- Asterisks (*): An instruction nestled between two asterisks is the sequence you’ll be repeating. For example, if you see
*sc, ch 1, sk 1*, it means you’ll single crochet, chain one, and skip a stitch, then do that entire sequence again and again until the pattern tells you to stop. - Parentheses ( ) and Brackets [ ]: These work just like asterisks, grouping a set of stitches that belong together. Sometimes, a designer will even tuck them inside an asterisk repeat for a “repeat within a repeat”—don’t panic, it’s just breaking a complex step into smaller bites. For instance,
*2 sc, (sc, ch 1, sc) in next st*means the smaller(sc, ch 1, sc)group is treated as a single unit within the larger asterisked repeat.
This is where seeing it visually can make all the difference. This little infographic connects the dots between the written words and what you’d see on a crochet chart.
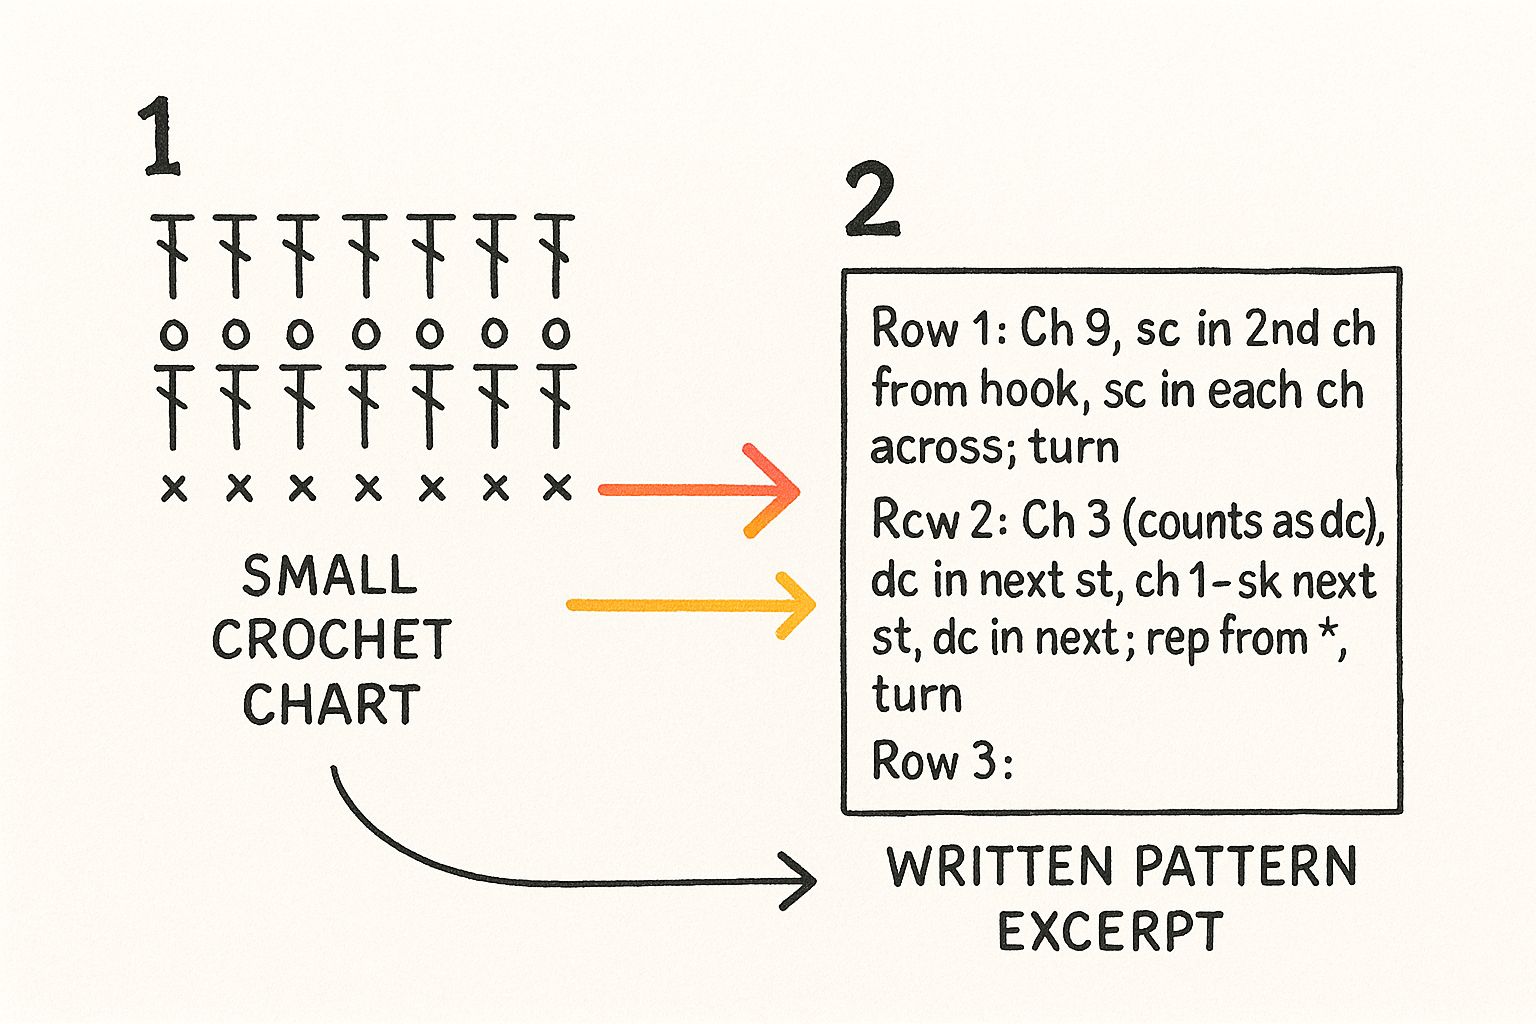
See how a written instruction like (sc, dc) in next st translates directly to the single crochet and double crochet symbols sharing the same spot on the chart? This kind of visualization makes even tricky instructions suddenly click. It shows that multiple stitches can be worked into a single stitch from the row below to create shells, fans, or increases.
Putting It All Together in a Real Example
Let’s break down a common instruction you might find in a scarf pattern to see how it works in the real world. Imagine you read this:
Row 2: Ch 1, *sc in next st, dc in next st; rep from * across, turn. <60 sts>
At first glance, it might look like gibberish. But let’s unpack it, step-by-step.
- First, you’ll chain 1. This is just a little “turning chain” to get your row to the right height.
- The asterisk kicks off your repeat: you’ll single crochet in the first stitch, then double crochet in the very next stitch. That’s your core combo.
- Then you see “rep from * across,” which is your cue to repeat that “sc, dc” sequence all the way to the end of your row. You will work this two-stitch sequence a total of 30 times over your 60 stitches.
- Finally, you turn your work, take a breath, and count your stitches. You should have exactly 60 stitches before you even think about starting the next row. If you don’t, something went wrong in the repeat, and it’s best to fix it now.
Getting comfortable with these repeats is truly the key to unlocking more advanced projects. It’s the skill that takes you from making simple dishcloths to confidently tackling complex blankets, lacy shawls, and beautifully textured sweaters.
Once these building blocks feel natural, you can create almost any texture imaginable. If you’re ready to see just how varied these stitch combinations can be, dive into our comprehensive crochet stitch guide for a ton of inspiration.
Making Sure Your Project Fits with Gauge
Let’s be honest. Have you ever poured your heart, soul, and a small fortune in yarn into a gorgeous sweater, only to find it fits your cat better than you? It’s a classic, frustrating rite of passage for almost every crocheter. The culprit isn’t your skill; it’s almost always a sneaky little thing called gauge.
Gauge is the single most important—and most skipped—step in a crochet pattern. It’s the secret sauce, the magic number. Put simply, it’s the density of your unique crochet fabric. It tells you how many stitches and rows should fit into a specific area, usually a 4×4 inch (or 10×10 cm) square. A pattern might say, “16 stitches and 20 rows = 4 inches in single crochet.” This is your target. This measurement is a direct reflection of your personal tension combined with your specific hook and yarn.
Ignoring the gauge swatch is a high-stakes gamble. Your personal tension—how tightly or loosely you sling that yarn—directly messes with this measurement. If you crochet tighter than the designer, your project will be smaller. If you’re a loosey-goosey crocheter, it will be bigger. Taking 30 minutes to make a test swatch is a tiny price to pay to avoid hours of wasted effort and a serious case of yarn-rage.
How to Create and Measure a Perfect Gauge Swatch
Making a gauge swatch isn’t just about mindlessly crocheting a square; it’s about creating a tiny replica of your future project’s fabric.
First, grab the exact yarn and hook size the pattern recommends. Don’t substitute yet! Then, using the specific stitch for the gauge (like single crochet or a special stitch combo), crochet a square that’s a bit bigger than the target. I aim for a 5×5 or 6×6 inch square. That extra space is crucial because it ensures you aren’t measuring the wonky, tighter stitches along the edges, which are never representative of your true tension.
Once your swatch is done, hold your horses. Don’t measure it just yet. If you’re using a natural fiber like wool or cotton, you absolutely must wash and block your swatch exactly how you plan to care for the finished item. Trust me on this. Fibers can “bloom” and change shape dramatically after a wash, which will completely alter the final size. A superwash wool might grow, while cotton might tighten up. What matters is the measurement of the finished, treated fabric.
After it’s dry, lay the swatch flat without stretching it into submission. Place a rigid ruler or a proper gauge tool right in the middle of the fabric. Now, count the number of stitches across a 4-inch span. Use pins to mark the start and end points for accuracy. Do the same for the rows, counting them within a 4-inch height.
Pro Tip: Your stitch count (the width) is almost always more critical for fit than your row count (the height). Most patterns make it easy to just add or subtract rows to get the right length, but trying to fix the width once you’ve started is a recipe for a headache.
What to Do When Your Gauge Doesn’t Match
So, what happens if your numbers are off? Don’t panic. This is literally why you made the swatch. This is the whole point. Think of it as calibration, not failure.
- Too many stitches in your 4 inches? This means your stitches are too small and your tension is on the tight side. The fix? Go up a hook size (for example, from a 5mm to a 5.5mm hook). This will naturally create larger, looser stitches.
- Too few stitches? Your stitches are too big, which means your tension is loose. Just switch to a smaller hook (say, from a 5mm down to a 4.5mm) to tighten things up and make your stitches more compact.
Make a new swatch with your new hook and measure all over again. Keep tweaking and swatching until you hit the designer’s target numbers. This little extra step is the professional secret to how to read crochet patterns like a pro and create beautiful garments that actually fit, every single time. It is the difference between a homemade item and a handmade one.
Common Questions About Reading Crochet Patterns
Even with a great guide, some questions just always seem to bubble up. Learning to read crochet patterns is a journey, and hitting a little speed bump is totally normal. I’ve put this section together to give you quick, clear answers to the hurdles I see pop up time and time again in crochet workshops and online groups.
Think of this as your personal troubleshooting guide for those “wait, what does that mean?” moments. It’ll help you solve problems on the fly and keep your creative momentum going.
What Is the Most Common Beginner Mistake?
Hands down, the most common mistake is skipping the gauge swatch. It’s so tempting to dive straight into the fun part, but trust me, failing to check your gauge is the #1 reason a sweater or hat ends up a completely different size than you expected. A close second is not counting stitches at the end of each row, which leads to wonky edges and incorrect shaping.
Every single instruction in that pattern is built on the designer’s stitch density. If your tension is even a little tighter or looser, your final project will be too small or too big. Taking 30 minutes to make a quick test swatch can save you from hours of wasted yarn and the heartache of a project that just doesn’t fit. Consider it part of the project itself.
How Can I Tell if a Pattern Is US or UK?
Ah, the classic point of confusion that has tripped up so many crocheters. Most professional designers are great about stating this upfront, usually with a note like, “This pattern is written in US crochet terms.” Look for this in the pattern notes section at the beginning.
But if that note is missing, I have a secret weapon for you:
- Scan the pattern for the single crochet (sc) stitch.
- The “sc” stitch only exists in US terminology.
- If you see “sc” anywhere in the stitch list or instructions, you can be 100% confident it’s a US pattern. On the flip side, if the most basic stitch listed is a “double crochet” (dc), you’re almost certainly looking at a UK pattern, as that’s their term for the shortest primary stitch.
Don’t just guess! A US double crochet and a UK double crochet are two totally different heights. Mixing them up will completely throw off the look, feel, and size of your project. It’s worth the moment it takes to confirm.
What Should I Do if I Lose My Stitch Count?
First off, take a deep breath and don’t panic. It happens to every single one of us, from brand-new beginners to seasoned experts. Miscounting is part of the process.
Lay your work down on a flat surface. Find the stitch count at the end of the last row you know was correct, which usually looks something like <42 sts>. Now, carefully count the little ‘V’ shapes along the top edge of your current row. It can be helpful to use your hook or a tapestry needle to point to each stitch as you count to avoid skipping or double-counting.
If your count is off, you’ll have to “frog” it (a cute term for “rip-it, rip-it”) back to the last row where your stitch count was right. A great way to avoid this in the future is to get in the habit of placing stitch markers every 10 or 20 stitches—it makes recounting a breeze! This is especially helpful in very long rows or when working in the round.
What Does Working in the Back Loop Only Mean?
Normally, when you make a stitch, you insert your hook under both strands of the little “V” at the top. But when a pattern says “back loop only” (BLO), it’s asking you to do something specific to create a stretchy, ribbed texture. You see it all the time in hat brims and sweater cuffs. The corresponding “front loop only” (FLO) creates a different, but also distinct, decorative ridge.
To do it, you’ll simply slide your hook under only the single loop that’s farthest away from you. That tiny change is what creates that distinct ribbed line and gives the fabric its bounce. It leaves the front loop unworked, which forms a horizontal bar on the side of the fabric facing you. Don’t worry, the pattern will always tell you exactly when to use this technique to get the intended design.
At Crochet Craze, we believe anyone can learn to create beautiful handmade items with the right guidance. Our platform is filled with easy-to-follow video tutorials and patterns designed to turn you into a confident crocheter. Start your creative adventure with us today at https://crochetcraze.com.