Crochet Blanket Guide: Top Tips for 2025 Success
Your Ultimate Crochet Blanket Guide: Getting Started
Looking for a comprehensive crochet blanket guide? Here’s a quick overview:
| Blanket Type | Standard Size | Recommended Yarn | Typical Stitches |
|---|---|---|---|
| Lovey | 12″ x 12″ | Soft acrylic/cotton | Single crochet, shell stitch |
| Stroller | 30″ x 35″ | Washable acrylic | Double crochet, granny stitch |
| Receiving | 40″ x 40″ | Cotton or cotton blend | Single or double crochet |
| Crib | 45″ x 60″ | Soft, washable fiber | Double crochet, ripple stitch |
| Throw | 52″ x 60″ | Worsted weight acrylic | Any stitch pattern |
| Twin | 66″ x 90″ | Worsted or bulky weight | Simple, repetitive patterns |
| Queen | 90″ x 108″ | Bulky weight | Basic stitches for faster completion |
| King | 108″ x 108″ | Bulky or super bulky | Simple patterns like double crochet |
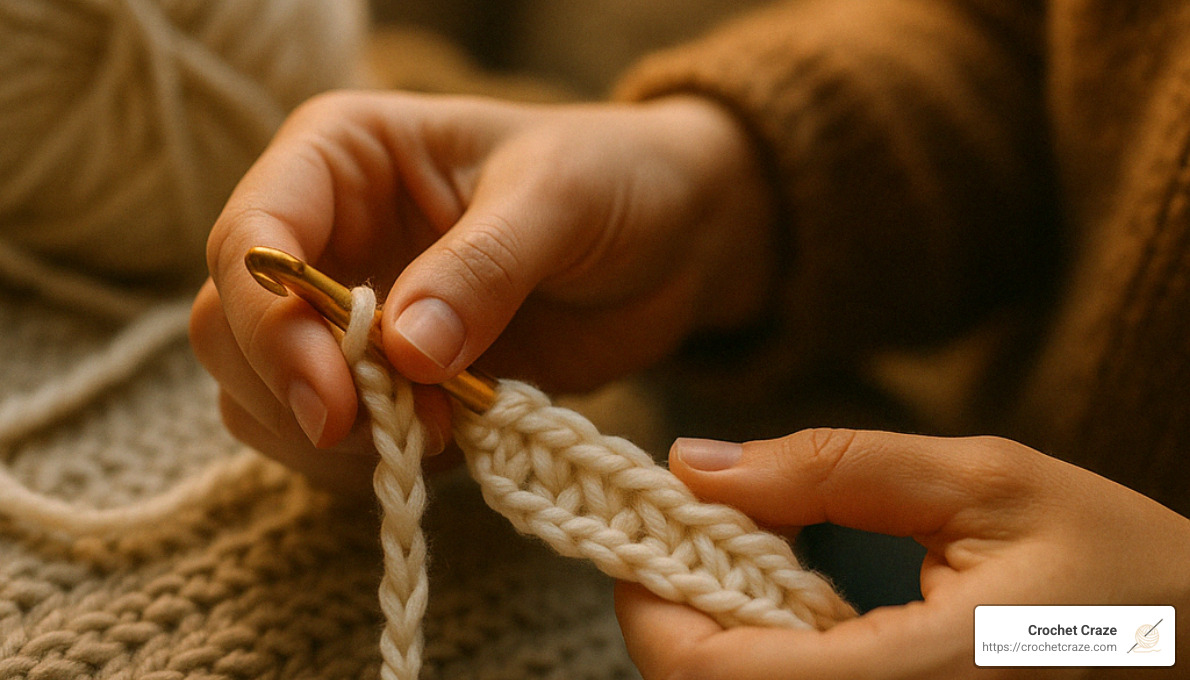
Creating a handmade blanket is one of the most rewarding crochet projects you can undertake. A crochet blanket guide isn’t just about following patterns—it’s about understanding the fundamentals that will help you create something both beautiful and functional. Whether you’re making a cozy throw for your living room or a special gift for a new baby, knowing the basics of blanket creation will set you up for success.
Nothing says cozy like a handmade throw blanket to cuddle up with on the sofa. This sentiment, shared by many crochet enthusiasts, captures why blankets remain one of the most popular projects for both beginners and experienced crafters. They’re practical, they make wonderful gifts, and the repetitive nature of blanket stitches makes them perfect for relaxing, mindful crafting.
The beauty of crochet blankets lies in their flexibility. You can make them any size, use any color combination, and choose from countless stitch patterns to create something uniquely yours. Even better, blankets are forgiving projects—small inconsistencies in tension or occasional mistakes often disappear in the overall design, making them ideal for beginners.
I’m Sonji Huerta, a newcomer to crochet who has recently finded the joy of blanket-making and compiled this crochet blanket guide to help fellow beginners steer their first major project. Having faced the initial challenges of selecting yarn, calculating stitches, and maintaining motivation through a large project, I’m eager to share what I’ve learned along the way.
Crochet blanket guide terms to learn:
– crochet lap blanket size chart
– how to crochet a lap blanket for beginners
Understanding Crochet Blanket Sizes
When you’re ready to dive into your first blanket project, one of the most important decisions you’ll face is choosing the right size. The beauty of crochet is that there’s no “one-size-fits-all” approach—as our crochet blanket guide emphasizes, your blanket can be as unique as you are! Still, understanding standard dimensions gives you a helpful starting point for planning.
Think of standard blanket sizes as friendly suggestions rather than strict rules. Whether you’re creating a tiny lovey for a baby to snuggle or an expansive king-sized masterpiece for your bedroom, knowing these common measurements helps you estimate yarn needs and project time.
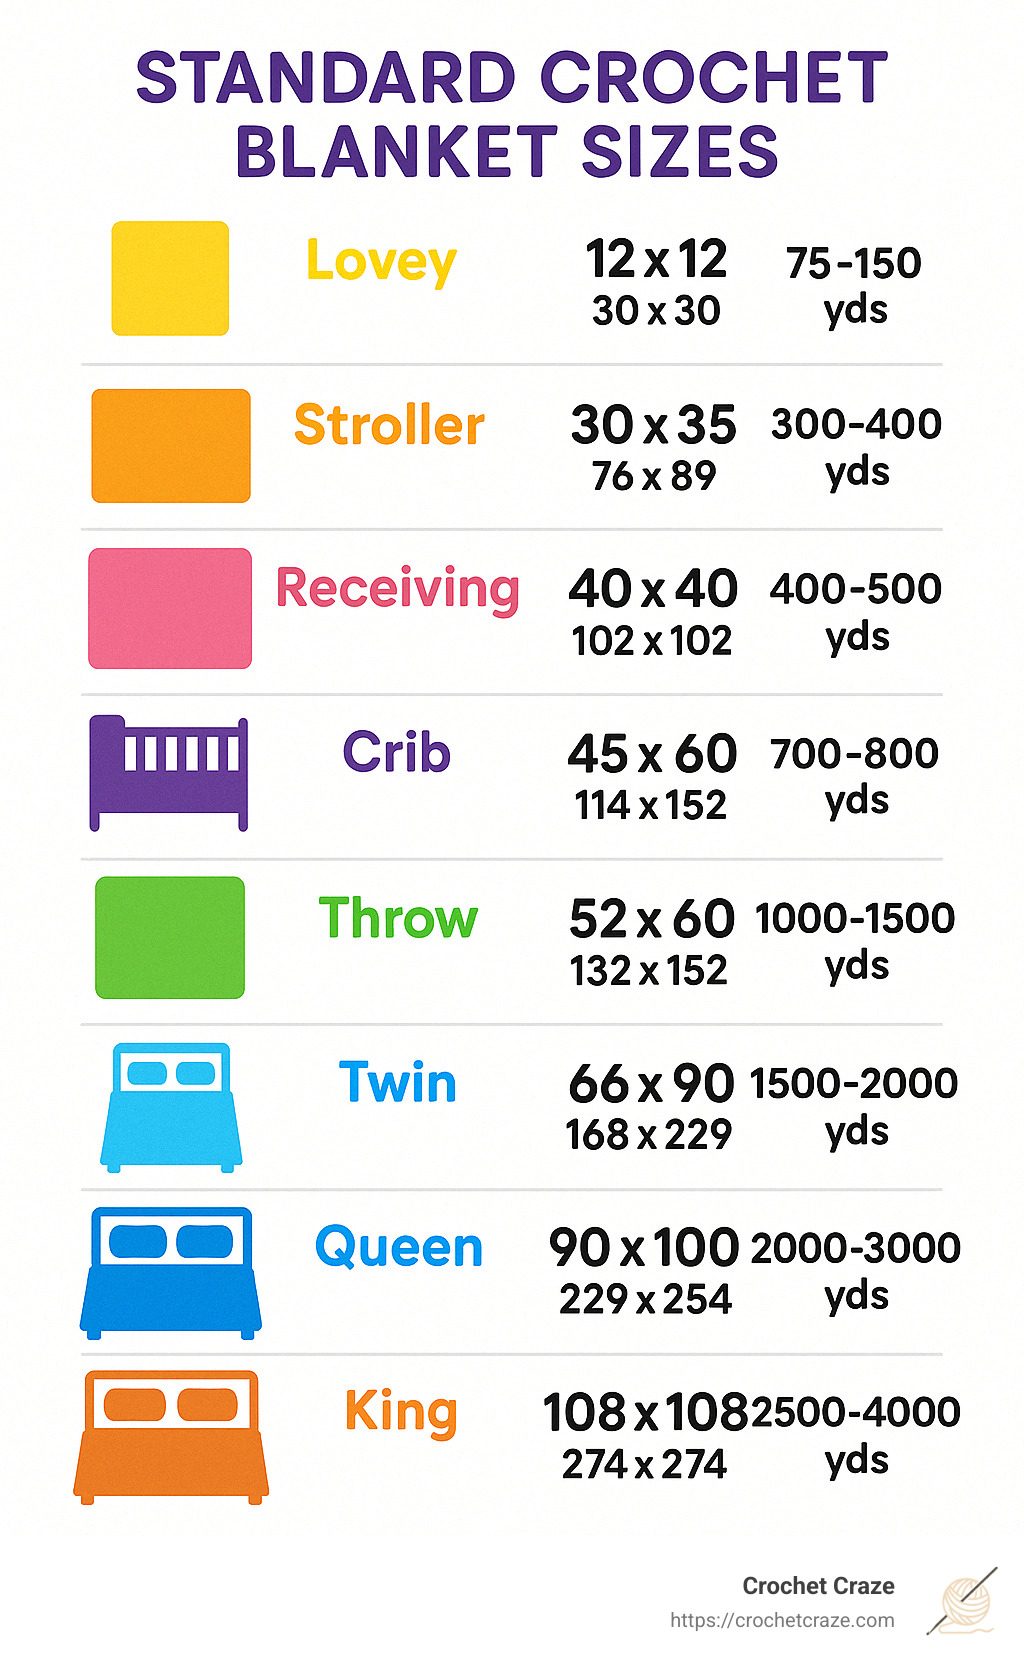
Here are the most common blanket sizes you’ll encounter:
Lovey: At just 12″ x 12″, these sweet little comfort blankets are perfect for babies to hold and cuddle.
Stroller: Measuring about 30″ x 35″, these are just right for tucking around a little one in their stroller or car seat.
Receiving: The classic 40″ x 40″ square is traditionally used for wrapping newborns and makes a treasured baby gift.
Crib: At 45″ x 60″, these fit standard cribs and toddler beds, giving little ones plenty of cozy coverage.
Throw: The versatile 52″ x 60″ size is perfect for draping over your lap or shoulders while relaxing on the couch.
Twin: Measuring 66″ x 90″, these blankets cover a twin-sized bed and work well for kids’ rooms.
Queen: At 90″ x 108″, these larger blankets provide good coverage for a queen-sized bed.
King: The generous 108″ x 108″ size offers ample coverage for king-sized beds.
As one crocheter with years of experience told me, “The best part about making blankets is the flexibility when it comes to sizes.” This captures an important truth—these measurements are just starting points. Your blanket can be any size that makes you happy!
Customizing Your Blanket Size
Creating a blanket that’s perfectly sized for your specific needs is one of the joys of crochet. Here’s how to make it happen:
Making a gauge swatch is your first step toward size customization. Before diving into your blanket project, create a small sample square (about 6″ x 6″) using your chosen yarn and hook. This little square will reveal crucial information about how your unique crocheting style affects the final dimensions.
Once your swatch is complete, grab a ruler and count how many stitches fit in 4 inches. For example, if you count 15 stitches across 4 inches, your personal gauge is 3.75 stitches per inch. This number becomes your magic multiplier for calculating your foundation chain.
To determine your foundation chain length, multiply your desired width by your stitch gauge. Let’s say you want a 36-inch wide blanket with that 3.75 stitches-per-inch gauge—you would need approximately 135 stitches (36 × 3.75 = 135) to achieve that width.
Don’t forget to adjust for stitch patterns! If your chosen pattern requires specific stitch multiples (like multiples of 3 plus 1), you’ll need to tweak your chain count. For our example of 135 stitches, you might round to 136 (45 × 3 + 1 = 136) to ensure your pattern works out perfectly.
Remember to consider borders in your calculations. If you plan to add a decorative edge, you might want to make the main blanket slightly smaller than your target size, allowing the border to bring it to the final dimensions.
One helpful tip: crochet fabric tends to grow slightly as you work, so when precision matters, it’s better to chain fewer stitches than you think you’ll need. You can always add a wider border if your blanket ends up smaller than intended.
The beauty of customizing your blanket size is that you can create something that perfectly fits your space, whether it’s a uniquely sized chair, an oddly proportioned bed, or even a special gift for someone with specific needs. With these calculation techniques in your toolbox, you’re well on your way to creating the perfect-sized blanket for any situation!
Choosing the Right Yarn and Hook
When I started my first blanket, I stood in the yarn aisle completely overwhelmed. Should I choose the soft, fluffy yarn or the practical, washable one? The truth is, your yarn choice shapes everything about your blanket – how it feels, looks, and how long it lasts. Let’s break down these choices in our crochet blanket guide so you can make the perfect selection for your project.
Yarn Types
Think of yarn types as different personalities, each bringing something special to your blanket.
Acrylic yarn is like that reliable friend who’s always there when you need them. It’s budget-friendly (your wallet will thank you!), comes in every color imaginable, and can be tossed in the washing machine without a second thought. I love acrylic for everyday blankets that might face spills or pet hair. The downside? It’s not as breathable as natural fibers, so it might not be ideal for hot summer nights.
Cotton yarn creates blankets with beautiful stitch definition – every loop and twist shows up crisp and clear. It’s wonderfully breathable, making it perfect for summer throws or baby blankets. Cotton doesn’t stretch much, which helps your blanket keep its shape. The trade-off is that cotton can be a bit harder on your hands while working, and the blankets tend to be heavier than acrylic ones.
Wool yarn brings natural warmth and a lovely drape to blankets. There’s something special about snuggling under a wool blanket on a cold winter evening! Some wool yarns now come in “superwash” varieties that can handle gentle machine washing. Just be mindful that traditional wool requires special care, and some people might be sensitive to wool against their skin.
Blended yarns offer the best of multiple worlds. A cotton-acrylic blend, for instance, gives you the breathability of cotton with the easy care of acrylic. These are great “Goldilocks” options when you want to balance different qualities in your blanket.
Yarn Weights
Yarn weight isn’t about how heavy the skein feels in your hand – it’s about the thickness of the strand. This choice affects both how your blanket feels and how quickly you’ll finish your project.
Worsted weight (4) is the most popular choice for blankets, and where I recommend most beginners start. It works up at a reasonable pace and creates a blanket with medium thickness. Think of it as the “just right” option.
If you’re looking for a lightweight summer throw or delicate baby blanket, consider DK weight (3) or even Sport weight (2). These create more flexible, lighter blankets but will take longer to complete.
In a hurry or wanting something extra cozy? Bulky (5) and Super Bulky (6) yarns are your friends. They work up incredibly fast – I once made a throw blanket in a weekend with super bulky yarn! Just keep in mind they use more yarn by length, so your project might require more skeins.
Lace weight (0) and Fingering weight (1) make gorgeous, delicate blankets but require significant time investment. I’d recommend saving these for special projects after you’ve got some experience under your belt.
Hook Sizes
Your hook and yarn should be dance partners that move well together. Generally, the thicker your yarn, the larger your hook should be. Here’s a simple guide to get you started:
For Sport weight (2) yarn, hooks between 4.0mm (G/6) and 5.0mm (H/8) work well.
With DK weight (3), try 5.0mm (H/8) to 5.5mm (I/9) hooks.
Worsted weight (4) pairs nicely with 5.5mm (I/9) to 6.5mm (K/10.5) hooks.
For Bulky weight (5), reach for 6.5mm (K/10.5) to 9.0mm (M/13) hooks.
When using Super Bulky (6), you’ll want 9.0mm (M/13) to 15mm (P/Q) hooks.
Here’s a little secret from experienced blanket makers: try going up one hook size from what the yarn label recommends. This creates a slightly looser, drapier fabric that’s perfect for blankets. Your stitches will have more movement and the finished blanket will have a lovely flow.
If you’re just getting started on your crochet journey, check out our more info about crochet yarn for beginners for additional guidance.
Best Yarns for Different Blankets
The perfect yarn depends on who’ll be using your blanket and how.
For baby blankets, softness and safety come first. Look for yarns specifically labeled for babies – these are processed to be extra gentle on sensitive skin. I always recommend washable fibers since babies and messes go hand-in-hand! Cotton and bamboo blends offer wonderful breathability to prevent overheating, while soft acrylics provide easy care. Avoid highly textured yarns with loops or bumps that could catch tiny fingers.
When making throw blankets for your living room, consider both comfort and decor. Medium to bulky weight yarns create that cozy factor we all love in a good throw. Think about where the blanket will live – wool or alpaca blends make wonderfully warm winter throws, while cotton or linen blends shine in summer months. And don’t forget to choose colors that complement your space!
For bed blankets, durability becomes especially important. These blankets see daily use and frequent washing, so machine-washable yarns are practically essential. Since bed blankets are larger projects, you might consider a lighter weight yarn to keep the finished blanket from becoming too heavy.
For a deeper dive into yarn weights and their properties, you might find this Yarn Weights Guide helpful.
The “right” yarn is ultimately the one that makes you happy when you work with it. Don’t be afraid to visit your local yarn store and touch different options before deciding. Your hands will thank you for choosing a yarn that feels good to work with through the many hours of creating your beautiful blanket!
Basic Crochet Stitches for Blankets
The heart of any crochet blanket guide lies in understanding the basic stitches that bring your cozy creation to life. Even with just a handful of fundamental techniques, you can create blankets that are both beautiful and meaningful.
Let’s explore the stitches that will become your best friends during blanket-making:
The single crochet (SC) is your most basic building block. It creates a tight, dense fabric that’s perfect for baby blankets where you want minimal holes and maximum warmth. This stitch also shines in graphghan projects where you’re creating pictures or designs within your blanket. While it works up more slowly than other stitches, the resulting fabric is sturdy and substantial.
Moving up in height, the half double crochet (HDC) offers that sweet spot between speed and texture. I love this stitch for blankets because it creates a fabric with nice drape while still providing good coverage. If you’re looking for something that works up faster than single crochet but still gives you a relatively dense fabric, HDC might become your go-to stitch.
The double crochet (DC) is probably the most popular blanket stitch for good reason. It works up quickly, creates a lovely drapey fabric, and is easy to master even for beginners. My first blanket was made entirely in double crochet, and it still looks beautiful years later. This stitch gives your blanket a classic, timeless look while not taking forever to complete.
When you’re eager to see fast progress, the treble crochet (TR) is your friend. This tall stitch creates a more open, lacy fabric that’s perfect for lightweight summer throws. The height of this stitch means your blanket grows quickly – a real motivator when you’re working on larger projects!
And who could forget the classic granny stitch? Those familiar clusters of double crochets with chain spaces between them create that nostalgic “granny square” look we all recognize. While often used in squares, this stitch pattern works beautifully in rows for blankets too. It’s especially wonderful for using multiple colors and creating that heirloom look that never goes out of style.
For step-by-step instructions on mastering these stitches, our basic crochet stitches page offers printable guides you can keep nearby as you work.
Crochet Blanket Guide: Mastering Basic Stitches
Before diving into your blanket project, taking time to master the foundation chain will save you frustration later. Think of your foundation chain as the backbone of your entire project – it needs to be just right.
Creating a good foundation chain starts with a slip knot on your hook. Then you’ll yarn over (wrap the yarn around your hook) and pull through the loop on your hook. Repeat this motion until you have the desired number of chains. Sounds simple, right? But this is where many beginners encounter their first problems.
Common foundation chain pitfalls can derail your blanket before you even begin. Chains that are too tight will make it nearly impossible to work into them later, leading to curled edges and frustration. Inconsistent tension creates an uneven starting edge that can affect your entire blanket. Miscounting chains is an easy mistake that results in a blanket that’s unexpectedly wide or narrow. And perhaps the sneakiest problem – a twisted chain can cause your entire blanket to spiral as you work.
“I always tell my students to treat their foundation chain with extra care,” shares crochet instructor Maria Delgado. “It’s worth taking your time here, even if you’re eager to get to the ‘real’ crocheting.”
My favorite tip for foundation chains is to work more loosely than you think you need to. Many crocheters even use a hook one size larger just for the foundation chain, then switch to the smaller hook for the rest of the project. And always, always count your chains multiple times before moving on – this small act of patience can save you from having to start over later.
Your foundation chain sets the stage for everything that follows. With a solid starting chain and these basic stitches in your toolkit, you’re well on your way to creating a blanket that will wrap loved ones in warmth for years to come.
Step-by-Step Crochet Blanket Guide: Starting Your Project
Ready to turn your yarn into something wonderful? Let’s get your blanket project off the ground! I remember my first blanket—I was so excited but also a bit nervous about starting such a big project. Don’t worry—I’ll walk you through each step to make sure you’re set up for success.
Before diving in, gather everything you’ll need: your chosen yarn, an appropriate crochet hook, scissors, a yarn needle for those finishing touches, and maybe some stitch markers (they’re optional but honestly, they’re lifesavers for keeping track of your work). Don’t forget a measuring tape and your pattern if you’re following one.
The foundation chain is where your crochet blanket guide journey truly begins. This simple string of chains forms the backbone of your entire project. Start with a slip knot on your hook, then chain the number of stitches you calculated from your gauge swatch. I like to place a stitch marker every 20 or 25 chains—trust me, when you’re counting 150+ chains for a throw blanket, these markers are your best friends!
One crocheter told me she sings a little counting song while making her foundation chain to stay focused. Whatever works for you—just make sure you count carefully. A blanket that’s accidentally too narrow or too wide can be frustrating to find later on.
Calculating the Number of Stitches Needed
Getting your stitch count right is like building a house on a solid foundation—it affects everything that follows. Let me show you with a practical example:
If you want a blanket that’s 48 inches wide, and your gauge swatch shows you get 3 stitches per inch, you’ll need approximately 144 stitches (48 × 3 = 144). But wait—if your pattern requires a multiple of 6 stitches, you’d need to adjust to 144 stitches (which conveniently is 24 sets of 6). Some patterns also require extra chains for turning, so you might need to add 2 more for a total of 146.
Different stitches create different fabric. A blanket made with single crochet will need many more rows than one made with taller stitches like double or treble crochet to reach the same length. This is why your gauge swatch is so important!
For more detailed help with calculating stitches for specific blanket sizes, our guide on how to crochet a lap blanket for beginners breaks everything down step by step.
Crochet Blanket Guide: Working Through Rows
With your foundation chain complete, it’s time for the first row—the moment when your blanket really starts taking shape! Depending on which stitch you’re using, you’ll skip a certain number of chains from your hook before placing your first stitch. For single crochet, skip 1 chain; half double crochet, skip 2; double crochet, skip 3; and treble crochet, skip 4.
When you reach the end of your first row, you’ll need to create a turning chain before flipping your work. Think of this as an elevator that brings you up to the right height for your next row. Single crochet needs just 1 chain, half double crochet needs 2, double crochet needs 3, and treble crochet needs 4. After turning, work your chosen stitch into each stitch across the row, and repeat this process until your blanket reaches your desired length.
I’ve found that maintaining even tension is one of the trickiest parts of crocheting a blanket. If you’re feeling tense or tired, your stitches might get tighter—and conversely, if you’re super relaxed, they might get looser. Try to crochet in similar conditions each time, and take breaks when needed. Your hands (and your blanket edges) will thank you!
Counting stitches in each row might seem tedious, but it’s worth it. Nothing’s more frustrating than realizing ten rows later that your blanket has been gradually getting narrower because you’ve been accidentally skipping the last stitch in each row. I learned this the hard way on my first blanket!
Crochet blanket guide wisdom: the first few rows are always the hardest. Once you get into a rhythm, you’ll find yourself flowing through the project, maybe even while watching your favorite show or chatting with friends. That’s when you know you’ve truly acceptd the crochet lifestyle!
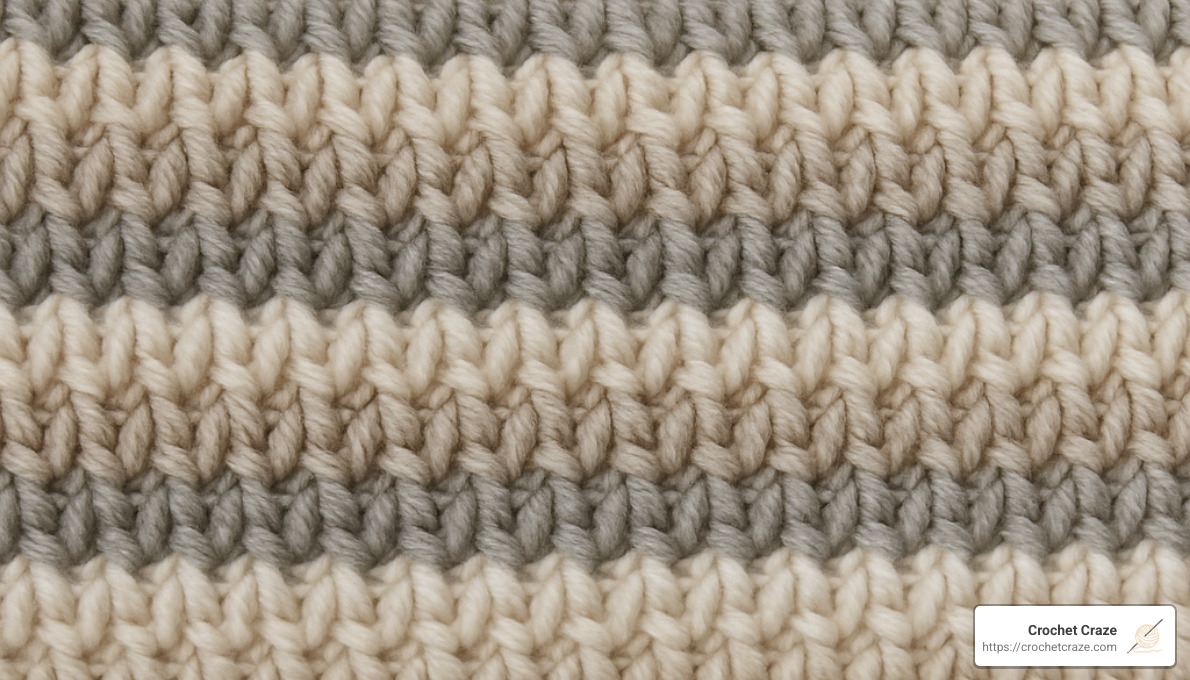
Adding Color and Texture to Your Blanket
Once you’ve mastered the basic stitches, your crochet blanket guide journey can take an exciting turn into colors and textures. This is where your project truly becomes unique and personal!
How to Change Colors in a Crochet Blanket
Adding color to your blanket isn’t just visually appealing—it can also keep you motivated as you watch your design emerge row by row. The good news? Changing colors is surprisingly straightforward.
When you’re ready to switch colors, work the last stitch of your current color until you have two loops remaining on your hook. Instead of completing the stitch with the same yarn, yarn over with your new color and pull it through both loops. That’s it! You’ve made your color change. Chain with the new color to begin your next row and continue crocheting as usual.
For a clean finish, leave a tail of about 6 inches from your old color to weave in later. Many crocheters find it helpful to weave in these ends as they go rather than facing dozens of loose strands at the end of their project.
Pro tip: If you’re creating stripes that are only a few rows wide, consider “carrying” the unused color up the side of your work instead of cutting it each time. Simply hold the unused strand along the edge and work your stitches around it when you reach that side. This technique saves yarn and reduces the number of ends to weave in later.
Stripes are perhaps the most beginner-friendly way to incorporate color, but don’t stop there! You might try a gradient effect using colors that blend into each other, or experiment with varying stripe widths for a more playful look. If you’re using variegated yarn, you might even explore planned color pooling for fascinating geometric patterns.
For visual learners, this tutorial on changing colors in crochet offers helpful step-by-step guidance.
Incorporating Different Stitches for Texture
While color changes create visual interest, textured stitches add a tactile dimension that makes your blanket truly special. The wonderful thing about texture is that it can shine even in a single-color project.
Basketweave stitch creates a woven appearance that looks much more complex than it actually is. By alternating front post and back post double crochets, you’ll create a fabric that resembles a woven basket. This stitch works beautifully in solid colors where the texture can take center stage without competition from color changes.
For something more delicate, the shell stitch creates lovely fan-like clusters that work wonderfully in baby blankets. The gentle scalloped effect is even more pronounced when you change colors every few rows.
The classic ripple stitch (sometimes called chevron or wave) has remained popular for generations—and for good reason! These zigzagging rows create movement across your blanket and work beautifully with multiple colors. There’s something mesmerizing about watching those peaks and valleys grow as you work.
If you’re looking for something with more dimension, the bobble stitch creates raised bumps or “bobbles” that stand out from the surface of your blanket. These can be arranged in patterns or scattered randomly for a playful polka-dot effect. Children especially love the tactile nature of bobble-stitch blankets.
For a more subtle texture, the moss stitch (also called seed stitch) creates a slight bumpiness by alternating single and double crochets. The result is a fabric with wonderful drape and a sophisticated look that works well for adult throws.
More adventurous crocheters might try the corner-to-corner (C2C) technique, which works diagonally from one corner to the opposite. This approach is perfect for creating picture blankets (graphghans) and has a distinctive texture all its own.
That textured stitches typically use more yarn than simpler stitches, so you’ll want to purchase a bit extra when planning your project. The added dimension is well worth it, though—there’s nothing quite like running your hand over a blanket with interesting textures and seeing how light plays across its surface.
Your crochet blanket guide journey is yours to customize. Whether you opt for bold color changes, interesting textures, or a combination of both, the choices you make will result in a one-of-a-kind creation that reflects your personal style.
Caring for Your Crochet Blanket
After pouring your heart into creating a beautiful blanket, you’ll want it to last for years—maybe even generations. Proper care isn’t just about cleaning; it’s about preserving your handiwork and the memories woven into every stitch.
The good news is that caring for your crochet creation doesn’t have to be complicated. Most yarn labels include specific care instructions, which should always be your first reference point. When in doubt, gentle hand washing in cool water with a mild detergent is the safest approach. Avoid wringing or twisting your blanket, as this can distort those beautiful stitches you worked so hard to create. Instead, press out excess water by laying the blanket between clean towels, then reshape it while damp and lay it flat to dry.
Different fibers have different needs, and understanding them will help your blanket stay beautiful longer. Acrylic blankets are wonderfully low-maintenance—usually machine washable and dryable on gentle cycles, making them perfect for everyday use. Cotton blankets offer similar convenience, typically machine washable in cool water, though they may last longer if you lay them flat to dry rather than tumbling them. Wool blankets require more tender loving care, usually needing hand washing in cool water unless they’re specifically labeled “superwash.” If you’ve chosen a blended yarn, follow the care instructions for the most delicate fiber in the mix—this cautious approach will protect your entire project.
When it comes to storing your blanket between uses, keep it in a cool, dry place away from direct sunlight, which can fade colors over time. Skip the plastic bags, which can trap moisture and lead to mildew. For wool blankets, consider adding cedar or lavender sachets to naturally deter moths. And remember—folding is better than hanging for heavy blankets, as hanging can cause stretching over time.
Don’t be discouraged if your blanket develops some pilling, especially if it’s made from acrylic yarn. This is completely normal and easily addressed with a fabric shaver or pill remover designed for sweaters. A little maintenance keeps your blanket looking fresh and new!
Safety Considerations for Baby Blankets
Creating a blanket for a little one comes with extra responsibility. Parents and caregivers often ask: “Are crochet blankets safe for babies? They can be safe if used with proper supervision, adhering to safety guidelines such as avoiding loose ends, embellishments, and ensuring that nothing interferes with the baby’s safety in cribs or car seats.”
When making a baby blanket, choose yarn specifically labeled as baby-friendly—these are tested for safety and skin sensitivity. Tight stitches are essential for baby items, as they prevent tiny fingers and toes from getting caught. Always weave in your ends securely, and avoid decorative elements like buttons or beads that could potentially detach and become choking hazards.
It’s also important to understand how your blanket will be used. Current safe sleep guidelines recommend keeping blankets out of cribs for sleeping infants. Instead, consider making a stroller blanket, a car seat cover (secured away from baby’s face), or a supervised tummy time mat. Baby blankets are wonderful for supervised activities like playtime on the floor, as a receiving blanket for holding and nursing, or as a comfort item for older babies and toddlers.
The joy of creating something warm and beautiful for a baby is one of the most rewarding aspects of crochet. Knowing your creation is both lovely and safe makes it all the more special—a gift of love that parents will treasure during those precious early months and beyond.
Blankets, like all handmade items, carry something special that store-bought items never will—the time, attention, and care you put into every stitch. With proper care, your crochet blanket guide project can become a cherished heirloom, passed down through generations and carrying your love with it.
Tips for Beginners: Staying Motivated, Even When You Don’t Feel Like It
Blankets are wonderfully rewarding projects, but let’s be honest—their size can sometimes make them feel like marathons rather than sprints. I’ve been there, staring at a half-finished blanket wondering if I’ll ever see the end. The good news? With a few simple strategies, you can maintain your enthusiasm from the first chain to the final border.
Creating a blanket is as much about the journey as the destination. When you’re working on a large project like this, setting achievable goals becomes your secret weapon. Rather than thinking about the entire blanket at once (which can feel overwhelming!), commit to completing just a few rows each day. I find that saying “I’ll finish 25% by the end of the month” feels much more manageable than focusing on the hundreds of rows ahead. And don’t forget to celebrate those small victories along the way—finished ten rows today? That deserves a little happy dance!
Make crocheting a treat rather than a chore by pairing it with activities you already enjoy. Your blanket can become the perfect companion for binge-watching your favorite shows or listening to that audiobook you’ve been meaning to start. Some of my most productive crochet sessions happen when I’m caught up in a good story, with my hands working almost on autopilot.
Looking for more social motivation? Consider joining a crochet-along (CAL) where others are making similar projects. The shared experience and gentle accountability can work wonders for your motivation. I’ve also found that taking my project to a coffee shop or park completely refreshes my enthusiasm—something about the change of scenery seems to reinvigorate both creativity and determination.
Every crocheter faces challenges, but they don’t have to derail your project. When boredom with repetitive stitches strikes, try changing colors more frequently or adding an accent row with a different stitch pattern. For hand fatigue, which can be a real issue with larger projects, remember to take frequent breaks, consider investing in ergonomic hooks, and experiment with different gripping techniques until you find what’s comfortable for your hands.
If you find your motivation waning, sharing progress photos online can bring encouragement from fellow crafters who understand exactly what you’re accomplishing. And as for mistakes? Small errors often disappear in the overall design of a blanket—perfection isn’t the goal, creating something made with love is.
For those days when you really don’t feel like picking up your hook (we all have them!), give yourself permission to take a short break. Sometimes a day or two away from your project is exactly what you need. When you’re ready to return, set a timer for just 15 minutes of crocheting—you’ll often find that once you start, you’ll want to continue beyond that time limit. I also recommend keeping your project visible in your living space as a gentle reminder of your creative commitment.

One of my favorite pieces of wisdom from the crochet community came from a crafter who shared: “And whenever I feel like it takes me so long to see any significant progress, I snuggle under the squares that I have already joined together.” What a beautiful reminder that even an unfinished blanket can provide both comfort and motivation!
When your enthusiasm starts to flag, reconnect with your original purpose. Was this blanket meant to be a gift for someone special? Is it intended to add warmth and color to your own home? Remembering the “why” behind your project can reignite your determination to see it through to completion.
The crochet blanket guide journey isn’t always a straight path—sometimes it meanders, sometimes it pauses—but with these strategies in your toolkit, you’ll find your way to that satisfying final stitch.
Frequently Asked Questions about Crochet Blankets
Let’s tackle some of the most common questions I hear from fellow crocheters about blanket making. After creating several blankets myself, I’ve learned these answers can save you time and frustration!
What are the standard sizes for crochet blankets?
When I first started crocheting blankets, I was constantly searching for the “right” size. The truth is, there’s no single correct size—it’s all about what works for you! That said, these standard dimensions can be helpful starting points:
Lovey blankets measure about 12″ x 12″ and make perfect security blankets for little ones. Stroller blankets typically run 30″ x 35″, ideal for covering a baby without excess fabric dragging on the ground. Receiving blankets are usually 40″ x 40″ squares, perfect for swaddling newborns.
For cribs, aim for around 45″ x 60″ to ensure good coverage without excess fabric that could pose safety concerns. Throw blankets (my personal favorite to make!) generally measure 52″ x 60″—perfect for cozy couch cuddles.
If you’re feeling ambitious, twin-sized blankets run about 66″ x 90″, queen blankets approximately 90″ x 108″, and king blankets a substantial 108″ x 108″.
These are just guidelines! I often make my throw blankets a bit smaller (around 48″ x 55″) because they work better for my couch and use less yarn.
How do you determine the number of stitches needed for a crochet blanket?
This was one of my biggest problems as a beginner! Here’s my foolproof method:
First, make a gauge swatch—a small sample square using your chosen yarn and hook. Once you’ve worked several rows, measure how many stitches fit in 4 inches of your swatch. Divide by 4 to get your stitches-per-inch rate.
Let’s say you get 3 stitches per inch. For a 40-inch wide blanket, you’d need 120 stitches for your foundation chain (3 × 40 = 120). But wait! If your pattern requires multiples (like multiples of 3 plus 1), you’ll need to adjust. For our example, you might round to 121 stitches (40 multiples of 3, plus 1).
I always add a few extra chains when starting—it’s easier to remove extras than to realize your blanket is too narrow halfway through!
What are the best yarn types for different types of crochet blankets?
Choosing the right yarn makes all the difference in your crochet blanket guide journey! I’ve tried many combinations, and here’s what works best:
For baby blankets, nothing beats soft, washable acrylics or cotton blends. Babies have sensitive skin and, let’s be honest, they’re messy! Look for yarns specifically labeled for baby items, which are usually extra soft and easy to clean.
When making throw blankets (which make wonderful gifts!), I prefer medium to bulky weight yarns for that cozy factor. Acrylic is budget-friendly and comes in endless colors, while wool or wool blends offer exceptional warmth for winter throws. During summer months, cotton throws feel cool and crisp.
For bed blankets, durability is key since they’ll see daily use. I recommend washable fibers like acrylic or cotton blends. One tip from experience: consider using lighter weight yarns for queen or king sizes—bulky yarn makes these blankets impressively heavy!
If you’re creating a decorative blanket that won’t see heavy use, this is your chance to experiment with novelty yarns, color-changing options, or yarns with interesting textures.
How long does it take to crochet a blanket?
“How long will this take?” is probably the question I get most often! The honest answer is: it varies tremendously.
As a beginner, my first baby blanket took about 25 hours of actual crocheting time, spread over several weeks. Now that I’m more experienced, I can finish a similar project in roughly half that time.
Your timeline depends on several factors: your experience level, the blanket size, stitch complexity, yarn thickness, and—most importantly—how much time you can dedicate to crocheting each day.
For planning purposes, a baby blanket might take 10-20 hours, a throw blanket 20-50 hours, and a bed-sized blanket anywhere from 50-100+ hours. Rather than rushing, I’ve learned to enjoy the journey—there’s something wonderfully meditative about creating something stitch by stitch.
How much yarn do I need for a crochet blanket?
This is crucial to get right—running out of yarn when you’re almost finished can be heartbreaking, especially if it’s a discontinued color!
For a baby blanket (around 30″ x 30″), I typically use 800-1,200 yards of worsted weight yarn. My favorite throw blankets (about 50″ x 60″) usually require 2,000-3,000 yards, while larger projects like twin blankets need 4,000-6,000 yards.
If you’re ambitious enough to tackle queen blankets, prepare to use 8,000-10,000 yards, and king blankets demand a whopping 12,000-15,000 yards of yarn.
Textured stitches like popcorn or bobble stitches use significantly more yarn than simple patterns. When in doubt, buy an extra skein or two—you can always return unused yarn or save it for another project (or is that just my excuse for building a yarn stash?).
Can I use multiple yarn brands in one blanket?
Absolutely! Some of my favorite blankets combine different brands. However, there are a few things I’ve learned (sometimes the hard way):
Try to stick with the same weight classification across brands. Even within “worsted weight,” for example, some brands run slightly thicker or thinner than others. This can affect your gauge and the final look of your blanket.
Be mindful of texture and drape differences. Some yarns are springier, others drape more neatly. These qualities can create interesting effects, but they might also cause sections of your blanket to behave differently.
Consider washing requirements—mixing a hand-wash only wool with machine-washable acrylic might create laundry challenges down the road.
My best tip? Make a small swatch combining your different yarns before committing to the full blanket. This lets you see how the yarns play together and whether you like the result.
With these answers in your crochet blanket guide toolkit, you’re well-equipped to tackle your next blanket project with confidence!
Conclusion
Creating a crochet blanket truly is a journey—one filled with loops, yarn, occasional tangles, and ultimately, immense satisfaction. Throughout this crochet blanket guide, we’ve walked together through everything from selecting the perfect size to choosing materials that match your vision. We’ve explored techniques that build your skills and shared tips to keep you going when motivation wanes.
Every blanket tells a story, doesn’t it? The story of late-night stitching sessions while binge-watching your favorite show. The story of the afternoon you spent frogging three rows because you miscounted (we’ve all been there!). The story of the hands that made it, the time invested, and most importantly, the love poured into each and every stitch.
I love what one of my crochet students once told me: “My blankets aren’t perfect—they’re perfectly mine.” What a beautiful way to think about our creations! Whether your blanket turns out exactly as planned or has a few “character-building” mistakes along the way, it will be uniquely yours, carrying your creative fingerprint in every row.
As you continue your crochet journey, don’t be afraid to play and experiment. Try that bold color combination you’ve been eyeing. Mix different stitch patterns in the same blanket. Blend yarns with complementary textures. Each project teaches something new and builds your confidence for tackling even more ambitious designs.
Here at Crochet Craze, we firmly believe that crochet is so much more than just a craft—it’s a form of meditation, a way to create comfort, express creativity, and connect with generations of makers who came before us. There’s something profoundly meaningful about creating warmth with your own two hands, one stitch at a time.
We hope this guide has sparked your creativity and given you the confidence to start your blanket project, even on those days when Netflix seems more appealing than picking up your hook. Even just a row or two counts as progress!
For more resources to support your crochet trips, explore our other guides and tutorials at Crochet Craze. We’re here to cheer you on through every chain, every row, and every completed project. Happy crocheting, friends!
