
Ever wondered how to crochet faster? Here's a little secret I've learned over countless projects and tangled skeins: the real magic isn't in frantic hand movements. It's about setting yourself up for success before you even make the first slip knot. By creating a smooth, efficient workflow, you get rid of all those tiny frustrations that kill your rhythm and, ultimately, your speed. True crochet velocity is born from comfort, efficiency, and smart choices. It's about transforming your process from a series of disjointed actions into a single, fluid motion.
Build a Foundation for Speed and Comfort
Before we even get into fancy drills or new stitches, let's talk about the real speed boosters: your environment and your body. It's something so many of us overlook. We blame our hands for being slow when the real culprits are the constant interruptions—stopping to untangle yarn, squinting in bad light, or shifting around to ease an aching back. Each one is a momentum killer. Think of it like a race car driver; they don't just focus on the gas pedal. They ensure the car is perfectly tuned, the track is clear, and their driving position is optimal. The same principle applies here.
Your first power move is creating an efficient workspace. This is less about having a fancy craft room and more about having your tools within arm's reach. Most importantly, you need to make sure your yarn can flow freely. A simple yarn bowl or a well-wound center-pull cake is a total game-changer. It stops the yarn from snagging or rolling under the couch, which means you don't have to pause and yank on the skein every few minutes. This tiny change alone keeps your hands focused on what they do best: stitching. When your yarn feeds smoothly and predictably, your brain doesn't have to constantly switch tasks from "stitching" to "yarn management." This maintained focus is a huge component of speed.
Ergonomics for Effortless Crocheting
Now, let's talk about how you sit. It has a massive impact on how long you can crochet comfortably. I know, I know—slouching on the couch feels cozy for the first ten minutes. But it's a fast track to neck, shoulder, and back pain, which forces you to stop way sooner than you want to. This isn't just about avoiding aches; it's about biomechanics. A poor posture creates tension that radiates from your spine, through your shoulders, down your arms, and into your hands. This tension physically restricts your movement and tires you out faster.
Instead, find a supportive chair. Sit upright, plant your feet on the floor, and let your spine be happy. Your shoulders should be relaxed and down, not hunched up by your ears. Your arms should be supported, perhaps by armrests or a pillow on your lap, so they aren't carrying their own weight. This posture isn't just better for your back; it's crucial for preventing the kind of fatigue that sabotages long crochet sessions. A relaxed body is a fast body. Remember to take breaks, too. Every 30-45 minutes, stand up, stretch your hands, roll your shoulders, and give your eyes a rest. This proactive approach prevents fatigue from setting in and allows you to maintain a higher speed for longer periods.
The goal here is to make every movement as effortless as possible. When you aren't fighting physical discomfort or wrestling with your supplies, your hands can find a natural, repeatable rhythm. That rhythm is what translates directly into faster, more consistent stitches.
Mastering Your Method for Maximum Speed
Beyond your setup, the way you hold your hook and tension your yarn plays a huge role. I've seen it time and time again in crochet communities. Some research even points to specific techniques being faster. For example, some studies found that crocheters using a 'scrunching' method—where the yarn is tensioned much closer to the hook—can crank out stitches up to 20-30% faster than those using more traditional tensioning methods. This is because the distance the yarn has to travel for each stitch is minimized, shaving milliseconds off every single movement. Speed isn't just a fun goal; it's becoming a valuable skill, as highlighted by emerging crochet business trends.
It all boils down to a few core elements:
-
Proper Lighting: Good, direct light is non-negotiable. It cuts down on eye strain, helps you see your stitches clearly, and saves you from the soul-crushing task of frogging a misplaced stitch. A daylight lamp positioned over your shoulder can illuminate your work without creating glare, making it easier to work with dark yarns or intricate patterns.
-
Organized Materials: Keep your hooks, stitch markers, and scissors in one spot. A small pouch or a little caddy works wonders. No more stopping mid-row to hunt for your snips. This concept, known as mise en place in professional kitchens, is about having everything you need for the task at hand ready and waiting.
-
A Relaxed Mindset: This might be the most important tip of all. Speed comes from calm, fluid movements, not tense, rushed ones. Take a deep breath, put on some music, and focus on finding a comfortable groove. Stress and anxiety create physical tension in your hands and shoulders, which is the enemy of speed.
Your Speed Boosting Fundamentals Checklist
Ready to put it all together? Here's a quick look at these foundational changes and how they directly impact your crochet speed and comfort. Think of this as your pre-flight checklist before you take off.
|
Technique/Setup |
Impact on Speed |
Best For |
|---|---|---|
|
Yarn Bowl or Center-Pull Cake |
Eliminates pauses for yarn pulling, creating an uninterrupted flow. |
Anyone tired of their yarn rolling away or getting tangled. |
|
Supportive Chair & Good Posture |
Reduces body strain, allowing for longer, pain-free crochet sessions. |
Crocheters who want to avoid the dreaded “crochet backache.” |
|
Optimized Tensioning Method |
Creates more efficient hand movements, directly increasing stitch-per-minute rate. |
Intermediate crocheters looking to level up their technique. |
|
Dedicated, Direct Lighting |
Prevents mistakes and reduces eye fatigue, minimizing time lost to frogging. |
Everyone, but especially those working with dark yarns. |
|
Organized Tool Caddy |
Keeps essential tools within reach, cutting out time spent searching. |
Crocheters who are tired of losing their scissors and stitch markers. |
Mastering these fundamentals won't just make you faster; it'll make crocheting more enjoyable. By removing the little annoyances, you free yourself up to get lost in the rhythm of the craft, which is where the real joy—and speed—is found.
Master Your Grip and Yarn Tension
If your setup is the engine for fast crocheting, then your grip and tension are the fuel. The way you hold your hook and wrangle your yarn directly impacts how smoothly you can pop out stitches. Even the tiniest inefficient movements add up over thousands of stitches, creating friction and slowing you to a crawl. The goal is to create a closed system where your hands work in perfect harmony, one feeding the yarn and the other executing the stitch with minimal effort.
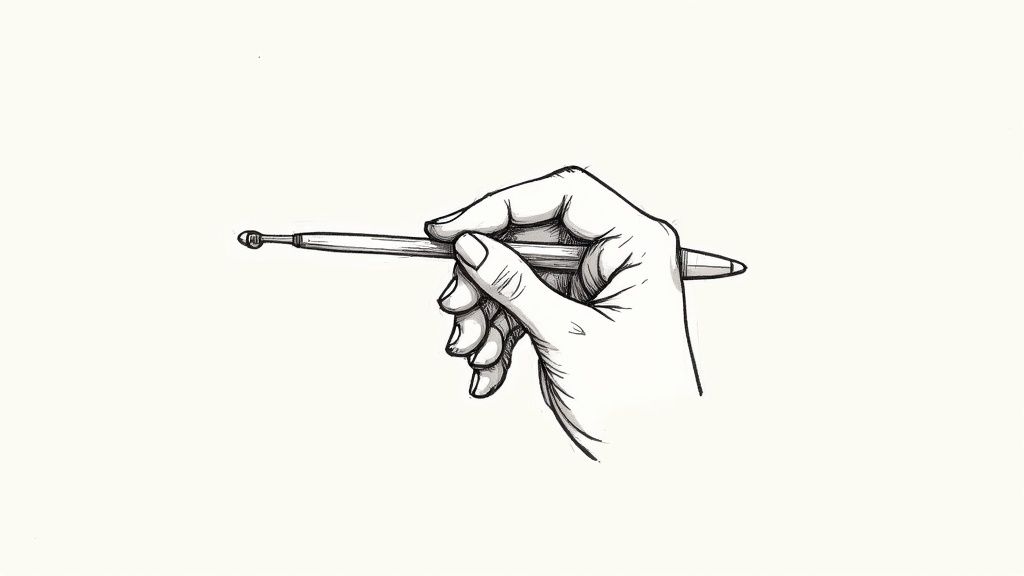
The two most common ways to hold a crochet hook are the pencil grip and the knife grip. Let’s be clear: there’s no "right" or "wrong" choice here. The best grip is the one that feels like an extension of your own hand, letting you crochet for hours without cramps. The "wrong" grip is simply the one that causes you pain or discomfort.
Finding Your Ideal Crochet Grip
The pencil grip is just what it sounds like—holding the hook as you would a pencil, guiding it with your thumb and index finger. I find this grip gives you incredible, fine-tuned control, which is why it’s a favorite for detailed work like amigurumi where precision is paramount. The movement is often generated more from the fingers and wrist, allowing for delicate and precise stitch placement.
On the other hand, the knife grip involves holding the hook from above, almost like you’re spreading butter on toast. A lot of crocheters (myself included, on long blanket projects) find this grip more powerful and less tiring on the fingers, since it uses more of your wrist and arm muscles. This grip often allows for a more rhythmic, rocking motion, which can be sustained for longer periods without fatiguing the smaller muscles in the hand.
Try them both. Seriously. Grab some scrap yarn and make a simple swatch for 10 minutes with each grip. Pay close attention to how your hand, wrist, and forearm feel. Which one feels more relaxed and rhythmic? The goal is to ditch the strain, because comfort is the secret ingredient to sustainable speed. You might even find that you switch grips depending on the project; a pencil grip for a tight amigurumi stitch and a knife grip for a loose, drapey shawl.
A relaxed hand is a fast hand. If you’re white-knuckling your hook, you’re creating tension that actively works against you. Loosen up and let the hook do the work. You’ll be shocked at how much this one tiny change smooths out your entire process.
The Art of Consistent Yarn Tension
Once your grip feels good, the next big hurdle is yarn tension. Inconsistent tension doesn’t just make your fabric look wonky; it forces you to constantly pause and adjust, completely shattering your rhythm. Simply looping yarn around your index finger is fine, but if you want to unlock another level of speed, it's time to experiment. The goal of any tensioning system is to deliver a perfectly consistent strand of yarn to your hook with the least amount of friction or manual adjustment possible.
One of my favorite, highly effective techniques is the lever or 'Irish' tensioning style. Instead of weaving the yarn through a maze of fingers, you hold it more directly, using your index finger like a lever to feed yarn right to the hook. This drastically cuts down on friction and creates a super-efficient path from the skein to your stitch. Your index finger essentially acts as a dynamic guide, providing more yarn when needed and holding it taut as you complete the stitch.
-
Play around with your tensioning hand. Try wrapping the yarn around your pinky once before it glides over your index finger. This adds a bit more drag for slippery yarns. Or, try weaving it over your index, under your middle, and over your ring finger for maximum control.
-
Think "feeding," not "pulling." Your hook should be doing the work of pulling yarn through the loops. Your other hand’s only job is to provide a steady, consistent supply. Your tensioning hand should be a passive but reliable delivery system.
Mastering these physical mechanics does more than just make you a faster crocheter; it actually deepens your connection to the craft. As you build this muscle memory, you’ll find crocheting becomes a more meditative and enjoyable flow state. In fact, many people discover the benefits of crocheting go way beyond just making cool stuff. By nailing your grip and tension, you’re not just chasing speed—you’re perfecting your entire practice.
Choose the Right Tools to Accelerate Your Craft
Let's be honest: your crochet speed isn't just about how fast your hands can move. It’s deeply tied to the tools you're holding. The right hook and yarn combo feels like gliding on ice, letting you fly through stitches. The wrong pairing? It’s like trying to drive with the emergency brake on. If you're serious about crocheting faster, you need to get strategic with your equipment. A tool should work with you, not against you.
A great place to start is your hook's material. A slick aluminum hook, for instance, is a dream when you’re working with "grippy" fibers like 100% wool or certain acrylics. The yarn has just enough texture to keep from sliding off by accident, but the hook's smooth-as-butter surface makes for a quick, fluid motion. The lack of friction means less effort is required for each stitch.
On the flip side, if you're wrestling with a slippery yarn like mercerized cotton or silk, a metal hook might feel too fast, almost like your loops have a mind of their own. This is where a bamboo or wooden hook becomes your best friend. Their slightly textured surface gives you just enough grip to tame those slick yarns, leading to better control and a much more consistent rhythm. It's about finding the perfect balance of slip and grip for the specific fiber you're using.
The Game-Changing Power of Ergonomic Hooks
While the hook's material handles the yarn, the shape of the hook itself takes care of you. This is where ergonomic hooks come in and completely change the game for anyone who wants to crochet faster and for longer. They are designed with human anatomy in mind, promoting a more neutral, relaxed hand posture.
Think about those standard, thin metal hooks. They often force your hand into a tight, pinching grip. It doesn't take long for that to turn into cramps, hand fatigue, and serious wrist strain. Ergonomic hooks, with their larger, shaped handles, are designed to fit more naturally in your palm. This lets you loosen up and relax your grip—the real secret to crocheting for hours without pain. The larger handle distributes pressure across your entire hand rather than concentrating it on a few points.
And the difference is huge. Studies have shown that switching to ergonomic crochet hooks can slash crochet-related hand pain by about 40%. Less pain means you can maintain your top speed for much longer sessions. You can find more insights on how tool choices are shaping the craft market and influencing what's available to us.
Why Your Yarn Choice Matters for Speed
Just as crucial as your hook is the yarn you choose. The fiber and weight of your yarn pretty much dictate how quickly a project will materialize in your hands. It’s simple physics: heavier yarns build up fabric way faster than lighter ones. Furthermore, the yarn's construction plays a vital role. A smooth, tightly plied yarn will be much faster to work with than a splitty, single-ply yarn that requires you to slow down to ensure you've caught all the strands.
This image shows exactly how yarn weight relates to your project speed. Thicker yarns mean bigger hooks and fabric that grows like magic.
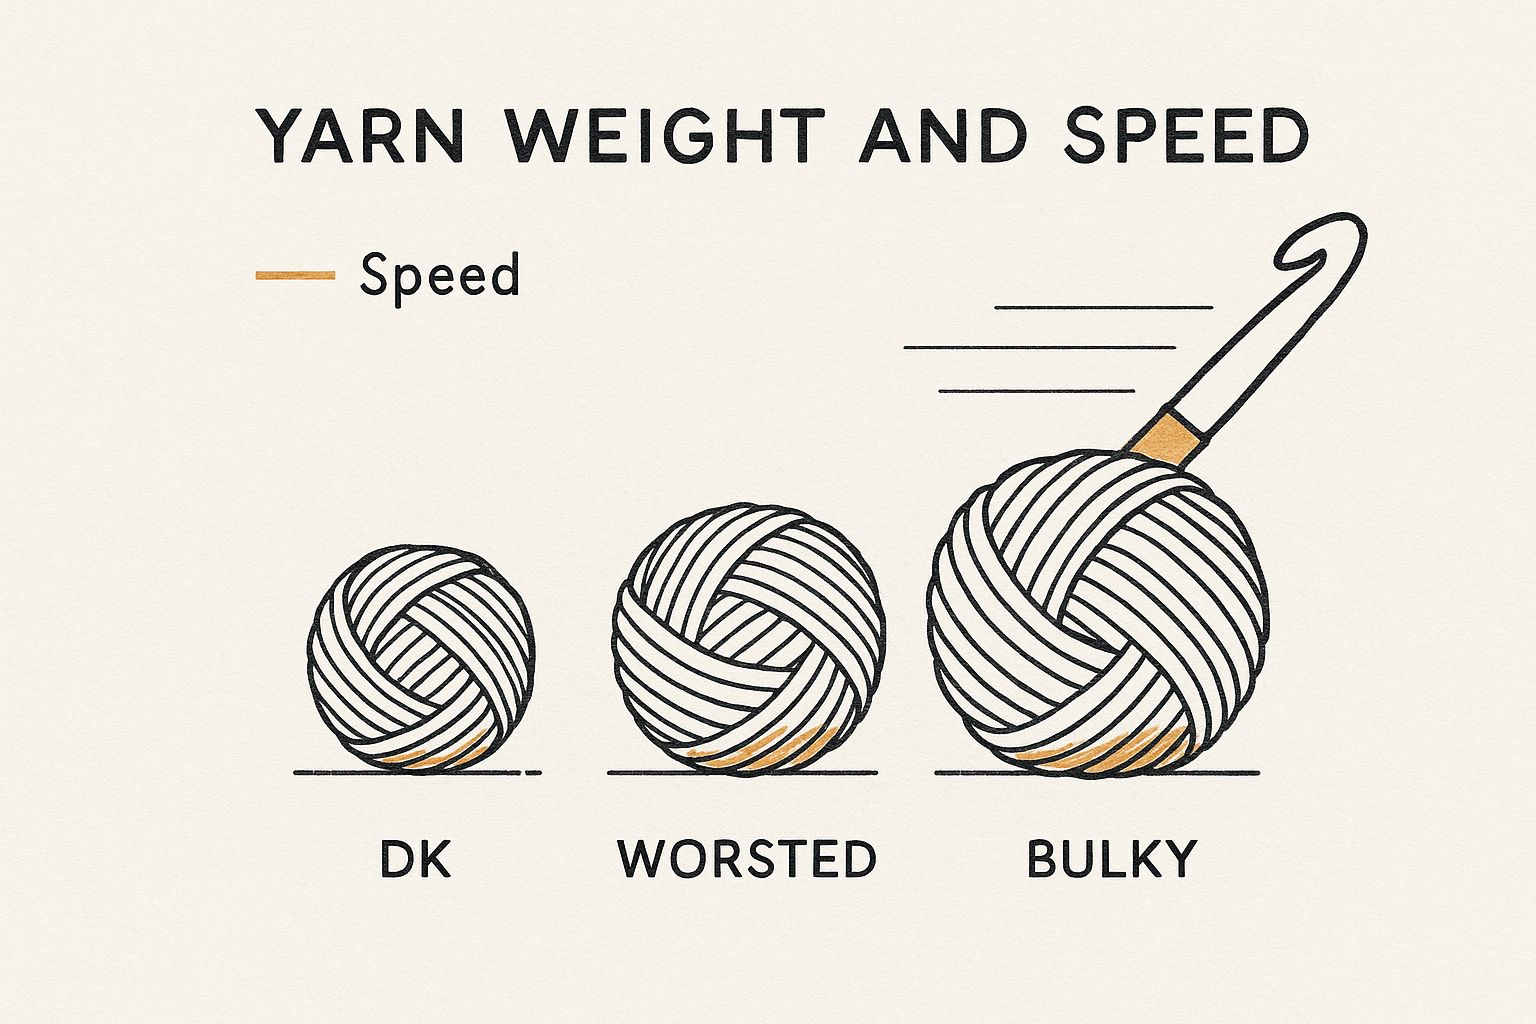
As you can see, just picking a bulky yarn over a DK weight for a blanket can shave a massive amount of time off your project, simply because every single stitch covers more ground. A single double crochet stitch in bulky yarn might be the same size as three or four stitches in fingering weight yarn.
I've experimented with countless combinations over the years, and a few truths always hold up. Here’s a quick rundown of how different hooks and yarns pair up for speed.
Hook and Yarn Speed Comparison
|
Tool/Material |
Speed Potential |
Best Use Case |
|---|---|---|
|
Aluminum Hook |
High |
Best for “grippy” yarns like wool or textured acrylics. |
|
Bamboo/Wood Hook |
Moderate |
Ideal for slippery yarns like silk, mercerized cotton, or rayon. |
|
Ergonomic Hook |
High (Sustained) |
A must-have for long crochet sessions with any yarn type. |
|
Bulky/Super Bulky Yarn |
Very High |
Perfect for quick projects like blankets, chunky hats, and scarves. |
|
Worsted/DK Yarn |
Moderate |
The workhorse for garments, amigurumi, and detailed projects. |
|
Fingering/Lace Yarn |
Low |
Used for intricate, delicate items like shawls and doilies. |
Ultimately, finding your perfect speed-crocheting setup is a bit of a personal quest. What works for me might need a little tweaking for you.
Key Takeaway: The fastest combination is often a smooth, slick yarn like a superwash merino or acrylic blend paired with a slightly grippy ergonomic hook. This pairing balances speed and control, minimizing snags and hand strain.
For your next project, don't just get lost in the color aisle. Think about how that yarn will feel gliding over your hook and through your fingers. A smooth, well-plied yarn that doesn't split will always be faster to work with than a splitty, fussy one, no matter how skilled you are. Matching your tools to your materials is a pro-level move that makes a world of difference.
Build That Muscle Memory with Drills and Practice
Let’s get one thing straight: true, lasting crochet speed isn't about frantic, hurried hand movements. Not at all. It’s something you cultivate through deliberate practice, building up a deep-seated muscle memory until your hands can fly through stitch sequences without you even thinking about it. This is where targeted drills can completely transform your craft. It's the process of making conscious, effortful actions into unconscious, effortless habits.
Instead of just powering through another project hoping you’ll magically get faster, set aside small pockets of time for specific exercises. Think of it like a musician running through scales or an athlete performing conditioning drills. It’s not the most glamorous part of learning, but it’s the secret sauce that separates the casual hobbyist from the seasoned pro. This focused training isolates the mechanics of crocheting from the creative process, allowing you to perfect the "how" without being distracted by the "what."
This kind of focused training is the absolute key to crocheting faster without your quality taking a nosedive. Your hands literally learn the most efficient path for every single movement—from the yarn over to pulling through a loop—making each action smooth, effortless, and repeatable.
Start with Timed Stitch Challenges
A simple yet surprisingly powerful drill is the timed stitch challenge. The goal here isn't to create something beautiful. It’s about pure, unadulterated repetition to build up your rhythm and speed. The aim is to push your hands to find a comfortable, sustainable pace.
Here’s how I like to set it up:
-
Pick a Basic Stitch: Grab a stitch you know like the back of your hand, like a single crochet (sc) or double crochet (dc). Using a familiar stitch means you can focus entirely on the motion, not the stitch construction.
-
Set a Timer: Start small. Two or three minutes is perfect. This is short enough to maintain focus but long enough to establish a rhythm.
-
Just Go: Crochet a quick chain and then fire off as many stitches as you can before that timer buzzes. Count your stitches and record the number.
Don't get hung up on perfection, especially at first. The initial goal is just to get your hands moving and establish a personal baseline. After a few sessions, you'll have a benchmark to beat, which, trust me, is incredibly motivating. Try this drill once a day or a few times a week, and you'll see that number climb.
Pro Tip: Whatever you do, don’t unravel these practice swatches! Keep them and scribble your stitches-per-minute count on a little tag. Seeing your physical progress pile up over a few weeks is a powerful visual reminder of how much you're improving.
Consistency and Isolation Drills
Once you've started building that raw speed, the next step is to dial in your technique with consistency drills. The mission here is to make every single stitch a perfect twin of the one before it. A fantastic way to do this is to make a gauge swatch with the sole purpose of achieving perfectly uniform stitch height and width. Don't worry about speed here; focus only on consistency. This slow, deliberate practice reinforces good habits that will hold up when you do increase your speed.
This is also the perfect time to get into deliberate practice, a concept where you isolate and perfect one tiny, specific motion.
For example, you could spend five solid minutes focusing only on your yarn over. Is it a smooth, single motion? Are you snagging the hook? Is your hook angle optimal? Then, shift gears and spend another five minutes just on the act of pulling through a loop. Are you pushing the hook through or pulling the loop over the hook? By breaking down a stitch into its core parts and mastering each one, you start to eliminate all those micro-hesitations that secretly kill your overall speed.
This level of detailed practice is also how you'll spot and finally fix those pesky bad habits. If you notice you’re constantly splitting yarn or your tension is all over the place, our guide to mastering your crochet by fixing common mistakes has some targeted solutions that can help. These drills build the automaticity you need to just fly through your projects.
Level Up with Advanced Techniques and Shortcuts
Okay, so you’ve got the basics down. Your posture is comfortable, your tension is no longer a wild rollercoaster, and you're ready for the fun stuff. This is where we get into the small, clever adjustments that turn solid crocheting into lightning-fast, fluid motion. These techniques are all about efficiency—doing more with less movement.
Think of these as crochet "hacks." They aren’t about reinventing the wheel but about shaving off precious seconds by cutting out wasted movements and adopting smarter stitches. Just weaving one or two of these into your routine can seriously boost your speed without making your quality take a nosedive. These are the marginal gains that, when combined, create a significant overall improvement.
Tweak Your Stitches with Clever Shortcuts
Honestly, the quickest way to crochet faster is to make each individual stitch more efficient. Some stitches are just naturally faster, while others are designed to skip the time-consuming bits. This is where tiny changes add up to a massive difference over a big project like a blanket. Tall stitches, for example, like the double crochet (dc) and treble crochet (tr), build fabric much faster than a single crochet. Choosing a pattern that utilizes these taller stitches can dramatically reduce your project time.
A perfect example is the yarn under single crochet (YUSC). Instead of yarning over like you normally would, you hook the yarn from underneath. It's a tiny tweak in motion, but for many crocheters, it’s a game-changer for speed, especially with amigurumi. It also creates a tighter, denser fabric with a cool little "x" shape—a total win-win for stuffed toys. The "yarn under" motion is often shorter and more direct than a "yarn over."
Key Insight: The fastest crocheters I know don't just have quick hands; they're strategic. They pick stitches and methods that demand fewer, more direct movements. Efficiency is the real secret sauce to speed.
Another game-changer is mastering standing stitches. These let you kick off a new row or round with a fresh color without fussing with a slip stitch and turning chain. A standing double crochet, for instance, perfectly matches the height of a regular DC and gets rid of that gappy look a chain-3 start can sometimes leave behind. It eliminates several small but time-consuming steps, allowing you to jump right into the pattern.
Think Strategically About Your Projects
Beyond individual stitches, you can speed things up by getting strategic about the project itself. The pattern you choose and how it's constructed can make or break your finish time. Reading through a pattern completely before you begin can help you identify opportunities for optimization.
Here are a few powerful, project-level adjustments to try:
-
Work in Continuous Rounds: For things like hats, baskets, and amigurumi, working in a continuous spiral is way faster than joining each round. You skip the stop-and-start of slip stitching and chaining up, letting you get into a deep, uninterrupted rhythm. Just remember to use a stitch marker to track the beginning of your round!
-
Pick Simple Repeats: Patterns that have you changing stitches every other row demand constant focus and double-checking. A simple one or two-row repeat, on the other hand, lets your muscle memory do the heavy lifting. Once you've memorized the repeat, you can crochet on autopilot, which is where you find your flow.
-
Experiment with Portuguese Crocheting: This is a pretty unique style where you tension the yarn around your neck or through a special pin on your shirt. It frees up both of your hands to just focus on the hook and the stitches, which can lead to incredibly fast, even results once you get the hang of it. The yarn feed is exceptionally smooth and consistent, and the stitch is often formed with a simple flick of the thumb.
These advanced methods are getting more traction as the craft world blows up. In fact, the global knitting and crochet market is expected to grow to USD 0.29 billion by 2032, fueled by the boom in handmade goods. That makes speedy skills pretty valuable, especially if you sell your work.
If you want to dive deeper into optimizing your process, don't miss our other crochet hacks for faster and easier projects.
Got Questions About Crocheting Faster? I've Got Answers.
As you start your quest to become the Usain Bolt of crochet, a few questions are bound to pop up. It's totally normal. You're probably worried about your stitches getting sloppy, wondering if you'll ever actually get faster, and eyeing that fancy yarn bowl with a healthy dose of skepticism. Let's tackle these head-on, so you can get back to your yarn with confidence.
Will Crocheting Faster Make My Stitches Sloppy?
This is the big one, isn't it? The fear that speeding up means your beautiful, even stitches will devolve into a chaotic mess. It’s a valid concern, but let’s reframe the goal here. You're not aiming for frantic, hurried crocheting. You're aiming for efficiency.
True speed comes from smooth, repeatable motions that cut out all the wasted energy. Think of it like a musician who practices scales. They don't get faster by flailing at the piano; they get faster by making their finger movements more precise and automatic. Their speed is a byproduct of their accuracy.
I won't lie, when you first start, your tension might wobble a bit as your hands learn a new rhythm. But if you stick with the drills we talked about, your muscle memory will kick in. This actually leads to neater, more consistent stitches at a higher speed because your hands know exactly what to do without you even thinking about it. Rhythm is your friend here, not frantic energy. The key is to increase your speed gradually, ensuring your quality doesn't suffer. If you notice your stitches getting messy, slow down slightly until the consistency returns, then gradually speed up again.
How Long Until I See a Real Difference in My Speed?
This is where I tell you "it depends," but I know that's not helpful. The good news is, you don’t have to wait months to feel a change. Progress is not always linear, but it is cumulative.
If you consistently practice—even for just 15-20 minutes a day—most crocheters I've talked to feel a noticeable improvement in their flow and rhythm within two or three weeks. Seriously. The initial gains often come from fixing the biggest inefficiencies in your process, like poor posture or inconsistent tension. These foundational changes can yield immediate results in comfort and endurance, which translates to speed.
The trick is to not get discouraged if you don't double your speed overnight. That's a recipe for burnout. Instead, focus on small, sustainable wins. Time yourself crocheting a simple swatch for five minutes each week. Seeing that stitch count tick up, even by a few stitches, is incredibly motivating and proves you're on the right track.
Do I Have to Completely Change How I Crochet?
Absolutely not! Trying to completely overhaul your personal crochet style is the fastest way to get frustrated and quit. This is about refinement, not revolution. Your existing style is built on hundreds of hours of practice; we want to enhance it, not replace it.
Start by just watching yourself crochet. Seriously, be an observer. Where are the little hitches in your process?
-
Is your yarn constantly snagging on your hook or fingers?
-
Does your wrist start to ache after a while?
-
Are you stopping to yank more yarn from a tangled skein every five minutes?
-
Do you readjust your grip on the hook frequently?
Pick just one of those friction points and focus on smoothing it out. You can make huge gains with tiny tweaks. Maybe it’s adjusting how you tension the yarn or consciously using more of your wrist instead of just your fingers. It’s all about making your natural style more efficient, not trying to become someone else. The best changes are the ones that feel natural and intuitive to you.
Do Accessories Like Yarn Bowls Really Help?
Yes, but maybe not in the way you think. A yarn bowl, a winder that makes a perfect center-pull cake, or a yarn-minder spindle isn't going to magically make your hands move faster. What they do is eliminate interruptions. They are tools of prevention—preventing tangles, preventing pauses, and preventing frustration.
Think about it. Every single time you have to stop to untangle a knot, chase a rolling ball of yarn across the floor, or pull-yank-pull on a stubborn skein, you break your rhythm. You're jolted out of your flow state and have to mentally "restart." Over a whole project, those little pauses add up to a shocking amount of lost time. These interruptions are the hidden thieves of your crochet speed.
By giving you a smooth, predictable stream of yarn, these tools let you maintain that continuous, uninterrupted workflow. And that momentum is absolutely essential for building and keeping the speed you’re working so hard to achieve. They are a classic example of "working smarter, not harder."
Ready to put these tips into action? At Crochet Craze, we have hundreds of patterns and easy-to-follow video tutorials designed to help you build your skills from the ground up. Find your next project and start your creative adventure today at https://crochetcraze.com.